Browsing Category

Herbs and Spices

Blood Orange Bulgur Wheat Salad with Honey, Meyer Lemon & Cilantro Dressing

February 6, 2012
 
This grain salad combines sweet blood orange with bulgar wheat and a honey, citrus and herb dressing. 
 
Blood Orange Bulgur Wheat Salad with Honey, Meyer Lemon & Cilantro Dressing | Fake Food Free

I like a straight forward recipe name; something easy to remember and easy to write, if necessary. But sometimes it simply isn’t possible. Sometimes you must name all the ingredients that lie within because they are all too good to be left out.

Take this salad for example. Every part of it makes my taste buds happy. Leaving out any of the above listed ingredients wouldn’t express to you just how exciting it is. Start with the citrusy cilantro, followed by local honey, and then the excitement really begins with the Meyer Lemons. Consider it off the charts once the blood oranges come into play.

So I apologize for that long title, but I hope you will find every part of this salad as tasty as I did.

Blood Orange Bulgur Wheat Salad
Makes: 2 servings
 
Ingredients:
 
1 ½ cups cooked bulgur wheat
2 ribs celery, sliced
2 green onions, sliced
¼ cup fresh cilantro, chopped
¼ tsp salt
2 blood oranges, sliced
 
Prep
 
Combine all ingredients except the oranges in a mixing bowl and toss to combine. Top with the dressing (recipe below), and toss to coat. Divide salad onto two plates and top with orange slices. Serve room temperature or cold. Makes 2 servings.
 
Honey Meyer Lemon Cilantro Dressing
 
Ingredients:
 
Juice and zest of 1 Meyer lemon
2 tbsp extra virgin olive oil
1 tbsp honey
2 tbsp fresh cilantro, chopped
Pinch of salt
 
Prep
 
In a small bowl, whisk together the lemon juice and oil. Slowly whisk in the honey. Stir in the cilantro and salt. Pour over the bulgur wheat salad.
 
Blood Orange Bulgur Wheat Salad with Honey, Meyer Lemon & Cilantro Dressing | Fake Food Free

Pin It


Spicy Chocolate Peanut Butter Cookies with Curry Glaze

October 29, 2011

It’s been a few years since I made these cookies, but I still love a bit of heat in my dessert baking. They are made with PB & Co The Heat Is On peanut butter that was sent to me to try back then. As expected, I was an instant fan.
 
Spicy Chocolate Peanut Butter Cookies with Curry Glaze Recipe | Fake Food Free


Ever since I made Fiery Peanut Butter Cookies with Peanut Butter & Company’s The Heat Is On, I’ve wanted to experiment more with spicy desserts.

Thanks to my minor addiction with Vosges Haut-chocolat, I can’t get enough of sweets with savory spices. So for Halloween I thought I’d try out a new version of cookies. I figure if nothing else you can trick a few people into trying them.

Despite the initial response you might get to the name, I promise after one bite they will want another. The warm heat, rich dark chocolate, nuttiness and curry turn out to be some pretty amazing partners in a cookie.

Happy Halloween!

Spicy Chocolate Peanut Butter Cookies with Curry Glaze Recipe | Fake Food Free

Spicy Chocolate Peanut Butter Cookies with Curry Glaze

Makes: About 18 cookies

Ingredients

½ cup Demerara sugar
½ cup mascavo sugar
½ cup unsalted butter, softened
1/3 cup PB & Co The Heat Is On
1 large egg
1 ¾ cups white whole wheat flour
2 tablespoon unsweetened cocoa powder
¾ teaspoon baking soda
½ teaspoon baking powder
¼ teaspoon salt
½ cup dark chocolate chips

Glaze
1 cup confectioner’s sugar
2 tablespoons meringue powder
½ teaspoon curry powder
Milk (any variety)

Prep

Preheat your oven to 350 degrees F. In the bowl of a mixer combine the sugars and butter. Cream on medium-high until light and fluffy. (Note: white and brown sugar will substitute for the sugars listed). Add the peanut butter and continue to mix until all ingredients a combined. Blend in the egg.

In a separate bowl, whisk together the flour, cocoa powder, baking soda, baking powder and salt. Gradually add dry ingredients to the mixing bowl and blend on medium speed just until combined. Stir in the chocolate chips.

Roll into balls about ¾ inch in diameter. They will not spread much during baking, flatten slightly with your hand. Bake for 10-12 minutes or until cookies are firm in the center. Transfer to a wire rack and allow to cool completely.

In a small bowl, combine the confectioner’s sugar, meringue powder and curry. Add milk, a 1/2 teaspoon to 1 teaspoon at a time until the glaze can be poured, but is thick enough to still coat the spoon. Take cooled cookies one by one and dip the tops into the glaze. Place on a cooling rack that has been set over a baking sheet to allow excess to drip on the sheet. Use a spatula to spread glaze if necessary.

Allow to sit untouched for about 15 – 20 minutes for glaze to harden. 

Spicy Chocolate Peanut Butter Cookies with Curry Glaze Recipe | Fake Food Free


Disclaimer: Peanut Butter & Co sent me the peanut butter used in this recipe free of charge. I was not obligated to blog about it and received no compensation for doing so.


Thanks for reading! All images and content are the property of Fake Food Free unless otherwise stated. Please do not republish full recipes and images without written permission. What is okay? Feel free to Pin images, share links to my posts or share the photo in a round up post with the title of this recipe and a link back to the post. Confused about copyright and food blogs? Here is some helpful information on Recipe Attribution. If you want to use a photo or full recipe, just ask. I’m sure we can work something out.   

Shrimp Spring Rolls

October 2, 2011

I have absolutely nothing against cilantro. In fact, I love the stuff. But I fear I greatly offended the herb this week.

I have this very organized habit of getting all my ingredients laid out on the counter whenever I begin to cook. This leads to a bad habit of pushing things around to create space when I need it for doing things like, um, rolling up spring rolls. 

How to Make Shrimp Spring Rolls | Fake Food Free

This was the first time I made spring rolls and I’m pretty darn happy with the result. I could use a bit more practice in rolling to get them tighter, but otherwise I claim success. Well, that is if you don’t talk to the cilantro.

As I proudly wrapped all the rolls and admired them sitting on the plate, I looked over and tucked away in the corner behind the coffee maker, was the cilantro! I had every intention of topping off my pile of filling with a sprig or two before rolling, but in my effort to create space I shoved one of my favorite herbs out of view!

How to Make Shrimp Spring Rolls | Fake Food Free

So we’ll just have to enjoy it as a garnish in the photos. The good news is, if you don’t like cilantro, these spring rolls are great without it. If you do, they’ll be even better with it inside and not just sitting on the plate.

Shrimp Spring Rolls
Makes: 6 to 7 rolls
Write a review
Print
Ingredients
  1. ~3 oz rice sticks
  2. 1 tablespoon cooking oil
  3. 3 green onions, sliced
  4. ½ large yellow bell pepper, thinly sliced
  5. 2 medium carrots, julienned (or if you are like me, as close as you can get to it)
  6. 1 ½ cups bok choy, greens only, chopped
  7. 2 cloves garlic, minced
  8. 1 tablespoon soy sauce
  9. 2 teaspoons fresh ginger, grated
  10. ~ 25 cooked shrimp
  11. Cilantro (optional)
  12. 6-7 rice paper wraps
Instructions
  1. Place the rice sticks in a bowl and fill the bowl with hot water to cover the noodles. Allow to sit until tender, about 5 minutes. Cool, chop and set aside.
  2. In a wok, heat the oil. Add the green onions, bell pepper, carrots, bok choy and garlic. Cook over high heat for only 1 to 2 minutes. If you want your veggies softer you can cook them longer. Add the soy sauce and the ginger.
  3. For each roll, soften the rice paper wraps according to package directions. Lay the rice paper on a flat surface or plate. On one end pile up some noodles, veggies (cilantro) and 3 to 4 shrimp. Slowly roll up the spring roll, tucking in the filling and folding in the sides as you go.
  4. Serve at room temperature or cold.
Notes
  1. Serving Sauces: The sauces were quickly thrown together. Tasty, but nothing extravagant.
  2. Spicy Mustard – Equal parts Dijon mustard and Sriracha
  3. Peanut Chile – 2 tablespoons natural peanut butter, 2 tablespoons imported Thai Chili sauce (I like to get imported because it is usually free of HFCS), 1 teaspoon grated fresh ginger, 1 teaspoon minimally refined cane sugar, 2 teaspoons soy sauce. Stir together the ingredients in a small bowl. Slowly whisk in water to reach the desired consistency.
Fake Food Free https://www.fakefoodfree.com/

How to Make Shrimp Spring Rolls | Fake Food Free


Thanks for reading! All images and content are the property of Fake Food Free unless otherwise stated. Please do not republish full recipes and images without written permission. What is okay? Feel free to Pin images, share links to my posts or share the photo in a round up post with the title of this recipe and a link back to the post. Confused about copyright and food blogs? Here is some helpful information on Recipe Attribution. If you want to use a photo or full recipe, just ask. I’m sure we can work something out.  

Thai Basil Pesto Orzo with Local Meatballs

August 15, 2011

When it comes to food, I do a lot of impulse buying. Although it’s not really food anymore, like, say, a candy bar in the check out aisle. No, now I guess you could call it ingredient impulse buying. Now it’s more like splurging on the chocolate bar I will later use in cookies.

Sometimes, though, I resist the temptation and I wait. This most often happens with things I know will be there a month or so later, especially meat.

Take these meatballs for example. I saw them at our local meat market well over 6 months ago. I wanted to try them, but decided to wait.

Every time I went they were there and every time I saw them I thought more about what I could do with them. Pasta, sure, but did I really need to buy them instead of making my own?

Turns out the answer to that is yes.

I finally picked up a small pack of these local, pastured meatballs that include a combination of beef, lamb and pork. They are spiced perfectly – a little garlic, a little parsley and a little of what I think was fennel seed.

They definitely needed a place to shine so I decided not to cover them in sauce. Instead, I combined them with a sauce in the raw, one that was more garden-fresh.

Despite the fact that my sweet basil is about to dry up, the Thai basil has been going strong. Now, I can’t say I like Thai basil as much as sweet, but it’s a nice substitute every now and then.

I used it in my standard walnut pesto and then topped the dish with some of the gorgeous red cherry tomatoes we’ve been fortunate enough to have most of the summer. They are juicy and sweet and just pop in your mouth, they are so fresh.

Thai Basil Pesto Orzo

1 cup packed Thai basil leaves
2 cloves garlic, peeled
2 tbsp chopped walnuts
2 tbsp freshly grated parmesan cheese
2 to 4 tbsp olive oil
Salt and pepper to taste
½ lb orzo, cooked to package directions
1 ½ cups cherry tomatoes, halved
½ lb meatballs, baked (optional)

In a small food processor, combine the basil, garlic, walnuts, cheese and 1 tbsp olive oil. Pulse until everything is finely chopped. Continue to pulse and the mixture will get slightly creamy due to the walnuts.

Continue to add olive oil to reach your desired consistency, whether you like it thick or thin. Add salt and pepper to taste.

Cook and drain the orzo. In a large bowl, combine the pesto and the orzo. Stir until all the orzo is coated. Transfer to a serving platter. Top with meat balls, if using, and cherry tomatoes. Serves 4-6.

Cucumber Watermelon Salad with Honey and Mint

July 9, 2011

Have you ever come up with a new idea only to realize, well, it’s really not a new idea? That happens to me a lot when I’m making food in my kitchen. This is kind of how it goes down in my head.

This ingredient would work so well with that. This one I’m not sure about, but let’s throw it in anyway. Oh wow, it does taste pretty good. Let’s get a photo and put it on the blog.

Then, feeling pretty proud of myself, I sit down to write the post. Most of the time I Google my recipe combinations (after I’ve made them) because I want to know what is already out there and never want it to look like I am claiming another person’s work as my own.

So I Google, and there it is. Lots of other people have thrown this combination together before, some within the last few weeks. Sigh, slowly the balloon begins to deflate.

Take this watermelon salad for example.

We bought a watermelon for our BBQ last weekend and barely any of it was eaten so it has been taking up valuable space in my fridge all week. My husband and I aren’t huge watermelon fans so I’ve been trying to find creative ways to use it.

Then these massive Asian cucumbers we planted began to ripen in the garden. Look at these things! They are as long as my forearm. They just happen to taste amazing as well with a unique sweetness.

I’ve seen the watermelon salads with things like tomatoes, feta cheese and onions around the web, so I thought why not throw in some cucumber.

Rest assured many people thought of this great idea before I did.

But with every recipe comes a little different twist. With this one I love the way the sweet honey and savory green onion work together along with the sea salt. The mint adds a little burst of unexpected flavor making it even more refreshing.

Cucumber Watermelon Salad with Honey and Mint
2 cups watermelon, cubed

1 ½ cups cucumber, peeled and cubed
2 green onions, greens and partial whites sliced
1 tbsp fresh mint, chopped
2 tsp olive oil
1 tsp honey
1/8 tsp sea salt
Pinch of black pepper

In a bowl, combine the watermelon, cucumber, green onions and mint. Add the olive oil and honey. Stir to combine. Sprinkle on the salt and pepper. You can eat it right away or refrigerate it for up to a couple days. As it sits more juice will form from the melon and cucumber. Serves 3 to 4.

Filipino-style Pastured Pork Kebabs

July 4, 2011

It’s an interesting experience to view your country through the eyes of someone else. Looking back I’m not sure why I hadn’t considered what a highlight this would be during our time living abroad. We encountered people who were in awe of us and those who passed judgment on us, not after getting to know us, but simply because we were from the United States.

Both situations made me equally uncomfortable, and it made me very self-aware regarding how I was perceived by others. What stood out to me the most was how the US was truly seen as the land of opportunity among the majority of people we encountered.

While we were welcoming a new adventure and happily leaving the US for a while, it felt so strange to have people view my country in this way when I really just wanted to experience theirs. After you encounter these reactions time and time again it makes you begin to think – maybe I should appreciate my own country a little more.

That is exactly what happened. Although what I appreciate about it is something that I never really considered before.

Sometimes I think we fail to remember that unless we happen to be American Indians, we’re not from here. Somewhere along the line someone in our families crossed those waters and was allowed to enter this great country we now call home. That may have happened many generations ago for some, or last year for others.

Personally, I don’t wave my flag to say ours is better than others. It’s waved to say I appreciate those who fought for the freedoms of this very diverse country, a diversity that began long ago and continues to this day. What I appreciate the most is that I can live and work among people whose cultures and heritage make my life richer whether it’s rooted in the hills of Kentucky or brought with them from abroad.

All that being said you likely also know my appreciation for food culture in this country. So a 4th of July barbecue taking place at our house just had to have a bit of an international flare.

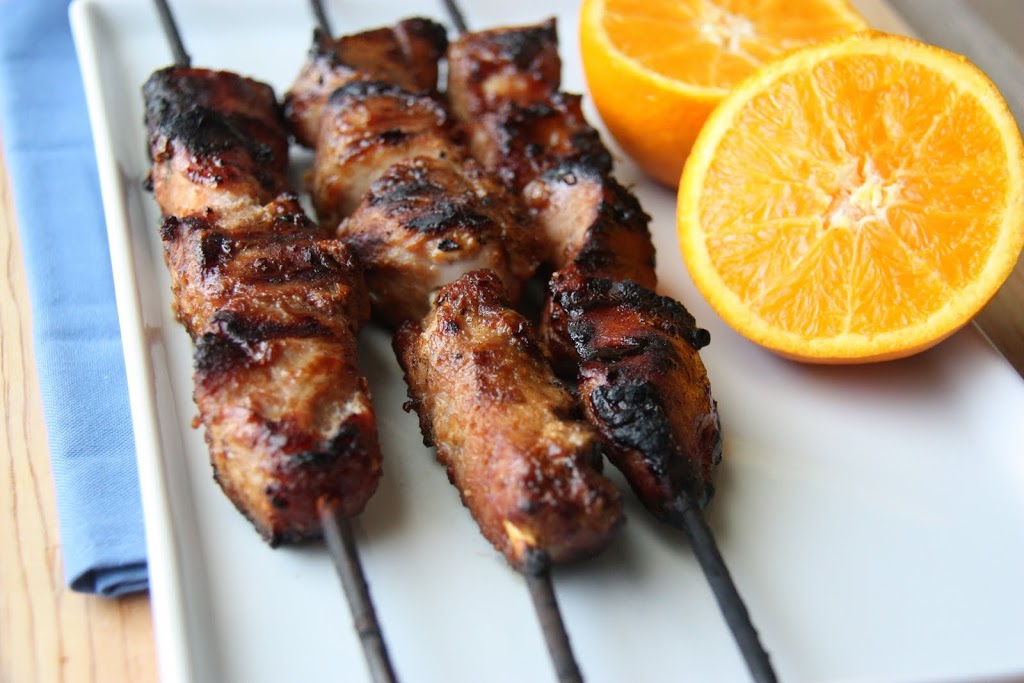
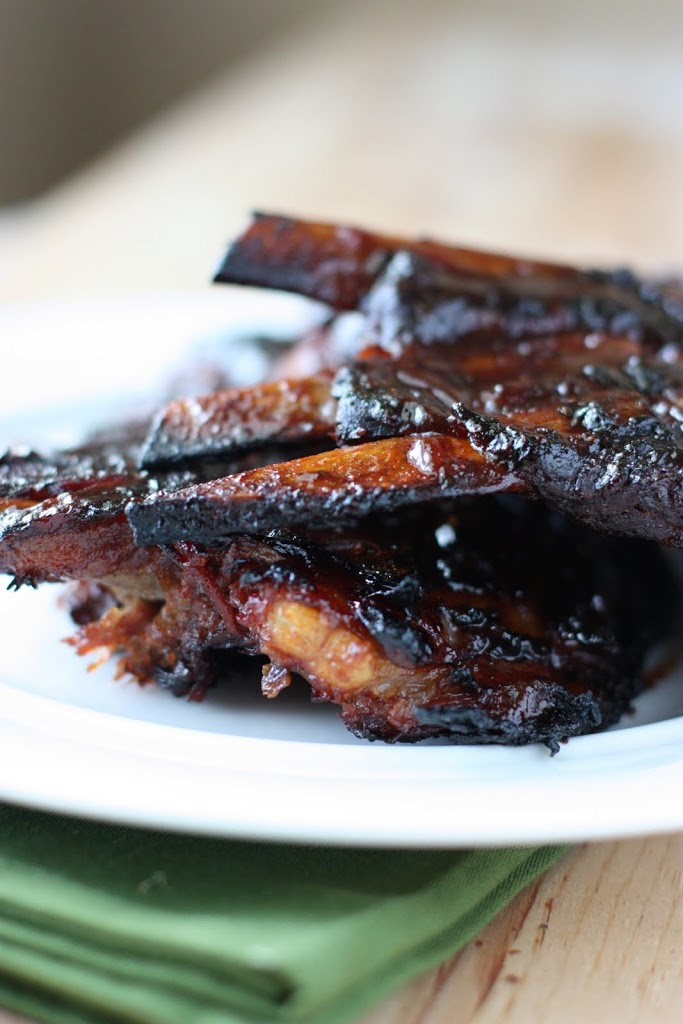
On Friday, we stocked up on a ridiculous amount of local, pastured pork from Marksbury Farm Market. The pork butt was rubbed down, smoked and served US-style with sweet and spicy BBQ sauces. The 6 lbs of pork sirloin kebabs, on the other hand, were headed in a different direction.

In college, my husband had a friend of Filipino heritage and his family would throw some amazing barbecues. I had the opportunity to attend one and the pork kebabs were simply incredible. My husband learned to make their delicious marinade and we thought it would be a great way to make our own barbecue this weekend a bit more international.

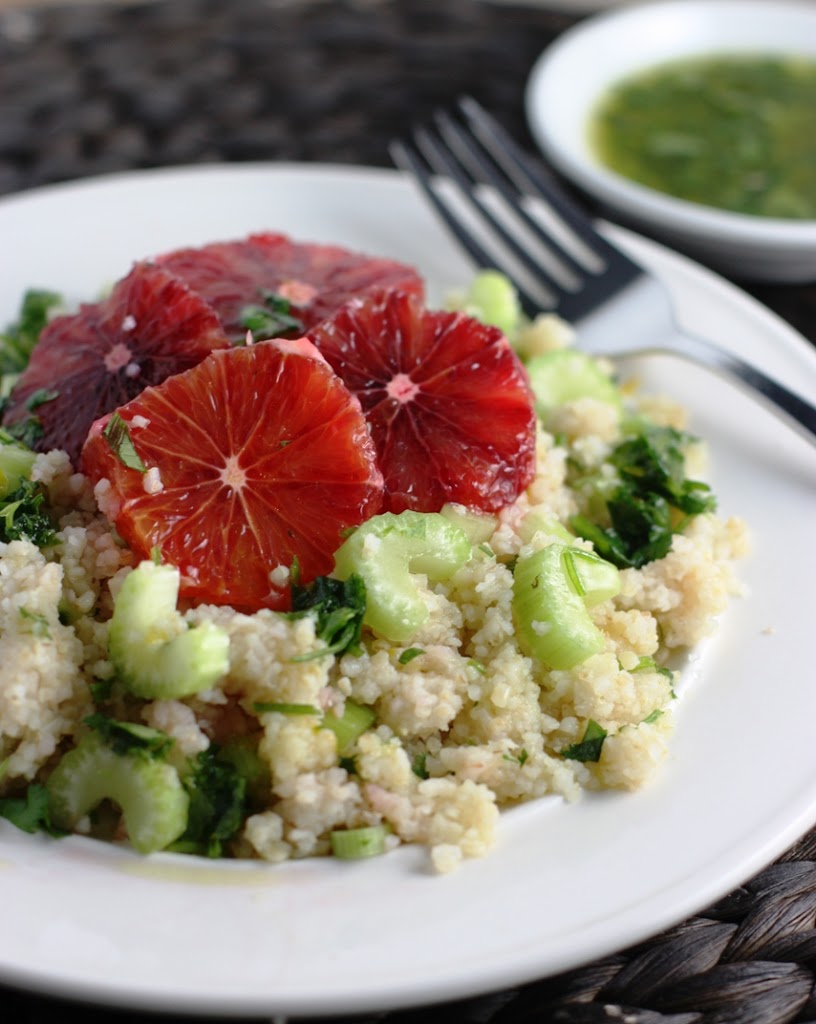
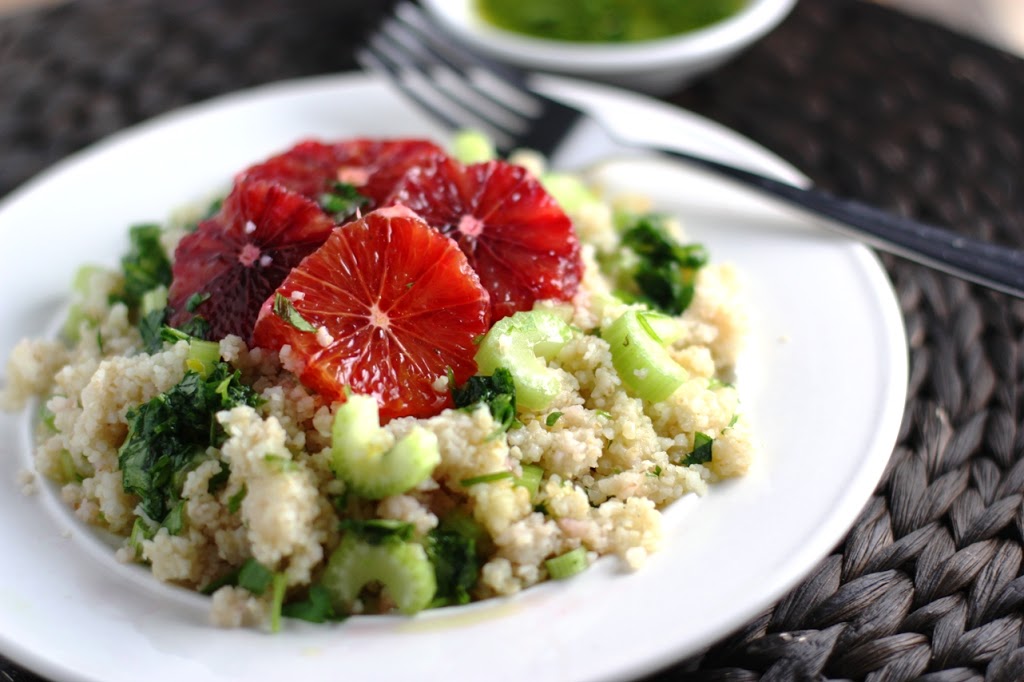
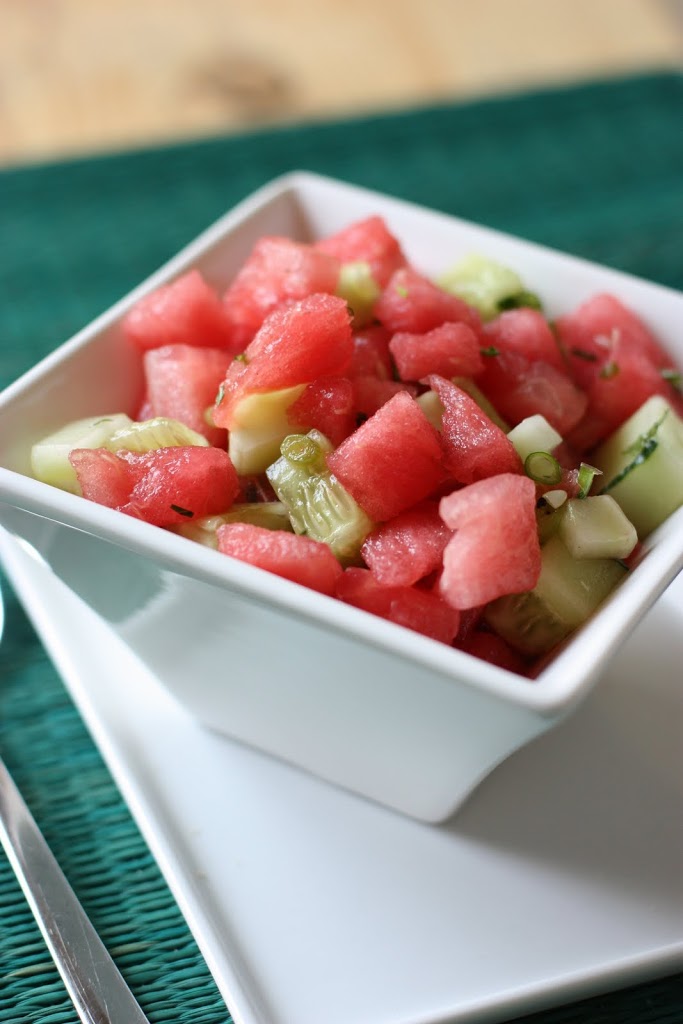
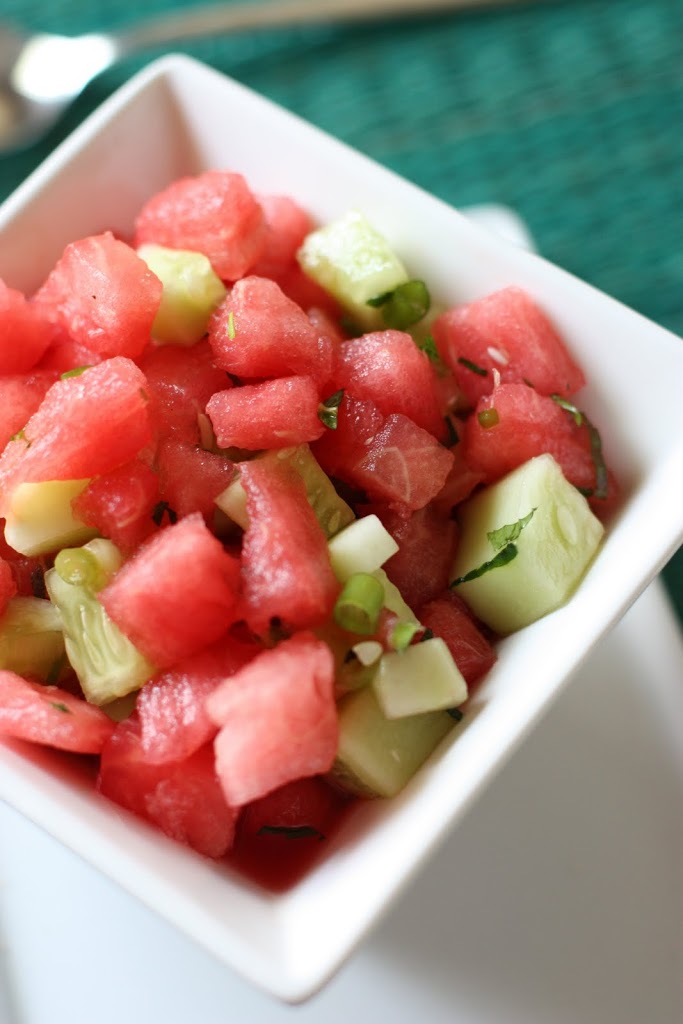
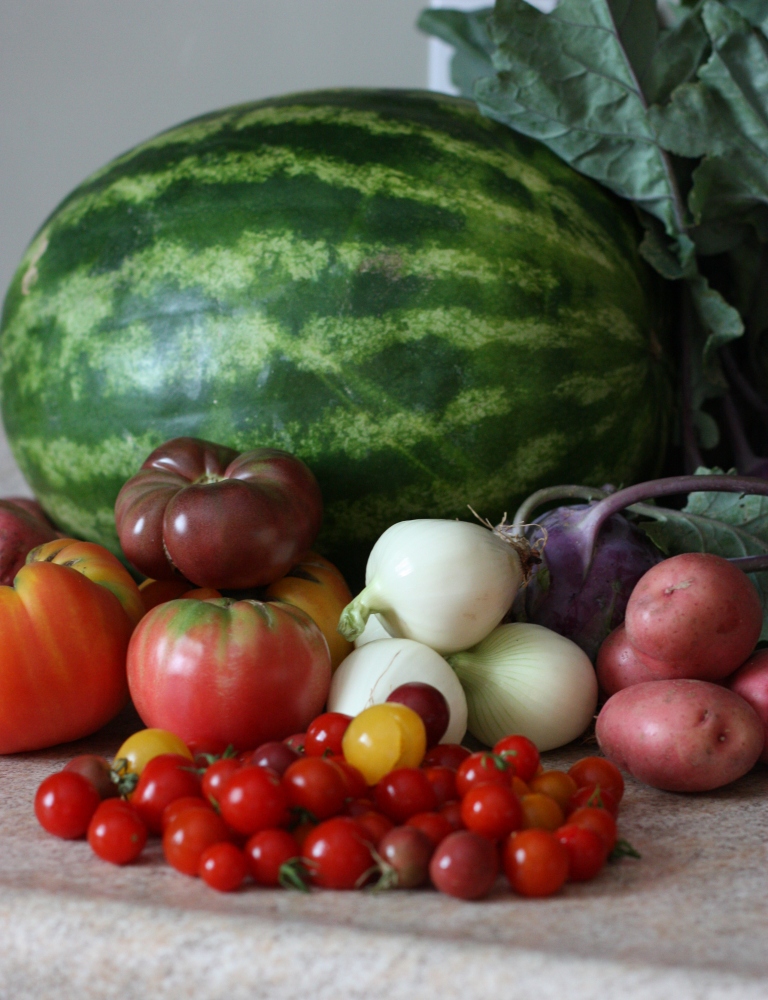
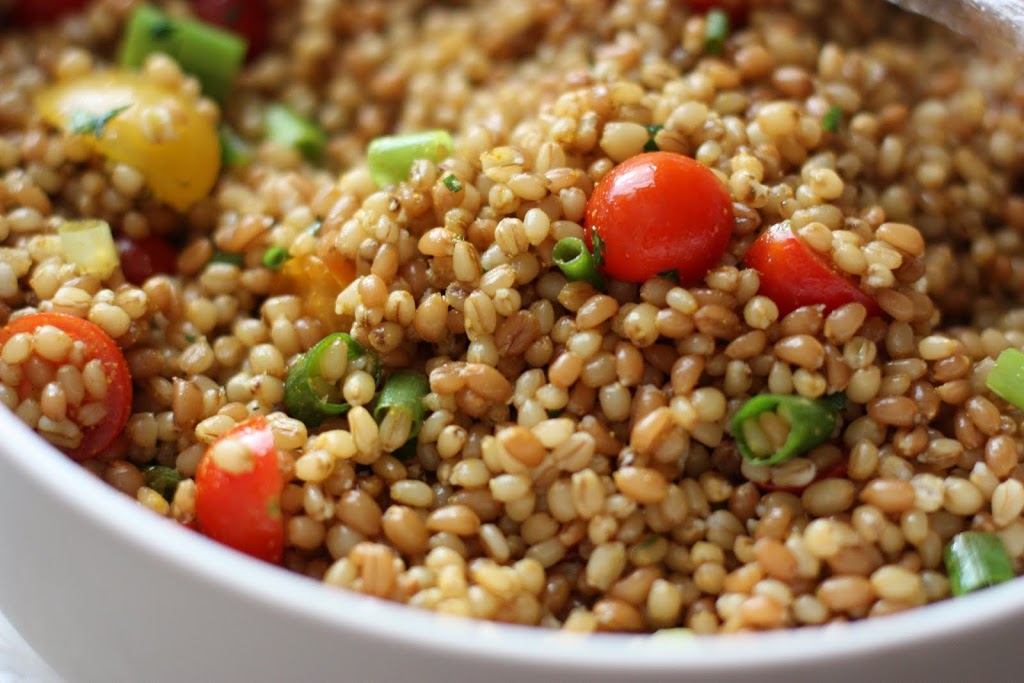
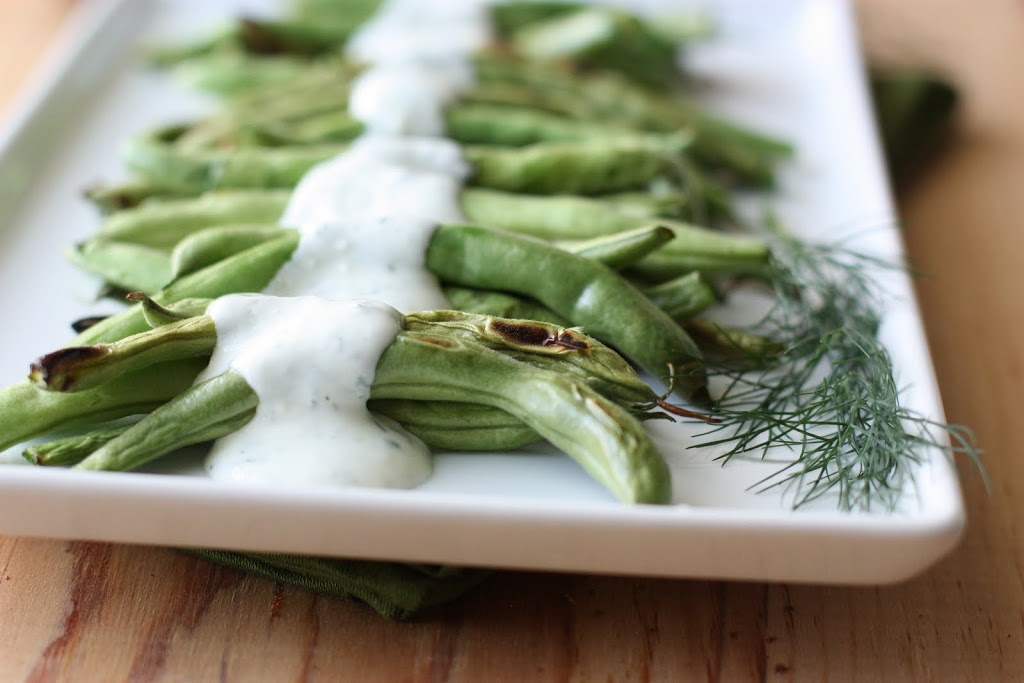
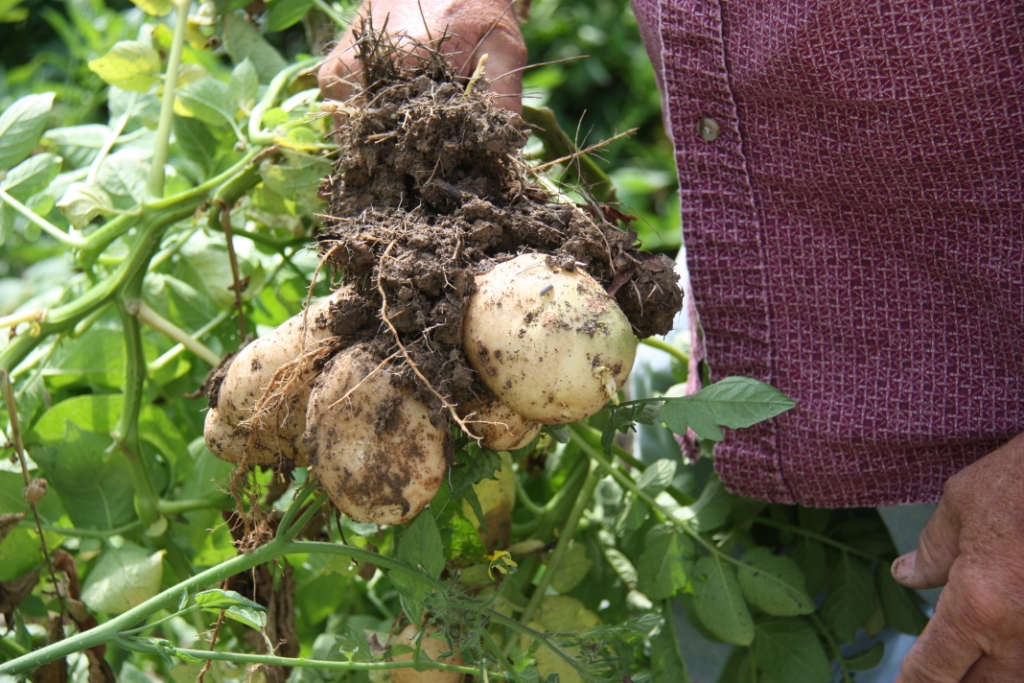
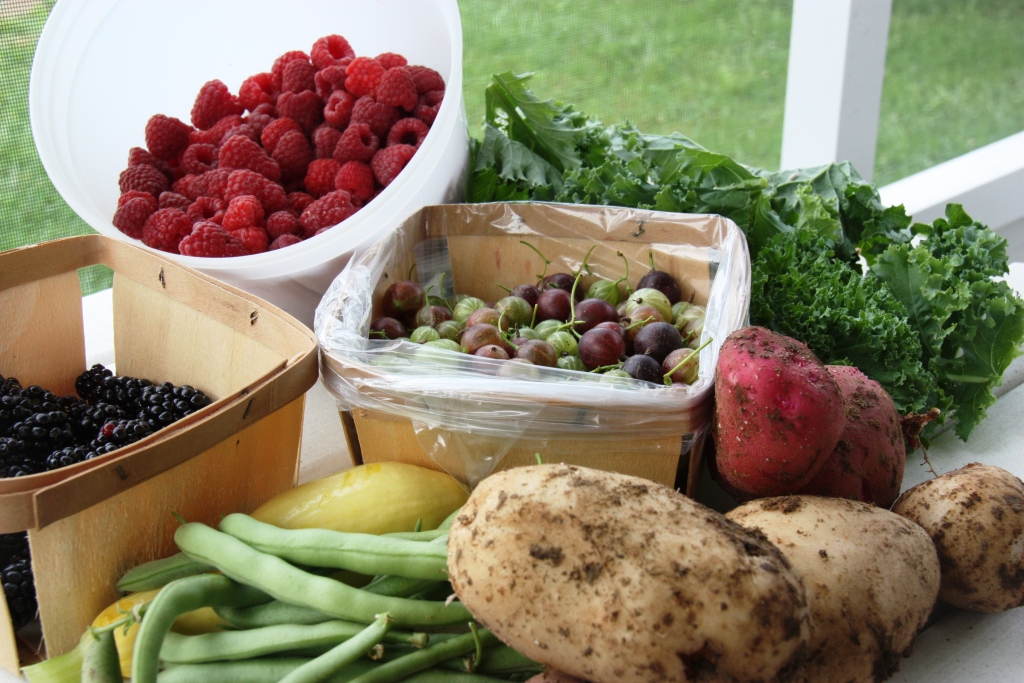
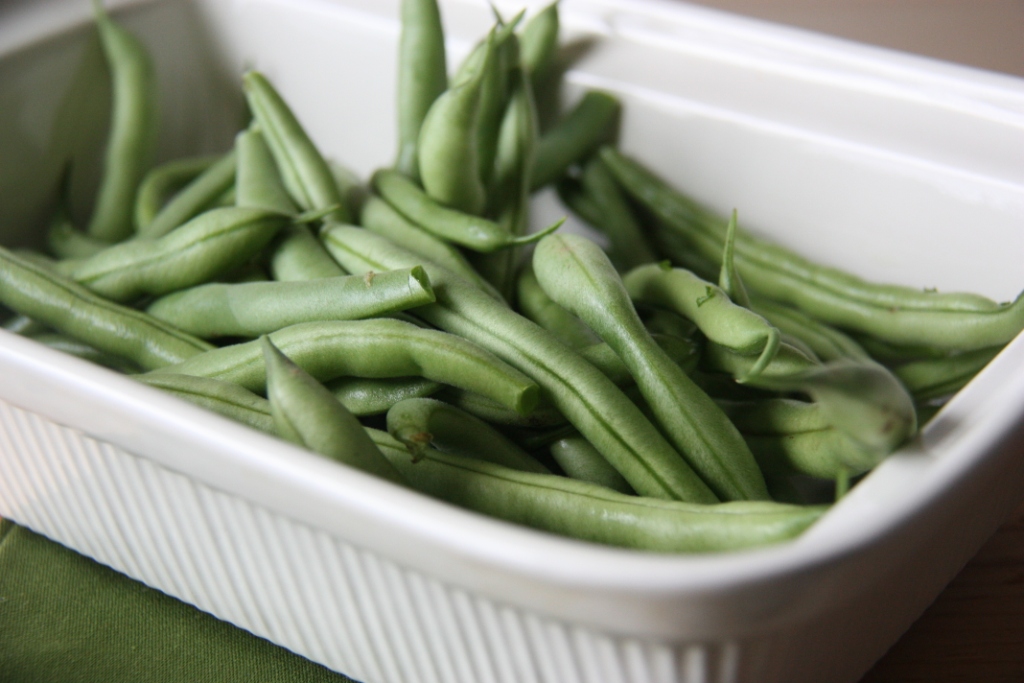
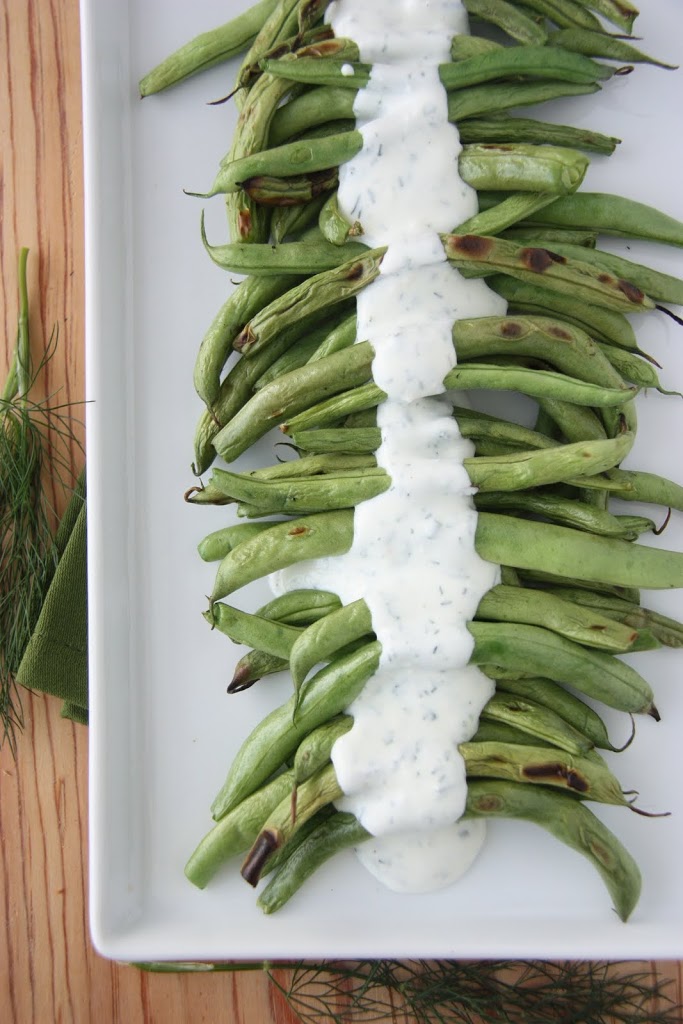
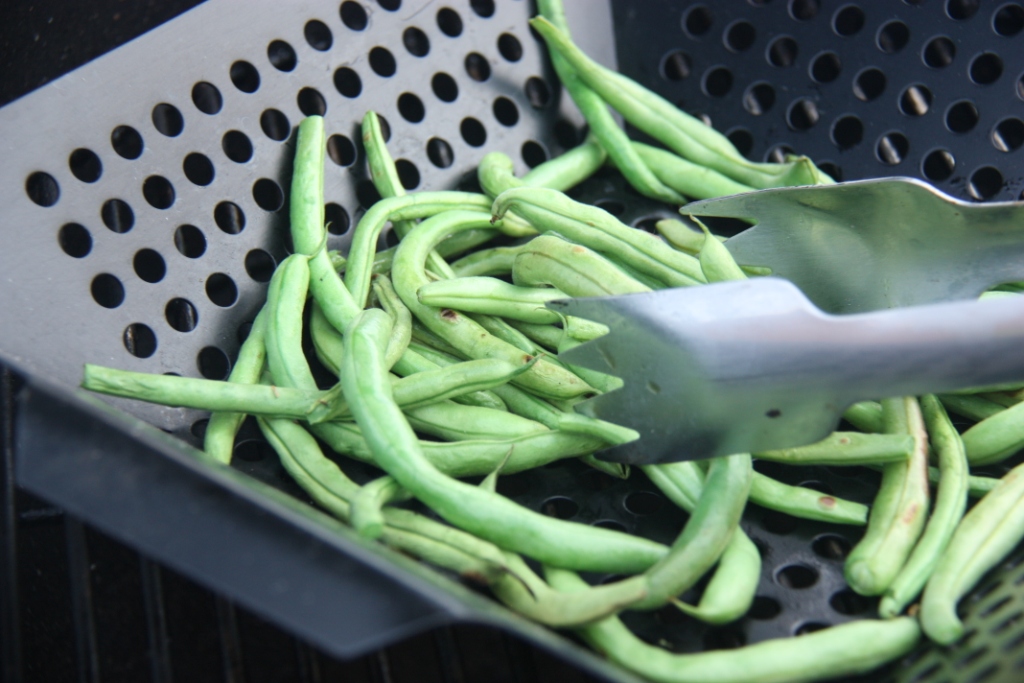
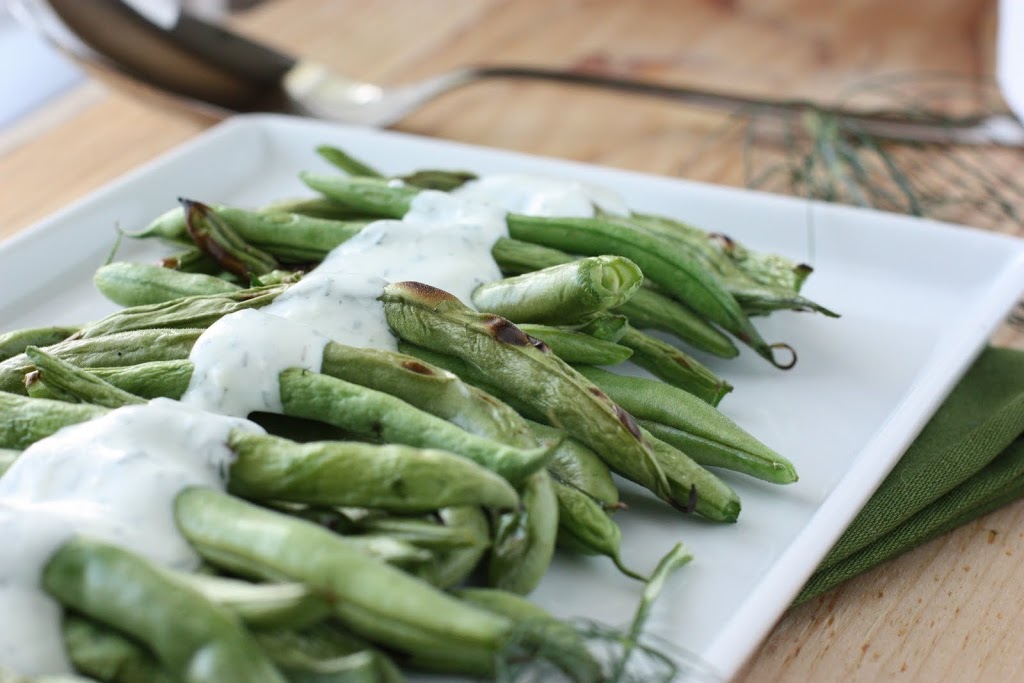
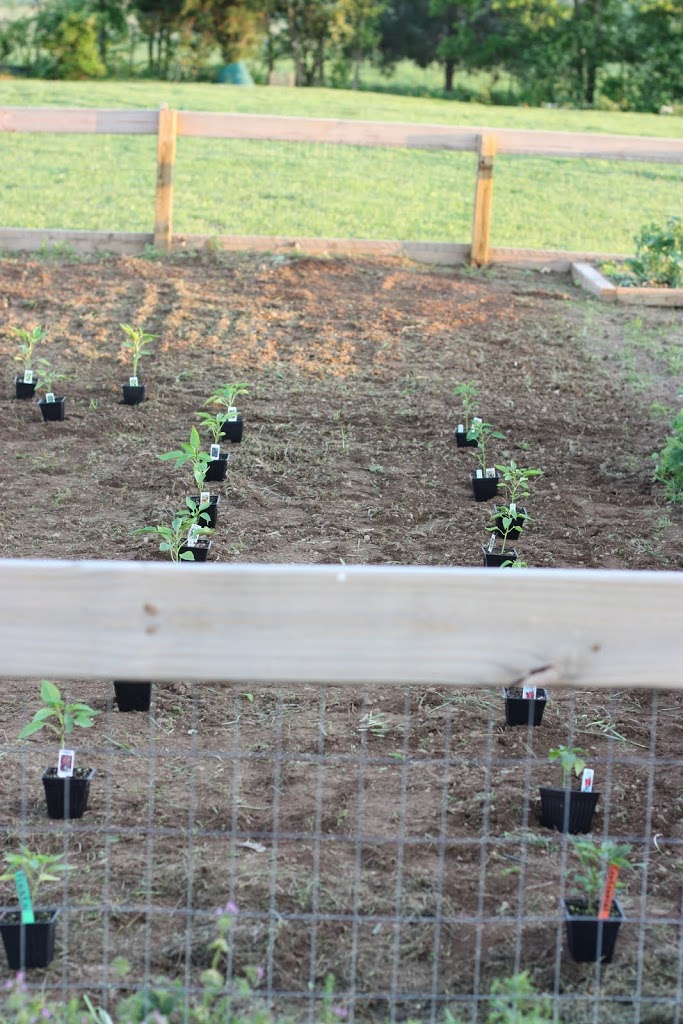
I stocked up on veggies from the Farmer’s Market on Saturday morning. This included potatoes for my Mustard Chive Potato Salad (although chives were replaced with dill this time and I used a lot more Greek yogurt), and colorful cherry tomatoes really brightened up the Curry Wheat Berry Salad. Basil from the garden and a good bunch of heirloom tomatoes rounded out the meal with a Caprese Salad.

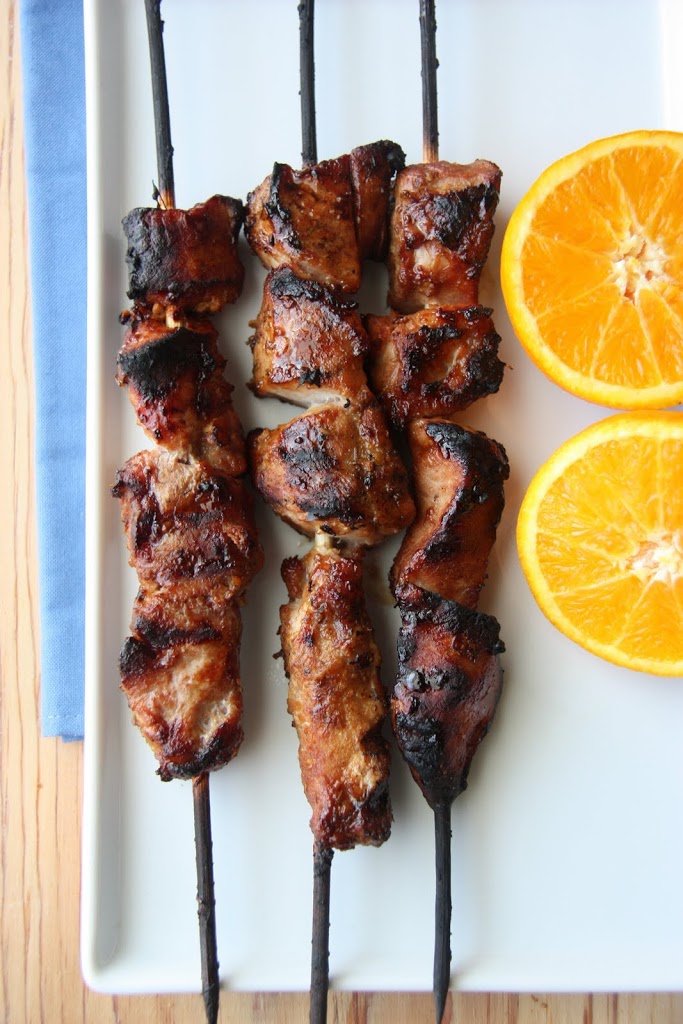
It all went over well, but the pork kebabs were definitely the star for us. I won’t hide my excitement that while most of the food was gone, there were a few pork kebabs leftover. Whether you use it for chicken, pork or beef, or what the heck, even tofu, the Filipino-style marinade is outstanding.

Filipino-style Pastured Pork Kebabs

6 lbs pork sirloin, cubed and skewered
3 heads of garlic, cloves smashed and peeled
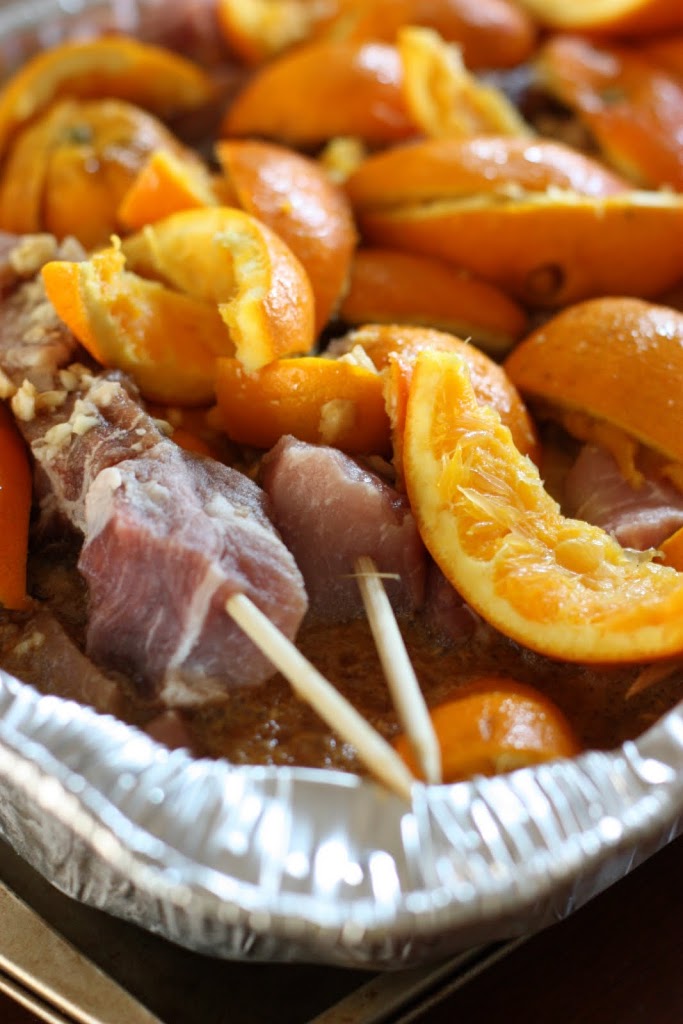
Juice of 8 oranges
4 cups soy sauce
1 ½ cups white vinegar
½ cup brown sugar

Place the kebabs in a deep baking pan. It’s best to work the marinade in two batches so divide each of the ingredients in half. Add half the garlic cloves, the juice of 4 oranges (reserve the peels), about 2 cups of soy sauce, ¾ cup vinegar and ¼ cup brown sugar to a blender. Blend on medium to high until all ingredients are mixed and the marinade is somewhat foamy.

Pour the marinade over the pork and continue with the second batch of marinade. Once all of the marinade is on the pork, place the leftover orange peels among the kebabs. Cover and refrigerate for 8 hours or overnight.

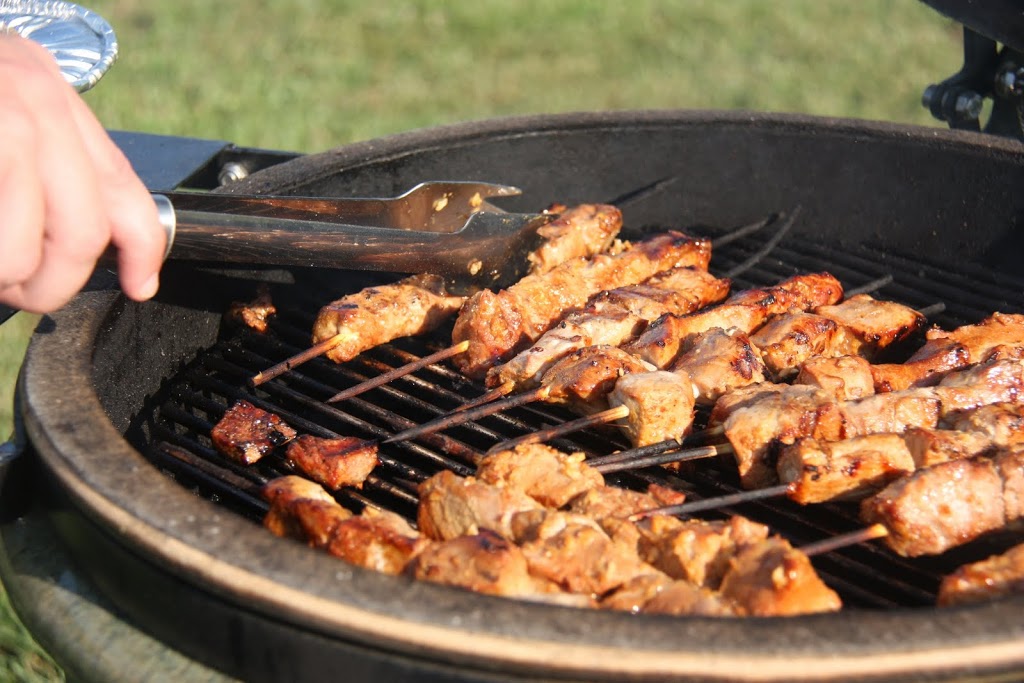
When ready to grill, once the grill is nice and hot, cook the pork to a temperature of 160 degrees F.

Grilled Green Beans with Dill Feta Sauce

June 27, 2011

This past weekend I took a quick trip to Indiana to surprise my mom for her birthday. It was a huge success in two ways. First, she was surprised; second, I was able to take any and all extra garden goods back with me to my Kentucky kitchen.

Our garden seems to be pouting a bit about the fact that we got it in around 3 weeks later than normal. Peppers and squash are slowly immerging from ours, but my parent’s garden is already flourishing.

This has a lot to do with the greenest thumb that exists in the world. It happens to be attached to my Dad’s hand.

I’m amazed at how tall his pepper plants are, at the diameter of the squash plants and how the cucumbers and melon plants have multiplied since our last visit over Memorial Day.

We opted out of growing our own potatoes this year, so I was happy to take all they had to offer. Kale is still growing strong there so I loaded up on a bag, cleaned the remaining raspberries off the bushes and took all the blackberries that had ripened thus far. We topped that off with a yellow squash and green beans. There were also lots of gooseberries whose recipe destiny I’m still contemplating.

Yesterday evening my husband decided he would try out some pastured pork spare ribs we got on sale from the local meat market. We were interested in tossing on some BBQ and finishing them off on his ceramic grill.

That needed to be matched up with lots of vegetables, so I decided the first of the harvest I’d tackle would be the green beans. We both aren’t raving green bean fans so I needed to find a creative way to cook them. Simply steamed wasn’t going to cut it.

Since just about everything else from the meal was on the grill I thought, why not grill the green beans too. So I slicked them up in some olive oil and my husband tossed them into a grill pan where they stayed for about 7 to 10 minutes. I took them off the grill when they were still firm, but beginning to brown and blister (in a good way).

I wanted to match them up with something slightly cooling to balance the smoky flavor. This sauce made with feta, dill and Greek yogurt was perfect. Not only did it go well with the green beans, but I think it will become my standard veggie dip from here on out.

Grilled Green Beans with Dill Feta Sauce

½ pound green beans, cleaned
Olive oil
½ cup plain Greek yogurt
1 tbsp crumbled feta cheese
1 tbsp fresh dill, chopped
1 tbsp fresh chives, sliced
1 tsp fresh lemon juice
Salt and Pepper to taste

Lightly sprinkle the green beans with olive oil and stir to coat. Gently sprinkle with salt and pepper to taste. Place the green beans in a grill pan and grill at about 325 degrees F for 7 to 10 minutes.

In a small food processor, combine the yogurt, feta, dill, chives and lemon juice. Pulse until a creamy sauce forms. Add salt and pepper to taste.

Remove the green beans from the grill, place on a serving platter and top with the feta sauce. Serves 2 to 3.

Grilled Pizza – Six Ways

June 4, 2011

You say grilling season, I say…pizza!

Yes, I know that other things like pork chops, hamburgers and veggie skewers may come to mind, but I have officially decided that my absolute favorite thing to grill is pizza.
We have a ceramic grill and those mesquite wood chips infuse the crust and toppings with a flavor that words can’t describe. From savory to sweet, there isn’t any kind of pizza that I don’t like grilled.
On Memorial Day, I was determined to kick off the grilling season with this favorite. Knowing that I’d be traveling this week for work I made up two batches of dough and lots of flavor combos so that my husband would have some leftovers during the week.
I have a favorite pizza dough that I make every time from Food Embrace (formerly Off Her Cork). I’ve mentioned it before and you can find the recipe there. I often switch the flour combos up and this time I used (for a double batch) 2 cups of unbleached white flour and 6 cups of white whole wheat flour. This dough rises every time without fail and it grills up so well.
I had the garden in mind for these combinations. Arugula is just beginning to grow, but I couldn’t wait any longer so I picked a few pieces early for one of my favorite pizzas. The loads of kale we have came in handy, too. Herbs were perfect for the cheese pizza and the strawberries came into play for the dessert pizzas.

I had picked up some local, grassfed brisket that had been smoked a few days prior and it was a bit too fatty for us. Not knowing what else to do with it besides sandwiches, I was so glad my husband came up with the great idea of dicing up the lean portions and using it for the pizzas.

Below are all the combos from this round of grilling. No measuring necessary. I eyeballed it all and used the amount I wanted based on my preferences. I divided the dough into 7 portions and we had 6 different topping combinations. All were different in size which is the fun of pizza making!
Although you might want to ignore the guava and cheese pizza. We had a bit of a mishap with the dough and it is more of an H than a circle or oval.
I love taking a few photos when my husband isn’t paying attention and this one depicts the necessary beverage for pizza grilling. We had picked up some imports earlier in the day.
Using plenty of olive oil and cornmeal to coat the dough, the grill was heated to about 350 degrees F and my husband grilled one side of the dough for about 3 minutes. The pizza dough is then flipped onto a tray and comes inside for toppings. So we are putting the toppings on the partially cooked side. Then it goes back on the grill for another 3-5 minutes with the uncooked side down. This way, the rest of the dough bakes as the toppings melt.
You’ll notice that all the photos are grill-side shots. Time is of the essence when grilling pizza because it will cool quickly. I was so hungry for pizza that no time could be wasted for photos once it was slid off the grill!

Kale and Mushroom
Red sauce (any of your favorites will do)
Sauteed kale and mushrooms (toss in a skillet with olive oil until kale is wilted)
Mozzarella

Arugula and Sundried Tomato
Mozzarella
Sundried tomatoes, thinly sliced
Arugula, chopped if leaves are large

Cheese and Herbs
Red Sauce
Mozzarella
Cheddar
Fresh oregano leaves
Fresh thyme leaves

Brisket and Blue Cheese

Red Sauce
Cheddar
Mozzarella
Blue cheese
Smoked brisket, finely diced

Peach and Strawberry

Peach preserves (I used what I had canned last year)
Strawberries, sliced
Mozzarella
Romeu e Julieta (Guava and Cheese)
Goiabada (guava paste, chopped, or guava jam)
Mozzarella

Garden 2011

May 24, 2011

Every time I walk outside I think – Welcome to year two of the garden!

In case you are wondering, year two is outstanding.
Year one you have lots of plants that aren’t bearing yet and it feels like forever until they actually will. You have more failures than successes, and at times you wonder if fighting all the weeds is worth it.

Oh, but year two? Year two is wonderful.


At least it is for us so far. Plants returned from last year and are producing more than we expected. We were able to evaluate what we really wanted to plant, what we could skip and pick up at the farmer’s market and what new things with which we wanted to experiment.

The garden feels more organized. We even built a trellis so the cucumbers could grow up instead of out, and threw in an official compost bin that looks a bit nicer in the yard.

 
Yes, year two is a good year.
Starting out, I knew I wanted to try some different varieties of plants, things I knew we wouldn’t have easy access to at markets. I feared I’d have to start everything from seed (which I’m awful at, by the way) until I stumbled upon Proper Plants via advice from a friend who also happens to be a horticulture expert.
Proper Plants is located in Lexington, KY and even after seeing on their website that they had over 50 varieties of tomatoes and peppers I wasn’t prepared for what I would encounter. Every time I saw a plant I had been wanting, like tomatillos and paprika peppers, I literally let out a little squeal. It was gardener heaven. 
I left with 19 pepper plants and 10 eggplant and tomato plants combined. In addition, lots of herbs. It was the most self control I’ve ever had to exercise when buying something as simple as plants.
Below is a list of all the wonderful things we have planted this year or that returned from last year along with a bit of a photo tour.
 Believe it or not, due to our layout and the plants we chose this year, we still have more space!

What else do you think we should grow?

Asparagus

Arugula, Dwarf Blue Curly Kale, Romaine and Bibb Lettuce

Peppers – Lilac, Merlot, Poblano, Cherry, Better Belle, Red Knights, Goliath Goldrush,  Anaheim, Mandarin, Paprika, Mariachi, Pinata, Centennial, Scotch Bonnet, Thai Chili, Sweet and Hot Banana


I can’t wait to have purple peppers!

Tomatoes – San Marzano, Mr. Stripey, Sweet Cherry


Tomatillos

Dealing with some early blight and bugs, but the plants are recovering nicely.

Japanese Eggplant, Thai Perch Eggplant

Patty Pan Scalloped Squash, Grey Zucchini

Asian Cucumber
Arugula

Dwarf Pak Choy

Parisienne Carrots
Strawberries, Raspberries, Blackberries, Blueberries (won’t bear until next year)
Yokahoma and Rouge Vif D’Etamps Pumpkins

Herbs – Sweet and Thai Basil, Lemon Verbena, Celery Leaf, Chocolate Mint, Italian Flat Leaf Parsley, Oregano, Chives, Thyme, Mint, Cilantro, Rosemary


I can’t wait to try this chocolate mint in a dessert!
This celery leaf allows you to add a little celery flavor without adding large pieces.
 

Fig tree


My dad gave us this fig tree. I hear they need special care, but can grow well in our area if given it.


A few garden fresh recipes:

Sweet and Simple Tomato Pepper Salad
Patty Pan Squash Stuffed with Basil Orzo
BLT Pizza with Spicy Chipotle Mayo
Whole Jalapenos with Honey and Allspice
Stuffed Poblano Peppers with Tomato Chile Sauce

Spiced Hot Chocolate

January 19, 2011

Snow is a mandatory part of winter for me. If I’m going to be freezing my buns off, I might as well have something beautiful to look at. Cold with no snow kind of makes me think – why bother? I’d rather have a beach.

Now, keep in mind that I live in Kentucky and not in a northern state where snow fall is plentiful. However, I will say I spent many a winter day trekking through deep snow on Purdue’s campus.

There is a bit of a catch when it comes to enjoying snow in central Kentucky. What you get in beautiful horse farms covered in white, you pay for in the public freaking out when snow is predicted.

The state is on a bit of an imaginary line when it comes to winter weather and snow fall. Some years we get it and some years we don’t. It could go either way. Seeing how many people feel very strongly about their southern roots and warm temps, most would prefer that we didn’t get any at all. So you can imagine what it is like here right now with the recent prediction of 3 to 5 inches starting tomorrow afternoon.

Yes, I can hear my readers in the great white north laughing from here. Truth is it only takes a prediction of a half inch for the supermarket shelves to be wiped clean of milk, bread and toilet paper.

Despite the madness, there is nothing like a winter night in, awaiting snow. It happens to be the perfect moment for some really good hot chocolate. It also doesn’t hurt to put it in a really cute mug.

My limited time curled up on the couch so far this winter as been spent doing two things. Practicing my knitting which I just began to learn this month as part of a new years resolution, and planning our garden for this spring. I’ve been paging through seed catalogs and I think we are going to have to buy some more property to accommodate all I want to grow!

Whether you are spending your winter nights reading or working on your laptop, this spiced hot chocolate will warm you up.

Spiced Hot Chocolate

This recipe serves one. Double as needed and feel free to add more or less of any of the ingredients to your taste.

2 to 3 each of whole spices – clove, cardamom, black peppercorns, allspice
1 to 1 ½ cups milk
2 tbsp unsweetened cocoa powder
1 tsp sugar (I used Dememara)

Place the spices in a tea ball or in a piece of cheesecloth tied off at the top. Anything that will allow you to steep it is fine.

Heat the milk, cocoa powder and sugar over medium high heat. Whisk well to incorporate the cocoa. Place the spice ball into the milk.

Heat the hot chocolate 2 to 3 minutes being careful to keep it under a boil, just barely at a simmer. Stir often. Once hot and the spices have been given time to infuse the milk it is ready to serve.

Serve in your favorite mug, curl up and enjoy!

Want to create beautiful food and product photos that you can't wait to share?!
Discover your style, control the light, and shoot using the tool you know how to use (yes, your phone included). Learn about free resources, Live Q&As with Lori, and online courses you can take from anywhere in the world!
We respect your privacy. Unsubscribe at any time.