Browsing Category

Herbs and Spices

Spicy Cornbread Muffins

September 27, 2010

Full meals have become a rarity around here. I find I’m always making one pot dinners, heating up some pasta with a sauce or stirring together a soup. If you haven’t been following my tweets or Facebook, you may not know that one of the biggest sporting events in the world is taking place right here in Lexington, Kentucky for the next 3 weeks.

The Alltech FEI World Equestrian Games have come to the US for the first time and they are right in our backyard. In addition to that, the company my husband works for is heavily involved which means crazy schedules and high stress levels around our house.


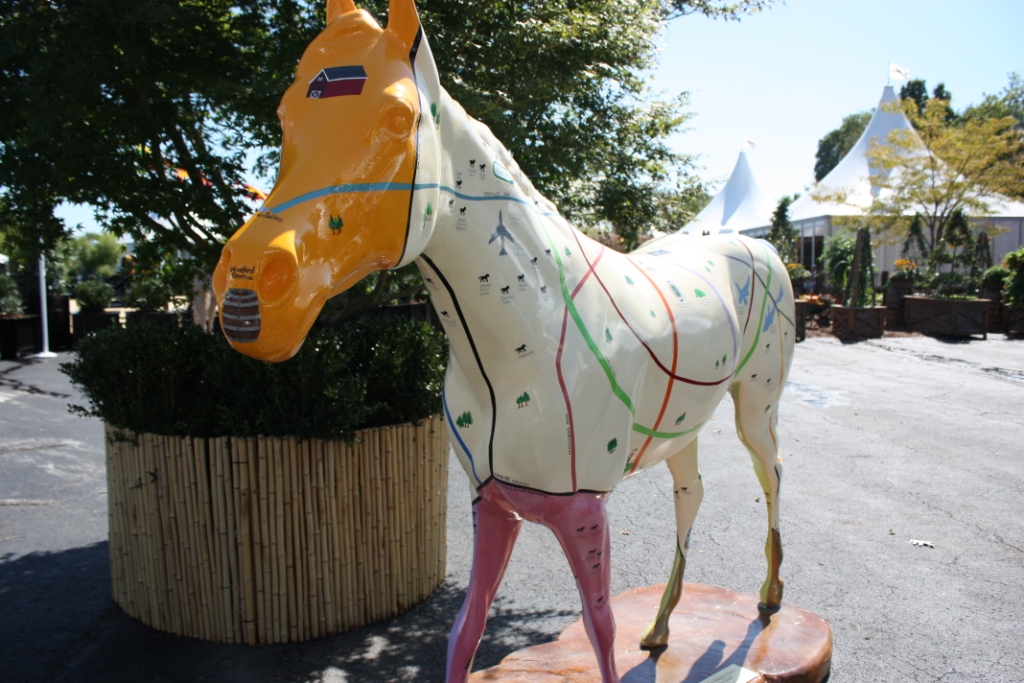
One of the many painted horses at the Kentucky Horse Park. This one is a map of all the horse farms in the area.


Sculpture in the courtyard made for the Games.


Opening ceremonies Saturday night. (Yes, a wide angle lens is on my wish list!)


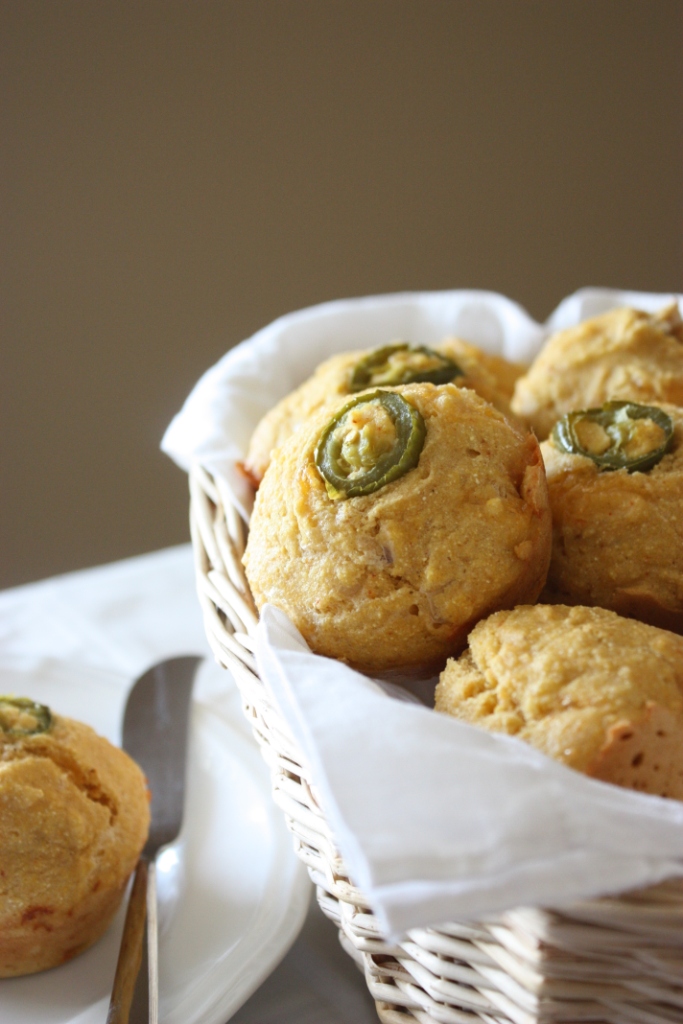
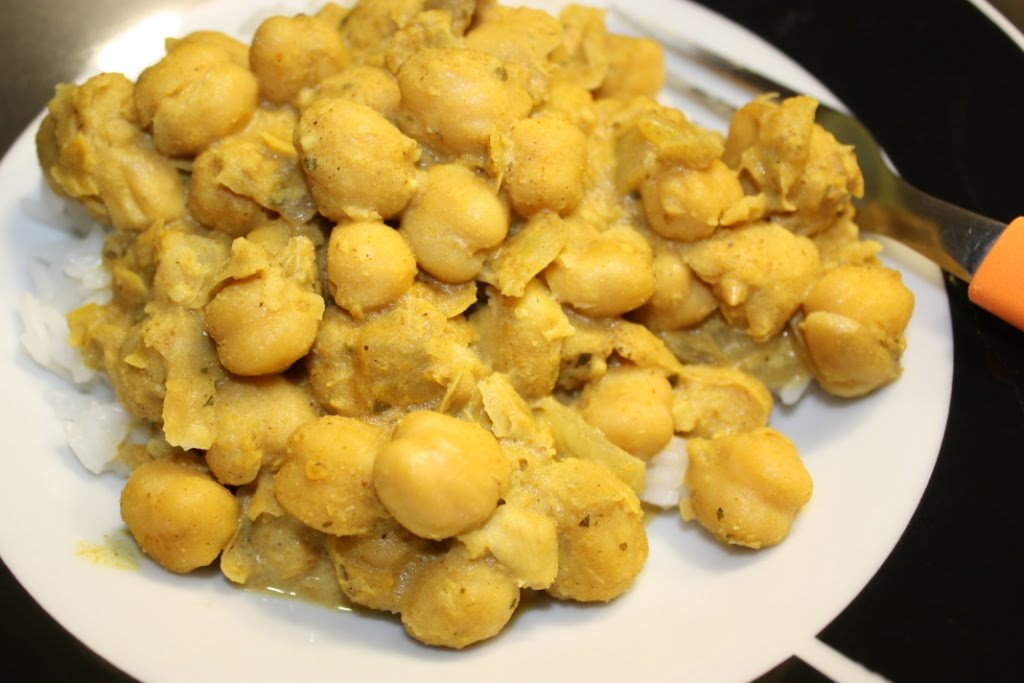
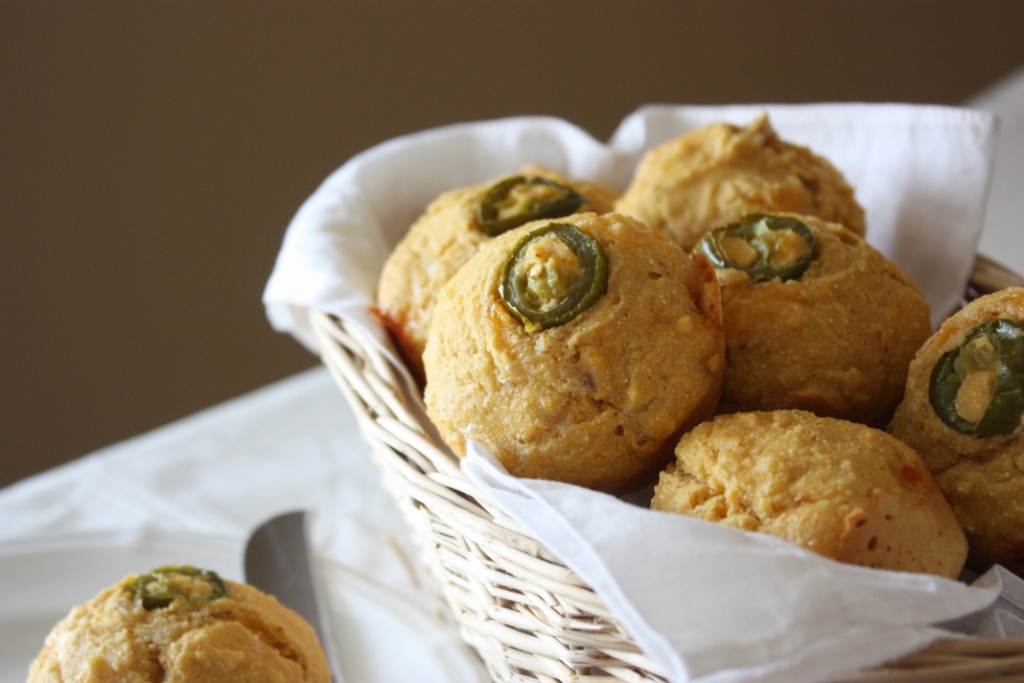
Fortunately, last night we sat down to one of those rare, full meals. As a result I felt the need for some type of roll or muffin, and given the fact that we are finally creeping into real fall weather, cornbread seemed just the thing; spicy cornbread that is.

I made some substitutions to the cornbread recipe on the back of the cornmeal package, added some spices and gave it some extra kick with shredded Habanero Havarti cheese. This was a specialty cheese we picked up at a creamery in northern Indiana, Fair Oaks Farm.

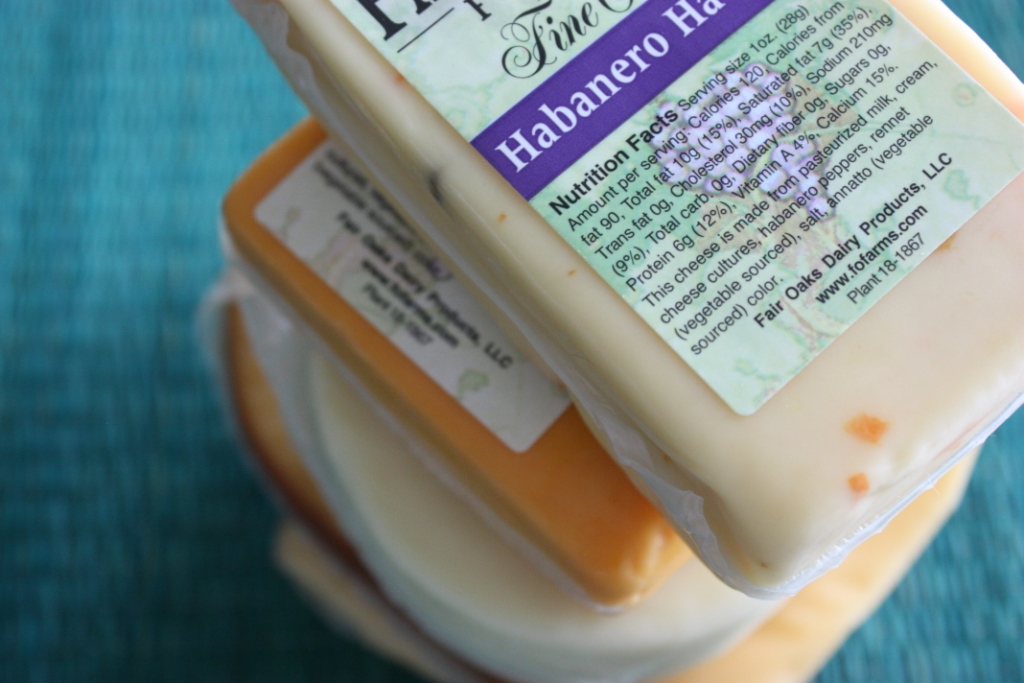
This cheese is so good, and hot! Sprinkling a bit here and there is all you need which is why it has lasted so long.

I left the sugar out of the original recipe to make them completely savory. I also tried cutting out the butter, but as a result I thought they were a little dry. So I’d recommend keeping the butter in, or substituting virgin coconut oil.

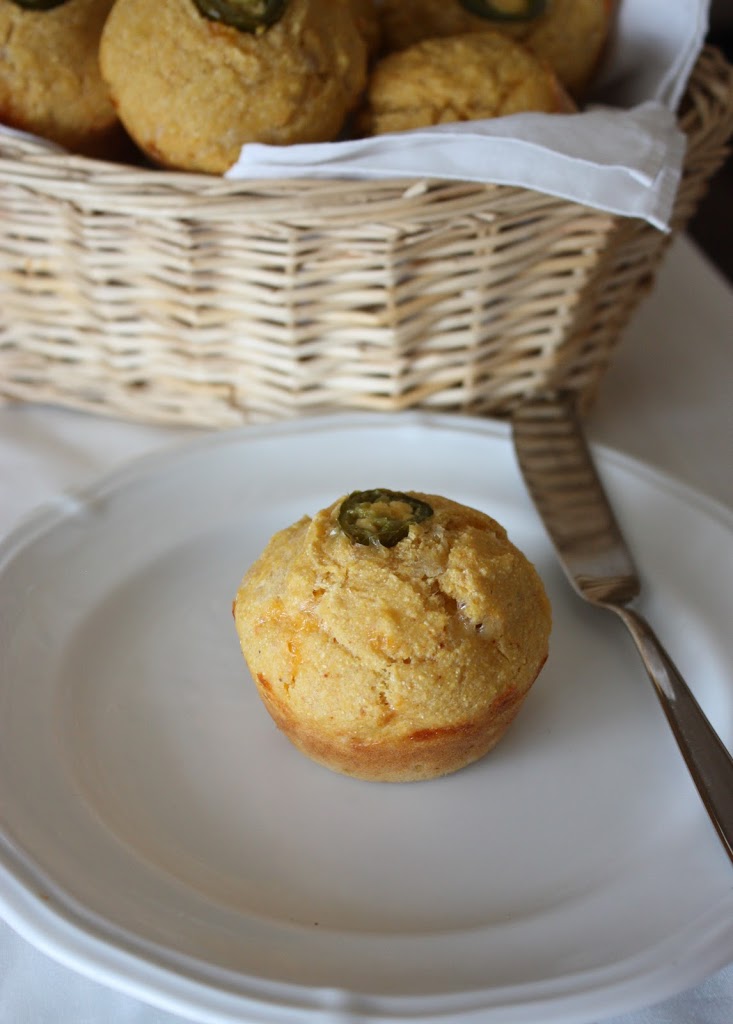
These muffins make a great side for barbeque or chili. You might even consider slathering on some peach jam like I did for a sweet and spicy combination!

Spicy Cornbread Muffins

Adapted from Martha White Golden Cornbread

2 farm fresh eggs
1 cup milk
¼ cup butter or coconut oil, melted
1 ½ cups yellow cornmeal
1 cup white whole wheat flour
2 ¼ tsp baking powder
¾ tsp salt
½ tsp ground cumin
½ tsp chili powder
¼ cup sharp cheddar cheese, shredded
¼ cup Habanero Havarti cheese (or pepper jack), shredded
12 pickled jalapeno slices (optional)

Heat oven to 400 degrees F and grease a 12-muffin tin.

In a large bowl, whisk together the egg and milk. Stir in the butter or oil.

Gently stir in the cornmeal, flour, baking powder, salt, cumin and chili powder. Add the cheese and stir just until combined.

Divide batter into 12 muffins. If using, place a jalapeno slice on each muffin. Bake for 12 to 15 minutes, or until the muffins are browned and a toothpick inserted in the center comes out clean.

Lemon Rosemary Thumbprints with Peach Jam

September 4, 2010

I’m happy to say that Fake Food Free has transitioned to the Substack Newsletter called Every Corner of the World.

I hope to see you there.

 Lemon Rosemary Thumbprints with Peach Jam | Fake Food Free  

One of my favorite cookies that show up at our holiday cookie exchange is a creative combination of lemon and rosemary in a shortbread. A former coworker of mine brings these cookies and I usually get to go home with all the extras. We both love them, but others seem to be resistant to the savory herb flavor in something that is supposed to be strictly sweet.

It is surprising how delicious the rosemary tastes in the cookies. It isn’t an overwhelming flavor, but more of a crisp, refreshing background to the sweet lemon shortbread. I’ve been meaning to make these cookies for a while, but just haven’t gotten around to it.

All that time thinking about them has given me the opportunity to get creative. First, let’s talk about the jam.

I’ve wanted to try some jam with alternative sweeteners all summer, but I’ve been afraid of ruining all that wonderful fresh fruit if it didn’t turn out well. When I came across Stone Fruit Preserves from The Cilantropist, I finally decided to give it a try. The recipe already had honey in it so I added demerara sugar instead of white sugar.

I also cooked it according to other jam recipes I’ve used, boiling it hard for about 15 minutes. I canned the majority of it and left about a ¼ cup as refrigerator jam which I used in the cookies.

For the cookies, I decided to try out some brown rice flour which I have never baked with before. I really like the texture it gave to the cookies. They have almost a cornmeal-like feel in the mouth. I wouldn’t go overboard with it though. A little adds nice texture, but too much makes them gritty.

The rosemary adds that same refreshing flavor as the cookies I enjoy from our holiday party. Despite the fact that there is rosemary, lemon and peach going on here it all blends nicely for one delicious thumbprint cookie. Feel free to substitute any type of jam. I think a lemon curd would be tasty with them, too.

Lemon Rosemary Thumbprints with Peach Jam | Fake Food Free

Lemon Rosemary Thumbprints with Peach Jam

Jam modified from Stone Fruit Preserves at The Cilantropist
Cookies modified from Jam Thumbprint Cookies by Ina Garten

Makes: About 18 cookies

Jam Ingredients

Peach Jam/Filling

2 lb. peaches, peeled, pitted and chopped
1 cup demerara sugar
¼ cup local honey
Juice of ½ a lemon

Jam Prep

Combine all ingredients in a heavy soup pot. Bring to a boil and cook, stirring often, for 15 minutes. You can check to make sure the jam has set up by spooning some on a plate and putting it in the freezer for a couple minutes. If it is thick and spreadable when you get it out, it is ready. Process as you would any jam if you choose to can it, otherwise, place it in a sealable container and store in the refrigerator for up to a week. Makes about 4 cups.

Cookie Ingredients

3/4 cup unsalted butter, softened
½ cup demerara sugar
½ teaspoon vanilla
1 cup brown rice flour
¾ cup white whole wheat flour
½ teaspoon fine ground sea salt
1 teaspoon lemon juice
1 teaspoon lemon zest
½ tablepsoon fresh rosemary, chopped

Cookie Prep

In a mixer, cream together the butter and sugar on medium to medium-high for about 2 minutes. Add the vanilla. Slowly mix in the flours, salt, lemon juice and lemon zest. Finally, mix in the rosemary. Form the dough into a ball, wrap in plastic wrap and refrigerate for at least 30 minutes.

Preheat the oven to 350 degrees F. Roll the dough into about 1 inch balls, maybe just a little larger. Place on an ungreased cookie sheet. Flatten the cookies slightly and make a small indentation in the center with your thumb. Fill the spot with about 1/8 to ¼ tsp of jam. Be carefully not to fill the space too full or it will bake out of the cookie.

Bake for about 12 minutes or until the cookies are firm and slightly browned. Let cool on the baking pan for about 2 minutes and carefully transfer to a cooling rack to allow the jam to set before serving. 

Lemon Rosemary Thumbprints with Peach Jam | Fake Food Free
 
 
Thanks for reading! All images and content are the property of Fake Food Free unless otherwise stated. Please do not republish full recipes and images without written permission. What is okay? Feel free to Pin images, share links to my posts or share the photo in a round up post with the title of this recipe and a link back to the post. Confused about copyright and food blogs? Here is some helpful information on Recipe Attribution. If you want to use a photo or full recipe, just ask. I’m sure we can work something out.  

Sweet and Simple Tomato Pepper Salad

July 30, 2010
 A simple summer salad recipe with garden tomatoes and peppers. 

Living in Brazil taught me a lot about food and cooking. First I had to overcome the mini-stove and let go of my perceptions of must-have ingredients. Then the learning and appreciation began.

The lesson I’m remembering this summer is that the simpler a food, the more delicious it can be. A single, fresh ingredient, whether meat or plant, matched with one spice, an herb or an oil can bring out more natural flavor than a recipe that includes 25 exotic ingredients.

I felt like I understood the concept of simple food before our move, but being exposed to local Brazilian cuisine made me realize I had a lot left to learn.

The main place that this lesson was reiterated to me was the churrascaria, those famous Brazilian barbecues (or churrasco if you are describing the cooking style or going to one at a home). I feel incredibly fortunate that I was able to experience this type of dining and food from the source, and not at an overpriced Estados Unidos version, as authentic as they might be.

It starts with the meat. The meat is seasoned with salt. A lot of salt (as in bags of the stuff), but still, just salt. Now this may not be the case everywhere, but it was at the barbecues we attended at the houses of friends.

These barbecues whether at a restaurant or a residence also included what would translate in the States as a salad bar buffet. However, not the layer-your-ingredients type of salad bar, but plates of vegetables in simple oil-based marinades, vinegar and herbs. Pastas were also included at restaurants and my favorite was always the spaghetti ao alho e óleo– spaghetti with garlic and olive oil. Again, pretty simple.

Cherry tomatoes from our Kentucky garden

Now that we are being invaded by loads of cherry tomatoes I remember a lot about how we enjoyed tomatoes in Brazil. I’ve never especially disliked tomatoes, but I was never the type of person who could sit down and eat just a tomato with salt and pepper either.

Then, in Brazil, I came across tomatoes quartered, drizzled in olive oil and fresh lime juice, topped with either parsley or cilantro and seasoned with salt and pepper. Wow, there was something about that citrus juice and those herbs that made a tomato so much better!

I am crazy about the little orange cherry tomatoes we have in our garden this year. They are so sweet you think you just popped a sugar cube in your mouth. In an effort to avoid taking away from their already delicious flavor, I’ve been including them in simple salads that mimic the flavors we had in Brazil.

Tomato Pepper Salad Recipe | Fake Food Free


This specific salad isn’t exactly the same, but I wanted to use all the ingredients from our garden with lots of color. I decided to switch out the lime juice for lemon this time, and parsley for fresh basil. Any variety of peppers will do, but I used a combination of orange, red and yellow because I am thrilled that we have a few from the garden.

If you want to go all out, I highly suggest using aged goat cheese. That is my absolute favorite, but unfortunately I just ran out of it last week, so here I’ve used feta which is good in a pinch.

Enjoy the simple flavors of summer!

Sweet and Simple Tomato Pepper Salad 

4 cups cherry tomatoes, quartered
½ candy onion, thinly sliced
1 cup thinly sliced bell peppers (I used a combo of orange, red, and yellow)
5 to 7 fresh basil leaves, chopped
3 tablespoons fresh lemon juice
3 tablespoons olive oil
1/3 cup crumbled feta or aged goat cheese
Salt and pepper to taste

The preparation is easy on this one. Simply combine all the ingredients in a bowl, stirring gently. Cover and refrigerate for at least 30 minutes before serving. Sprinkle on more basil or cheese just before serving if desired. Makes 6 to 8 servings.


Sweet and Simple Tomato Pepper Salad Recipe | FakeFoodFree.com


Thanks for reading! All images and content are the property of Fake Food Free unless otherwise stated. Please do not republish full recipes and images without written permission. What is okay? Feel free to Pin images, share links to my posts or share the photo in a round up post with the title of this recipe and a link back to the post. Confused about copyright and food blogs? Here is some helpful information on Recipe Attribution. If you want to use a photo or full recipe, just ask. I’m sure we can work something out.  

Cucumber Dill Wheat Berry Salad

July 1, 2010

Cucumber Dill Wheat Berry Salad | Fake Food Free | A hearty cold grain salad with a tangy yogurt dressing and refreshing cucumber.

Ever since my food service class in undergrad I have been crazy about herb gardens. The class involved operating both the department cafeteria and a seated dining room two times a week. I had to take the course over the summer the year before I graduated so the fresh foods we used were at their peak.

On the first day of class Chef walked us outside and showed us the herb garden right behind our building on campus. I had walked by it on my way to classes for nearly 2 years and had never seen it. It was a modest row of basics – basil, thyme, parsley, oregano, dill, cilantro and a few others. The whole garden was only about 6 feet long and 3 feet wide, but the plants were overflowing out onto the side walk and most came to at least knee height.

It was my first introduction to using fresh herbs in cooking. I’m sure that was evident to my instructors when I kept pronouncing thyme as it looks with the “th” and not “time.” Our TA quietly told me the correct pronunciation to help me avoid embarrassment.

Since then I’ve been interested in herb gardens and while I still may mispronounce a name now and then, and I am thrilled to have my own again this year. The only problem is the plants produce A LOT and my cooking can’t keep up with them. I’m always looking for things to use them in, but I have to admit they tend to go a few days at a time without me picking a single leaf.

So last week, armed with some wheat berries, I began thinking about what herbs would go well with the grain. That led me to think about the fresh cucumbers I picked up at the farmer’s market which ended up in thoughts of Greek yogurt.

Finally, all those food thoughts resulted in this:

Cucumber Dill Wheat Berry Salad | Fake Food Free | A hearty cold grain salad with a tangy yogurt dressing and refreshing cucumber.

The Cucumber Dill Wheat Berry Salad ended up a hit. I was able to combine two of my favorite herbs for a refreshing cold grain salad. I used leftover, previously cooked wheat berries so if yours are still warm, wash them well under cold water to cool them off. Also, peel your cucumber before chopping if it is of the waxy skin variety.

I’ve already made this salad once more for lunch and now I have my eye out for a potluck to take it to (it can easily be doubled or tripled).

Cucumber Dill Wheat Berry Salad | Fake Food Free | A hearty cold grain salad with a tangy yogurt dressing and refreshing cucumber.

Cucumber Dill Wheat Berry Salad

Makes: 2 servings

Ingredients


1 cup cooked wheat berries
½ medium cucumber, chopped
1 T fresh lemon juice
½ T fresh dill, chopped
½ T fresh chives, chopped
1 ½ T plain Greek yogurt
Salt and pepper to taste

Prep

Place the wheat berries and chopped cucumber in a medium-sized bowl and set aside.

In a small bowl, whisk together the lemon juice, dill, chives and yogurt. Pour the dressing over the wheat berries and toss or stir to coat. Sprinkle with a generous amount of sea salt which adds great flavor and a little black pepper. Eat right away, or refrigerate for up to a day. 


This recipe was submitted to Souper Sundays at Kahakai Kitchen.
 
Thanks for reading! All images and content are the property of Fake Food Free unless otherwise stated. Please do not republish full recipes and images without written permission. What is okay? Feel free to Pin images, share links to my posts or share the photo in a round up post with the title of this recipe and a link back to the post. Confused about copyright and food blogs? Here is some helpful information on Recipe Attribution. If you want to use a photo or full recipe, just ask. I’m sure we can work something out. 

Patty Pan Squash Stuffed with Basil Orzo

June 7, 2010

Stuffed Patty Pan Squash with Basil Orzo Recipe

Just when I was becoming confident in my knowledge of squash varieties I came across a new one at Lexington Farmer’s Market a couple weeks ago.

My Dad has grown varieties of yellow squash and zucchini in his garden my whole life, but I’ve never come across Patty Pan Squash. It is also sometimes called Scalloped Squash for obvious reasons. Have you seen it or cooked with it before? 

Patty Pan Squash

Patty Pan or Scalloped Summer Squash

Just look at that interesting shape. It is as if the little squash decided that it really didn’t want to grow long and decided to grow wide instead. You know, just to be different.

Well, in my opinion, different is good, and while Patty Pan has a similar flavor and texture to its longer cousins it adds a lot more fun to cooking.

Patty Pan Squash Stuffed with Basil Orzo


I spent several days trying to figure out what I was going to stuff into these little bowl-like vegetables. I kept going back and forth between rice, bulgur and orzo, finally settling on orzo. With all the fresh basil in our herb garden at the moment, I thought an Italian twist was the way to go.


Patty Pan Squash Stuffed with Basil Orzo


At first I was much more interested in the shape than the actual squash, but that quickly changed as I began creating this dish. Patty Pan are easy to roast up. If you trim the stem and flip them over you can simply remove the top, clean out the seeds and stuff them with all sorts of ingredients. These squash can also be sliced and steamed or sautéed with a little olive oil or butter.

Patty Pan Squash preparation

The yellow Patty Pan that I used had a sweet, fresh flavor. They seemed even sweeter to me than standard yellow straight or crooked-neck summer squash. The basil and cheese combination with its slight saltiness paired perfectly with the tender, sweet flesh of the squash.

Patty Pan Squash Stuffed with Basil Orzo

Makes: 2 servings

What you’ll need:

2 medium Patty Pan squash
Olive oil
1 cup orzo, cooked and cooled
2 tablespoon whole milk ricotta cheese
2 tablespoon Romano cheese, grated
6 fresh basil leaves, chopped
¼ teaspoon sea salt
1/8 teaspoon black pepper

How to make it:

Preheat the oven to 400 degrees F. Trim the stem off the squash to create a flat surface. Coat them in olive oil and place them stem side down in a baking dish. The bake time will vary greatly depending on the size of the Patty Pan. I had two, one smaller than the other. The smaller cooked in 30 minutes and the larger took 40 minutes. Insert a fork in the flesh to ensure that it is tender and remove from the oven. Set aside until cool enough to handle.

In a bowl mix together the orzo, cheeses, basil, salt and pepper. Set aside.

Patty Pan Squash recipe prep

Using a small paring knife carefully cut the top off of each squash. Gently scrape out some of the seeds using a spoon to create a bowl to hold your filling. Scoop half of the filling into each squash. Return to the oven and bake 5 to 7 minutes longer until everything is heated through. Makes 2 side dish servings.


Thanks for reading! All images and content are the property of Lori Rice and Fake Food Free unless otherwise stated. Please do not republish full recipes and images without written permission. What is okay? Feel free to Pin images, share links to my posts or share the photo with the title of this recipe and a link back to the post. Confused about copyright and food blogs? Here is some helpful information on Recipe Attribution. If you want to use a photo or full recipe, just ask. I’m sure we can work something out.

An Amateur at Everything: The Garden

April 25, 2010

These days about the only thing that I’m not an amateur at is eating and exercising, everything else is new territory. In fact, I’ve been trying to learn about so many new things lately that it is not uncommon for the mass confusion of new information swimming in my head to become evident in my actions. Between baking, writing and photography, you might find me trying to figure out how to set the aperture and ISO on my oven, or I could be halfway through writing before I realize I don’t need to structure an email to my husband like a query letter.

One of these new activities I’ve taken on is gardening. We had a small garden at our last house and I can handle herbs, but the main reason we moved out of town a bit to our new house was to have more land to grow food. Note to self — big garden is quite the undertaking.

Last weekend was full of outdoor frenzy as my parents came to visit and help put in the garden. My Dad’s truck was loaded with everything from plants, to a tiller, to tomato cages. This proved terribly embarrassing for my Mom who was a bit worried they would run into someone they knew during their 4 hour drive, Beverly Hillbillies-style.

Fortunately, things were strapped down well and it all made it into the garden. The weekend proved to me that I know absolutely nothing about the art. My main problem is I tend to experiment without researching. I mean, I like to research what works and what doesn’t, especially when it comes to nutrition. However, when it comes to things like cooking and gardening I tend to throw things together and see how they do.
I was given some valuable lessons over the weekend including how difficult it is to maneuver a massive tiller through soil. I had done this before when I was younger, but I had forgotten how challenging it was. I also have notes, thoughts and tips floating through my head about how far apart to plant things, which plants need water, when to mound up dirt, what parts to break off a plant, when items will sprout, how to harvest it…….
Yeah, my head hurts too. Good thing my parents are only a phone call away, and that plants can be hearty little suckers because I’m sure I’ll screw a few things up.
This is how it all started last Saturday.
And thanks to the hard work of my parents and husband, this is what we ended up with.
The main thing I have my eye on at the moment are the strawberries. The plants came directly from my Dad’s garden and they were blooming last week and now we even have signs of growing berries!

We’ve planted blackberries and raspberries in the back of our yard. I’ve also got some herbs going up near the house. In addition, there are some new trees around and the beautiful flower we got as a housewarming gift.

So far this is what we have planted:

Carrots, Asparagus, Potatoes (red and white), Tomatoes (Early Girl, Roma, Beef Master and Orange and Red Cherry), Green Beans, Cucumbers, Zucchini (Yellow and Green), Corn, Onions (Red and White), Spinach, Lettuce, Arugula, Bell Peppers (Orange and Yellow), Jalapenos, Banana Peppers, Anaheim Peppers, Strawberries, Kale, Blackberries, Raspberries, Blueberries, Basil, Thyme, Rosemary, Cilantro, Parsley, Dill, Mint. Later will come pumpkins, butternut squash, melons, broccoli and Brussels sprouts.

Whew! Bring on the produce!

What will I master next? Well, canning of course.

PS. Links will be back next weekend!

A Boy, His Grill, and a Spatchcocked Chicken

April 12, 2010

Over the past few months I’ve regularly documented all of the things I am thrilled to have returned to since our move back to the States. In fact, I wouldn’t blame you for thinking me annoying because I tend to express my excitement with an over abundance of irritating happiness.

There was the real winter with snow which necessitated the wearing of boots not just for fashion, but for functionality. A full size oven with a temperature setting that goes low enough to prevent burning all my baked goods to a crisp. A washer and dryer that take fewer than 90 minutes for each cycle. My KitchenAid mixer with all its powerful capabilities.

Ahhh, I smile just thinking about it all.

Despite my glowing excitement, I was getting a little bit worried that my husband hadn’t yet experienced such bliss. Sure, he had some of his favorite electronics back, and we now have a nice size garage with a yard to tend to, but something was missing.

Over Easter weekend I learned what it was. This:

Yes, a grill. As much as we enjoyed the food and culture of the Brazilian barbeque, let’s just say, there is no place like home. We talked about it often during our time abroad — grilling different kinds of meats from chicken to pork tenderloin, burgers, hot dogs and even fruits and vegetables; the array of side dishes, and sitting outside all afternoon with a beer in hand.

He had his heart set on a Big Green Egg for a long time, even before we moved back to the US. However, after some research he learned that there are the same style of grills out there (a ceramic pod grill that cooks by charcoal) without the same price tag.

We couldn’t find any sources around here, but some stores in our hometown occasionally carried them. When he learned that two had come in the day we got to Indiana for our Easter visit, off he went with my Dad to grab one before it was gone.

He’s been anxiously awaiting the opportunity to get cooking so this weekend we decided to break out the new grill and see what this baby can do.

First we tried chicken. Until this weekend I had seen the process of spatchcocking a chicken on the web and on tv, but had no idea that “spatchcocking” was the appropriate term. I gave it a try last night. To be honest, I did get a flat chicken out of the process which was the goal, but I really have no idea if I did it exactly as it should be done. In fact, I already discovered a step I accidentally skipped. Shhhh! I’m not telling.

Therefore, you really shouldn’t listen to me about how to spatchcock a chicken when there are much more knowledgeable people out there to tell you. Check out A Good Appetite or this YouTube video for some help.

I can, however, tell you the rub I used on the bird which turned out nicely. My husband wanted something a little more spicy/Cajun in nature since I typically do Italian-style herb rubs. I coated the chicken with the spices below and then rubbed it generously with olive oil.

First Chicken of the Season Spicy Rub

1 tsp chili powder
1 tsp cumin
¼ tsp crushed red pepper
1 tsp garlic powder
1 ½ tsp sea salt
¾ tsp ground black pepper

Combine in a small dish and mix with your fingers to crust of the red pepper with the other spices. Rub over the chicken including under the skin.

After an hour on the grill, the chicken was perfect. Nice and juice with a crispy skin just as was predicted by all the recipes I’d read prior to our attempt. There will be lots of grilled chicken in our near future, especially once Pike Valley has some available again later in the month. They should process 32,000 chickens this year. Not bad for a farm using humane, sustainable practices. The word is really getting out about them.


In addition to the chicken we decided to grill up some burgers for later in the week, as well as some asparagus as a side for our chicken. Grilled asparagus is about the easiest thing you can cook on a grill. I drizzled it with olive oil and sprinkled on some of the herb seasoning I told you about a few days ago. About five to eight minutes on the grill and it’s all done.


Tomorrow I’ll tell you more about the burgers and a new pasta salad I tried out.

Have the grill out yet? What’s on the menu?

Dreaming of Grilled Vegetables

March 23, 2010

For two whole summers I enviously read blog post after blog post about grilled vegetables from around the food blogging world. At that point we were in an apartment in Brazil with no grill of our own. Not to mention, while grills of Brazil and the foods they produce are quite nice, it’s just not the same as our version in the U.S. I’m also not sure a vegetable has ever touched a grill where we were living. Red meat, yes, veggies not so much.
My anticipation of creating my own grilled produce has been building all winter. Now, that we are finally in a house, there is a spot being held for a new grill. However, it has turned out to be the last thing on our shopping list. While we have filled the house with couches, chairs and desks, the yard is still looking a bit bare.

That will change soon enough, but today I just couldn’t wait. After finding some zucchini and mushrooms in the fridge I decided to grab the grill pan and make an indoor version of a grilled vegetable sandwich for lunch.

I sliced up the vegetables, drizzled them with olive oil, and then sprinkled them with this herb rub.

A friend of mine gave me this and it is from Herb ‘n Renewal, a Kentucky company that sells herb products. You may not have access to this exact combo, but you can see the ingredient list here if you want to mimic it.
I cooked everything for a few minutes on each side, layered everything on the bread (Flax Oat Bran from Great Harvest) and then grilled the sandwich itself to make it more of a Panini. It hit the spot, but unfortunately it has made my longing for grilled foods even stronger!

There really isn’t an exact recipe here, but I will list out what I added to my sandwich. You can add whatever veggies you like.

Grilled Vegetable Sandwich

2 slices of whole grain bread
4 slices of zucchini
10 rings of Anaheim pepper
2 white mushrooms, sliced
Sprinkle of olive oil and herb seasoning
1 ½ tbsp cream cheese
1 green onion, sliced
1 tbsp fresh cilantro, chopped
¼ tsp garlic powder
Handful of fresh spinach

Place the veggies on the grill and sprinkle with olive oil and herb seasoning. Cook 3 to 4 minutes on each side or until tender. In a small bowl, mix the cream cheese, green onion, cilantro and garlic powder. Spread on one slice of the bread. Stack the grilled veggies on the second slice and top it with the spinach. Place the first slice on top, cream cheese side down. Return to the grill pan and grill for 1 minute on each side.

This post is being submitted to Souper Sundays at the Kahakai Kitchen.

Quick Chickpeas in Curry

September 14, 2009

The first time I had chickpeas with curry was in Vienna at the summer film festival. At this event, along with the film comes a large variety of vendors selling foods from around the world. Typically with so much available I can decide what I want pretty quickly, however, it was one of those nights when I was hungry, but nothing specific sounded good.
I finally settled on the Indian food booth. Knowing that I like chickpeas and curry and other veggies, I gave it a try. Wow, did it hit the spot – creamy, spicy, vegetarian. As Anthony Bourdain mentioned in his recent NYC episode of No Reservations, Indian cuisine is the way to go if you want to eat a vegetarian meal. You will never miss meat. There are just too many great flavors and textures going on.
It is these kinds of dishes I seem to remember when I eat alone while my husband is traveling for work.
I tend to go to one of two extremes when I’m around the apartment by myself during dinnertime. I either spend all my time in the kitchen making new things, or I simply don’t want to cook at all. Weird, I know. There really isn’t a way to predict what the upcoming attitude will be.
Recently, though, I was in a no-cook mood. I think it has to do with the packing and preparing to move. Despite not wanting to cook, well, I still really wanted to eat. So with some chickpeas in the freezer (I have to cook them from dried here) and some coconut milk left over from a previous dish, I decided on a quick curry.
Keep in mind; this is in no way authentic. It is simply my way to get the flavors I want in a quick and healthy meal. This time around I only had chickpeas and onion, but it is excellent with some cauliflower thrown in as well.
Quick Chickpeas in Curry

½ tbsp olive oil
¼ cup onion, chopped
2 cloves garlic, minced
2 ½ cups cooked chickpeas
2 tbsp curry powder (more or less to taste)
1 cup chicken stock
½ cup coconut milk
In a deep skillet, heat the olive oil, and then add the onion and garlic. Cook for about five minutes or until the onion is slightly tender. Add the chickpeas and then sprinkle with the curry powder, mix well and allow them to heat through.
Pour in the chicken stock. Place a lid on the skillet and cooking for about five minutes or until everything is bubbly and begins to thicken. Finally stir in the coconut milk and heat through. Serve over white or brown rice if desired.
If you happen to find yourself in Vienna during late June through late August, do pay the Music Film Festival a visit. It is an outdoor event set-up at the Rathaus. My husband and I love it. We’ve been twice and are already considering a stop there during our travels next year.
Also, if you want to know some more ways to use your chickpeas check out these recipes from Reeni at Cinnamon & Spice. If it is curry your interested in you’ll learn a lot from this post at Oyster Food and Culture.
Want to create beautiful food and product photos that you can't wait to share?!
Discover your style, control the light, and shoot using the tool you know how to use (yes, your phone included). Learn about free resources, Live Q&As with Lori, and online courses you can take from anywhere in the world!
We respect your privacy. Unsubscribe at any time.