Browsing Category

Breads

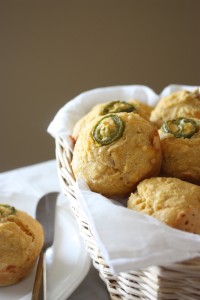
Spicy Cornbread Muffins

September 27, 2010

Full meals have become a rarity around here. I find I’m always making one pot dinners, heating up some pasta with a sauce or stirring together a soup. If you haven’t been following my tweets or Facebook, you may not know that one of the biggest sporting events in the world is taking place right here in Lexington, Kentucky for the next 3 weeks.

The Alltech FEI World Equestrian Games have come to the US for the first time and they are right in our backyard. In addition to that, the company my husband works for is heavily involved which means crazy schedules and high stress levels around our house.


One of the many painted horses at the Kentucky Horse Park. This one is a map of all the horse farms in the area.


Sculpture in the courtyard made for the Games.


Opening ceremonies Saturday night. (Yes, a wide angle lens is on my wish list!)


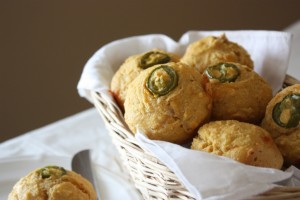
Fortunately, last night we sat down to one of those rare, full meals. As a result I felt the need for some type of roll or muffin, and given the fact that we are finally creeping into real fall weather, cornbread seemed just the thing; spicy cornbread that is.

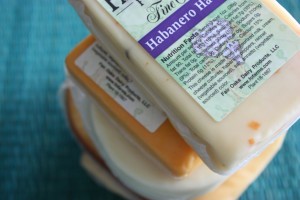
I made some substitutions to the cornbread recipe on the back of the cornmeal package, added some spices and gave it some extra kick with shredded Habanero Havarti cheese. This was a specialty cheese we picked up at a creamery in northern Indiana, Fair Oaks Farm.

This cheese is so good, and hot! Sprinkling a bit here and there is all you need which is why it has lasted so long.

I left the sugar out of the original recipe to make them completely savory. I also tried cutting out the butter, but as a result I thought they were a little dry. So I’d recommend keeping the butter in, or substituting virgin coconut oil.

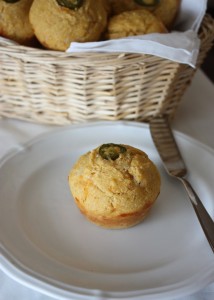
These muffins make a great side for barbeque or chili. You might even consider slathering on some peach jam like I did for a sweet and spicy combination!

Spicy Cornbread Muffins

Adapted from Martha White Golden Cornbread

2 farm fresh eggs
1 cup milk
¼ cup butter or coconut oil, melted
1 ½ cups yellow cornmeal
1 cup white whole wheat flour
2 ¼ tsp baking powder
¾ tsp salt
½ tsp ground cumin
½ tsp chili powder
¼ cup sharp cheddar cheese, shredded
¼ cup Habanero Havarti cheese (or pepper jack), shredded
12 pickled jalapeno slices (optional)

Heat oven to 400 degrees F and grease a 12-muffin tin.

In a large bowl, whisk together the egg and milk. Stir in the butter or oil.

Gently stir in the cornmeal, flour, baking powder, salt, cumin and chili powder. Add the cheese and stir just until combined.

Divide batter into 12 muffins. If using, place a jalapeno slice on each muffin. Bake for 12 to 15 minutes, or until the muffins are browned and a toothpick inserted in the center comes out clean.

Cherry Lemon Pistachio Scones

July 21, 2010

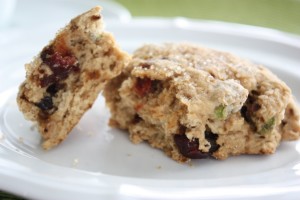
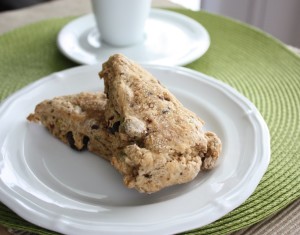
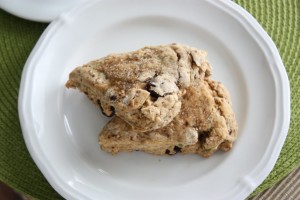
I’ve written of my love of scones before, although it has been a long time since I’ve made them. This is purposeful since a batch barely lasts a day in our kitchen. Yes, put me and a scone in the same room and the self control goes out the window.

Due to a series of events that involved inspiration and obtaining of ingredients, I decided I had sacrificed long enough. It was time for another batch of scones.

Earlier this week I was inspired by this amazing Lemon and Pistachio Cakes recipe at Baker Wanabe. This is a new blog by Anna from Chef Wanabe, one of my favorite food blogs. I still want to try that cake as is, but for this recipe it got me thinking about the lemon pistachio combo.

Next, I received a package of assorted nuts and dried fruit from Oh Nuts. I was thrilled to receive this because I was able to get raw nuts – cashews, pistachios and almonds. I find that I no longer need salt on nuts. If you take it away, you get to enjoy the true, unique flavor of each variety. I also got a bag of dried tart cherries, the benefits of which I wrote about just last week.

I broke into the bags right away. The nuts were very fresh and while the cherries do have added sugar and oil (it is difficult to find varieties that don’t), I just couldn’t stop snacking. Then I reminded myself that I needed to use these for some cooking.

Hmmm…lemon, pistachio…how about cherries too? Check!

So far I haven’t made scones with white whole wheat flour so I tried it with this time around. Excellent! I also skipped a glaze and simply pressed some demerara sugar into the top of each before baking.

My only change is that in the recipe written below I reduced the salt to ¼ teaspoon. I used sea salt and the original ½ teaspoon I added made them just a little too salty and overpowered the sweet. Otherwise these scones have it all – sweet, salty, tart, chewy and crunchy!

Cherry Lemon Pistachio Scones

1 ¼ cups white whole wheat flour
2 ¼ tsp baking powder
2 tbsp mascavo sugar
¼ tsp sea salt
1 tbsp lemon zest
¼ cup cold unsalted butter
Juice from ½ a lemon
2/3 cup dried tart cherries
¼ cup raw pistachios
½ cup milk
Demerara sugar

Preheat the oven to 400 degrees F. In a medium bowl, mix together the flour, baking powder, mascavo sugar, salt and lemon zest. Cut the butter into pieces and blend with two knives or a pastry blender until the butter is cut into pea-size pieces.

Stir in the lemon juice, cherries and pistachios. Gradually add the milk and mix the dough to form a ball. Place the dough ball on a floured surface and flatten or roll out until it is ¼ to ½ inch in thickness.

Cut it into 8 pieces and place the pieces on a greased baking sheet. Sprinkle each scone with Demerara sugar and gently press it in to stick. Bake for 13 to 15 minutes or until the edges are browned and scones are baked through. Makes 8 scones.

Happy 70th Birthday to my Dad today! One of my most loyal readers!
 
Disclosure: Oh Nuts nuts and dried cherries were sent to me free of charge. I was not under any obligation to write about or cook with them, and I did not receive any compensation for doing.

Chocolate Chip Zucchini Cake with Candied Walnuts

July 12, 2010

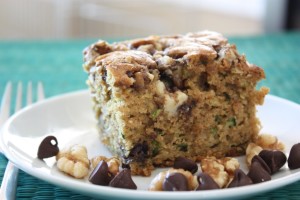
Let’s give a round of applause to the first person who decided to add vegetables to desserts, breads and muffins. There is the carrot cake, sweet potato pie, beets in cakes, and of course, zucchini bread. Perhaps vegetables surrounded by sugar aren’t always the best way to go, but it is certainly nice to throw a veggie dessert in the rotation every now and then.

Summer squash doesn’t always stand out as a nutritional superstar, but it definitely has some appealing characteristics. It is rich manganese which activates enzymes that play a role in energy metabolism. It also plays a role in the formation of healthy cartilage and bone. Zucchini also offers vitamin C, vitamin A and dietary fiber in addition to several other vitamins and minerals.

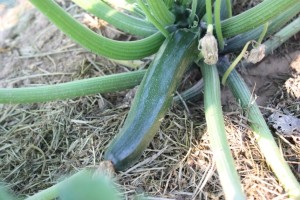
I showed you our zucchini in my last post. We have three plants bearing right now which means we have at least one or two zucchini every day.

We have eaten plenty of sautéed summer squash around here topped with fresh herbs and olive oil. So about two weeks ago I was ready for some zucchini bread. At least bread is what I started with. Then I started thinking about cake.

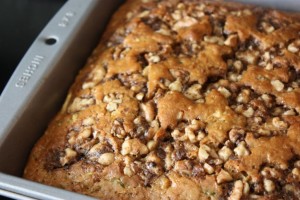
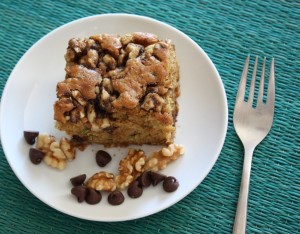
After adapting the zucchini bread recipe from the 75th Anniversary Edition of the Joy of Cooking by adding my favorite sugars and flour along with some additional spice. I had the cake recipe set. With the chocolate chips and the walnuts this definitely falls in the dessert category, but just between you and me we did have some for breakfast.

Chocolate Chip Zucchini Cake with Candied Walnuts
Cake adapted from Joy of Cooking, Sweet Zucchini Bread

1 ¼ cups white whole wheat flour
1 tsp baking soda
1 tsp baking powder
½ tsp cinnamon
¼ tsp nutmeg
½ tsp salt
¾ cup demerara sugar
2 eggs
½ cup butter, melted
½ tsp vanilla
2 cups fresh zucchini, shredded
½ cup dark chocolate chips

2 tbsp butter melted
1/8 cup mascavo sugar
½ cup walnuts, chopped

Preheat the oven to 350 degrees F and lightly grease an 8 x 8 inch brownie pan.

In a medium bowl whisk together the flour, baking soda, baking powder, cinnamon, nutmeg and salt. Set aside.

In a larger bowl, whisk together the demerara sugar and eggs. Slowly whisk in the ½ cup cooled, melted butter. Whisk well to dissolve the sugar as much as possible. Stir in the vanilla.

Gradually add the dry ingredients to the wet ingredients and stir just until combined. Add in the zucchini and the chocolate chips and stir just until incorporated. The batter will be very thick. Transfer the batter to the prepared baking pan.

In a small dish, stir together the butter, mascavo sugar and walnuts until the walnuts are coated. Sprinkle the walnuts over the batter and press in gently.

Bake for about 30 minutes or until a toothpick inserted in the center comes out clean. Cool and serve warm or at room temperature. Makes about 9 servings.
Nutritional Resources
WHFoods: Summer Squash (my favorite resource on the web for nutritional info)
Oregon State University: Manganese

Whole Grain Rhubarb Waffles with Strawberry Butter

June 1, 2010
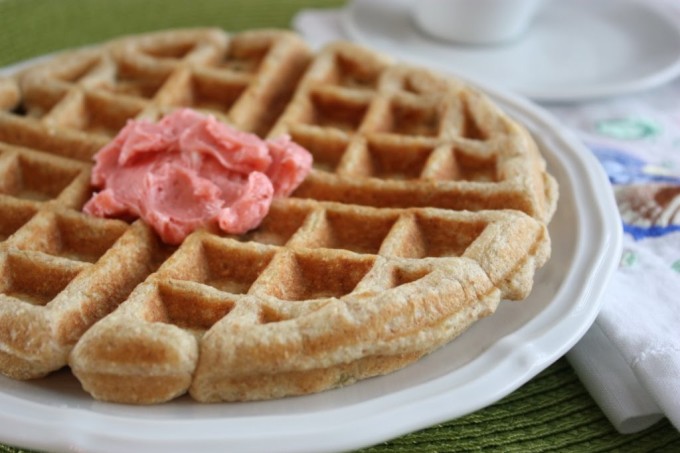
Whole Grain Rhubarb Waffles with Strawberry Butter | Fake Food Free
 

I’m always inspired when I read about other food bloggers taking on challenging ingredients. It is usually something like a root veggie or an over abundance of cabbage in a CSA box. While there is apprehension at first, the final result is always beautiful even if you don’t prefer the star ingredient.

Rhubarb has been my challenging vegetable as of late. It was a staple in our garden growing up, but when I had the opportunity to grow it myself, I declined. But since my parents had an over abundance, I was offered some of this year’s harvest. Seeing it as a culinary challenge, I accepted.

I feel a bit sorry for rhubarb with its poisonous leaves. It really isn’t a nutritional superstar either; just a stalk that is often in the shadows of fruits like strawberries, in order to be enjoyed.

Whole Grain Rhubarb Waffles with Strawberry Butter | Fake Food Free

I like the flavor of rhubarb, just not the texture. This is especially true after growing up at dinner table with brothers who made disgusting jokes about said texture while eating the pie. Thus, be careful of the way you perceive and communicate perceptions of foods to children. I’m proof that those comments hang around and can control food preferences later in life!

But now, I was up for the challenge of tackling my rhubarb apprehension. With plenty on hand I had to come up with something that would present the flavor, but not the texture.

My first thought? Waffles!

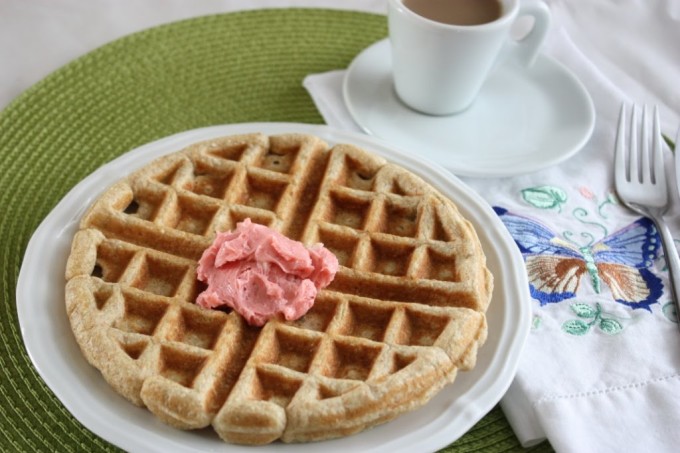
Ever since I got my waffle maker last Christmas I’m always thinking about new waffle recipes. For this one, the rhubarb blended in nicely to the whole grain waffle and while it wasn’t quite as strong as I would have liked it was still good. I topped it off with some strawberry butter and breakfast was complete.

Whole Grain Rhubarb Waffles with Strawberry Butter | Fake Food Free

Whole Grain Rhubarb Waffles with Strawberry Butter

Makes: About 6 waffles

Ingredients


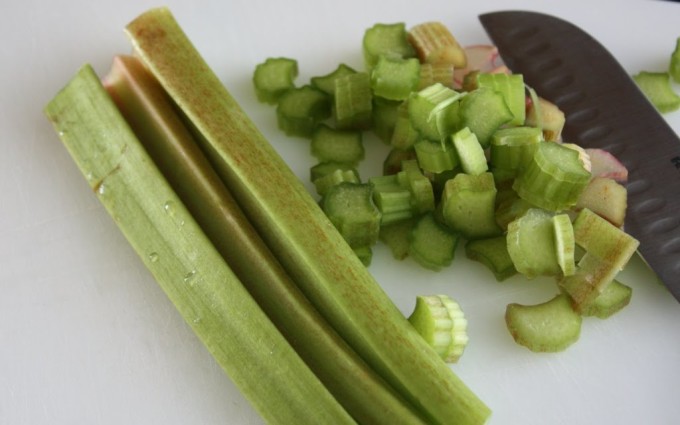
1 cup rhubarb, chopped
4 tablespoon water
¼ cup demerara sugar

1 cup white whole wheat flour
¾ cup whole wheat flour
1 tablespoon baking powder
½ teaspoon salt
¼ cup unsalted butter melted, plus 2 tbsp more for waffle iron
2 large eggs, lightly beaten

Prep

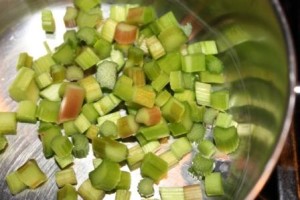
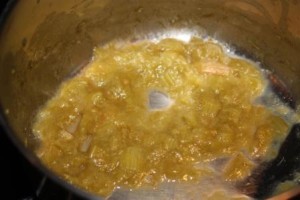
In a sauce pan, combine the rhubarb, water and sugar. Cook on medium-high heat, stirring often until the rhubarb cooks down to a jam-like consistency, about five to seven minutes. Remove from the heat and set aside.

rhubarbrhubarb-cookedrhubarbpan

In a large bowl, sift together the flours, baking powder and salt. Stir in the cooled melted butter, eggs and rhubarb. Stir to combine all the ingredients.

Heat your waffle iron and lightly brush each side with melted butter. Pour a heaping 1/3 cup of batter onto the iron, close and cook for about four minutes. Remove and repeat with the butter for the next waffle. Top waffles with strawberry butter (below) before serving. 

Strawberry Butter

I really enjoy fruit butters in place of syrup on waffles. We used to make them all the time when I worked in a bakery. There are a variety of ways to create them, but the easiest is with jam and butter. I used some strawberry freezer jam that my mom made with this year’s fresh strawberries.

Ingredients

¼ cup butter, unsalted, slightly softened
2 teaspoon strawberry jam, the thinner the consistency the better

Prep

Place ingredients in a small food processor. Process until everything is blended and the butter is soft and spreadable.

For more info, the University of Illinois Extension Service has a helpful page about rhubarb.


Thanks for reading! All images and content are the property of Fake Food Free unless otherwise stated. Please do not republish full recipes and images without written permission. What is okay? Feel free to Pin images, share links to my posts or share the photo in a round up post with the title of this recipe and a link back to the post. Confused about copyright and food blogs? Here is some helpful information on Recipe Attribution. If you want to use a photo or full recipe, just ask. I’m sure we can work something out.  

BLT Pizza with Spicy Chipotle Mayo

May 20, 2010
 
BLT Pizza with Spicy Chipotle Mayo | Fake Food Free
 
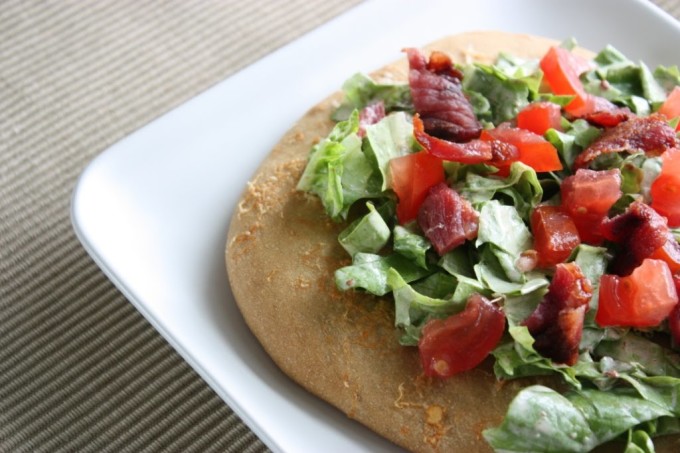
The Bacon Lettuce and Tomato sandwich is a symbol of summer for me. Growing up, when the lettuce was ready in the garden and the tomatoes perfectly ripened this sandwich was on the menu. It is quick and easy with both protein and vegetables, not to mention some fat to help you absorb the veggie vitamins. I will admit that often my sandwiches were bacon and cheese as a kid, but fortunately I now appreciate the fresh vegetables so I’ve graduated to full BLT status.
 
Last week I was looking through one of my cookbooks and found a recipe for a BLT pizza. I thought it was a great idea for spicing up the traditional and decided to give it an even greater twist with a little chipotle mayo.
 
I bought the bacon from St. Asaph Farm not too far from the town we live in. I’m really excited to be finding so many natural farms around central Kentucky that implement the practices of Joel Salatin and Polyface Farm. In addition, I enjoyed talking with the owner, Rachel. She has lived abroad in the Dominican Republic and her husband in India and then they moved to India together after they were married. I’m always amazed at the international experiences I encounter here at home.
 
The bacon is jowl bacon from pastured pork and has a delicious flavor. It cooked up nicely. I like mine crispy and my husband likes his chewy so I usually cook a few slices of bacon longer than the others.
 
The lettuce came from my Dad’s garden which we got when we were visiting over Mother’s day weekend. The tomato, from a hydroponic grower at the farmer’s market.
 
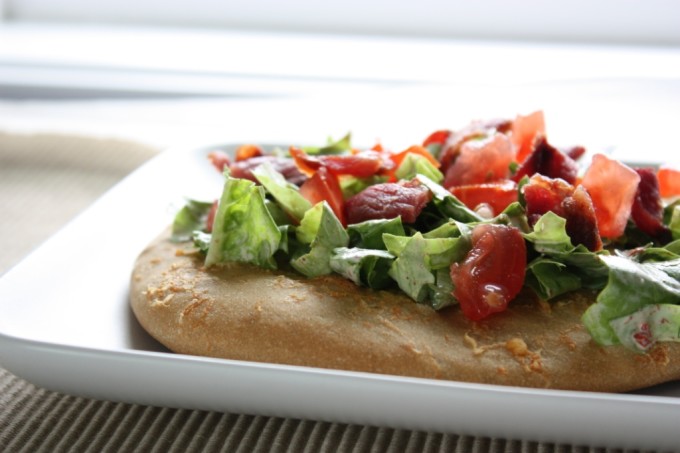
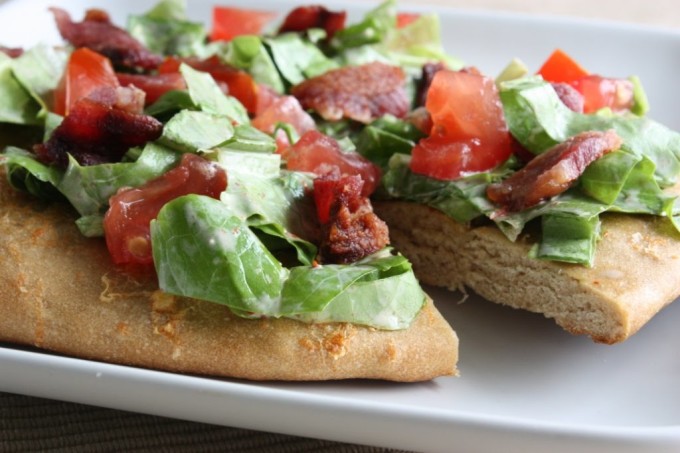
I made this Focaccia recipe from Tyler Florence, split it into four loaves and sprinkled on some shredded parmesan before baking. I used the chipotle salsa from the Shrimp Taco Dorado I posted recently. It is really just a chipotle mayo. To make it, combine some mayonnaise, one to two chipotle peppers in adobe (based on how spicy you want it) and a squeeze of lime juice and blend it up.
 
BLT Pizza with Spicy Chipotle Mayo | Fake Food Free
 
Summertime BLT Pizza with Spicy Chipotle Mayo
Adapted from Weight Watchers Dining for Two
 
Makes: 4 servings
 
Ingredients
4 individual rounds of baked focaccia or your favorite pizza crust
8 slices of bacon, cooked and chopped1 large tomato, chopped
4 cups lettuce, chopped
½ cup chipotle mayo (more or less to taste)*
 
Prep
 
In a large bowl, combine the bacon, tomato and lettuce. Pour over the mayo and toss to coat all the ingredients. Divide into four servings and place on top of each pizza. Cut into slices with a knife and serve.
 
*See explanation in text above the recipe. 
 
 
BLT Pizza with Spicy Chipotle Mayo | Fake Food Free

Butternut, Flax and Walnut Bread

May 12, 2010

It is rare that you come across a food that is fresh and local, yet out of season. Sounds kind of strange doesn’t it? Fall and winter squash is such an amazing thing. Stick those babies in a cool environment and they seem to last forever.

That is exactly how this bread came about. At Easter my parents gave me two butternut squash, the last two of the 2009 season. They had kept them in the garage all winter and spring.

I wasn’t sure what I would find when I cut them open. I inserted the knife and carefully split open the squash a little nervous that I might be met with smelly, rotting innards. I breathed a sigh of relief when I saw only bright orange flesh staring back at me, ready to be roasted.

I will admit I was pretty thrilled. One, because of how amazing these veggies are that they can be stored for so long and still taste great. Two, because this cool, rainy spring we are having is really messing with my cravings! I should be in a blissful state of enjoying fresh salads and grilled fish, but I find myself wanting warm comfort food and baked goods scented with cinnamon and spice.

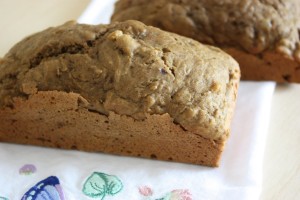
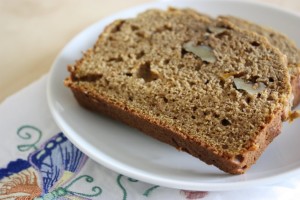
The latter led to this recipe. Regardless of the season I can’t seem to pass up a tender, yet hearty quick bread for breakfast. This one is a twist on banana bread. It is sweetened with mascavo sugar and maple syrup and has some walnuts and flax meal thrown in for extra crunch and nutrition. The result? A slightly sweet bread, soft and moist from the squash — the perfect partner for coffee or tea eaten plain or with a small swipe of cinnamon butter.

Butternut, Flax and Walnut Bread

1/3 cup minimally refined cane sugar
3 tbsp maple syrup
½ cup butter, melted
2 eggs
1 cup roasted butternut squash, mashed or pureed
2 tsp ground flax meal
¾ cup milk
2 ½ cup white whole wheat flour
1 tsp baking soda
1 tsp salt
2 tsp cinnamon
½ cup walnuts, chopped

Preheat the oven to 350 degrees F. Grease two loaf pans, or you can use one standard loaf pan and two mini-loaf pans like I did.

In a mixing bowl whisk together the sugar, syrup and butter. Add the eggs and whisk until combined. Stir in the squash, milk and flax. Sift together the flour, baking soda, salt and cinnamon. Gradually mix these dry ingredients into the wet batter just until everything is combined. Stir in the nuts.

Divide the batter between loaf pans. Bake the small loaf pans 20 to 25 minutes and the standard loaves 30 to 32 minutes, or until a toothpick inserted in the center comes out clean. Cool for 10 minutes, de-pan and allow to cool completely on a wire rack.
Jackfruit Muffins

April 26, 2010
Jackfruit Muffins Recipe | Fake Food Free


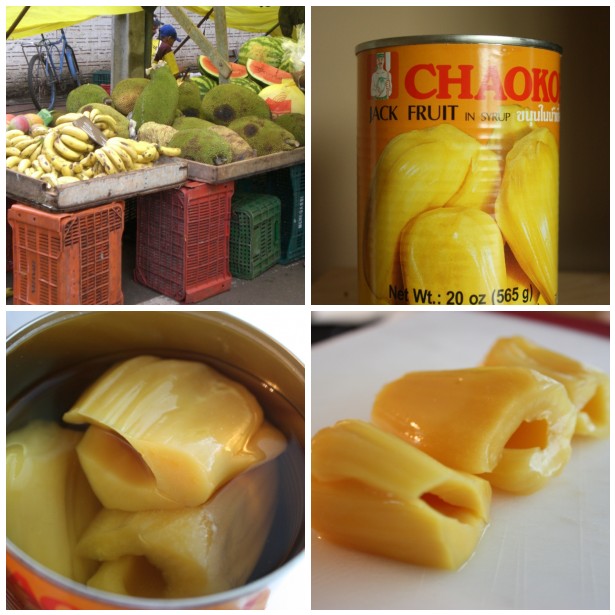
What exactly is a jackfruit?

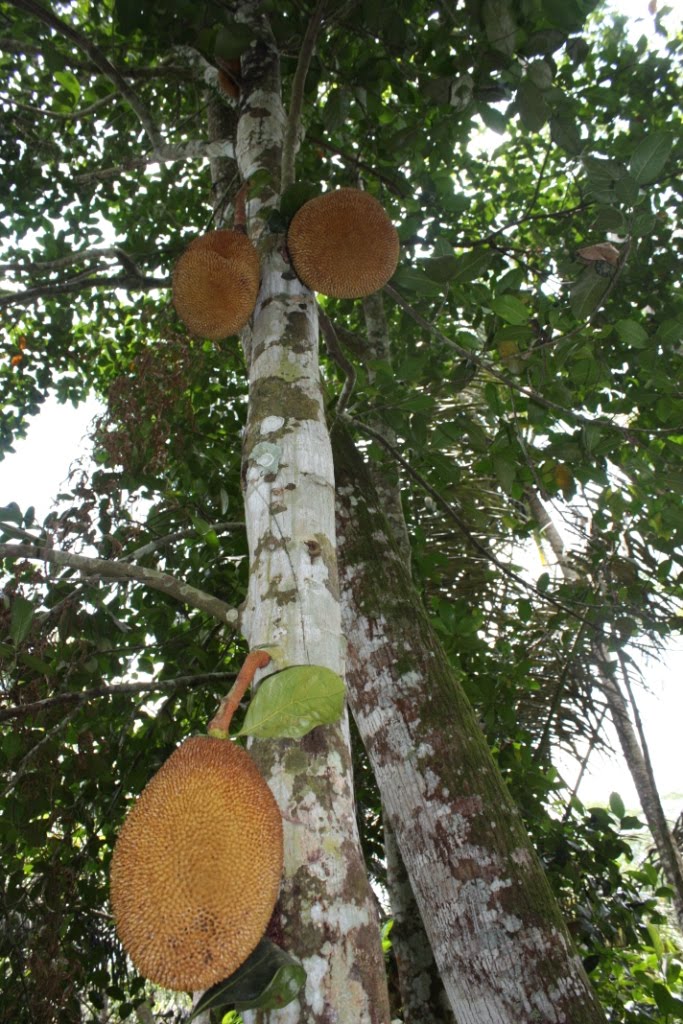
Well, it is likely the largest fruit you’ve ever seen. My first encounter with them was in Brazil, the photo at the right was taken in Ubud-Bali, Indonesia. When I say big, I mean when they are sitting on the ground they would come up to about mid-thigh, some perhaps even to your waist.

I might also mention that they are quite scary. There were many growing in the park around the zoo where we lived in Brazil. On more than one occasion I heard a ripe one fall out of a tree and hit the ground. Beneath such a tree you do not want to be. Loudest thud I’ve ever heard.

Jackfruit Tree

I only tasted them once when we were in Brazil at the local farmer’s market. It was a sticky, gooey piece of fruity flesh that tasted somewhat like a mix between a mango, banana and pineapple. I had a difficult time with the texture, but the fruit has a delicious flavor.

Despite my easy access, I never bought one. I often regret that decision now, but there were two reasons for this. The first was their size. About 98% of the time I went to the market by myself and this required a 20 minute walk each way. Yeah, lugging a fruit the size of my lower body back to the apartment wasn’t going to happen.

Jackfruit

Second, anytime we got into a conversation about jaca (the Portuguese word for jackfruit) we were warned of the sticky flesh. Apparently it is no less binding than a good glue and I heard horror stories from friends about how they spent days trying to get it off their hands after they would eat them outdoors as kids. I really didn’t want to tackle that either.

Before we left Brazil, Tracey at the Tangled Noodle posted a recipe for Langka Muffins. Langka is jackfruit in the Philippines. What a language lesson you are getting in this post!

After seeing the recipe, I wanted to try it, but still didn’t get up the courage to buy fresh jackfruit. Then, when we were in Thailand I tried a jackfruit shake that was incredible and my interest grew.

The next thing I knew we had moved back to the US and I found canned jackfruit at our international market. I know it is a bit backwards for a real foodie to have access to the fresh and go for the canned, but the canned I knew I could handle.

 I was a bit surprised by the texture of the fruit in the can. It was much different than what we had in Brazil. This might have to do with the fact that the fruit I had in Brazil was overripe and they probably harvest the canned variety early, or it could have been the syrup, or maybe it is a different variety that grows in different regions. Who knows?

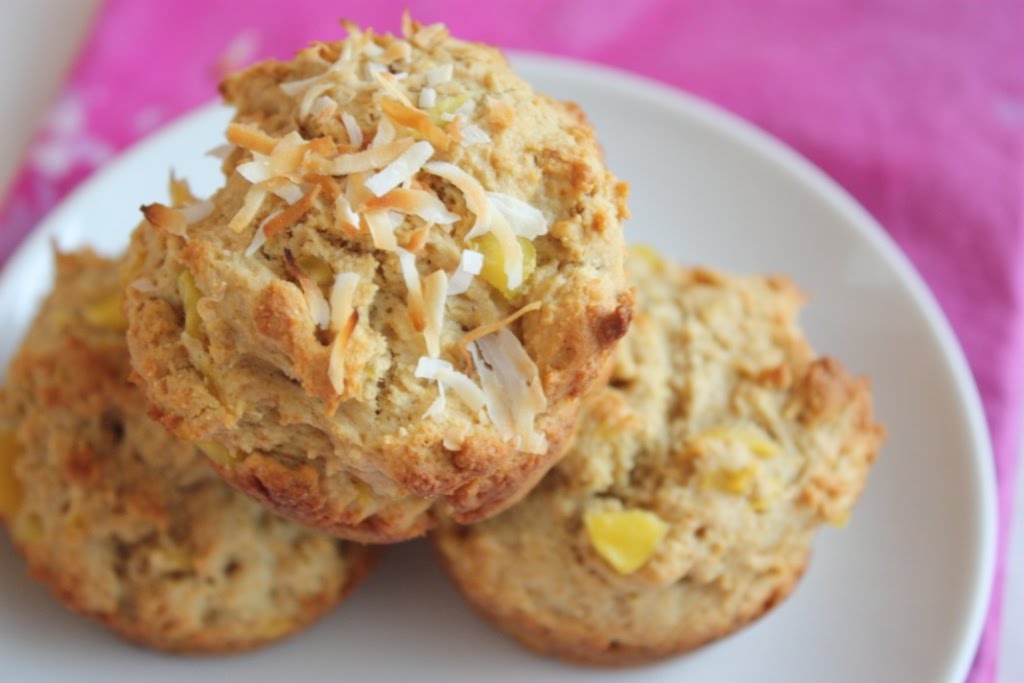
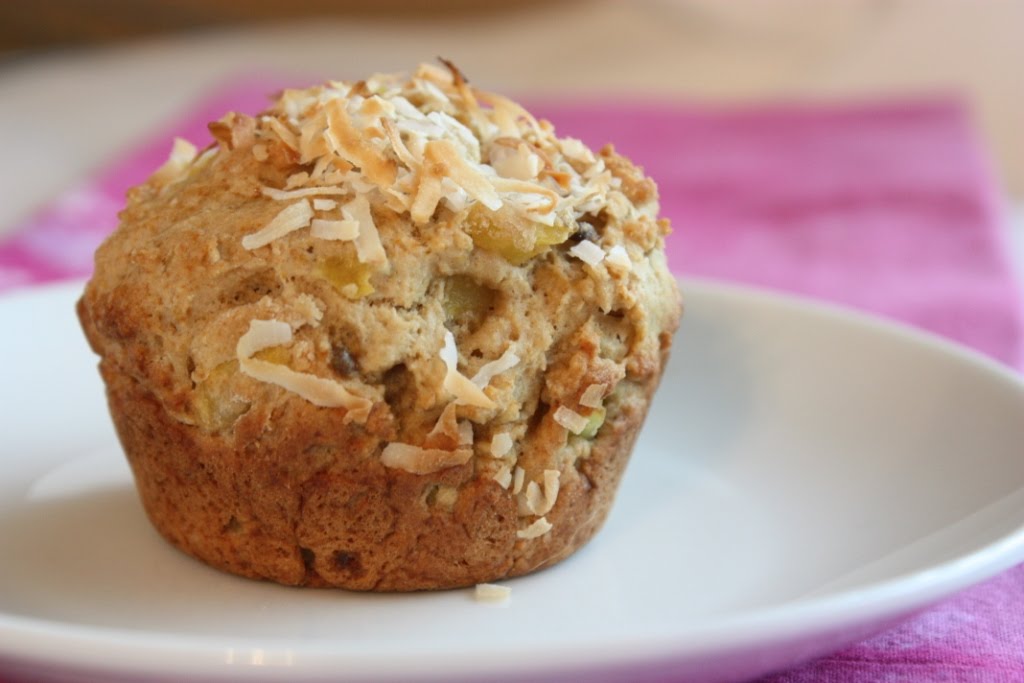
I know one thing though, Tracey wasn’t kidding! Those muffins are delicious! I modified the recipe a bit to use whole grains, coconut oil and some mascavo sugar I have left from Brazil. I also topped some of them with coconut before baking.

Jackfruit Muffin Recipe


Jackfruit Muffins
Modified from Langka Muffins at Tangled Noodle

Ingredients
2 cups white whole wheat flour
3 tsp baking powder
½ tsp salt
¼ cup minimally refined sugar
½ cup milk
1/3 cup virgin coconut oil, melted
1 egg, beaten
1 cup chopped jackfruit with ¼ cup syrup reserved
½ cup shredded coconut,unsweetened (optional)

Preparation
Preheat the oven to 400 degrees and grease or spray the bottom of each muffin tin with coconut oil or non-stick spray. Sift together the flour, baking powder and salt. Set aside. In a separate bowl whisk together the sugar, milk, oil, egg and jackfruit syrup.

Gradually add the wet ingredients to the dry. Stir in the jackfruit just until everything is combined. This batter will be very thick. Divide into 12 muffins. Press coconut into the top of each muffin if using. Bake for 18 to 20 minutes or until muffins are browned and a toothpick inserted in the center comes out clean. Cool and remove from pan. Makes 12 muffins.
Pastured Sausage and Jalapeno Pizza

April 23, 2010
When we were in Antigua last December our resort had a lunch restaurant with a wood-fire pizza oven. Well, it wasn’t just a lunch restaurant it was actually open until about 5:00pm. The pizza was delicious, and I’m not going to lie, there were some fourth-meals consumed in the afternoon between lunch and dinner.
A few days before we departed we decided to try the Messicana pizza. This is a bit of an inside joke because everything supposedly Mexican in nature is “Mexicana” in Brazil, which is actually pronounced “meh-sh-cona”. So it is interesting to see what some cultures associate with Mexican cuisine. Trust me, we aren’t the only ones who completely screw it up. For example, the Mexicana pizza where we lived in Brazil often had Doritos on it. I rest my case.
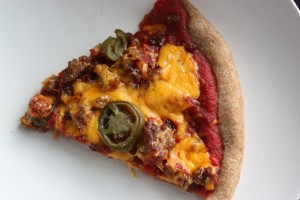
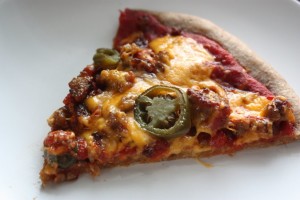
This pizza in Antigua was topped with sausage, and jalapenos. At first I wasn’t incredibly motivated to try it, but once we finally did (very late in our trip) we were beating ourselves up that we hadn’t ordered it sooner. Such a simple combo, but it is so good.

This past weekend when my parents were in, I made my Brown Biscuits with the pastured pork sausage I got from Pike Valley Farm. I held some of it back to use later in the week for this pizza. Fortunately I also had some pizza crust in the freezer so it was a quick meal.

I don’t have a favorite crust at the moment. I typically use the recipe on the back of the Hodgson Mill Whole Wheat flour bag and substitute White Whole Wheat Flour to make it a little lighter. Turns out great.

For the sauce, I use tomato puree in my basic marinara and usually add a little more crushed red pepper to spice it up a bit. Although with the jalapenos on this pizza, that wasn’t really necessary.

Sausage Jalapeno Pizza

2 pizza crusts, about 8 to 9 inch
½ cup pizza sauce
¼ lb. pastured pork sausage, browned
1 cup cheese, shredded (I like cheddar with this combo)
½ cup sliced jalapenos

Preheat oven to 400 degrees F. I know I’m a bit odd with this, but I don’t like my pizza dough to be uncooked or soggy in the middle. The only way I’ve been able to master this with at-home pizza is to bake it for about 5 to 7 minutes before adding the toppings.

Divide the sauce and spread on each pizza. Top with the sausage (with pastured you won’t need to do any draining or rinsing), then the cheese. Next spread your jalapenos evenly on each pizza. Bake 7 to 10 minutes more until cheese is browned and bubbly.

Granola Pancakes

April 22, 2010

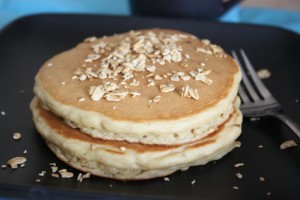
Several weeks ago I was watching an episode of Diners, Drive-ins and Dives; one of my favorite shows, if you haven’t gathered as much from my blog thus far. In that particular episode the restaurant being featured served granola pancakes. I quickly jotted down the idea like I always do when I discover something on television that I want to try and recreate.
A few days later Galaxy Granola offered to send me some of their granola to try. Now, I’m all about making my own granola. I’m all about making all my own foods in general. However, I try to find a balance with my blog because I know I can’t sit in front of my computer and tell you that you need to make everything from scratch.
Everyone has different lifestyles and responsibilities. However, I can tell you to make the majority of your own foods and when buying packaged items, choose those with the least amount of ingredients and ingredients you can identify.
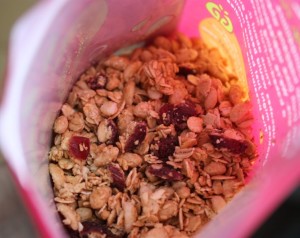
What inspired me to try the granola was the company’s goal of providing a product with less fat. I embrace fat, but not the processed kind in packaged foods. Instead of processed oils, Galaxy uses fruit. I could also live with their list of ingredients such as evaporated cane juice, wildflower honey and spelt and barley flakes.


Once the granola got here I knew I wanted to try making the pancakes with it, but we tried it by itself first. My favorite is the Vanilla Almond which is what I used in my recipe. This is a fine granola, however. No large chunks so it is more ideal to sprinkle over yogurt than eat by hand. Of course, I’m still in favor of making your own, but if you need to grab a bag when you are in a time crunch, or maybe to take on a trip this granola would be a better choice than many out on the market today with their endless list of additives.

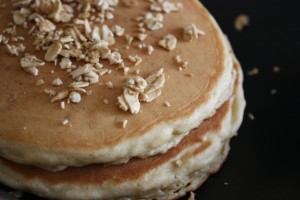
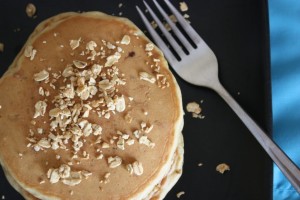
These whole grain pancakes where just what I had envisioned before making them. They are filling, but not too heavy. The granola adds texture and sweetness. I’m sold on adding granola to pancakes to spice up breakfast and will definitely do it again.

Granola Pancakes

1 large egg, beaten
1 cup white whole wheat flour
1 cup milk
1 tablespoon minimally refined sugar (I used mascavo)
2 tbsp virgin coconut oil, melted
3 tsp baking powder
¼ tsp salt
½ cup granola

In a medium-sized mixing bowl combine all ingredients. You may need to add a little more milk, depending on the type of granola you use as it may make the batter thicker.

Use a ¼ cup measure to drop pancakes onto a preheated griddle two to three at a time. Grease the griddle beforehand if it is not non-stick. Once the pancakes begin to bubble, flip to the other side. The pancakes will be cooked after about a minute and a half to two minutes on each side. Makes 6 pancakes.

Want to try some Galaxy Granola?

The company will give away a bag to one of my readers. Tell me in the comments if you make your own granola or buy it (or both) and why. I will pick a winner at random next Monday, April 26, 2010. (The company ships to US addresses only.) You can check out the Fruit Not Fat blog as well where the company posts recipes and workouts.

Disclaimer: Yes, I received this granola for free, and no, I wasn’t required to post about it and received no compensation for doing so.

Pretzels: A Word About Easter History

March 30, 2010

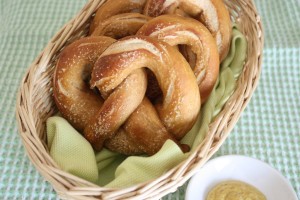
When I think about the things I associate with Easter, pretzels is typically not one of them. Hot-cross buns, chocolate, eggs, bunnies, and on a religious note, sacrifice, the cross and new life. No, pretzels really don’t make the list. Well, that was before I read about their history a couple years ago.
My interest in pretzels began when we traveled to Austria and Germany a few years ago. At that point I discovered one of my top five meals of all time – German sausage, kraut, mustard, a pretzel and beer.
It has to be from the source though, so traveling is required. A simple meal, yes, and likely very unexciting for many, but it tops my list. In many cases, I could just go for the pretzel, mustard, and beer, and believe me; in Germany they are large enough to be made a meal!
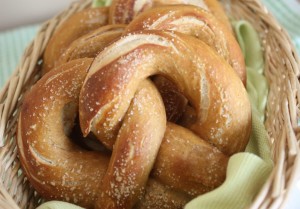
This is what sparked my interest in pretzels and I soon learned that their history is strongly associated with Easter. Well, actually, they are associated with Lent. As the story goes, pretzels originated in Southern France or Northern Italy when a monk was making unleavened bread for Lent. At this time it was common for arms to be folded across the chest when praying with each hand on the opposite shoulder. Does that vision look familiar?
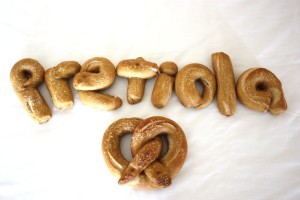
Such is the traditional shape of the pretzel. Supposedly this monk used the pretzel as a reward for children or other monks (each account is a bit different) who recited their prayers. Therefore the pretzels were first named “pretiola” which is Latin for “little reward.”
Another name associated with the pretzel is “bracellae” which is Latin for “little arms.” As pretzels made their way to Austria and Germany they became known as a “bretzel” or “pretzel.” Historically, aside from the association with Lent, pretzels symbolize good luck, long life and prosperity.
I’ve wanted to make pretzels for a while now, especially since I read about the history, and I decided that this Easter is the year for it. Traditionally, due to the strict Lenten fasting rules of the Catholic Church, breads made during this time were composed of only water, flour and salt.
Most pretzels today use more ingredients. For example, the one I set out to make is a recipe for Homemade Soft Pretzels by Alton Brown. As is typical of my baking, I made a few changes.
I used mascavo sugar in place of the white sugar and white whole wheat flour in place of all-purpose flour. I also didn’t have kosher or pretzel salt so I just used my finely ground sea salt, but used half of what the recipe calls for in kosher salt.
I was so happy that these whole grain pretzels turned out beautifully. They raised well, browned up nicely and remained soft and tender on the inside.
Whole Wheat Soft Pretzels
Adapted from Homemade Soft Pretzels by Alton Brown

1 ½ cups warm water
1 tbsp of mascavo/muscavado sugar
1 tsp sea salt
1 pk active dry yeast (I used rapid rise)
4 cups white whole wheat flour
4 tbsp unsalted butter, melted
10 cups water
2/3 cup baking soda
1 egg yolk, beaten
1 tbsp water
Olive oil
Salt or other seasoning
Combine the sugar, salt and water in the bowl of a mixer and sprinkle the yeast on top. Let it sit for 5 minutes, it will begin to foam. Add the flour and butter and use the dough hook to mix the dough on slow. Gradually increase the speed to medium and let mix until the dough forms and pulls away from the sides of the bowl. This only took about 2 to 3 minutes for me.
Remove the dough and knead into a ball. Place the ball in a clean bowl and coat with olive oil. Cover and set aside in a warm place to let rise for about 55 minutes.
Preheat the oven to 425 degrees F. Bring the water and baking soda to a boil in a large soup pot. Separate the dough into 8 equal pieces and roll out each piece to about 24 inches long. Shape into a U, cross in the middle, and press the two ends into the opposite sides of the bottom of the U. In other words, make a pretzel shape however you see fit. Mix the egg yolk with the water in a small bowl and set aside.
Drop the pretzels in the boiling water one at a time for about 30 seconds. Remove after they float to the top. Place on a cookie sheet (four pretzels per sheet) covered with greased parchment paper or with a silicone mat. Brush the pretzels with the egg yolk mixture and sprinkle with salt or other seasoning. Bake for about 12 minutes or until golden brown. Cool and enjoy.

Eating these lovely treats is a far cry from a sacrifice, which is what I usually associate with the Lenten season. So that is why I think I’ll stick with the name “pretiola.” I will gladly take these as a little reward any time of year.

In fact, I like that name so much I decided to spell it out for you. So this pretzel experiment is being submitted to the Eating Your Words Challenge hosted by Tangled Noodle and Savor the Thyme.

Resources for more info about pretzel history:
Catholic Education Resource Center: Lenten Pretzels
CatholicCulture.org: Pretzels for God
The History of the Pretzel

Snyder’s of Hanover: History of Pretzels

Want to create beautiful food and product photos that you can't wait to share?!
Discover your style, control the light, and shoot using the tool you know how to use (yes, your phone included). Learn about free resources, Live Q&As with Lori, and online courses you can take from anywhere in the world!
We respect your privacy. Unsubscribe at any time.