Browsing Category

Breads

Apple Cheddar Brown Biscuits

March 18, 2010

You know those moments when you taste something incredible? Not just good food, but something that could quite possibly be the best version of a dish or an individual ingredient you’ve ever put in your mouth.
I had that experience this week and with something that was unexpected – sausage.

I wouldn’t say we eat a lot of sausage. Although, German sausage is in my top 5 of all time favorite meals, and I have to say a piece with waffles or an omelet can really complete a breakfast. However, it has been a long while since I’ve had any.
I’ve been steering clear of ordering meat out at restaurants and buying meat from the supermarket since the beginning of the year. It’s just a personal choice I’ve made. I want the meat I consume to come from grass-fed, pastured and humane (as possible) sources. The last time I tried to order sausage from the farm that has become our regular resource, they were all out. A restaurant had completely wiped them out of all their pork sausage. Bummer.
But a few weeks ago, I placed an order for eggs and Teresa let me know that there would be sausage available in a week, so I signed up and waited patiently. This week, I finally got around to trying it.
I took one nibble from the skillet after I browned it up and I knew. This is what sausage is supposed to taste like! Not greasy, not dry and overcooked, not so salty and seasoned that you can barely taste anything else. This was perfection.
The lack of fat, I’m sure, has to do with it being pastured meat. The seasoning, perhaps it was their processor, but somebody is doing something right. The meat was tender and that familiar sausage flavor was there, but mild and there was just a tiny bit of heat that lingered.
Seriously, I can’t believe I’m going on about sausage like this, but this is some good stuff.
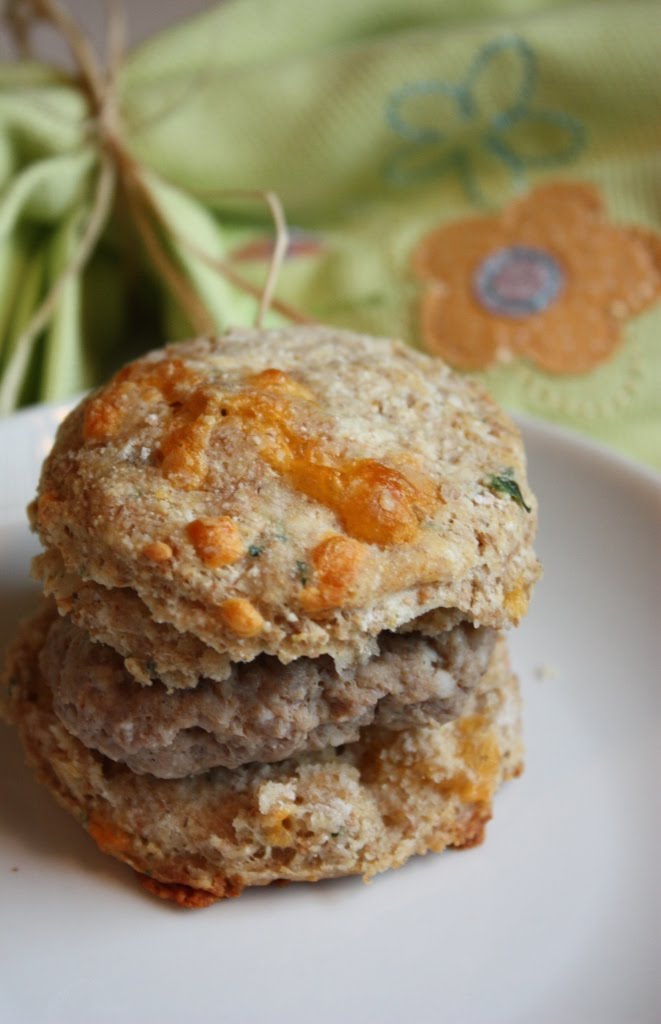
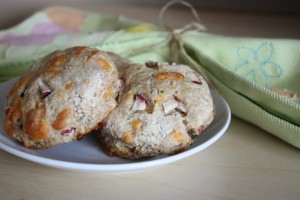
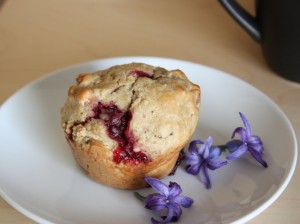
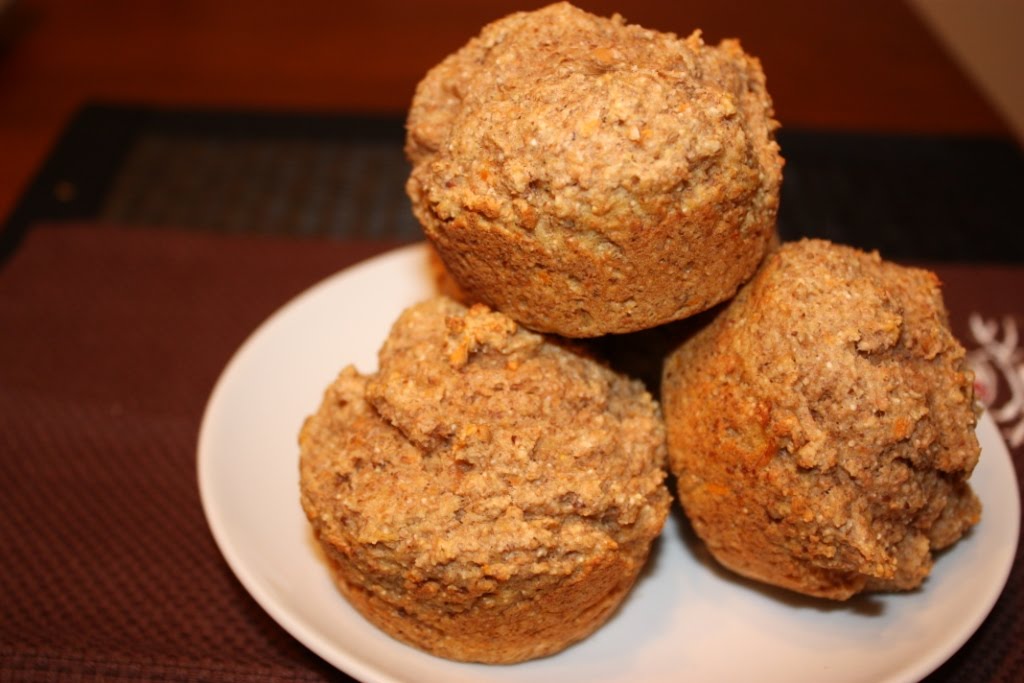
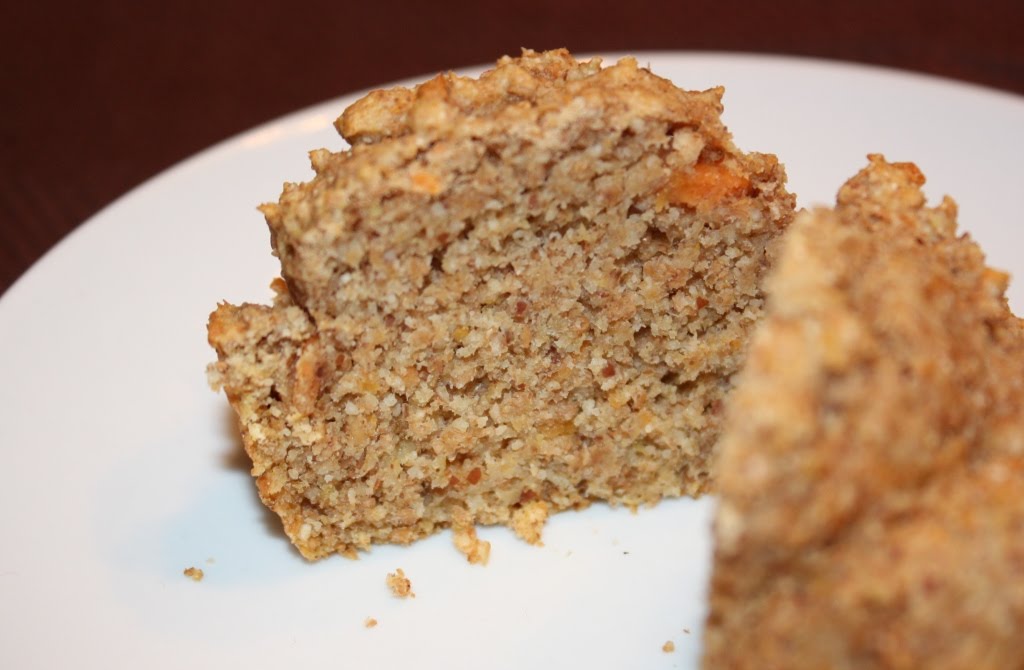
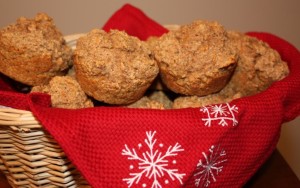
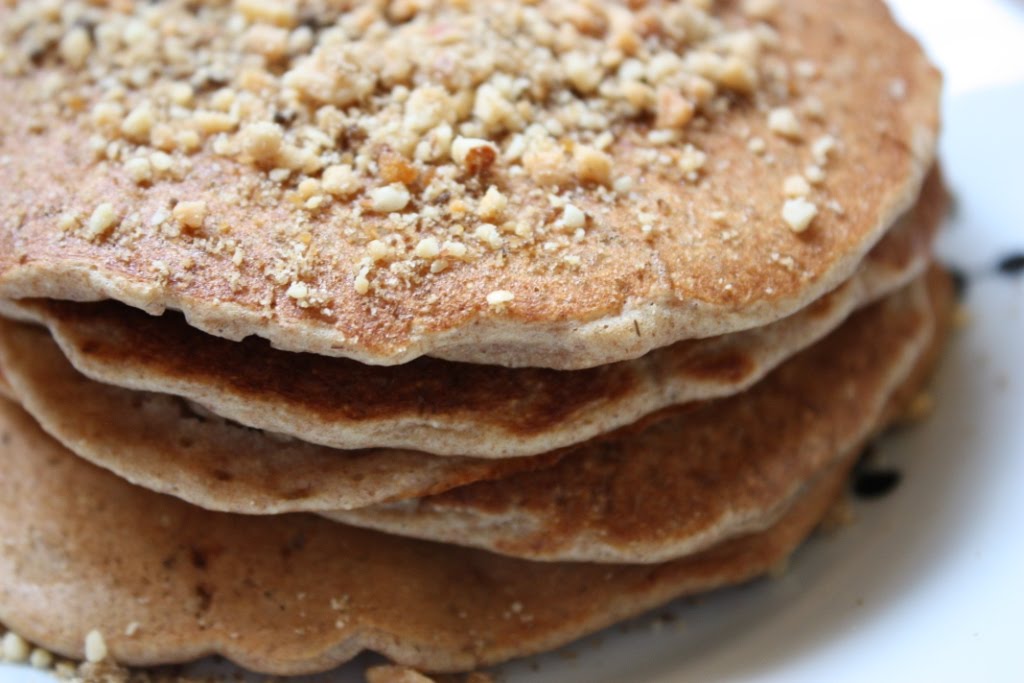
Since I really don’t think it is a good idea to sit down to a bowl of sausage I needed something with which to eat this tasty meat. I love the way apple and cheddar cheese go together, so I thought why not put them in a biscuit.

However, you know me; it couldn’t be just a plain white biscuit, so I decided to combine white whole wheat flour and whole wheat flour for some lesser refined brown biscuits. The sausage pairs up with them nicely and I love the tiny bits of sweet apple I get among the salty flavors.
Next up? Bacon. I’m on the waiting list, though, so the anticipation will be building until May!

Apple Cheddar Brown Biscuits


1 cup white whole wheat flour
¾ cup whole wheat flour
1 tbsp baking powder
½ tsp salt
1 tsp dried parsley
¼ tsp garlic powder
4 tbsp butter
¾ cup milk
1/3 cup shredded cheddar cheese
¼ cup apple, finely diced
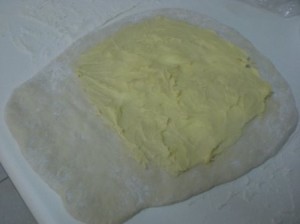
Preheat the oven to 400 degrees F. Combine the flours, baking powder, salt, parsley and garlic powder in a mixing bowl. Cut the butter into cubes and add to the bowl. Mix using a pastry blender until the butter is transformed into pea-sized pieces. Make a well in the center of the dry mix and add the milk. Stir to combine.
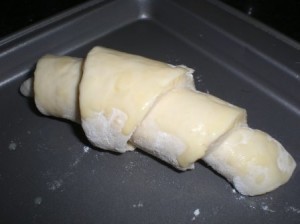
Add in the cheddar and apples and gently mix in. It is easier to use your hand for this. Place the dough on a floured surfaced and roll it out to about a 1 to 1 ½ inch thickness. Using a glass or biscuit cutter, cut into biscuits and place on an ungreased cookie sheet.
Bake for about 12 minutes or until golden brown. Allow to cool to touch, slice open and place a sausage patty inside. Makes about 12, 2-inch biscuits. (Mine made 11, but I think they were slightly bigger than 2 inches.)

7-Grain Blackberry Pecan Muffins

March 8, 2010


7-Grain Blackberry Pecan Muffins Recipe
 
I’ve been in a breakfast rut lately. Between oatmeal, muesli and some fruit I haven’t broken my pattern in a few weeks. However with a newly completed kitchen, all the kitchen boxes unpacked and a freezer still full of last summer’s berries I decided to climb out of my rut and get baking.
 
I was at Whole Foods last week and picked up my favorite 7-grain cereal from the bulk bin. I just love the bulk bins. You can get so many grains at a great price. Since I have yet to make it down the aisle without bumping someone with my basket or receiving an accidental elbow I don’t worry too much about lack of turnover. The grains seem to fly off the shelf there.
 
I cooked up a big batch 7-grain cereal for us to eat throughout this week and I thought it would make a good addition to the muffin batter. Then I decided on a blackberry and pecan combo. I used butter this time, but next time, when I have fresh berries, I want to try these muffins with coconut oil. I was worried the coconut oil would solidify in the batter when I added the frozen berries since this has happened to me before.
 
The muffins baked up beautifully. They have a hearty, yet soft texture on the inside and are overflowing with tart berries. The pecans add a toasty crunch with each bite. This combo would work for a lot of different grain cereals, even steel cut oats, and with a lot of different berry/nut combos. I like this one because the muffin itself is sweet, but the blackberries add a strong pucker effect because they are a tart variety.
As of this week, the breakfast pattern has been broken, at least for a little while.
7-Grain Blackberry Pecan Muffins

1 cup milk
½ cup grain cereal, cooked
¼ cup butter, melted
1 egg
½ cup minimally refined sugar (I used mascavo)
2 tsp baking powder
½ tsp salt
2 cups white whole wheat flour
1 ½ cup frozen blackberries
1/3 cup pecans, chopped
 
Preheat the oven to 400 degrees F and lightly grease the bottoms of a 12 serving muffin pan. In a bowl, whisk together the milk and cooked cereal. Stir in the butter, egg and sugar. Add the baking powder and salt and then gradually stir in the flour. Stir just until combined, the batter will be very thick. Gently stir in berries and nuts.
Divide batter into 12 muffin cups. Bake for 18 to 20 minutes. Cool in muffin pan for about 5 minutes and remove to a cooking rack or enjoy warm.


********************************************************
Our fridge is finally in its appropriate spot and the kitchen is complete! I still can’t get over all the space I have. I love that I have to actually take a few steps to walk to the fridge from the stove! I’m looking forward to a lot more baking now that I have all this counter space for kneading, mixing and tossing around ingredients.
 

Merry Christmas #6 and #26

December 24, 2009

Yes, I’m still making my way through that 30 Foods List. I may not have accomplished it all by my 31st birthday (this past Oct), but I’m determined to follow through and finish the list soon. I think my New Year’s resolution will be to finish it by June.
Yesterday I took on two of the Christmas recipes I listed – #6 Gingerbread men and #26 Stollen bread.

The Gingerbread men simply because I’ve never even made gingerbread of any kind. My mom doesn’t like gingerbread so it wasn’t part of our Christmas celebrations growing up.

The Stollen because I fell in love with this bread when I worked in a bakery. We would bake loaves and loaves of it during the month of December. I’m also drawn to it because of my German roots.
I chose some recipes I liked from the web, stocked up and got baking. Let’s start out by saying that it wasn’t exactly the most successful baking day.
The gingerbread men turned into round gingerbread cookies. I cut the recipe in half and I think I didn’t add enough flour. I couldn’t roll and cut them out, even after cooling the dough. However, the recipe I used from Good Things Catered is fantastic! I love the flavor and the gingerbread is nice and soft. I didn’t end up with what I intended, but the cookies were still tasty and festive.


Although, I think I’m the only one in the family who likes gingerbread. Therefore, I could be the only one eating them. Cut-outs or not, based on that little tid-bit of info. I’m glad I made a half batch and they freeze well!

I enjoyed every part of the process of making the Stollen – the sponge and dough, the kneading, the baking. Bread is just my thing. I only need to perfect my ability for making it. I can’t seem to align my love of baking it with truly great results.

I followed a recipe from In Mama’s Kitchen and instead of candied fruit I used dried cherries, dried pineapple and raisins. I was trying to get around products with high fructose corn syrup and most candied fruit has it. A friendly reader sent me a source for some without it last year, but I procrastinated and never got around to ordering any.


The bread has potential. The flavor of the fruit, spices and rum really come through. It was just a little denser than it should have been. I also tried to get away without adding the glaze which we used to put on top of the ones I made at the bakery, but in all honesty I really like that addition. Next time I will probably glaze them to add a little more sweetness.

So I’m not completely disappointed, but I will be attempting both again. Good, but not great, however, still worth the effort.

Did you try any new recipes this year? How did they turn out?

I want to wish each of you a very Merry Christmas! Whether you celebrate it or not, I hope you will feel all the warmth and happiness this holiday can bring. Thank you for reading Fake Food Free and for all your great comments. I’m looking forward to continuing this blog, and all the friendships I’ve found through it, into 2010.

Merry Christmas!!

Sweet Potato Flax Muffins

December 8, 2009

These muffins were inspired by Off Her Cork. I read Andrea’s Thanksgiving Day recap and the idea of putting bananas in sweet potato casserole to sweeten it caught my attention right away. I had wanted to make some muffins with some hearty, healthy ingredients that were also relatively low in added sugar and this gave me a great idea to work with.
These muffins are made with the flesh of a mashed sweet potato, banana and maple syrup for sweetness, and flax and whole wheat flour for an extra nutritional boost. They are slightly sweet with a hearty texture. The banana comes through and the sweet potato adds a special richness.
Sweet Potato Flax Muffins

2 cups whole wheat flour
¼ cup ground flaxseed meal
4 tsp baking powder
½ tsp salt
1 egg, beaten
¼ cup maple syrup
¼ cup butter, softened
1 ripe banana, mashed
1 sweet potato, flesh only, mashed
½ cup milk
Preheat the oven to 375 degrees F and lightly grease a 12 muffin pan. In a large bowl mix together the flour, flaxseed, baking powder and salt. In a separate bowl mix together the egg, maple syrup and butter. Combine well and add in the mashed banana, sweet potato and milk. Slowly incorporate the dry ingredients mixing gently just until they are incorporated into the batter. Divide the batter evenly into each muffin tin. Bake 15 to 18 minutes.

Peanut Butter Wheat Berry Pancakes

September 21, 2009

I love all things peanut butter, so despite first making these peanut butter and wheat berry pancakes several years ago, they remain a breakfast favorite!
 Peanut Butter Wheat Berry Pancakes Recipe | Fake Food Free

There are several things you should know about me when it comes to pancakes. I like a very simple recipe. I know you can add eggs, and oil, and milk and create a nice fluffy platform for rich maple syrup, but what I look for is something closer to a just-add-water mix that doesn’t come from a box.
 
And speaking of syrup, while I do love the stuff, I often enjoy my pancakes dry. I sweeten the batter a bit, top them with butter, and then maybe some dry, yet sweet toppings. You’ll understand what I mean in a few minutes.
 
I also like a hearty whole grain pancake. I sometimes add oatmeal to my batter, but given my recent fondness for wheat berries, I thought I would give them their chance to shine once again. And shine they did.
 
This recipe combines whole grains with salty-sweet peanut butter. The wheat berries lend their chewy goodness and the sparkling water creates a somewhat lighter texture to this filling breakfast. I spread a little butter on the finished product and then made a mixture of ground peanuts and mascavo sugar. Sprinkling this on top gave them all the sweet flavor I needed.
 
Peanut Butter Wheat Berry Pancakes Recipe | Fake Food Free
 
Peanut Butter Wheat Berry Pancakes
Makes: 5 small pancakes
Write a review
Print
Ingredients
  1. ¾ cup whole wheat flour
  2. 1 teaspoon baking powder
  3. ¼ teaspoon fine ground sea salt
  4. 3 tablespoons mascavo sugar
  5. ¼ cup cooked wheat berries
  6. ¾ cup sparkling water
  7. 2 tablespoons peanut butter (any variety)
  8. 2 tablespoons chopped salted peanuts
Instructions
  1. In a medium bowl, stir together the flour, baking powder, salt and 2 tablespoons of the sugar. Stir in the wheat berries. Next, whisk in the water until everything is combined. Add the peanut butter, and stir or whisk until it is evenly distributed into the batter.
  2. Preheat the griddle. Measure ¼ cup of the mixture for each pancake and pour onto a hot griddle. Cook about 2 minutes, or until bubbles begin to form on the surface of each pancake. Flip and cook another minute or two, until the pancake is browned on both sides and cooked through the center.
  3. In a small bowl, stir together the chopped peanuts with the remaining 1 tablespoon of sugar. Sprinkle over the pancakes before serving.
Fake Food Free https://www.fakefoodfree.com/
 

Thanks for reading! All images and content are the property of Fake Food Free unless otherwise stated. Please do not republish full recipes and images without written permission. What is okay? Feel free to Pin images, share links to my posts or share the photo in a round up post with the title of this recipe and a link back to the post. Confused about copyright and food blogs? Here is some helpful information on Recipe Attribution. If you want to use a photo or full recipe, just ask. I’m sure we can work something out.  

Nutty Grain Beer Bread

July 29, 2009

Oats, wheat berries, ground flaxseed, sesame seeds and walnuts. These are a few of the things I had sitting around the apartment that were begging to be used. When I stopped by the supermarket on Monday and walked past the beer aisle I caught a glimpse of what all these ingredients had the potential to become – whole grain beer bread!

Much of the dark beer here in Brazil is Malzbier. It’s very low alcohol and some compare it more to root beer than traditional beer. I used to enjoy it when we first arrived, but it is rather sweet. I can’t even think of anything that equates to it in the US. It can be enjoyable as a dessert, but lately I’ve found that it’s just too sweet for my preferences. However, I have learned it is a great addition to beer bread.

Hungry for a nutty, grainy bread to complement my breakfast, and as a base for my overconsumption of goiaba (guava) fruit jam I decided it was time to use of my stash of ingredients and see what would happen.

I did a quick search for a beer bread to guide me and found Peanut Butter Boy’s Whole Grain Beer Bread. This got me off to a good start.

I used mascavo sugar (unrefined cane sugar) and cut back on it a bit due to the sweetness of the beer. Then I soaked my steel cut oats and wheat berries for a ½ hour. Threw everything together and let ‘er bake.

A definite winner. I’ll be making this one again and again. However, I would suggest soaking the grains a bit longer, perhaps 45 minutes, because there were still some rather hard bites to be found. I guess you could choose to sprout them as well, but I didn’t go that far. Also, any dark beer will do.

Fresh from the oven or toasted with jam the bread is full of crunchy texture with the mild sweetness of the dark beer. Hearty, healthy and filling – exactly what I was going for.

Nutty Grain Beer Bread

Adapted from Peanut Butter Boy’s Whole Grain Beer Bread

3 cups whole wheat flour
1 T mascavo sugar
1 T baking powder
1 t salt
2 T sesame seeds
¼ cup chopped walnuts
2 T ground flaxseed
1/3 cup steel cut oats (soaked and drained)
1/3 cup wheat berries (soaked and drained)
1 can (350 ml beer)

Preheat the oven to 375 degrees F and grease a 9 x 5 inch loaf pan. In a large bowl, gently mix together the flour, sugar, baking powder and salt. Stir in the sesame seeds and flaxseed. Next pour in the oats and wheat berries. It is fine if a bit of the soaking liquid goes in to add moisture. Mix well and then begin pouring in the beer a little at time as you stir until the can is empty. Then stir until the dough is well combined.

Pour into your baking pan, spread evenly and bake for 45 min to 1 hr. Once browned and baked through, remove from the oven and cool on a wire rack for about 10 minutes. De-pan and enjoy!

Apples, Carrots and Zucchini in One Tasty Bread

June 2, 2009

I am a huge fan of zucchini bread. What better way to enjoy a vegetable, right? While I’ve also had apples in bread as well as carrots, I can’t say I’ve combined them all together before. Well, until yesterday.
We came across this recipe for Garden Harvest Cake in the April 2009 issue of Cooking Light. My mom and I (well more my mom than me) decided to give it a try. Since we didn’t change the recipe at all I will leave it as link for you to check out.
Although the recipe says it is a cake it has every characteristic of a quick bread. I always come across recipes that call for applesauce instead of oil and I’m never incredibly impressed with the results. However, as opposed to applesauce, this recipe uses a fresh Granny Smith apple to cut the amount of oil a bit and the results are fantastic! You will end up with a moist, tender bread full of cinnamon flavor with the slight crunch of toasted walnuts. A great breakfast for a hot summer morning.

#5 Croissants

May 7, 2009

I love a good croissant, almost as much as I love scones. A few years ago, I read the book French Women Don’t Get Fat by Mireille Guiliano. At that time I was just getting interested in real foods made from scratch and putting in the time and effort to make them.

I’m sure many of you have read the book and will remember that there is a croissant recipe featured. I was really intrigued when I came across the recipe. I guess I always knew you could make them at home, but a croissant was something I always associated with a bakery…as in for purchase.

I was motivated at how simple the recipe appeared and after reading the book I copied it and filed it away, knowing one day I would try my hand at making them. Well the day finally arrived a few weeks ago! The croissants made their appearance at our Easter breakfast this year.

I was pleased considering this was my first attempt. They came out flaky and buttery. I do need to adjust the baking time on the next batch as they got a little too brown on the bottom. That’s okay because it only means I get to make them again!

At first it appears to be a complex process, however, there really are very few ingredients involved. Although the steps are spread out, each one is fairly simple. It got a bit confusing while reading the original recipe because I wasn’t sure when to use what, so I’ll split it up according to the day.

The croissants take three days to make and are ideal for a weekend treat on Sunday morning. To do this you’ll need to start on Friday.

Croissants
Recipe from French Women Don’t Get Fat by Mireille Guiliano

Friday Night

1 cup milk
2 tsp active dry yeast
2 ¼ cups flour
2 Tbsp sugar
1 tsp salt

Dissolve yeast in 1/4 cup of warm milk. Measure out 2 ¼ cups flour and add 2 Tbsp of this flour to the milk and yeast. Whisk until smooth, and then cover with plastic wrap. Set aside for about 20 minutes or until it doubles in size.

Meanwhile, mix the sugar and salt with the remaining 2 1/8 cups of flour. Prepare you mixer by putting on the dough hook attachments.

Next, transfer the raised dough of milk, yeast and flour to the mixing bowl. Warm the remaining ¾ cup of milk and add it to the bowl. Turn the mixer to high and gradually add in dry ingredients of flour, sugar and salt. Reduce the speed to low and allow it to mix until the dough is sticky and soft. Cover the bowl with plastic wrap and refrigerate overnight.


Saturday Morning

12 Tbsp unsalted butter at room temperature
3 Tbsp flour

Using your hand and a plate or a clean surface, knead the flour into the softened butter until fully incorporated. Shape into a square.

Cover your work table with flour. Remove the dough from the fridge and begin to shape it into a 6 inch x 15 inch rectangle. Spread the butter on the top 2/3 of the rectangle of dough leaving a ½ inch border around the outside.

Fold the dough like a letter, folding the bottom 1/3 up first and then the top 1/3 down. Turn it counter clockwise so the open flap is to the right.

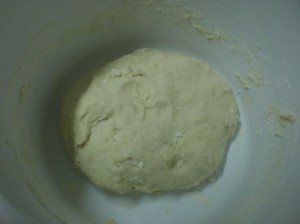
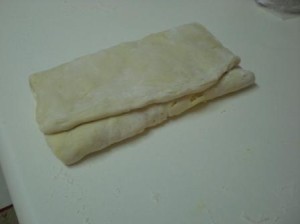
Roll it out again to a 6 inch x 15 inch rectangle and fold again. Transfer to a baking pan, cover tightly with plastic wrap and put back in the fridge for about 6 hours.

Saturday Afternoon

Remove the dough from the fridge, place on a floured work surface. Roll out the dough and fold just like during the morning. Do this two times, wrap it again and refrigerate it overnight.

Sunday Morning (You’re almost done!)

2 Tbsp milk for brushing
1 egg yolk + 1 Tbsp milk for glaze

Plan to start this process about 2 hours before you want to eat the croissants. Transfer the dough to a floured work surface. Roll it out to a 16 inch circle. Cut the dough into quarters and each quarter into 3 triangles.


To make each croissant, roll the wide base of triangle toward the corner. Transfer each one to a baking sheet. Brush with milk and then let them stand for about 45 minutes. They should double in size.


Preheat your oven to 400 degrees F. Brush each croissant with the egg, milk glaze. Bake for 15 to 20 minutes. If they brown to quickly lay a piece of foil over the top during baking. Let them cool 20 minutes before serving.

Croissants also just happen to be #5 on my 30 Foods List!

Bread Success!

March 26, 2009

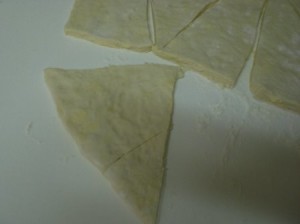
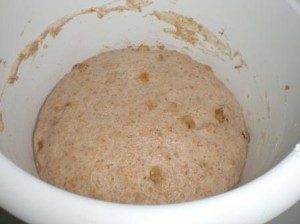
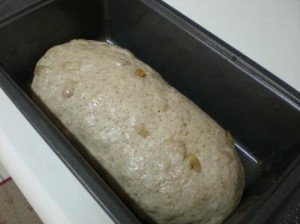
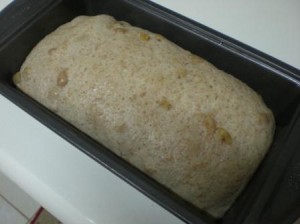
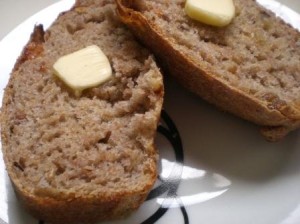
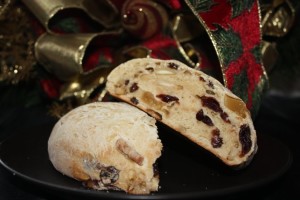
Despite my past work in bread bakeries I rarely have bread success at home. I’m not sure what it is – atmosphere, yeast, lack of talent. My mom makes amazing bread and I’ve always strived to develop a similar skill at making it.
Good news! I think I finally had a bread success.
I will admit it came after a few failures, though. I had a simple baguette recipe I found in a book a long while back that I play with occasionally. It has never turned out well. One reason is that it has too much salt. I never could get used to the flavor. I decided, however, that the recipe had potential if adjusted it enough and if I set my sites on more of a loaf as opposed to a baguette.
I had some golden raisins left from my scones and a bread from my past came to mind today – Cinnamon Raisin Walnut. It has been forever since I’ve had it so I decided to give my base recipe one last attempt at being successful.
I am so happy about the loaf I ended up with. It has a hard, crusty outside and a soft inside just the way I like my bread. The cinnamon and raisins add just a touch of sweetness without being too overwhelming. I had to wrap it up and push it to the corner of the kitchen after two pieces for fear it would be gone before the end of the day.
I will warn you in advance that this is an all-day kind of bread, or at least all morning. It might be a good idea to leave this one for a relaxing weekend. My next mission will be to increase the whole wheat flour (I was almost out) and incorporate some different grains.
Cinnamon Raisin Nut Bread
1 ¼ cups warm water
1 tsp instant dry yeast
1 ½ cups white flour
1 ½ cups whole wheat flour
¾ tsp salt
1 ½ tsp cinnamon
½ cup golden raisins
1/3 cup walnuts
Mix the yeast with water and let it sit while you mix the other ingredients. Combine the flour, salt, cinnamon, raisins and walnuts in a mixing bowl. Pour in yeast and mix with a spoonula until combined. Turn the dough out on a floured surface and knead for five to eight minutes. Form the dough into a round loaf and place in a greased bowl. Let rise for about one hour or until it has doubled in size.


Punch down the dough and form it into a long loaf. Place it in a greased loaf pan. It will look something like this.


Let it rise for 2 more hours at which point it will look more like this.


Bake at 400 degrees Fahrenheit for about 25 minutes or until the loaf is nicely browned on the outside. Remove from oven and use a knife to loosen the sides and de-pan immediately. Let cool on a wire rack.

#9 Irish Fruit Scones

March 16, 2009

While I’ve been known to enjoy a full, hearty breakfast, my usual daily selection is a bowl of oats or a simple omelet. Truth-be-told, however, without a concern for health or calories a pastry and coffee would be my favorite way to start a day. Yes, I would be sure to run out of energy in a few hours, but there is something incredibly enjoyable about a sweet treat and a strong cup of coffee.

Breakfast pastries come in many varieties and while others may go for the cinnamon roll, cheese Danish or muffin, I reserve this special breakfast spot for the scone. Put me in a bakery with an assortment of sweets and 9 times out of 10 the scone will be mine.

My love of scones started when I began working in a bakery. We used to make the most amazing blackberry, cream cheese scones you have every put in your mouth. As I’ve traveled more and tested more scones, I now realize that what we made there really wasn’t much of a scone at all. They were too sweet and cake like.

It is only after traveling to Ireland that I think I have experienced a true scone. I have found I love them just the way they are, as well. That dry crust with a bit of moist goodness in the center, just a touch of sweet flavor making jam and clotted cream the perfect addition.

In honor, of the upcoming Irish holiday I decided to make my own batch of scones. While I have tried them in the past I’ve never made the Irish Fruit Scones that I’ve enjoyed so often on our trips to the Dublin area. It also helps that this is item #9 on my list of 30 foods. I’m slowly but surely making my way through my 30th b-day list.

I used the recipe from greatfood.ie and you can find the recipe here. I had to make my own buttermilk using 1 tablespoon of white vinegar to a little less than a cup of milk. I also used golden raisins in my recipe.

While the result was not quite as perfect as those I’ve had in Ireland, I was quite pleased with the results. They make a great St. Patrick’s Day breakfast.

Tomorrow, I plan to share my Brazilian St. Patrick’s Day dinner, a traditional Irish favorite with a Brazilian twist. See you then!

Want to create beautiful food and product photos that you can't wait to share?!
Discover your style, control the light, and shoot using the tool you know how to use (yes, your phone included). Learn about free resources, Live Q&As with Lori, and online courses you can take from anywhere in the world!
We respect your privacy. Unsubscribe at any time.