Browsing Category

Lunch and Dinner

Petrale Sole with Heirloom Tomatoes and Pesto Recipe

August 15, 2013

After 8 months on the West Coast (and with my struggles for finding farm-direct meat), we decided it was finally time to start exploring local fish. I’ve always said I wanted to live by the water where fresh fish and seafood were plentiful and now, here I am. It’s time to take advantage.

So over the past few weeks, instead of passing by the fish vendors at the Farmers Market, I’ve been stopping, looking and asking questions. Most of the fish I’m finding was caught that morning and filleted soon before it got on ice and to the market.

So far I’ve settled on some beautiful Petrale sole from two different vendors at two different markets. (I’ll branch out soon. I’m slow to take on new fish, apparently.) One pack came from Monterey Bay to the south of us and the other Bodega Bay to the north of us.

I’m not an expert in cooking or eating fish, but I really like this variety. The second set of filets was much thicker which made them ideal for baking so I decided to fancy them up a bit. I scanned some recipes on the web and a found a few that baked the fish over onions. You know I always have plenty of heirloom tomatoes around, and there was also leftover homemade pesto from the minestrone soup. With all that, this super simple recipe came together.

I hope you like it as much as I did! As I continue to explore the markets here, more fish recipes are sure to come in the future. If you have a favorite type of fish or recipe, I’d love to hear about it.

Petrale Sole with Heirloom Tomatoes and Pesto

1 tbsp unsalted butter
1 small onion, sliced
2 cloves garlic, thinly sliced
10-12 oz Petrale sole filets
¼ cup fresh pesto
1 medium heirloom tomato
4 lemon slices

Preheat the oven to 375 degrees F.

In a small skillet, heat the butter over medium high. Add the onion slices and the garlic. Reduce the heat to medium and cook for about 5 minutes, just until the onions start to become tender.

Transfer the onions to a baking dish and spread in a single layer. Top the onions with the sole filets. Spread the pesto evenly over each filet. Top the pesto with tomato slices. Add the lemon slices around the perimeter of the baking dish.

Bake for 12 to 15 minutes, until the fish turns white and flakes with a fork. Serves 2 to 3.

A Day at the San Francisco Cooking School

August 14, 2013

From a distance it doesn’t look like a cooking school. It could easily be mistaken for a boutique, or better yet, an art gallery. But once the glare of the windows clears and you open the door, if you have even the slightest interest in cooking, your heart skips a beat. It’s then that you realize that this is an art gallery, a hands-on gallery for the art of cooking.

Beautifully set, modern tables were the first thing I encountered. A clear sign that lunch would be delicious. Then the colorful Dutch ovens and well-organized white dishes that line each shelf caught my attention. I marveled over the ovens and ranges for a bit, and then I found my work station.


This was my first time visiting the San Francisco Cooking School. The 10 or 12 of us there were the lucky ones who responded quickly enough to an email inviting us to attend a Knife Skills workshop for food media.

We received a condensed version of the class with instruction on the various knife cuts while we prepped the ingredients for Minestrone Soup with Pesto. David taught us about batonnet and julienne while Jodi filled us in on the details of the school and the classes they offer.

What a diverse line up of classes. In addition to Knife Skills, you can take courses in Cooking Fundamentals, Soba Making, French Macarons, Recipe Testing and Development along with their Cook the Book series which features recipes from cookbooks focused on a variety of ethnic cuisines. If you want to take your cooking beyond your own kitchen, they also offer full-time and part-time culinary and pastry arts certificate programs.

As we chopped up the ingredients that we later took home to make our own minestrone soup, David finished up the class by making a rustic pesto. Jodi served up the soup they made earlier which would serve as our lunch along with crusty bread, a delicious salad with seasonal stone fruits, and wine.

I’ll admit, I’m not the biggest minestrone fan, but the pesto on this soup made all the difference. After more enjoyable conversation about the school with David and Jodi, we ended our meal with some of the best cookies I’ve had the pleasure of eating – almond, chocolate, candied ginger, and rosemary and cornmeal. These cookies had me scouring the website to find a course that would teach me how to make them.

Jodi granted me permission to reprint the soup recipe for you. It is the perfect summer-to-autumn transition meal. It is warm and comforting for the cooler days ahead, and it uses up late summer and autumn vegetables. 

Enjoy the soup, and when in San Francisco, check out the San Francisco Cooking School. I assure you there are few more inspiring or enjoyable places to cook.

Minestrone with Pesto

Reprinted with permission from Jodi at the San Francisco Cooking School

Soup:
3 tbsp extra-virgin olive oil
1 ½ cups diced onion
2 medium carrots, cut in ½-inch dice
2 medium leeks, white and light green parts only, finely sliced
2 stalks celery, cut in ½-inch pieces
Coarse salt and fresh pepper to taste
2 potatoes, peeled and cut in ½-inch dice
6 cups hot chicken or vegetable stock
1 (14 ounce) can chopped tomatoes
1 ½ cups Savoy cabbage, thinly sliced
1 ½ cups zucchini, cut in ½-inch dice
1 (14 ounce) can cannellini beans, drained and rinsed

Pesto:
2 cups gently packed basil leaves
1 medium garlic clove, chopped
¼ cup toasted pine nuts
½ cup extra-virgin olive oil
½ cup freshly grated Parmesan

In a large stock pot, heat the olive oil over medium heat. Stir in the onions, carrots, leeks and celery with a pinch each of salt and pepper. Cook until the vegetables are lightly browned and begin to soften, 5-6 minutes. Add the potatoes and cook, stirring occasionally, 2-3 minutes more.

Stir in the chicken broth, tomatoes and a pinch each of salt and pepper and cook until all the vegetables are tender, about 1 hour. Add the cabbage, zucchini and beans. Cook until cabbage and zucchini are just tender with a bit of a bite, about 6 minutes more.

While the soup is cooking, make the pesto. Using your knife, finely chop the basil, garlic, and pine nuts together. Place in a small bowl and add the oil until the mixture is shiny and moist. Stir in the cheese and season to taste with salt and pepper.

Serve the soup with a drizzle of the fresh pesto over the top. Serves 6.

Disclosure:  My visit to the San Francisco Cooking School was part of a free food media event. I was not required to post about my visit and received no compensation for doing so.

Bacon, Corn and Brown Rice Stuffed Squash Recipe

August 8, 2013
Summer Squash Stuffed with Bacon, Corn and Brown Rice | Recipe | Fake Food Free
 

 When I tell people that we moved here from Kentucky I get the usual response. It’s the same response I received any time we traveled while living there.

It is something similar to, “I bet this is (that was) different,” or “This must be an adjustment.”

Now, I don’t get cranky or offended. It’s not like I’m out to defend the upper southern part of the U.S. There are a lot of things that are different here in a very good way, and there are a lot of things that are the same.

Regardless of whether you live in rural Kentucky or Northern California, if you rarely go anywhere else, well, there you are. There are as many people here that haven’t seen other parts of the US as there are people who haven’t in Kentucky. So I don’t blame people for having this perception, but as you know from my blog I had myself in a pretty good food situation back East.

California wins when it comes to variety of produce, growing seasons and ethnic cuisines, but it falls way behind in something else – meat.

Oh, it’s here. It’s grass-fed and finished, pastured, organic, whatever you want. But it’s one other thing.

Impersonal.

I really dislike buying meat here. There are a few butchers, but when you add in the price of a quality product along with the fact that it’s being sold in California, ouch. The Farmers Markets have better prices for similar products, but it’s difficult to talk to people about the meat as a line 10 people deep waits behind you.

When people ask me what I miss most about Kentucky, that’s easy. The farms.

I’ve asked about buying farm direct, coming out for a visit, and so far the answer is that they only sell at the market. Although, some do have a dinner for customers one day a year.

I miss knowing the breeds, conditions and getting things like housemade prosciutto, sausage without the casing and blue/eggs that are mixed right in with the brown ones because they all come from the same group of chickens.

I know – cry me a river, Lori. I see all those Instagram and Facebook pictures of produce and landscape. Life is rough. Boo-hoo.

I get it. I’m not complaining. I realize I haven’t covered every base yet. I’m sure there are options out there. I guess my point is that I will, at least for a while, still have a reason to respond to all those who suggest Kentucky is different with – yes, yes it is.

bacon-ends


With all that being said, the meat I have ventured to get here has been very good. I finally found bacon ends last weekend at the Farmers Market. 


Bacon, Corn and Brown Rice Stuffed Squash Recipe | Fake Food Free
It called for a celebration of summer stuffed squash. Feel free to substitute any grain here. Cue ball or patty pan squash will work the best since this is a loose stuffing.


Bacon, Corn and Brown Rice Stuffed Squash

Makes: 6 stuffed squash


Ingredients

½ cup long grain brown rice
Extra virgin olive oil
6 cue ball or small patty pan (scalloped) squash
½ cup chopped pastured bacon ends
Kernels from 2 ears of corn
2 green onions, sliced, green and white portions divided
1 small bell pepper, diced
½ teaspoon finely chopped rosemary
¼ teaspoon salt
¼ teaspoon ground black pepper
½ cup finely grated cheddar cheese.


Preparation

Preheat the oven to 400 degrees. Lightly coat a casserole dish with olive oil.

Bring 2 cups of water to a boil and add the rice. Bring to a boil and reduce heat to a low boil. Cook for 15 minutes until just barely tender, drain and set aside.

Meanwhile, cut the tops off the squash and scoop out the insides with a spoon. Reserve the flesh. Lightly rub the squash with olive oil and arrange in the baking dish. Pre-bake the squash for about 10 minutes.

In a deep skillet, brown the bacon on medium-high for about 5 minutes. Cook until your desired crispness. I like mine super crispy.

Add the corn, whites of the onions (reserve greens for garnish), the bell pepper and the chopped flesh of the squash. Cook for about 5 more minutes on medium to medium-high, until most of the moisture has evaporated.

Stir in the brown rice. Add the rosemary, salt and black pepper. Stir in the cheddar cheese. Transfer the stuffing to each of the squash.

Bake for 20 to 25 minutes, until the squash is tender. Garnish with reserved onion greens. Makes 6 stuffed squash.


Thanks for reading! All images and content are the property of Fake Food Free unless otherwise stated. Please do not republish full recipes and images without written permission. What is okay? Feel free to Pin images, share links to my posts or share the photo in a round up post with the title of this recipe and a link back to the post. Confused about copyright and food blogs? Here is some helpful information on Recipe Attribution. If you want to use a photo or full recipe, just ask. I’m sure we can work something out.

13 Best Tomato Recipes

August 1, 2013

I did it again.

Every year when the end of May rolls around, I forget. Unlike other bloggers who spend weeks building up to the big day, planning giveaways and making special recipes, it passes me by, and few weeks later I think – oops, I forgot again.

I’m talking about my food blogging anniversary. Fake Food Free has been alive and well for over 5 years. It’s overwhelming to think where this blog has taken me since I began typing my first words in our apartment in Southern Brazil.

Things have evolved through my travel, adventures in food culture and gardening. My photos are a bit better than those dark point-and-shoot images I started with, and I’d like to think my recipe writing has improved as well. I’ve met amazing people, and now I’m at a place where health, food and recipe writing, and taking food photos are my work. As you’ll hear me say often – Life is good.

And it all started with this blog.

While things have changed a bit here, and I don’t get to post as much as I used to, this is certainly not a farewell post. It’s a big Cheers, Prost and Saúde to another 5 and beyond!

What better way to celebrate than with tomatoes! Well, okay, a cocktail might be better, but right now we’re in the heart of summer and all I can think about are beautiful heirlooms, sweet cherries and plump Romas.

After 5 years of blogging, I’ve created and adapted my fair share of recipes using my favorite part of this season.

Here are 13 that you must make before the 2013 tomato season passes us by! (Click on the name and it will take you to the post with the recipe.)

Roasted Garlic, Tomato and Black Bean Soup

Grilled Marinara Pasta

Honey Peach and Tomato Black Rice Salad

Hearty Tomato, Kale and Mushroom Sauce

Roasted Tomato, Black Bean and Arugula Salad

Smoky Tomato Jam

Beer Cheese Tomato Soup

Honey-Pecan Tomato Tarts with Blue Cheese

BLT Spinach Salad with Fresh Garlic Dill Dressing

Heirloom Tomatoes and Cantaloupe

Stuffed Poblano Peppers with Tomato Chile Sauce

Poblano Cilantro Salsa

Sweet and Simple Tomato Pepper Salad

Warm Corn and Purple Cabbage Slaw with Coconut Dressing Recipe

July 11, 2013


I was without virgin coconut oil for almost 5 months. How I did it, I have no idea.


Over the past few years it has become my go-to oil – for cooking, baking, to spread on toast. I finished up my last jar before the move in December, thinking I’d get more when I settled into the place. It’s hard to believe it has taken this long. I’m so glad to have it back in the kitchen, and I’m also happy to be able to offer you some for your kitchen too.


Tropical Traditions remains my favorite brand and I’ve done a few giveaways of their products on the blog before. I use their Gold Label Virgin Coconut Oil in my cooking, and aside from the past 5 months, you can always find the 32 ounce jar in my cabinet. Actually, it is even nicer to have around now that we’ve moved to the Bay Area. With the temperatures being more stable and the climate more mild, it always seems to be at the perfect consistency.


Gold Label Virgin Coconut Oil - 32 oz.
I love that this oil comes in small batches, handmade from family producers. If you haven’t checked them out, they have a lot of great products. I’m also a huge fan of their Coconut Peanut Butter. I’ve used coconut oil in many recipes on the blog and I’ve written about the science that convinces me to include it in my diet.


This time I decided to use it in something other than baked goods. In fact, I went a bit crazy with coconut. I love what we always called fried corn in my family, which was basically corn cut off the cob and skillet cooked in butter with onions and bell peppers. I took that idea and added some purple cabbage to make a slaw, and then doused it with some delicious coconut flavor.


Since coconut oil is solid at room temperature, I kept this salad warm. The crazy-with-the-coconut comes in with the dressing. I used coconut oil, coconut vinegar and coconut sugar.


This makes six servings, but I’m not going to lie. I’m pretty sure I ate three for dinner the night I made it. I absolutely love the flavors. I make a lot of recipes I enjoy, but many just don’t make the cut to be repeats in my kitchen. This one will be coming around again, and soon!


Warm Corn and Purple Cabbage Slaw with Coconut Dressing

1 tsp virgin coconut oil
½ medium onion, thinly sliced
3 ears of corn, kernels cut off the cob
½ medium red bell pepper, thinly sliced
1 small head purple cabbage, thinly sliced
3 tbsp coconut vinegar
1 tbsp virgin coconut oil, melted
1 tbsp coconut sugar
¾ tsp salt


Heat the teaspoon of olive oil in a large skillet or wok over medium-high. Add the onion and cook for 30 seconds. Add the corn and cook for 2 to 3 minutes, until the moisture evaporates and corn just barely begins to brown.


Add the red pepper and cabbage and toss to heat the cabbage through. Cook about 30 seconds. You want the cabbage to wilt a bit, but not color the rest of the dish. Remove from the heat.


In a small dish, whisk together the coconut vinegar, 1 tablespoon of coconut oil, coconut sugar and salt. Pour the dressing over the warm vegetables and toss to coat.
Serve warm. Makes about 6 servings.


************************************************
GIVEAWAY CLOSED

So I thought it was about time I give away some coconut oil to you again. And if you haven’t tried it, you are in for a treat! After 5 years of blogging, I’m not much for the bells and whistles of like me here or follow me there. I’m more interested in hearing from you. There are only two requirements to enter.

  • Second, leave a comment here telling me your subscribed AND tell me in your comment what your most memorable experience is with coconut or coconut oil. 
Was it during a trip abroad, or a favorite family recipe? I’ll start. My best memory with coconut is when we traveled to Ubud, Bali and enjoyed a walking tour of a local village. Our guide asked a farmer to climb an amazingly tall palm and cut us a coconut. They then showed us how to cut a spout from the skin and drink it from the coconut. Incredible experience.
I’ll only include valid answers with the required info in the random draw. Leave your comment by Wednesday, July 24th, 11:59 pm PST.
If you’d like to learn more about Tropical Traditions here are some helpful links so you can stay connected.
Tropical Traditions on – Facebook, Twitter, Google+, Pinterest (all appropriate links)
More from Tropical Traditions:
 Win 1 quart of Gold Label Virgin Coconut Oil!
Tropical Traditions is America’s source for coconut oil. Their Gold Label Virgin Coconut Oil is hand crafted in small batches by family producers, and it is the highest quality coconut oil they offer. You can read more about how virgin coconut oil is different from other coconut oils on their website: What is Virgin Coconut Oil?
You can also watch the video they produced about Gold Label Virgin Coconut Oil:
Tropical Traditions also carries other varieties of affordable high quality coconut oil. Visit their website to check on current sales, to learn about the many uses of coconut oil, and to read about all the advantages of buying coconut oil online. Since the FDA does not want us to discuss the health benefits of coconut oil on a page where it is being sold or given away, here is the best website to read about the health benefits of coconut oil.

***************************************

And the winner is:

Meagan of Meagan’s First Kitchen (and you can see what has been keeping her away from the kitchen the past few months at Because Forgetting is Easy). Congrats Megan! Send me your address and I will pass it along to the folks at Tropical Traditions. Your Gold Label Virgin Coconut Oil will arrive soon! 

Gluten Free Baked Shrimp Etouffée Recipe

June 14, 2013

I laughed out loud.

I’m not talking about chuckling or giggling here. I’m talking about a huge, hearty laugh. Again, and again, and again.

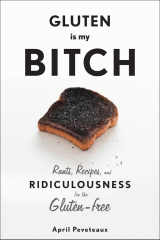
I’m not sure I’ve ever had a book make me laugh like Gluten Is My Bitch, Rants, Recipes and Ridiculousness for the Gluten-Free by April Peveteaux. At first it might seem odd to laugh at such a serious health condition, but laughter is medicine and humor is healing.

Now I should explain that I don’t have celiac disease or gluten sensitivity, nor do I opt out of eating gluten for personal reasons. I have had my fair share of stomach issues in the past, but mine were corrected by cutting out all artificial sweeteners and fat replacers. In an indirect way, I can relate.

Keeping up on the various ways of eating and nutritional issues is also part of the deal after you spend your college years studying nutrition. The science, the mechanisms, the nutrients – as much as I love food and eating from a creative standpoint my left brain would never be satisfied without the scientific side.

This book has it all, and a little something extra.

When reading about conditions like celiac disease, what you don’t often get is the personal side. A side explaining what it is really like to be forced to change your diet. To eliminate things you love, not because you want to lose weight or reduce risk of disease, but because if you don’t, you will be in serious discomfort. It’s not a choice. There is no option.

I wouldn’t have thought there was a way to make such a serious issue so completely hilarious, but April figured it out. Along the way there are tips for eating out, feeding kids with gluten intolerances, traveling and substitutes for your old favorite foods.

Along with all this laughter and helpful information, there are also lots of recipes, bringing us to reason I wanted to review the book here. Cocktails, cakes, cookies, pasta dishes and meaty main courses like Fried Chicken and Waffles and Italian Meat Loaf.

I knew that the timing of this post would likely align with prepping for my first marathon (it’s Sunday!), so I wanted to make something filling. Something with plenty of (gluten-free) carbs. I also wanted it to be something I hadn’t tried before.

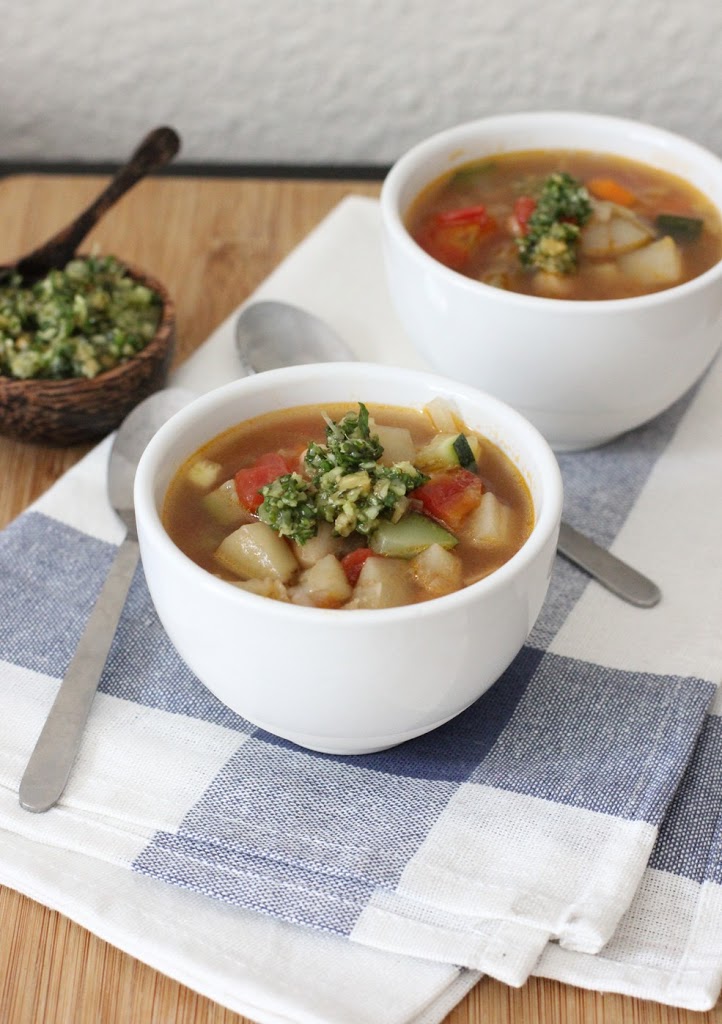
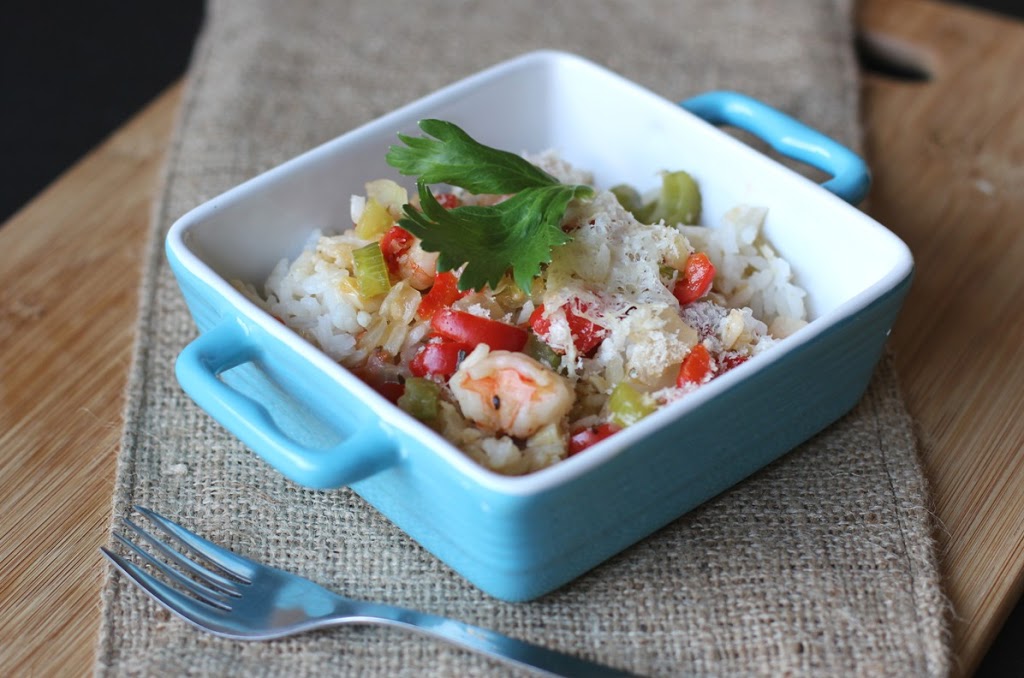
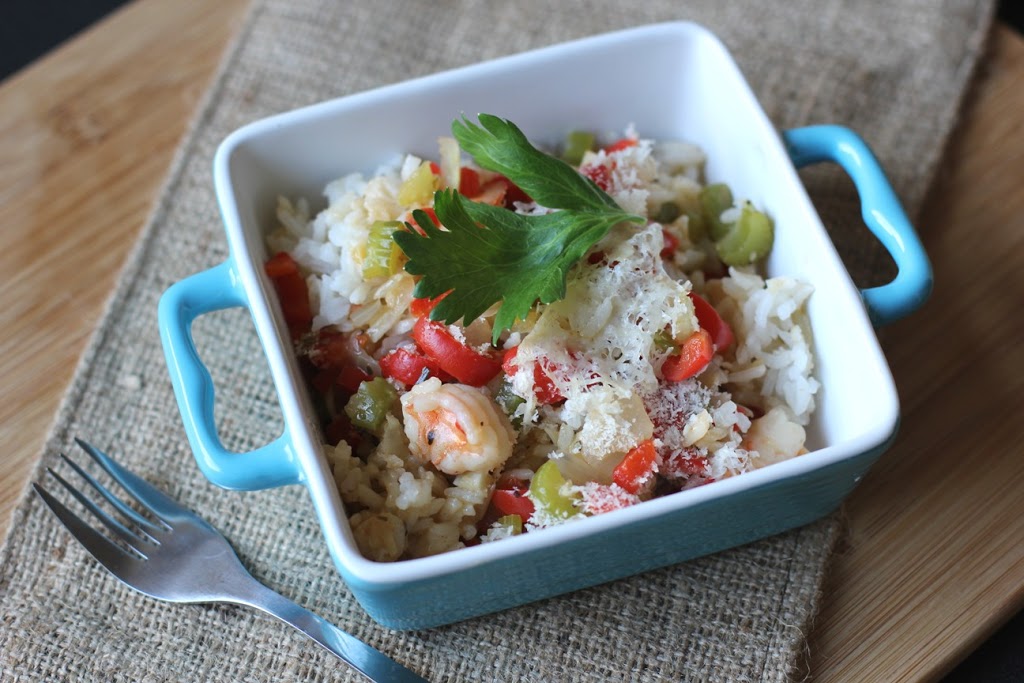
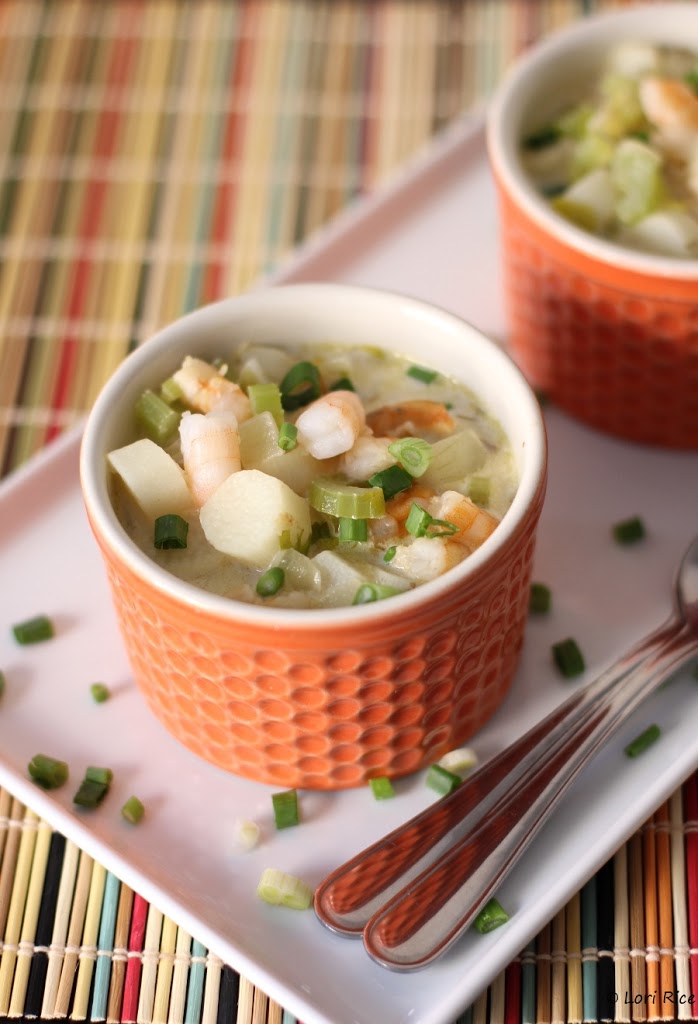
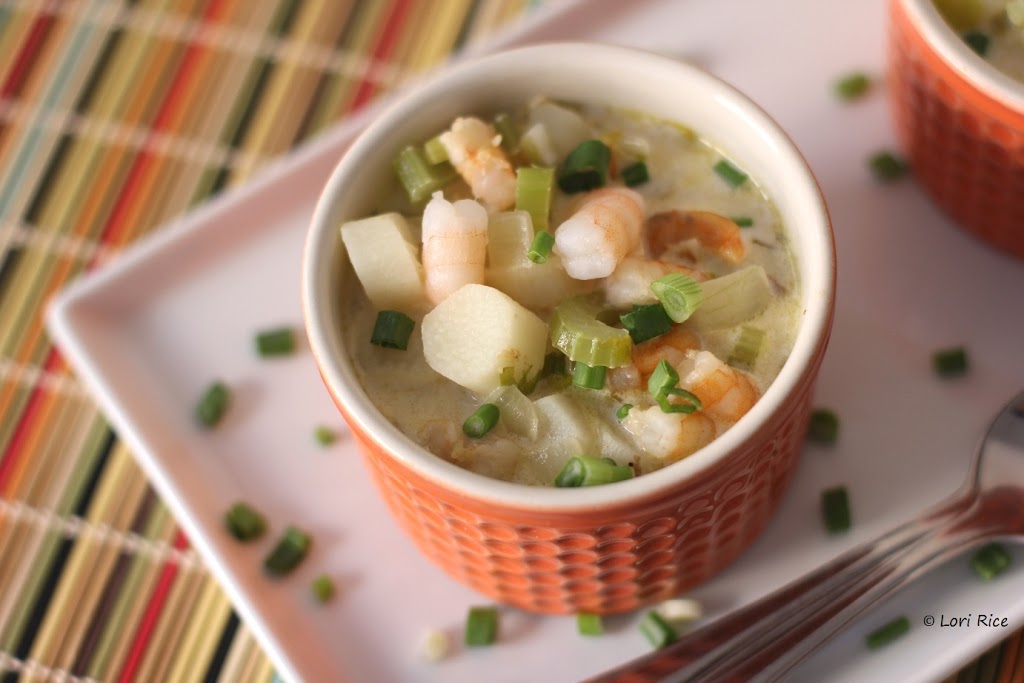
Enter, the Baked Shrimp Etouffée.

This hit the spot. For a gluten free version, April’s recipe calls for millet flour and gluten-free bread crumbs. The flavors are delicious and I love that this baked version is a one pot meal.

Whether you have a gluten intolerance, want to learn more about it, want some great recipes, or simply want to laugh out loud, add this book to your summer reading list.

Baked Shrimp Etouffée 

Copyright © 2013 April Peveteaux, reprinted with permission from Abrams Books

Cajun food makes an impression. Or maybe that’s all the booze you ingested with your boudin. Which is why I still remember an etouffée that had a little extra somethin’-somethin’ from my very first trip to New Orleans, which was ages ago.

After experimenting, I do believe the crust atop this shrimp etouffée is spot on with the roux, and the stew, and now a little cheesy crunch. Laissez les bons temps rouler.

Prep time: 20 minutes  Cook time: 35 minutes
Makes: 10 servings

INGREDIENTS

1 tablespoon butter
1 tablespoon olive oil
5 garlic cloves, minced
1 bell pepper, chopped
1 Spanish onion, chopped
2 celery stalks, chopped
¼ cup millet flour
2 cups chicken stock
½ teaspoon sea salt
1/8 teaspoon freshly ground black pepper
1 teaspoon hot sauce
1/8 teaspoon cayenne pepper
1/8 teaspoon paprika
½ teaspoon oregano
1½ pounds shrimp, shelled and deveined
5 cups cooked rice
2 tablespoons gluten-free bread crumbs
1 tablespoon grated Parmesan
Parsley, for garnish

Preheat the oven to 350ºF.

In a cast-iron skillet over medium heat, heat the butter and oil. Add the garlic, pepper, onion, and celery, and cook until soft.

Whisk the flour into the onion mixture until well combined. Add ½ cup of the chicken broth and whisk to combine. Gradually add the remaining broth and cook until the mixture has thickened.

Add the salt, pepper, hot sauce, cayenne, paprika, and oregano. Stir, reduce the heat to low, and simmer for about 6 minutes. After 6 minutes, add the shrimp and continue cooking for about 4 minutes more, until the shrimp are pink. Do not overcook the shrimp.

Remove the mixture from the heat and pour it into a medium bowl. Place the cooked rice in the skillet, and top it with the shrimp mixture.

Sprinkle the gluten-free bread crumbs and Parmesan evenly over the shrimp mixture and place the skillet in the oven. Bake until slightly golden brown, 10 to 15 minutes.

Remove from the oven, top with the parsley, and serve.

Bacon and Oyster Mushroom Stuffed Squash Blossoms Recipe

June 11, 2013

It’s surprising that with all the squash plants I’ve grown, I’ve never tried cooking with squash blossoms. I always blamed it on bad timing.

Those pretty yellow flowers would appear in early summer and I would think – No way am I picking those. I want a squash out of that. What if the plant doesn’t produce much this year?

Then (as you know if you’ve grown squash) by mid to late summer when I was buried with summer squash up to my eyeballs, I wish I had used some of those blossoms. 

I no longer have my own squash plants, but I did spot some of those pretty blossoms at the Ferry Building Farmer’s Market last weekend. I wasn’t quite sure what I would do with them, but I had oyster mushrooms, bacon, bread and tomato sauce, too, so this is how it went. And when I have my own squash plants again someday, I will definitely be picking those blossoms.

Bacon and Oyster Mushroom Stuffed Squash Blossoms

1.5 ounces oyster mushrooms, chopped
2 slices bacon, chopped
2 tbsp finely chopped onion
1 clove garlic, minced
1/3 cup bread crumbs
3 leaves fresh basil, chopped
Salt and pepper to taste
12 small to medium squash blossoms
¾ cup your favorite marinara sauce
2 tbsp grated Parmesan cheese

Preheat the oven to 350 degrees F.

Preheat a deep skillet over medium-high, add the bacon and mushrooms. Cook for about 3 minutes. Add the onion and garlic. Continue to cook until the bacon is browned and the mushrooms are tender, about 3 to 4 minutes more.

Stir in the bread crumbs and the basil. Add salt and pepper to taste. Remove from the heat.
Fill each squash blossom with about a heaping tablespoon of the stuffing, depending on the size of the blossom. Twist the end of the flower to seal.

Pour the marinara in a baking dish and spread over the bottom of the dish. Arrange the blossoms in a single layer over the sauce. Top with the Parmesan cheese.

Bake for 20 minutes or until the blossoms become tender and the cheese begins to brown. Serves 2 to 3, if the squash blossoms are on the smaller side.


 Thanks for reading! All images and content are the property of Fake Food Free unless otherwise stated. Please do not republish full recipes and images without written permission. What is okay? Feel free to Pin images, share links to my posts or share the photo in a round up post with the title of this recipe and a link back to the post. Confused about copyright and food blogs? Here is some helpful information on Recipe Attribution. If you want to use a photo or full recipe, just ask. I’m sure we can work something out.  


Ginger Coconut Soup with Wai San and Shrimp Recipe

March 26, 2013

Wai San is a potato-like root vegetable that I discovered at an Oakland Farmers market several years ago. It turned out to be delicious addition to this ginger coconut soup!

I watched the mass of shoppers hover around the table for at least 10 minutes before I mustered up enough courage to elbow my way in and take a look. I was surprised to see a knobby, speckled, skinny root vegetable staring back at me. I had no idea what it was and given all the hustle around me, I doubted I’d get an answer even if I asked.


I walked away, but it didn’t take long for my curiosity to get the better of me. Finally, on my last lap through the Farmers Market there was a lighter crowd swarming the vendor. I stepped up, analyzed the unfamiliar root, and I caught his eye. I asked what it was. He responded twice with the proper name, and I’m sure my face revealed that not only could I not hear over the people, but that I also couldn’t understand him.

His next response was, “Chinese potato. You cook it like potato in a soup.

Sold. I grabbed up a handful and he nodded in acknowledgement that I only needed a few for soup.


After a bit of research, I think I finally found the name for this new-to-me vegetable. I say – I think – because it wasn’t easy to come by. I have found a couple of blogs which identify it as Wai San.

It’s long and thin, and almost looks like it has dots. Check.

When it’s peeled, its starch is sticky and a little glue-like. Check.

It boils up like a potato, yet it has a blander flavor. Check.

If you happen to know it by another name, please let me know in the comments. I’d love to learn more about it.

This being my first attempt at cooking with Wai San I didn’t want to get too adventurous. I stuck to the recommendation for soup, and I wasn’t let down.

Cut into small pieces, it takes less time to cook than potato. It has a similar texture, but it’s less starchy. It’s almost like a cross between a carrot and a potato, but with little flavor. That is, until you mix it with the ginger, coconut milk, and shrimp in this soup. Then it becomes all kinds of delicious.

 
Ginger Coconut Soup with Wai San and Shrimp Recipe
Serves 4
Wai San, a potato-like root veggie, makes a delicious addition to this soup. If you can't find it in your area, any type of potato can be substituted. Adjust the cooking time to cook until the potato you use is tender.
Write a review
Print
Ingredients
  1. 1 tablespoon extra virgin olive oil
  2. 1 small yellow onion, diced
  3. 4 cloves garlic, minced
  4. 2 stalks celery, sliced
  5. ½-inch piece of ginger, peeled and grated
  6. 1 ½ cups peeled and chopped Wai San
  7. 1 (13.5 ounce) can coconut milk
  8. 3 cups seafood stock
  9. ½ pound cooked shrimp, chopped
  10. ½ teaspoon sea salt
  11. ¼ teaspoon ground black pepper
  12. 2-3 green onions, sliced for garnish
Instructions
  1. Heat the olive oil over medium-high in a large soup pot. Add the onion, garlic and celery. Cook, stirring often, for 2 to 3 minutes, or until the vegetables begin to soften. Add the ginger. Add the Wai San and cook 1 more minute.
  2. Pour in the coconut milk and seafood stock. Bring to a low boil and then reduce the heat to a simmer. Allow the soup to simmer about 5 minutes or just until the Wai San is tender.
  3. Add the shrimp, salt, and pepper. Cook just until the shrimp are heated through, about 1 minute. Top each bowl of soup with green onions and serve warm.
Fake Food Free https://www.fakefoodfree.com/


Guinness Braised Kale with Roasted Potatoes and Poached Eggs Recipe

March 13, 2013
Guinness Braised Kale with Roasted Potatoes and Poached Eggs Recipe | Fake Food Free
 
It’s that time of year. The time when food bloggers everywhere pull out the Guinness, Bailey’s, Jameson and potatoes to create an Irish-inspired recipe for St. Patrick’s Day. I’m no exception.
 

If you’ve read my blog much at all you know that Ireland has a special place in my travel-loving heart. I’ve had the opportunity to visit three times, exploring gorgeous landscape, overdosing on amazing food and drink and even meeting bloggers. So I can’t let March 17 pass without making something that uses a few flavors from Ireland. I’m always tempted by the incredible desserts that pop up on other blogs, but I decided to go savory. This is a super simple meal, but the Guinness adds a deep flavor to the kale that tastes so good with the eggs and potatoes. Bonus, it’s perfectly suitable for breakfast, lunch or dinner.


Guinness Braised Kale with Roasted Potatoes and Poached Eggs

Makes: 4 servings

Ingredients

10-12 red or white new potatoes, quartered
2 tbsp extra virgin olive oil, divided
2 tsp dried dill
½ tsp sea salt
¼ tsp ground black pepper

1 lb. kale, stemmed and chopped
3 cloves garlic, minced
¼ cup Guinness Extra Stout beer
¼ tsp sea salt

4 poached eggs

Prep

Preheat the oven to 425 degrees F.

In a large bowl, combine the potatoes, 1 tablespoon of the olive oil, dill, sea salt and black pepper. Stir to coat the potatoes with the oil and spices. Transfer the potatoes in a single layer on a baking sheet.

Bake for 15 minutes. Remove from the oven and stir the potatoes. Return to the oven and bake 15 to 25 more minutes, or until the potatoes are tender with crispy edges.

While the potatoes are baking you can prepare the kale. Heat the remaining tablespoon of oil in a large skillet over medium-high. Add the kale and garlic. Cook for about 1 minute, stirring to coat the kale in the oil.

Add the beer. Cook 30 seconds more, or until the kale begins to wilt.  Remove from the heat and stir in the sea salt.

To assemble, divide the potatoes into 4 serving bowls, top with ¼ of the kale and finish it off with a poached egg. Serve warm. 

 
Guinness Braised Kale with Roasted Potatoes and Poached Eggs Recipe | Fake Food Free

I leave you with two short PSAs for this Irish holiday that we all enjoy so much in the States. # 1 It’s St. Paddy’s Day, not St. Patty’s Day. I learned this just a few short years ago, but definitely click on that link. #2 Skip the green beer and order a Guinness (or a Kilkenny, or a Smithwicks, or a Bulmer’s Cider).

Sláinte!

Thanks for reading! All images and content are the property of Fake Food Free unless otherwise stated. Please do not republish full recipes or images without written permission. What is okay? Feel free to Pin images, share links to my posts or share the photo in a round up post with the title of this recipe and a link back to the post. Confused about copyright and food blogs? Here is some helpful information on Recipe Attribution. If you want to use a photo or full recipe, just ask. I’m sure we can work something out.

Hog Island Oyster Farm – Marshall, California

February 26, 2013

I was just about to post an Instagram photo when I noticed two little words at the top of my phone.

No Service.

Not only-one-bar, or the dreaded E, but no service. Zip, zero.

Wait a second. We moved from rural Kentucky to California, right? And you are telling me we don’t have service here.

We were headed to Marshall, California. A small community in Marin County, tucked inside the Tomales Bay. After some twists and turns, carefully passing an entire Tour de France of cyclers, and smiling back at enough happy dairy cows to supply my morning coffee for years, we reached our destination – Hog Island Oyster Farm.

It turns out you don’t need cell service. You don’t need anything at all in this patch of paradise except oysters, lemon, butter, hot sauce and maybe some wine.

A visit to Hog Island was among the many tips we received when we announced – we’re moving to the East Bay. I was introduced to their oysters a few years ago when I visited San Francisco, but this, this is different.

This is the farm. This is rural California in all its glory. And as my husband and I said to each other a few minutes after we arrived – this is why you live here.


There are two options for diners at Hog Island. You can order raw oysters shucked for you at The Boat along with bread, cheese and wine or beer, and take a seat at one of the shared picnic tables (first come, first served).

Your other option is to reserve one of the (5, I think) picnic tables many weeks in advance. With my husband’s birthday in mind, I made a reservation for the end of February back in early January. Here you have a grill and a table to yourself. You bring along your picnic and grilling gear, extra eats, and wine or beer.

Oysters can be purchased near the entrance. You shuck them yourself, and then eat the delicious suckers raw or toss them on the grill. They provide shucking gear, lemon, hot sauce, freshly grated horseradish and Hog Wash (rice vinegar, shallot, jalapeno, cilantro and lime juice.) I’ll add that you are free to order anything from The Boat as well including oysters already shucked for you.

My tip – reserve a picnic table and get the early time slot.

We arrived at 10:30 and were among the first guests there on a Saturday morning. The tranquility of the area set the stage for our entire day. It was absolutely amazing.After soaking it all in, we headed over to buy our oysters.

I’ve never been a huge raw oyster fan. That was before I had a Hog Island oyster straight out of the tank, shucked for me. It tasted like the bay – light, salty, and refreshing. We ordered the Atlantics to eat raw, and the small oysters to put on the grill.

Two things I learned during our trip – 1) I cannot shuck an oyster to save my life, and 2) I love grilled oysters!

Fortunately, my husband was up for the challenge of shucking them all. And a challenge it was. It takes a lot of strength and just the right angle, something I couldn’t master in 3 hours.

If one were to shuck an oyster correctly (from what I understand), you would place oyster cup side down and insert the tip of the shucking knife into the pointed end at the hinge. Once the ligament pops, you slide the knife in along the inside of the top, flat shell and pop it off. Slide the knife under the meat to release it from the shell and remove any pieces of shell that might have broken off.

After gathering a few tips from the staff, we topped our open oysters with a little butter and placed them on the heated charcoal grill. Once the edges of the oyster began to brown we took them off with tongs, topped them with hot sauce and lemon juice, and ate them with a fork. Raw oysters are good, but the grilled are now my favorite.

After filling ourselves with oysters and sourdough bread, we were left with enough time to watch the water (my very favorite pastime), and take in what was around us. The area got crowded by lunchtime, but it was much less so than I was expecting. I’m sure it would be different in the summer. I’m also sure we will find out personally because we will be back a few more times this year. It may be the only time I actually look forward to seeing the words – No Service.

Want to create beautiful food and product photos that you can't wait to share?!
Discover your style, control the light, and shoot using the tool you know how to use (yes, your phone included). Learn about free resources, Live Q&As with Lori, and online courses you can take from anywhere in the world!
We respect your privacy. Unsubscribe at any time.