Browsing Category

Lunch and Dinner

Simple Coconut Chicken

August 26, 2009

One night recently when I asked my husband what sounded good for dinner he told me coconut chicken. It was at that moment I realized that I had not made this dish, a standard go-to meal back home, for almost two years. I couldn’t believe I had forgotten about it, and here I am in the middle of the land of all things coconut!
So I pulled the dish together that evening and I just happen to be making it again tonight. I’ve altered how I make it a bit now because the original method used a lot of butter. It definitely tastes good with that, but I wanted to give the chicken a more intense coconut flavor so I soaked it in coconut milk for a few hours before coating it and baking it in the oven.
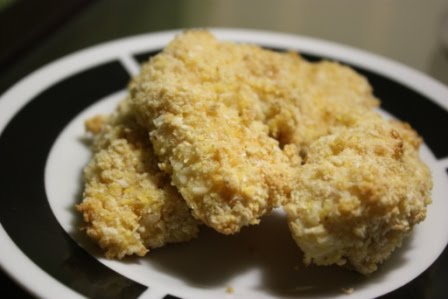
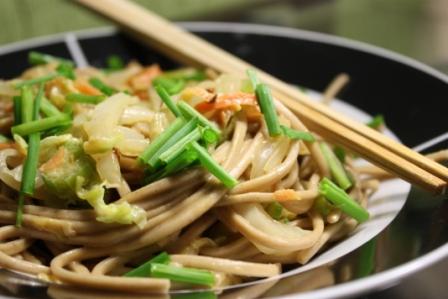
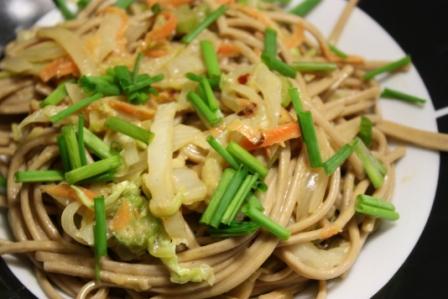
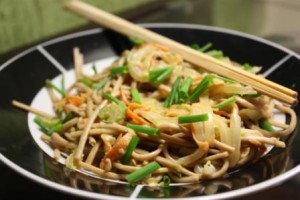
The milk kept the chicken moist, the bread crumbs give it a nice crunch and the flaked coconut offers a mild sweetness. I like to drizzle it with honey or it is great dipped in a Thai chili sauce. The leftovers are also good chopped up in a veggie stir-fry over rice.
This is one of those recipes without exact ingredients because I rarely measure. You might need to add a little more or a little less of each based on how much chicken you are making, and if you are using the whole breast or breast pieces.
Simple Coconut Chicken

2 large chicken breast, cut into bite-size pieces
1 cup coconut milk
1 ½ cups bread crumbs (your choice – panko, whole wheat, gluten free)
1/3 cup flaked coconut
½ tsp salt
¼ tsp black pepper
Arrange the chicken in a deep dish or bowl and pour over the coconut milk. Move around the pieces to coat them evenly, cover the dish and allow to marinate in the fridge for two to four hours (although I’m sure longer wouldn’t hurt).
On a plate or flat baking dish, combine the breadcrumbs, coconut, salt and pepper. Remove the chicken from the fridge and toss each piece in the breadcrumbs to coat evenly. Arrange on a baking sheet.
Bake at 400 degrees F for 25 to 30 minutes or until gold brown and the chicken is cooked through. You can flip the chicken once during baking to help it brown more evenly.


Do you have any past recipes that you loved, but have completely forgotten about? Or am I the only one who can’t seem to keep my recipes straight?

Culture-filled Friday: Strogonoff de Frango

August 14, 2009
For some reason I feel the need to introduce this recipe with a bit of explanation. Now, if I were one to associate negative terms with food I might call this post “Fattening Friday”. However, I try not to do that because I feel like even high calorie, low produce cultural foods should be savored. So instead I’ll go with “Culture-filled Friday” because if there is one entrée you will find on almost every menu in town it is Strogonoff de Frango (Chicken Stroganoff).

Stroganoff is a dish of Russian origin, but this area of Brazil has embraced it as its own. It is made differently due to the absence of sour cream, and has a topping of batata palhas (match stick potatoes). It can be found in many different forms – over rice, over a baked potato, on a pizza – you name it. I honestly think every restaurant has some version of it on their menu except for the sushi places. Heck, they would probably even make it for you if you made a special request.
While I’m not a huge stroganoff fan, my husband loves it. Here is a picture of his stroganoff potato from a stuffed potato restaurant in the mall. Huge, huh? And they say portion sizes are big in the U.S.

About a year ago I was spending the day with the wife of one of my husband’s coworkers and she made us Strogonoff de Carne for lunch so I was able to witness the process. It is a rather simple dish and hers had wine in the sauce as well as Worcestershire sauce. Most often when my husband orders it he orders the chicken variety so when I wanted to make a meal for him recently, I decided it would be culturally-correct of me to finally give stroganoff a try.

To be honest, the recipe I ended up finding for the chicken variety was tasty and this is coming from someone who isn’t the biggest Brazilian stroganoff fan. Something I think made a huge difference is that I had some spicy brown mustard on hand and I used it instead of yellow. It gave the dish a robust, tangy flavor that really stood out. I’d recommend that substitution. I served ours over potatoes because I had a few that needed to be used up.
So if you are looking for a stick-to-your ribs dish of Russian origin, but Brazilian flare – here you go!
Strogonoff de Frango
From FloridaBrasil.com
3 chicken breasts, sliced or cubed
1 clove garlic, minced
2 tbsp mayonnaise
1 tbsp butter
1 medium onion, finely chopped
½ cup ketchup
1/3 cup mustard (I used spicy brown)
1 cup jarred mushrooms, sliced
1 cup heavy cream (original recipe calls for crème de leite so if you can get the Nestle table cream often found in Latin food markets, use that)
Match stick potatoes
In a bowl, mix together the raw chicken, garlic and mayo. In a deep skillet or soup pot, melt the butter and add the onions, cook about three minutes. Add the chicken and cook until golden brown and cooked through. Mix in the mushrooms, ketchup and mustard. Stir in the cream and remove the pan from heat. Salt and pepper to taste. Serve over white rice or a baked potato and top with the match stick potatoes.

Gorgonzola & Black Rice Stuffed Peppers

August 13, 2009


Growing up, I never really liked my mom’s stuffed peppers (sorry Mom). I’m not sure what it was about the combination of tomato, rice and beef, but it was never appealing as a kid. Now, I enjoy those flavors more, but when it comes to stuffing veggies I like to branch out and try some different combinations.

I picked up some green bell peppers at the market last week. While the red and yellow varieties are much more to my liking, I often buy green to toss in recipes and to top our salads. Bell peppers in general are full of vitamin C and vitamin A, and I figure a few extra antioxidants here and there certainly can’t hurt.

I also learned an interesting tidbit of info when I was refreshing my nutrient knowledge. By the way, I typically research foods on WHFoods.com. It is such a great site that pulls together the latest research articles on all kinds of foods. Anyway, apparently bell peppers contain a recessive gene that eliminates the compound capsaicin which is responsible for heat in other varieties of peppers. I guess I found this especially interesting because I’m not all that familiar with the dominant and recessive genes of my fruits and veggies.

Moving on. Instead of adding these peppers to another dish, I decided a stuffed pepper sounded good for dinner last night. Given my so-so view of the traditional stuffed pepper, I took stock of what I had available and got to work. I had some black rice that needed to be used up. I love Gorgonzola cheese with walnuts so that gave me the idea that the nuttiness of the black rice might go well with a sprinkle of the cheese.

What I ended up with was a green bell pepper stuffed with black and long grain white rice, topped with savory Gorgonzola. The flavors went so well together – lightly nutty and salty with a touch of sweetness from the pepper.

I have a feeling this will now be my go-to recipe for stuffed peppers. My husband enjoyed it because the texture had a hearty, meaty taste without the dish actually containing meat. It is an ideal meat-free dish to incorporate into your week.

Gorgonzola & Black Rice Stuffed Peppers

4 small round green bell peppers, or two longer peppers
1 cup cooked long grain rice (wild or brown would work too)
¼ cup onion, finely chopped
2 cloves garlic, minced
¾ cup bread crumbs (white, wheat, spelt)
¼ cup chicken stock
½ cup cooked black rice
1 egg, beaten
½ tsp salt
¼ tsp black pepper
2 oz Gorgonzola cheese, crumbled

Preheat the oven to 350 degrees F and lightly coat the surface of a square glass baking dish with olive oil. In a large bowl mix together the white rice, onion, garlic and bread crumbs. Add in the chicken stock (or use water if you prefer a vegetarian option) and stir to moisten. Stir in the black rice (this will turn the mixture a dark purple). Mix in the egg and season with salt and pepper. If the mixture is too dry to stuff the peppers add a little more chicken stock.

Cut the tops off of your 4 round peppers or split your 2 longer peppers in halves. Clean out the seeds and large veins. Place them in the greased baking dish and fill each with the rice mixture. Top each with an equal amount of the cheese by pressing the crumbles into the rice. Bake for 45 to 60 minutes, until the pepper begins to brown and is tender. Serves 4.

Soba with Spicy Peanut Sauce

June 23, 2009

So, I’m beginning to think that getting settled back in is an illusion. I can’t seem to get completely organized and feel like I’ve been about two steps behind since returning to Brazil almost three weeks ago.

The research and providing you with any valuable health info has certainly been lacking, but the effort is still ongoing. I’m determined to have a post up about coconut oil this week and I have a few other topics that are begging me to look into them.
I may not have had much time to do research, but I am still cooking so a simple recipe will have to suffice until I get my act together.
I am infatuated with spicy peanut sauce. My husband can’t stand it. My husband was away on business last night. So what do you think I had for dinner? Yep, spicy peanut sauce.
I had never cooked with soba noodles until coming to Brazil. I’m not sure why that is. I guess I wasn’t really familiar with them. Soba noodles are a Japanese noodle made of buckwheat and wheat flours. I think they have more of a unique texture than flavor and I like to cook them until just barely tender.
I should mention that while I have made soba noodles I have yet to do anything culturally accurate with them. I plan to make spicy soba at some point, but haven’t taken on the challenge yet. Two Peas and Their Pod posted a wonderful recipe a few days ago for soba which is what got the noodles on my mind in the first place, but I didn’t have all the ingredients to complete that dish. I went another direction.
Soba with Spicy Peanut Sauce

1 Tbsp olive oil
2 cloves garlic, minced
¼ of a large onion, thinly sliced
½ cup carrot, shredded
1 cup zucchini, shredded
1 cup Napa cabbage, shredded or thinly sliced
Salt and pepper to taste
250 g soba noodles, cooked
2 Tbsp chives or scallions, sliced

Sauce:

2 Tbsp (generous) creamy peanut butter
1 Tbsp soy sauce
1 tsp sesame oil
1/8 cup water
1 clove garlic, minced
½ tsp ground ginger
½ tsp crushed red pepper (less or more depending on taste)

Heat oil in a sauce pan and cook garlic, onion, carrots, zucchini and cabbage until tender. Salt and pepper to taste, but remember that the peanut butter will add much salty flavor.
Whisk peanut butter, soy sauce and sesame oil in a small bowl. Gradually pour in water while whisking. It will be thick, but moisture from your cooked veggies will thin it more. Whisk in garlic, ginger and red pepper.
Pour the peanut sauce over the warm veggies in the skillet and toss to coat. Next toss in the soba noodles. Heat if it has cooled. Garnish with chives or scallions and serve.
Makes about 3 servings, depending on how hungry you are. As in if you just got back from a big workout, maybe only 2.

**Season the final dish to taste. You may find it needs more salt, pepper or red pepper once together. Also, an added teaspoon of sugar or a brown sugar will sweeten the peanut sauce if you prefer.

______________
P.S. My Cafe & Cream Shortbread is in the running for a French press coffee maker over at the lovely blog, My Food and Life Encounters. If you liked it, I’d love to have your vote over there via a comment. You should check out the blog if you haven’t, voting or not. Lots of great recipes!
Update: I won, I won!!!! Thank you to all who voted – Tangled Noodle, Cinnamon & Spice, Jefferson’s Table, 5 Star Foodie, So what are you making for dinner?, Mei and The Yeast I Could Do!
Hope I didn’t miss anyone. I owe you all a cafezinho!

Asparagus Pizza with White Garlic Sauce

May 28, 2009

Beautiful green stalks of tender asparagus have been plentiful around here. When it comes to my list of favorite vegetables unfortunately asparagus resides at the bottom of the list. I don’t exactly dislike it. Well, okay, maybe at one time I disliked it, but now it just isn’t my veggie of choice.

When it comes to nutrition there is really no reason why this spring vegetable shouldn’t be enjoyed. That is the case with most vegetables though, right? Our bodies need that produce and asparagus is full of vitamin K, folate, vitamin A and vitamin C.

This is the first year that I’ve had the chance to really experiment with it, though, and I’m finding that I enjoy it a bit more with each dish. For example, my brother threw some on the grill the other day and it was fabulous. I didn’t put a thing on it; straight off the grill and into my mouth. Excellent.

Tonight I decided I would try topping a pizza with some asparagus my dad had brought in from the garden yesterday. I combined roasted garlic with a basic white sauce. Then spread this over a wheat pizza crust and topped it with steamed asparagus and mozzarella cheese.

My original plan was to add caramelized onions, but I opened the fridge to find that we were all out. So I decided to use another garden treat and chopped up some scallions. I sprinkled these on the pizza as soon as it came out of the oven.


I find white sauce pizzas to be a pleasant change from the standard and this was no exception. Turns out asparagus is quite a tasty pizza topping.

Spring Asparagus & Scallion Pizza with White Garlic Sauce

1 head of garlic
Olive oil
1 wheat pizza crust
1 cup asparagus, chopped into medium sized pieces
1 tbsp unsalted butter
1 tbsp flour
1 cup milk (chicken stock would work too)
Salt and pepper to taste
1 cup mozzarella cheese, shredded
½ cup scallions, chopped

Preheat the oven to 375 degrees F. Slice off the top 1/3 of the head of garlic. Place on a piece of aluminum foil and coat with olive oil. Wrap in foil and roast for 45 to 60 min. Work on the rest of the pizza as it bakes and set aside when finished.

Steam the asparagus just until tender and bright green. Set aside.

Melt butter in a small sauce pan and sprinkle in flour. Use a whisk to stir constantly creating a roux. Slowly pour in milk as you whisk and allow mixture to cook until thickened, stirring constantly. Once it reaches your desired consistency (preferably a thick sauce) squeeze the head of garlic into the sauce. Whisk to break up garlic and then add salt and pepper to taste.

Spread sauce on crust and sprinkle with half of the cheese. Top with the asparagus and the remaining cheese. Bake until cheese is melted and bubbly. When I make my crust I partially bake it before adding the toppings so it takes about 15 additional minutes for the pizza to finish.

Once out of the oven top it with the scallions and serve.

The Roma

April 15, 2009

I wouldn’t say that the sandwich is a popular item with locals where we live in Brazil, but they are offered at most cafes and juice shops. Since I’m not one to enjoy sitting down to a plate of rice, beans and red meat for lunch on a hot day, I truly appreciate the attempt to offer the sandwich as a culinary choice and I’ve been introduced to a lot of new fillings and combinations.

There is a juice and sandwich shop in town called Jungle Juice. They serve excellent juices, açaí in a bowl and some tasty sandwiches. The first time we stopped by there one sandwich caught my attention and it has been my favorite ever since – The Roma.

I should probably tell you that if the quesadilla from yesterday was a bit out of your comfort zone regarding the use of a mango, this one might be too. The stars of the Roma sandwich are chicken, gorgonzola cheese and mango. I originally tried it because I wanted to be adventurous, and I was not expecting how wonderful this combination turned out to be.

The sandwich is served warm and I must admit that my recreation does need some practice. My version was good, but not exactly like the one at the restaurant. The lessons I learned include: 1) It needs mayonnaise. 2) The mango needs to be very ripe and very sweet.
I’m really not a big fan of mayo. I rarely get it on my sandwiches, however, to this particular sandwich it adds the moisture needed to make it more palatable. When it mixes with the gorgonzola it really takes away the identifiable mayo flavor.
The sweetness of the mango balances the saltiness of the cheese. The combination is excellent; much like what you get from gorgonzola and pears. However, the cheese is strong, so the mango needs to be very ripe and sweet to compete with that flavor.
Interested to try it?

The Roma Sandwich

2 French rolls or pieces of baguette (I used some whole wheat sandwich rolls this time)
1 ½ cups cooked chicken, chopped or shredded
2 to 3 ounces gorgonzola cheese
1 mango, chopped
Mayo to taste

First, toast the bread in the oven until it is nicely browned and set aside. You can do this while you are putting the sandwich fillings together.

In a skillet, heat the chicken. Toss in the mango and heat through. Next crumble the gorgonzola and add it to the skillet. Stir to heat and melt the cheese so that it is incorporated into the chicken and mango. Salt and pepper to taste if desired.


Spread a little bit of mayo on the toasted bread and fill each sandwich roll with ½ of the chicken filling. Serve warm.

Sweet and Spicy Mango Quesadilla

April 14, 2009

Yesterday I mentioned a certain class in grad school which always brings back memories of my initial interest in the mango. It just so happened that in this same class there was also a woman whose family owned a restaurant in a nearby town.
 
We would often get into class conversations about food while waiting for the instructor to show up and my ears always perked up when she started talking. For me, owns restaurant translates to – has some great food ideas and recipes.
 
As we were nearing the end of the semester and summer around the corner she mentioned her favorite snack to make was a mango, jalapeno quesadilla. I was intrigued from the moment I heard those words. There is no better combination for me than that of sweet and spicy. Add some warm, gooey cheese to that and the dish is nearing perfection.
 
I have kept that combo in my mind for what seems like years and I finally got around to giving it a try.
 
Wow! What an amazing creation!
 
The sweet mango cools the flavorful heat of the jalapenos. The salty cheese balances out the flavors. The slightly toasted tortilla only adds to the complex texture.
I used a cheese here that is very similar to a Colby back home. I could definitely see Cheddar working well or if you like even more heat maybe a Pepper Jack.
 
Sweet and Spicy Mango Quesadilla
Large flour tortilla
1/2 cup mango, sliced or diced
1/4 cup cheese
Jalapenos, sliced or diced (from the jar, but fresh could work too)
Place tortilla in a warm skillet (use a little butter if desired) and top with ingredients. Fold in half and toast on each side until slightly browned and cheese is melted.
 

Beef and Eggplant Stromboli

March 13, 2009

There is this local pizza joint in my home town the makes the most amazing Stromboli. It is a favorite of my whole family and any time we are together you can bet that at least one dinner will end up being Stromboli night.
I’ve never had anything comparable. They use the most amazing soft, white bread that has been toasted with butter giving it this perfect crisp, chewiness. The meat is of sausage type, very finely ground with a sauce that you can order mild, medium or hot made so with varying amounts of crushed red pepper. Each bite is just full of chewy, spicy, cheesy goodness. It is one of those things that, try as you may, you will never be able to replicate exactly. Good for them, I guess.
Despite failed efforts I still continue to make the occasional Stromboli. I seem to change it a bit every time and last night was a good example. Earlier in the week I had roasted an eggplant intending to make some Baba ghanoush only to realize that I was out of tahini. Not wanting to waste it, I thought why not incorporate it into my sandwich somehow for a bit of a nutritional boost.
After eating the Strombolis, I expressed to my husband how great they were. Sorry, I’m not at all afraid to be proud when I make something darn tasty. The opposite happens equally as often so I figure take credit of something good when you can.
I purchase bread at a local bakery here and this time I used pão francês; small roll-like breads that are a bit lighter and softer than a traditional baguette. Any type of roll would do though, just pick your favorite.

While I can’t pass on a Stromboli as tasty as the one I get in my hometown, this one isn’t so bad, as well as not being so bad for you.

Beef and Eggplant Stromboli
4 rolls or pieces of baguette, 3 to 4 inches in length
2 cloves garlic, minced
½ green bell pepper, chopped
½ medium onion, chopped
½ lb lean ground beef
Insides of one roasted eggplant
½ to 1 can of tomato sauce
1 tsp dried basil
1tsp dried oregano
¼ tsp crushed red pepper
Dash of salt and black pepper
1 cup shredded cheese
Split each of your breads and broil, cut side up, for 3 to 5 minutes until dried out a bit and slightly browned. Set aside.
Heat some olive oil in a skillet and add garlic. Cook for one minute then add pepper and onion. Cook for two minutes and add beef. Once beef is browned add in eggplant and heat through. Add sauce to desired consistency and seasonings, let simmer a few minutes for flavors to blend.
Spread ¼ of the sauce mixture on the bottom of each Stromboli bread. Use ¼ cup cheese for each sprinkling half on the meat mixture and half on the top half of the roll.

Broil until cheese is melted and bubbly. Assemble the sandwich and serve.

Stuffed Potatoes

March 11, 2009

I’ve always been a fan of the baked potato. I was rather sad when it got such a bad rap as the “carbs are evil” campaigns started around the nutrition world. I am very glad to see that the potato is being promoted for its positive points now and showing up more regularly on healthy plates. Just ask Denise Austin about it – fitness icon turned potato pusher.

My selection of baked potato toppings has changed over the years. I have never really been a butter and sour cream person. There was once ranch dressing, then I moved on to salsa and lately a little hot sauce is all I need.

Around here, the stuff potato is a popular item in the mall food courts. While some of the stuffings aren’t the best for you, you’ve got to admit that when it comes to health you can do a lot worse in a food court than a baked potato.

I especially like that they have a “light” menu at these places because that is usually where my favorite combination resides. I posted about the arugula and sundried tomato combination that I was introduced to since coming to Brazil. You can find it on everything from sandwiches to pizza and also on your baked potato.

So here is the one I get at the food court. Dark leafy greens, anyone?


Here is my recreated version.


It makes for a simple, tasty lunch and is, without a doubt, full of vitamins. The best way to eat it is to get in there and mix everything up so you’ve got a little potato in each bite.

All you need is – a baked potato, chopped arugula, chopped sundried tomatoes and a little of your favorite cheese. You can open the potato and throw the cheese on first to melt it, or you can dice it and toss it with the veggies.

I’ve gotten more creative with stuffing my potatoes since we made this cultural discovery, which actually comes from the UK in the eyes of Brazilians. Any time there is a world food fest here the tent representing England serves stuffed taters.

I didn’t get a photo, but last night I browned up some lean ground beef with onions and peppers, and added a little bbq sauce. The mixture went on top of our potatoes with a little cheese. That was also a great combination.

How do you stuff your potatoes?

*********************************************

Over the past few weeks I’ve made some of the recipes from other food bloggers and thought I would mention a couple. Both turned out great!

Mongolian Beef from Pink Bites which I turned into a lettuce wrap.

Homemade Bubbly Beer Bread from Zesty Cook. I used the Brazilian Beer, Bohemia.

Stuffed Zucchini

January 21, 2009

One thing we always had a lot of growing up was zucchini. My dad’s garden would overflow with it for a few weeks each year when it was at its peak. During this time we would overdose on it – fried, boiled, in bread, as fritters. Shredding it was never fun, but the end result was usually worth it.
While zucchini is a summer squash this dish has all the comforts of winter for me. I found it on the Food Network a few years ago. If I can score an overpriced zucchini this time of year at the store, I like to whip it up for something different. It always makes for a lean, high protein, healthy carb dinner with all the vitamins tomatoes and squash have to offer.
I like the zucchini stuffed better than I do the peppers so while the original recipe is Stuffed Zucchini and Red Bell Peppers my version is just zucchini. Below is my adapted recipe, click the link to see the original.

Stuffed Zucchini

Adapted from the Food Network and Giada De Laurentiis

Olive oil
1 small onion, grated
¼ c parsley, chopped
1 egg
3 tbsp ketchup
3 cloves garlic, minced
1 tsp salt
¼ tsp pepper
1/3 c grated parmesan
¼ c dried bread crumbs
1 lb ground turkey
3 to 4 zucchini, halved and hallowed out
1 ½ c marinara sauce (I use my homemade version)

Preheat oven to 400 degrees F. Drizzle oil in oven proof baking dish. Whisk together – onion, parsley, egg, ketchup, garlic, salt and pepper. Mix with ground turkey, bread crumbs and cheese. Stuff the zucchini with the meat mixture, arrange in dish. Cover with marinara (you could also top it with cheese) and bake for 45 minutes.
Want to create beautiful food and product photos that you can't wait to share?!
Discover your style, control the light, and shoot using the tool you know how to use (yes, your phone included). Learn about free resources, Live Q&As with Lori, and online courses you can take from anywhere in the world!
We respect your privacy. Unsubscribe at any time.