Browsing Category

Lunch and Dinner

Roasted Corn and Pepper Wheat Berry Salad

August 8, 2011
 

Roasted Corn and Pepper Wheat Berry Salad Recipe | Fake Food Free
Fresh corn is finally here and lots of it! I’ve mentioned before that I feel a bit sorry for fresh corn. It often gets a bad rap for being turned into corn syrup and invading our food supply, and it’s almost always categorized as a dreaded starchy veggie. I think all of this causes us to overlook how truly wonderful a fresh ear in the middle of summer can be.

My quest this summer has been to avoid taking any seasonal fruit or veggie for granted and corn has been no exception. I bought 2 dozen ears a couple weeks back and froze half of it. The rest was roasted and skillet-fried for salads and fresh salsas.

Growing up my mom always made fried corn. It really wasn’t fried, just cooked in a skillet with butter and green peppers. I loved corn prepared like this as much as eating a crisp, sweet ear on the cob.

Knowing how good it is from the skillet and knowing how much I like roasted vegetables, I just had to turn on the oven in the heat of summer to roast some up.

Roasted Corn and Pepper Wheat Berry Salad Recipe | Fake Food Free

I used a mix of peppers from our garden, both hot and sweet, but any variety would work. I added onion and some herbs as well.

This was one of those eat-the-entire-bowl kind of salads. So sweet from the fresh corn and just enough savory flavor from the roasting.

I wanted to make it into more of a meal so I added some cooked wheat berries which worked out really well. I actually enjoyed the salad both warm and cold. Both versions tasted equally as good.

Roasted Corn and Pepper Wheat Berry Salad Recipe | Fake Food Free

Roasted Corn and Pepper Wheat Berry Salad

Makes: 4 to 6 servings

What you’ll need:
Kernels from 2 ears fresh sweet corn 
2 Poblano peppers, cored and chopped
2 Anaheim peppers, cored and chopped
1 yellow bell pepper, cored and chopped
2 Pinata peppers, cored and chopped (these are similar to jalapenos)
2 sweet banana peppers, cored and chopped
½ medium sweet onion, chopped
1 tablespoon olive oil
1 teaspoon each finely chopped fresh herbs – basil, thyme, rosemary
Salt and pepper to taste
1 cup cooked wheat berries

How to make it:
Preheat the oven to 400 degrees F. Place all veggies on a large baking sheet. Sprinkle with the herbs and olive oil. Turn the veggies to coat them with the oil.

Roast for 20 minutes, stirring once halfway through. Veggies should begin to brown slightly and soften.

Remove from the oven and season with salt and pepper to taste. Transfer to a large bowl. Stir in the wheat berries. Serve warm or cold.


Thanks for reading! All images and content are the property of Lori Rice unless otherwise stated. Please do not republish full recipes and images without written permission. What is okay? Feel free to Pin images, share links to my posts or share the photo in a round up post with the title of this recipe and a link back to the post. Confused about copyright and food blogs? Here is some helpful information on Recipe Attribution. If you want to use a photo or full recipe, just ask. I’m sure we can work something out.


Campfire Cookery: A Cookbook Review

July 6, 2011

I’ve become more familiar with campfire cooking over the years, but when I first reviewed this cookbook, Campfire Cookery, it was all new to me! This book remains one of my favorites and I love making this recipe during tomato season!

Caramelized Tomato Tarte Tatin à la Clark from Campfire Cookery on fakefoodfree.com   

Other than hot dogs and S’mores I can’t say I’ve ever taken advantage of a campfire for cooking. My husband likes to tell me stories of his Boy Scout days and all the great foods they used to make – biscuits, cobblers . He promises they tasted amazing.

It seems that the campfire cooking theme is big this summer so when I found out about Campfire Cookery: Adventuresome Recipes and Other Curiosities for the Great Outdoors by Sarah Huck and Jaimee Young I couldn’t wait to get a copy. If there is one cookbook that is not on my shelf, it is certainly one about campfire cooking!

This cookbook is all kinds of fun! You’ll learn everything you need to know about campfire cooking from splitting wood to the appropriate temperatures for cooking to suggested campfire songs. Then there are all the great recipes that are anything but your standard pork and beans. Proof is in the Scape Risotto with Cured Ham, Lamb Tagine with Preserved Lemon and Dates, and seven varieties of S’mores including Honeyed Chocolate Orange!

If you don’t think you’ll find yourself out in the forest for dinner anytime soon, no worries. There are plenty of recipes that don’t require a campfire and even those that do can be modified for kitchen cooking. However, if you have the opportunity to do any campfire cooking consider this cookbook your strongest ally.

When I turned to page 152, I could not wait to try Caramelized Tomato Tarte Tatin à la Clark. I have to admit, there were no campfires to be found or the opportunity to create one so I made this recipe in the kitchen in a 375 degree F oven. It would have worked well on our ceramic grill, though, too.

Caramelized Tomato Tarte Tatin à la Clark from Campfire Cookery on fakefoodfree.com

I know it’s hard to believe, but I don’t have a cast iron skillet. I know. It’s on the list. However, this recipe gave me the perfect opportunity to use my soap stone pot that I got in Belo Horizonte, Brazil. It worked out so well and I was happy to put that pot to use.

This tarte tatin smelled absolutely amazing when it was baking. I knew it was going to taste so good. I used unbleached all-purpose flour for the crust and it turned out light and flaky. Our cherry tomatoes are just now coming on so I had a few of those, some San Marzano tomatoes chopped and I even threw in a couple tomatillos.

The tomatoes and caramelized onions are so sweet and there is just enough salty, buttery flavor from the crust to offset the sweetness. This is one recipe I will be putting to use all summer. Once our cherry tomatoes come on full force I’ll likely be baking it to take to friends as well. If I’m lucky, maybe I can do the real thing and try it at the campfire.

Caramelized Tomato Tarte Tatin à la Clark
Reprinted with permission from Abrams Books
Provides 4–6 portions

From the book: Our friend, the gifted food scribe melissa clark, inspired this dish. She prepares a similar version in the oven and tops it, decadently, with a puff pastry crust. Alas, fire cookery has its boundaries, and unfortunately, puff pastry pushes them. Here we’ve substituted her brilliant pie crust recipe, which is equally divine. When summer comes, and ripe, sweet tomatoes drip from the vine like gems on a countess’s décolletage, do not overlook this recipe. It is a worthy use for Nature’s bounty.

2 tablespoons unsalted butter
2 red onions, halved and thinly sliced
3 tablespoons plus 1 pinch Demerara or raw sugar
1 1/2 pounds mixed heirloom cherry tomatoes (4 to 5 cups)
1/4 cup chopped pitted kalamata olives
2 tablespoons chopped fresh thyme leaves
1 tablespoon extra-virgin olive oil
1 1/2 teaspoons sherry vinegar
1 large pinch each kosher salt and freshly milled black pepper
1, 10-inch pie crust (the book refers to Melissa Clark’s Pie Crust
Unparalleled, page 78)

Prepare a medium-high-heat fire, with the flames occasionally licking the grill grate. Let it burn steadily until it begins to form glowing, ash-covered coals and embers, about 45 minutes. Then use a coal shovel or like implement to scrape a bed of embers off to the side of the fire pit. Nestle the skillet’s lid into the flames to heat.

Place the skillet upon the cooking grate. Add the butter and melt completely. Stir in the onions and a pinch of sugar. Cook, stirring occasionally, until the onions are dark golden and caramelized, about 20 minutes.
In the meantime, in a bowl, combine the tomatoes, olives, thyme, olive oil, vinegar, and salt and pepper. Stir the tomato mixture into the skillet with the caramelized onions.

Caramelized Tomato Tarte Tatin à la Clark from Campfire Cookery on fakefoodfree.com

Quickly rake hot coals from the embers of the fire to form an even bed at the side of the fire pit (be sure to save some coals for one’s lid).

Place the skillet atop the bed of coals. Unwrap the pie crust and arrange it neatly on top of the tomato mixture, tucking the edges into the sides of the skillet. Using a knife, cut several vents in the pastry lid so that steam may escape. Remove the hot lid from the fire and place it on top of the skillet. Generously heap additional red coals onto the lid. It is important that the coals on the lid remain blazing hot during baking; should they cease to glow, heap on a fresh batch. Bake until the crust is golden and firm to the touch, about 20 minutes.

Increase the heat of one’s fire to high; Return the skillet to the cooking grate and let simmer until the juices beneath the surface of the pastry begin to bubble thickly through the vents and take on a jamlike appearance, 15 to 20 minutes. Let cool 5 to 10 minutes in the skillet before slicing into wedges and serving, crust side up, or flipped, crust side down, onto a plate.

Caramelized Tomato Tarte Tatin à la Clark from Campfire Cookery on fakefoodfree.com
 

Get the book:


On a side note, can you believe this is my 500th post?!


Disclosure: A review copy of this cookbook was sent to me free of charge. I was under no obligation to review it and received no compensation for doing so. This post contains affiliate links. 

Thanks for reading! All images and content are the property of Fake Food Free unless otherwise stated. Please do not republish full recipes and images without written permission. What is okay? Feel free to Pin images, share links to my posts or share the photo in a round up post with the title of this recipe and a link back to the post. Confused about copyright and food blogs? Here is some helpful information on Recipe Attribution. If you want to use a photo or full recipe, just ask. I’m sure we can work something out.  

Filipino-style Pastured Pork Kebabs

July 4, 2011

It’s an interesting experience to view your country through the eyes of someone else. Looking back I’m not sure why I hadn’t considered what a highlight this would be during our time living abroad. We encountered people who were in awe of us and those who passed judgment on us, not after getting to know us, but simply because we were from the United States.

Both situations made me equally uncomfortable, and it made me very self-aware regarding how I was perceived by others. What stood out to me the most was how the US was truly seen as the land of opportunity among the majority of people we encountered.

While we were welcoming a new adventure and happily leaving the US for a while, it felt so strange to have people view my country in this way when I really just wanted to experience theirs. After you encounter these reactions time and time again it makes you begin to think – maybe I should appreciate my own country a little more.

That is exactly what happened. Although what I appreciate about it is something that I never really considered before.

Sometimes I think we fail to remember that unless we happen to be American Indians, we’re not from here. Somewhere along the line someone in our families crossed those waters and was allowed to enter this great country we now call home. That may have happened many generations ago for some, or last year for others.

Personally, I don’t wave my flag to say ours is better than others. It’s waved to say I appreciate those who fought for the freedoms of this very diverse country, a diversity that began long ago and continues to this day. What I appreciate the most is that I can live and work among people whose cultures and heritage make my life richer whether it’s rooted in the hills of Kentucky or brought with them from abroad.

All that being said you likely also know my appreciation for food culture in this country. So a 4th of July barbecue taking place at our house just had to have a bit of an international flare.

On Friday, we stocked up on a ridiculous amount of local, pastured pork from Marksbury Farm Market. The pork butt was rubbed down, smoked and served US-style with sweet and spicy BBQ sauces. The 6 lbs of pork sirloin kebabs, on the other hand, were headed in a different direction.

In college, my husband had a friend of Filipino heritage and his family would throw some amazing barbecues. I had the opportunity to attend one and the pork kebabs were simply incredible. My husband learned to make their delicious marinade and we thought it would be a great way to make our own barbecue this weekend a bit more international.

I stocked up on veggies from the Farmer’s Market on Saturday morning. This included potatoes for my Mustard Chive Potato Salad (although chives were replaced with dill this time and I used a lot more Greek yogurt), and colorful cherry tomatoes really brightened up the Curry Wheat Berry Salad. Basil from the garden and a good bunch of heirloom tomatoes rounded out the meal with a Caprese Salad.

It all went over well, but the pork kebabs were definitely the star for us. I won’t hide my excitement that while most of the food was gone, there were a few pork kebabs leftover. Whether you use it for chicken, pork or beef, or what the heck, even tofu, the Filipino-style marinade is outstanding.

Filipino-style Pastured Pork Kebabs

6 lbs pork sirloin, cubed and skewered
3 heads of garlic, cloves smashed and peeled
Juice of 8 oranges
4 cups soy sauce
1 ½ cups white vinegar
½ cup brown sugar

Place the kebabs in a deep baking pan. It’s best to work the marinade in two batches so divide each of the ingredients in half. Add half the garlic cloves, the juice of 4 oranges (reserve the peels), about 2 cups of soy sauce, ¾ cup vinegar and ¼ cup brown sugar to a blender. Blend on medium to high until all ingredients are mixed and the marinade is somewhat foamy.

Pour the marinade over the pork and continue with the second batch of marinade. Once all of the marinade is on the pork, place the leftover orange peels among the kebabs. Cover and refrigerate for 8 hours or overnight.

When ready to grill, once the grill is nice and hot, cook the pork to a temperature of 160 degrees F.

Lemon Feta Orzo with Shrimp

June 19, 2011

The problem with developing an interest in food is that little by little one becomes a food snob. You might swear it will never happen, but the transition is very slow, barely noticeable at first. You find you start to get a little pickier. Then you find yourself completely turning down things because they just aren’t up to your standards. That’s when you realize it.

I’m a food snob.

It may not be in the traditional sense. I don’t need fancy caviar and champagne, but I do want authentic Asian cuisine and microbrews.

I think it started with coffee. There was a day when I would drink that stuff that is produced affordably for the masses at conferences or in the typical office setting just so I could have my coffee. Now, no thanks. I’d rather go without than suffer through a mediocre cup.

Then it moved on to cheese. While it doesn’t have to be imported, I definitely would prefer a small scale creamery making authentic varieties. At the very least, I have to buy it by the block and shred it myself. That being said, I haven’t been to France yet, so I have a feeling things may only get worse.

The latest addition to my food snobbery list is pasta. Once I made homemade pasta I was sold that the time invested is completely worth the final result. I rarely have the desire to buy and boil up dried pasta. However, some of those fancy shapes and sizes are a bit too difficult for home production, for me anyway.

Orzo is the first one that comes to mind. I love orzo and I’m just not sure I would have the talent or patience to make all those little pieces!

So okay, maybe I’m not as snobby as I thought, but I am starting to get the impression that in certain situations my standards are a bit high. I guess that’s just more reason to travel for the best and make the rest!

Lemon Feta Orzo with Shrimp

1 lb orzo, cooked to al dente
2 tbsp olive oil
2 cloves garlic, minced
2 spring onions, sliced (greens reserved)
20 to 25 shrimp, thawed if frozen
Juice and zest of 1 lemon
1 cup black olives, sliced
½ cup feta cheese, crumbled
1 tbsp fresh parsley, chopped
½ tsp black pepper

Heat 1 tbsp of the oil in a large, deep skillet (a wok works well) over medium-high heat. Add the onions and garlic. Cook 1 to 2 minutes. Add shrimp, the juice of half the lemon and the zest of half the lemon. Cook until the shrimp just begin to turn opaque, or if already cooked, just until they start to heat through.

Add the drained pasta to the skillet. Stir in the olives, and feta. Continue to cook until the shrimp is cooked or heated through. Remove from heat. Add the remaining tbsp of oil, the juice and zest of the other half of lemon, the reserved onion greens (scallions), parsley and pepper. Stir to combine all ingredients. Serves 4 to 5.

Grilled Pizza – Six Ways

June 4, 2011

You say grilling season, I say…pizza!

Yes, I know that other things like pork chops, hamburgers and veggie skewers may come to mind, but I have officially decided that my absolute favorite thing to grill is pizza.
We have a ceramic grill and those mesquite wood chips infuse the crust and toppings with a flavor that words can’t describe. From savory to sweet, there isn’t any kind of pizza that I don’t like grilled.
On Memorial Day, I was determined to kick off the grilling season with this favorite. Knowing that I’d be traveling this week for work I made up two batches of dough and lots of flavor combos so that my husband would have some leftovers during the week.
I have a favorite pizza dough that I make every time from Food Embrace (formerly Off Her Cork). I’ve mentioned it before and you can find the recipe there. I often switch the flour combos up and this time I used (for a double batch) 2 cups of unbleached white flour and 6 cups of white whole wheat flour. This dough rises every time without fail and it grills up so well.
I had the garden in mind for these combinations. Arugula is just beginning to grow, but I couldn’t wait any longer so I picked a few pieces early for one of my favorite pizzas. The loads of kale we have came in handy, too. Herbs were perfect for the cheese pizza and the strawberries came into play for the dessert pizzas.

I had picked up some local, grassfed brisket that had been smoked a few days prior and it was a bit too fatty for us. Not knowing what else to do with it besides sandwiches, I was so glad my husband came up with the great idea of dicing up the lean portions and using it for the pizzas.

Below are all the combos from this round of grilling. No measuring necessary. I eyeballed it all and used the amount I wanted based on my preferences. I divided the dough into 7 portions and we had 6 different topping combinations. All were different in size which is the fun of pizza making!
Although you might want to ignore the guava and cheese pizza. We had a bit of a mishap with the dough and it is more of an H than a circle or oval.
I love taking a few photos when my husband isn’t paying attention and this one depicts the necessary beverage for pizza grilling. We had picked up some imports earlier in the day.
Using plenty of olive oil and cornmeal to coat the dough, the grill was heated to about 350 degrees F and my husband grilled one side of the dough for about 3 minutes. The pizza dough is then flipped onto a tray and comes inside for toppings. So we are putting the toppings on the partially cooked side. Then it goes back on the grill for another 3-5 minutes with the uncooked side down. This way, the rest of the dough bakes as the toppings melt.
You’ll notice that all the photos are grill-side shots. Time is of the essence when grilling pizza because it will cool quickly. I was so hungry for pizza that no time could be wasted for photos once it was slid off the grill!

Kale and Mushroom
Red sauce (any of your favorites will do)
Sauteed kale and mushrooms (toss in a skillet with olive oil until kale is wilted)
Mozzarella

Arugula and Sundried Tomato
Mozzarella
Sundried tomatoes, thinly sliced
Arugula, chopped if leaves are large

Cheese and Herbs
Red Sauce
Mozzarella
Cheddar
Fresh oregano leaves
Fresh thyme leaves

Brisket and Blue Cheese

Red Sauce
Cheddar
Mozzarella
Blue cheese
Smoked brisket, finely diced

Peach and Strawberry

Peach preserves (I used what I had canned last year)
Strawberries, sliced
Mozzarella
Romeu e Julieta (Guava and Cheese)
Goiabada (guava paste, chopped, or guava jam)
Mozzarella

Ataulfo Mango and Jalapeno Quesadillas

April 26, 2011

There are few fruits I enjoy more than the Ataulfo Mango. These little yellow mangos are the size of your palm and they melt in your mouth like butter. Also called Champagne Mangos, they have a smooth texture with none of the fibrous or stringy pulp you find in, say, a Tommy Mango.

Unfortunately, their season is only about 2 to 3 weeks here. They are imported from Mexico by Whole Foods and Wal-mart (in this area). Even sadder is that this season has almost come to an end. So I guess you can say this post is in honor of their tastiness. It also works well with other varieties of mango so don’t let the lack of Ataulfo mangos hold you back!

I’ve shared this recipe before, but with it spotlighting one of my favorite flavor combinations (and with a few better photos this time around) I thought it worthy of a repost. Not to mention, this time I made them with homemade corn tortillas.

No recipe is necessary. You simply add as much of each ingredient as you like. You’ll need about a half mango for each quesadilla if your tortillas are small, about 5 inches in diameter.

Ataulfo Mango and Jalapeno Quesadillas

Ataulfo mango, diced
Diced or sliced pickled jalapenos
Shredded cheese, I used a whole milk mozzarella
2 tortillas (I’m partial to homemade)

Place all ingredients on one tortilla. You can help it melt a bit by popping it in the microwave for a few seconds. Top it with the other tortilla and heat over medium-high in a skillet until the tortilla is slightly browned and crispy.

I’ve also tried the combo in an Ataulfo Mango Jalapeno Pizza. Equally as good!

Goat: Meat, Milk, Cheese – A cookbook review

April 18, 2011

I remember the first time I tasted goat cheese and I can remember how much I disliked it. That tart, tangy flavor was so foreign to me, like nothing I’d had before.

I’m not exactly sure what happened. Either my tastes developed or I gave into all the people around me who couldn’t stop raving about it, but the second time I tried it things had changed. I couldn’t get enough of the smooth, creamy texture or the flavor I once found too strong.

Now, I’m ordering plates of it as an appetizer, I buy both Chèvre and aged goat cheese at the farmer’s market and I jumped on an opportunity at work last fall to attend a goat cheese making course at a local farm. It’s now both a luxury and a staple.

So when I heard about the cookbook Goat: Meat, Milk, Cheese by Bruce Weinstein and Mark Scarbrough I was already day dreaming about the recipes it might contain before I got the copy in hand.

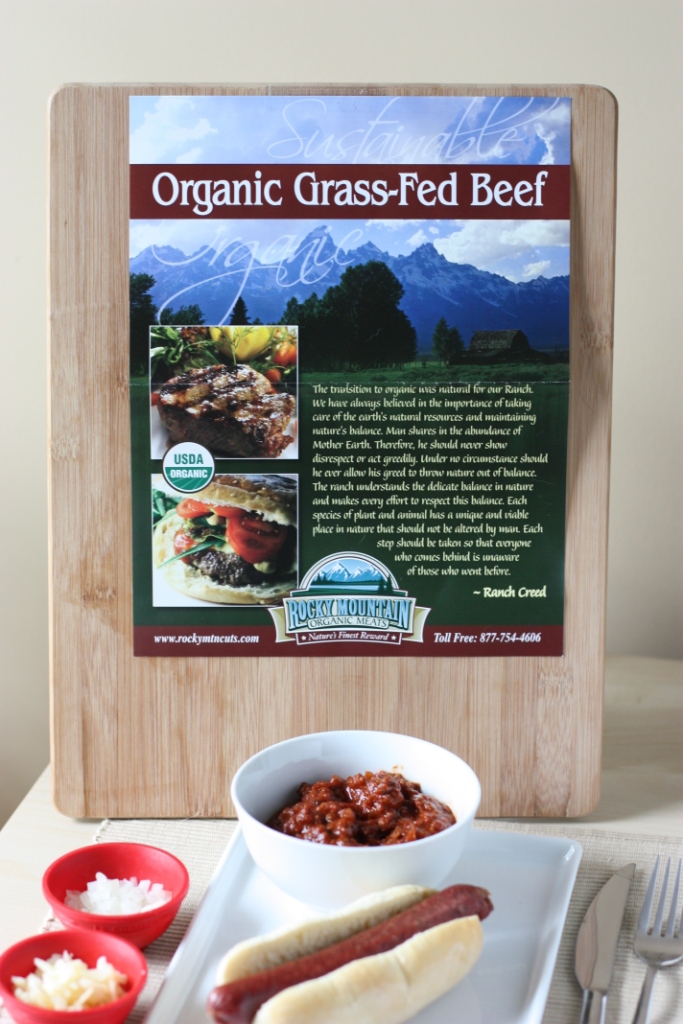
We’ve established that I love goat cheese, but this cookbook also highlights goat meat. A large gold emblem on the front cover states, “The most widely eaten meat across the globe.”

I can’t say I’ve had an abundance of goat meat, but I have tried some dishes, in Jamaica actually. I am intrigued with its popularity and use around the world, much of which is spreading across the U.S. Even a local international market here in central Kentucky sells cuts and goat meat production is growing rapidly in the ag world.

Whether your pick is goat meat, milk or cheese, or all three together, this book has it covered. There’s nothing out there quite like it. Chapter 1 is all about goat meat and some amazing recipes that highlight it. They are as exotic as Goat and Quince Stew, Normandy-inspired Shanks with Butter, Apples, and Cream and Kibbeh, something we had often in Brazil. Others are as familiar and comforting as Goat Meatloaf and Chili.

Chapter 2 covers Milk and Yogurt. It is in this section that I begin to become amazed at the variety and creativity. Chilled Blueberry Tzatziki Soup and Goat Milk Fudge are just a couple of the things that you don’t see every day.

Chapter 3 is all about glorious goat cheese. The No-Holds-Barred Mac and Crab and Goat Cheese, Chèvre Truffles and Goat Cheese Brownies have topped my list. Notice that I keep mentioning these chocolate creations. I am now intrigued by the idea of goat cheese and chocolate!

In addition to all the background information on the foods of each section as well as a culinary history lesson that accompanies the ethic recipes, there is the beautiful food photography. This is one of those books you’ll spend days browsing, followed by days in the kitchen making the recipes.

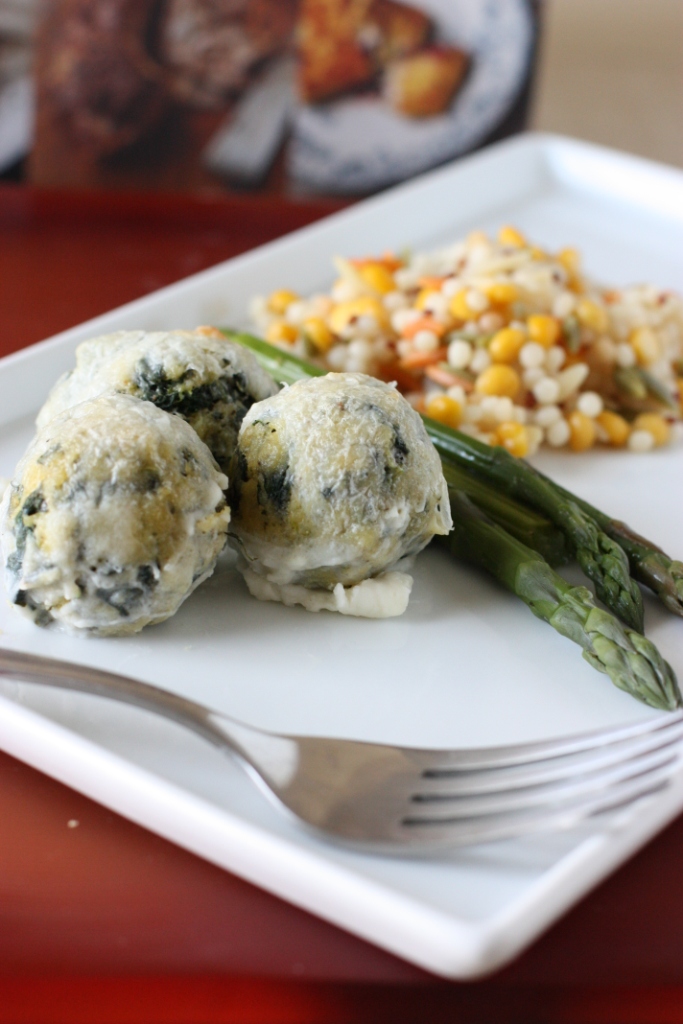
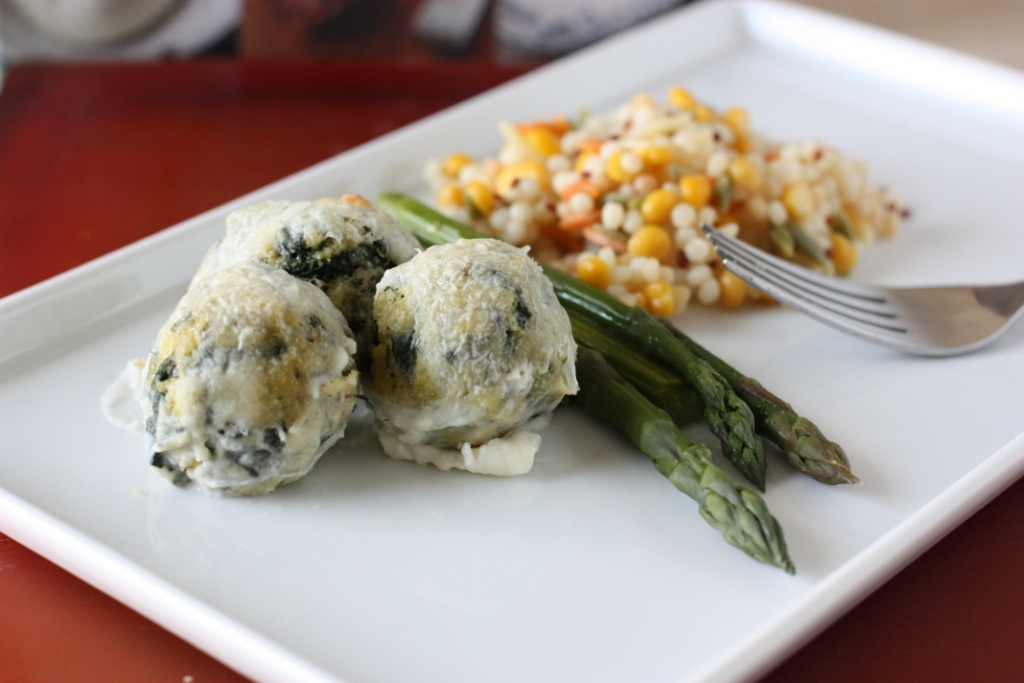
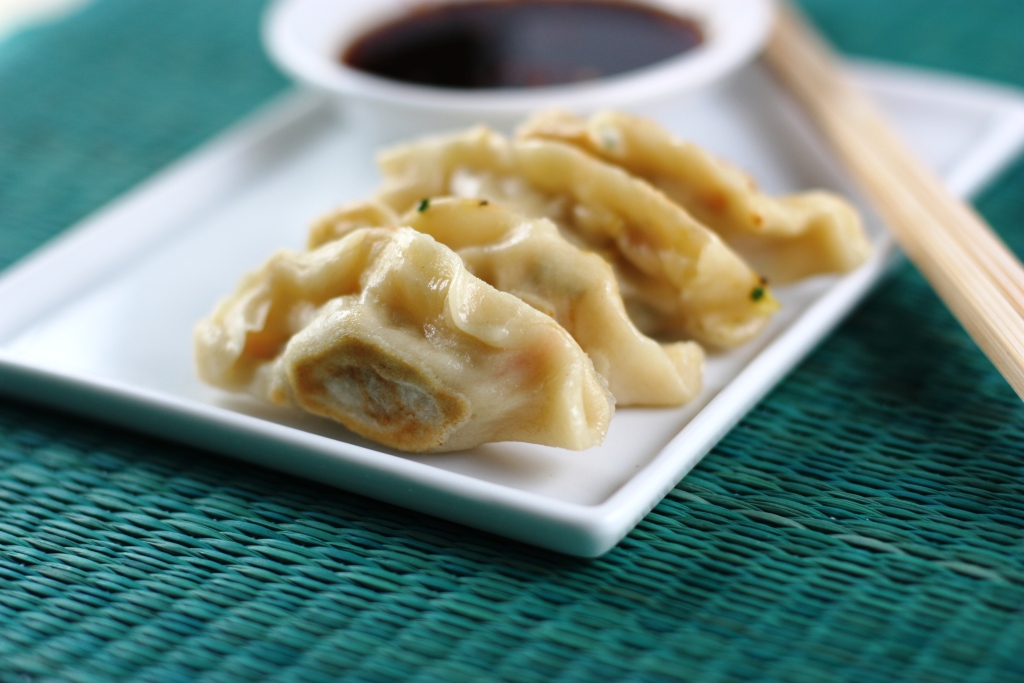
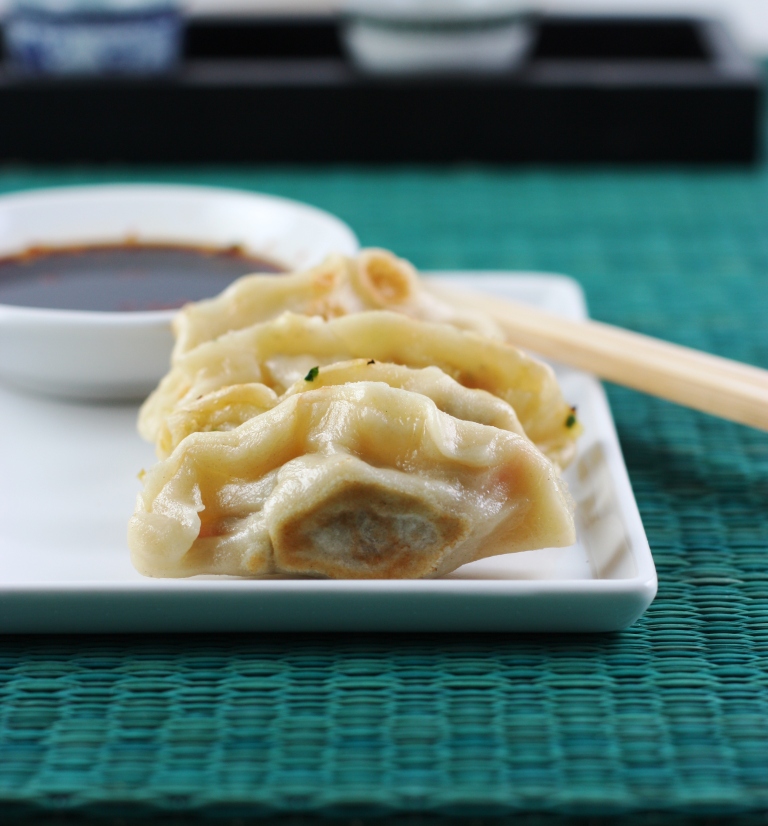
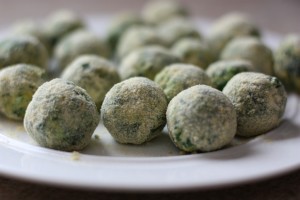
Given my love of goat cheese, it’s probably no surprise that I wanted to make a recipe out of Chapter 3. I wanted to go with something unique and the Baked Spinach-and-Goat-Cheese-Dumplings caught my eye. Trust me, if you saw the picture in the book, they’d catch yours too.

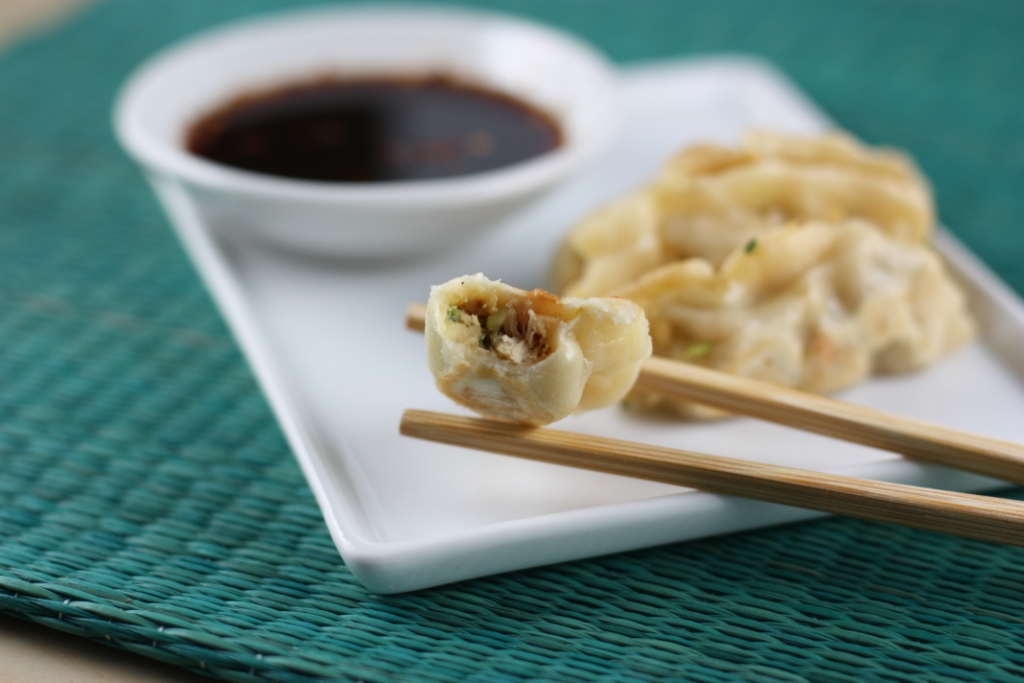
These are so easy to make and the result is outstanding. The dark greens, goat cheese and lemon blend into a flavor that is earthy and refreshing at the same time. They are hearty and filling. If you have meat lovers in your house, they’ll never miss it. To top it off, there is the rich, creamy goat milk sauce that ties it all together.

The book states,

“Bruce made these for lunch one day, and, I swear, I almost passed out. They’re light dumplings, sort of like gnocchi, baked in a creamy white wine sauce. I was supposed to eat the accompanying salad. But who could waste calories on salad?”

I love my greens, but in this case, I have to agree!

Baked Spinach-and-Goat-Cheese Dumplings
Reprinted with permission from Abrams Books

One 10-ounce (one 280-g) package frozen chopped spinach, thawed
8 ounces (225 g) fresh Chèvre or soft goat cheese, at room temperature so that it’s very creamy
4 ounces (115 g) hard, aged goat cheese, such as goat Gouda, finely grated and divided
3 large egg yolks
¾ cup (170 g) semolina flour, plus more for rolling the little dumplings
1 tablespoon finely minced chives or the green part of a scallion
1 teaspoon salt
½ teaspoon finely grated lemon zest
½ teaspoon freshly ground black pepper
¼ teaspoon freshly grated nutmeg
1 tablespoon goat butter (or unsalted cow butter, if you must)
1 tablespoon all-purpose flour
1 cup (240 ml) regular or low-fat goat milk (or cow milk, if you must)
2 tablespoons dry white wine or dry vermouth

First, grab the frozen spinach in small handfuls and squeeze as hard as you can over the sink to get rid of as much excess moisture as you can. Put the bundles in a big bowl and use a fork to separate the spinach back out into bits and threads.

Whisk in the fresh chèvre or soft goat cheese, half the grated hard goat cheese, the egg yolks, semolina flour, chives, salt, lemon zest, black pepper, and nutmeg. You want a creamy but somewhat stiff mixture, because you’re going to form it into balls.

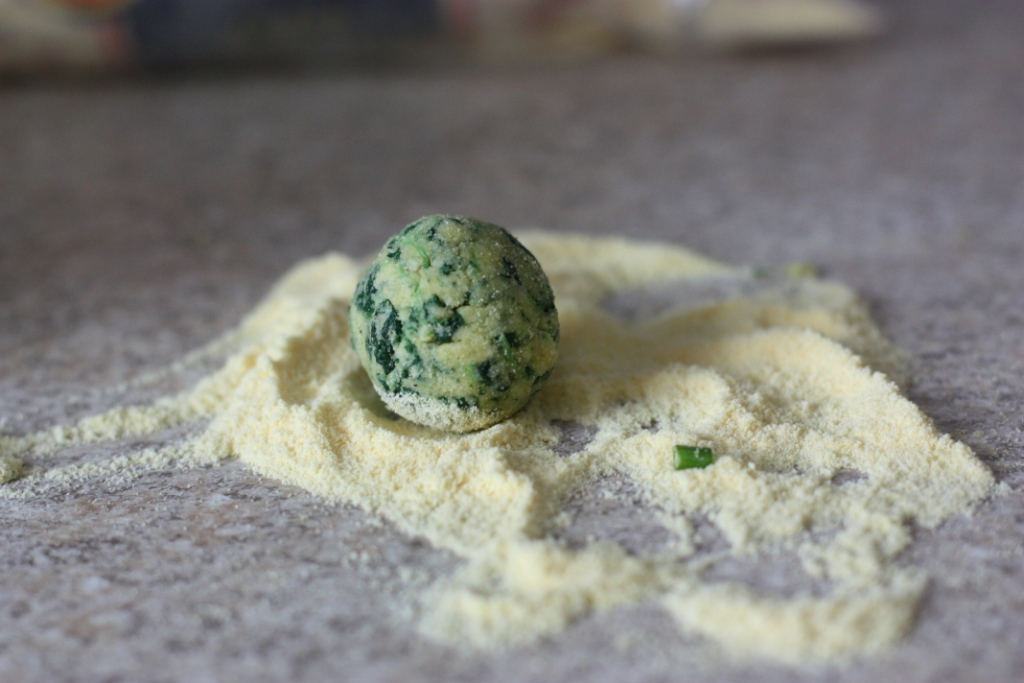
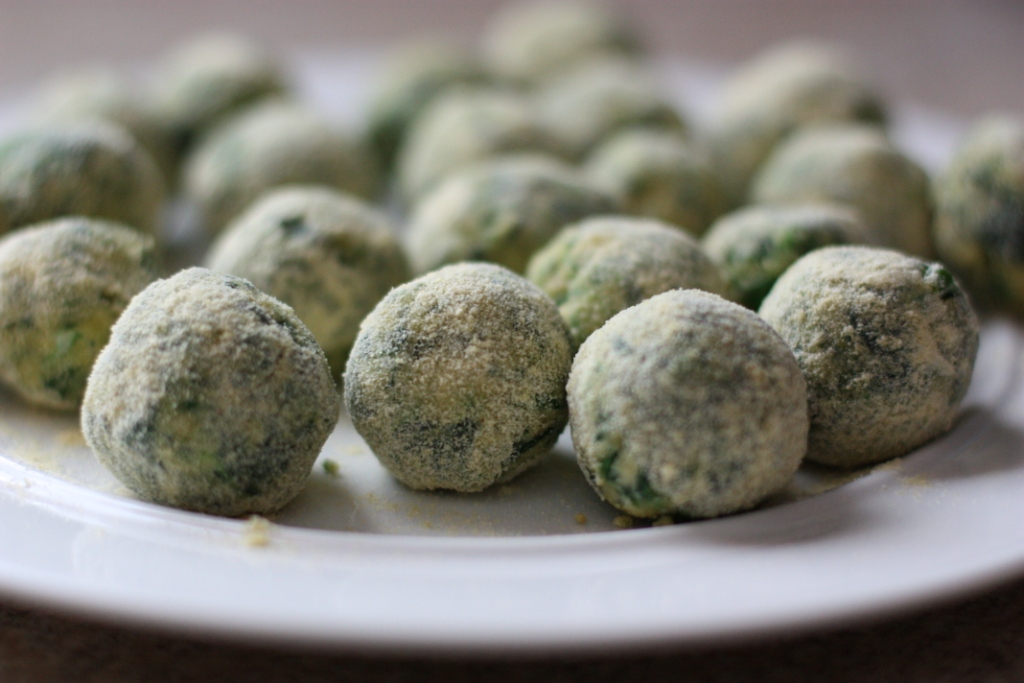
Sprinkle a little more semolina flour onto a clean, dry work surface. Pick up a little bit of the spinach mixture, a little smaller than a golf ball. Roll this in the semolina flour to form an oblong ball, sort of like a football but without the pointed ends. Set aside and continue rolling more, adding more flour to your work surface as need be (but not too much, or the balls will turn gummy). You’ll end up with about 24 dumplings.

Bring a large pot of water to a boil over high heat. Add 5 or 6 dumplings. Lower the heat so the water barely simmers. Poach for 10 minutes. Use a slotted spoon to transfer the dumplings from the pot to a 9 x 13-inch (23 x 33-cm) baking dish or an oblong roasting pan. Then add 5 or 6 more dumplings to the pot and repeat the poaching process again—and again—until all the dumplings are done and in the baking dish or roasting pan. Why not just toss them all into the water at once? Because they’ll crowd the pot and stick together. You want enough space so they can bounce around freely in the simmering water.

Position the rack in the center of the oven and preheat the oven to 375 F (190 C). Melt the butter in a small saucepan set over medium-low heat. Whisk in the all-purpose flour. Whisk over the heat for 30 seconds. Then whisk in the milk in dribs and drabs, a little bit each time to form a paste—and then more at a time, although never more than a slow, steady drizzle.

Once all the milk is in the pan, whisk in the wine, raise the heat to medium, and whisk until bubbling and slightly thickened, just a minute or so.

Pour this sauce over the dumpling balls in the baking dish or roasting pan. Sprinkle the remaining grated cheese over the dish. Bake until the sauce is bubbling and just beginning to brown, about 15 minutes. Cool in the pan for 5 minutes before serving.

Classic Chili Dogs Courtesy of Rocky Mountain Organic Meats

March 27, 2011

I connected with Rod of Rocky Mountain Organic Meats on Twitter some time ago. I’m not sure who followed who first, but I remember in one conversation he shared with me how delicious the grass-fed meats were way out there in Wyoming due to the type of grass the cows were feasting on. My response was that we had some pretty good meat right here in central Kentucky due to our beloved Bluegrass. Secretly though, he had peaked my interest in those meats way out west.

Well, a few months later, I was given the offer to try Rocky Mountain Organic Meats firsthand when Rod asked if I’d like to sample a few items. I thought about it a while and after reading more about the company, I decided I couldn’t pass it up.

As you know, we buy most (were at about 95% now) of our meats locally and ensure that they are sustainably and humanely raised. Rocky Mountain Meats fits all that criteria except the local part. However, I decided this could work in the favor of my readers.

Every time I write about the great meat I get around here, I usually have at least one person tell me in the comments that they wish they had access to similar products in their area. In most cases you do. You just have to venture outside the city a bit, but there are likely some cases where you don’t. So sharing these products with you is to let you know that you do have access to some incredibly tasty, sustainably and humanely produced animal products through the good ol’ internet.

If you want to know exactly what this company is all about there is an abundance of information on their website including a little about what they do, who they are and what they sell. It starts like this:

“Rocky Mountain Organic Meats offers the finest Certified Organic grass-fed beef and grass-fed lamb in the country. All of our meats are 100% grass-fed and grass-finished and come from the best cattle and sheep country the Rocky Mountains have to offer. Our livestock is raised the old-fashioned way; no steroids or growth hormones, no antibiotics and no grain. Our only additives are clean water, lush grasses and fresh air resulting in lean and delicious organic grass-fed beef and lamb.”

I was a bit overwhelmed when the box arrived at my door. I couldn’t believe the selection! Along with ground beef, lamb and sirloin steak, there was summer sausage, beef breakfast sausage, pastrami, hot dogs and my new favorite snack, Honey Beef Jerky. Wow, that stuff is good! Considering all the beef jerky lovers in my family, a bulk order will likely be on the Christmas list.

The ingredients used in processing, smoking and aging the products are as natural as the meat itself. I found black pepper, paprika, celery juice and others boldly listed on the front of the packages.

So with all this great meat, you know I had to come up with something exciting to share with you.

I found myself thinking back to some favorite foods that we haven’t had in years. The combination of healthy eating in general, decreasing our support of the current fast food system and increasing our investment in grass-fed meats means that we’ve stopped eating a lot of the foods we might have splurged on in the past.

Enter the classic chili dog. Not just any chili dog, but the most sustainable, from scratch, partially local, mostly organic and all grass-fed chili dog you have yet to see.

First I started on the buns using the same recipe I posted a while back for the Bread Bowl. I just portioned the pieces after the bread doubled and made each into hot dog-bun shapes. The bun recipe makes about six so you’ll have a couple left over.

I got to work with the organic grass-fed ground beef and made a chili-type sauce that was part Coney, part Lori’s tastes. My husband said it was a bit more tomato-y than the Coney sauces he’s used to, but that is where the Lori’s tastes come in. I like that tomato flavor in my chili.

That last sentence in the quoted description above is spot on. The beef was so lean that I had no grease to drain from the pan. It was full of the flavor I’ve come to expect from grass-finished beef. Excellent,and it was a perfect match for the chili sauce.

I cooked up their organic beef hot dogs just to heat them through. You could grill, pan fry or boil them depending on your preferences. These hot dogs had a slight sausage texture to them which we didn’t mind at all. They were just right as the main attraction in this dish.

I saved a bit of chopped onion to top off the dogs, and I shredded up one of our new favorite Kentucky cheeses, St. Jerome from Kenny’s Farmhouse Cheese. It has a creamy texture and resembles the flavor of an Asiago to me.

Pile it all together and you have the best dog around. The perfect blend of foods from the past combined with food choices of the present.

Classic Chili Dogs

4 homemade hot dog buns
½ lb organic, grass finished ground beef
1 small onion, finely chopped
2 tbsp chili powder
1 tsp smoked paprika
½ tsp celery salt
½ tsp ground mustard
1 tsp mascavo sugar (or brown sugar)
2 cups tomato sauce
1 tbsp tomato paste
Salt and Pepper to taste
4 organic, grass-finished hot dogs
¼ cup shredded cheese (optional)

In a medium size sauce pan begin to brown the grown beef. Reserve 3 tbsp of the chopped onion for garnish and place the rest in the pan with the beef. Continue to cook until the beef is cooked through.

Next add the chili powder, paprika, celery salt, ground mustard and sugar. Stir in the tomato sauce and tomato paste. Let simmer for 1 to 2 minutes and then add salt and pepper to taste.

Slit each bun down the side, lay a warm hot dog in the bun and top with the chili. Sprinkle on a little chopped onion and shredded cheese for garnish. Serves 4.

 Disclaimer: The products featured were sent to me free of charge from Rocky Mountain Organic Meats. I was not required to post about them and received no compensation for doing so.

Ginger Chicken Pot Stickers

March 23, 2011

These Ginger Chicken Pot Stickers are one my favorite recipes from the Fake Food Free archives! You can make your own won-ton dough, or take a shortcut and use store-bought wrappers. The filling is also a great use for leftover roasted chicken!

Ginger Chicken Potstickers Recipe | FakeFoodFree.com


When my husband asked me what we were having for dinner this past Sunday, “pot stickers” came out of my mouth before I really even thought about it. Apparently, my stomach knew what it wanted before my brain had time to register it.

Once I said it, I was committed, which really isn’t a bad thing. I had actually had making homemade pot stickers on the back burner since I started my food blog, so we are going on three years. That’s a pretty long time to be meaning to make something.

My first excuse was that I didn’t have a pasta roller to get the dough thin enough. Well, I got one of those last October for my birthday so I was quickly running out of reasons why I shouldn’t make it. Aside from the cutting and stuffing, they really are easy to make, just a little time consuming.

We had grilled a local, pastured chicken a few days before so I had plenty of meat to make a filling. I went through the fridge and pulled out a few things from the vegetable drawer, threw it in the food processor and was surprised at the delicious combination that resulted.


Easy Potstickers Recipe | FakeFoodFree.com 

 I mentioned that I had been meaning to make these since the start of my blog and that is because of this recipe for Soy-Butt Pot Stickers from one of the very first blogs I read regularly, Eating Out Loud.

That is where you will find the very simple dough recipe and some general instructions on making pot stickers. I found that running the dough through the roller just two times on a middle setting worked fine. Be sure to keep your surface well floured to prevent it from sticking. This recipe, both dough and filling, made about 60 pot stickers.


Ginger Chicken Potstickers Recipe


They cooked up beautifully with the exception of a few that got a little too brown on one side. The ginger came out strong in the filling, but it was balanced with the green onion, soy, and cilantro. We made a meal of these, but they would also work great for a party appetizer.


A favorite recipe from the early days of FakeFoodFree.com. Ginger Chicken Potstickers.

Ginger Chicken Pot Stickers
Yields 60
These Ginger Chicken Pot Stickers are one my favorite recipes from the Fake Food Free archives! You can make your own won-ton dough, or take a shortcut and use store-bought wrappers. The filling is also a great use for leftover roasted chicken!
Write a review
Print
Ingredients
  1. 2 cups cooked chicken, shredded
  2. 2 carrots, peeled and grated
  3. ¾ cup cabbage, grated
  4. 3 green onions, finely chopped
  5. 2 tablespoons chopped fresh cilantro
  6. 1 tablespoon finely grated fresh ginger
  7. 3 tablespoons soy sauce
  8. 1/4 teaspoon fine sea salt, or more to taste
  9. 1/4 teaspoon ground black pepper
  10. 60 homemade won-ton wrappers
  11. 1 tablespoon cooking oil
Instructions
  1. Place all ingredients except the won-tons in a food processor. Pulse 3 to 4 times in 10 to 15 second intervals until the ingredients are still slightly chunky, but hold together when pressed into a ball.
  2. Lay all of the won-tons out on a flat surface. Place an equal amount of filling in the center of each won-ton. Brush the edges of each won-ton with water. Fold in half and pinch and fold the ends to make a half moon.
  3. Preheat about 1 tablespoon of oil in a large skillet over medium-high heat. Work in batches and place the pot stickers on their sides in the skillet. Allow to cook on medium-high heat for about 4 minutes. Avoid moving them around. Once they are stuck to the skillet, pour about 1/8 of a cup of water into the skillet. Cover with a lid or foil and cook for about 1 minute. Remove the lid and let any remaining liquid evaporate. Remove the pot-stickers and serve warm.
  4. You can freeze extra pot-stickers before cooking. They also hold up well if you cook them and store them in the fridge to reheat and finish off in a day or two.
Fake Food Free https://www.fakefoodfree.com/
  

Thanks for reading! All images and content are the property of Fake Food Free Productions, LLC and Lori Rice unless otherwise stated. Please do not republish full recipes and images without written permission. What is okay? Feel free to Pin images, share links to my posts or share the photo in a round-up post with the title of this recipe and a link back to the post. Confused about copyright and food blogs? Here is some helpful information on Recipe Attribution. If you want to use a photo or full recipe, just ask. I’m sure we can work something out.

Vegetable Stir-fry with Orange Soy Glaze

March 3, 2011

I can think of few things easier to make than a hearty vegetable stir-fry. When the vegetable drawer needs a good cleansing, it is my go-to dish. Chop, cook, spoon on top of rice and you are done.

The only catch for me is that I need a little something extra for flavor. It can be as simple as a little crushed red pepper and tamari sauce, but I must go beyond vegetables, salt and pepper.

This orange soy glaze does the trick. It is full of orange zest which gives the vegetables a fresh, slightly sweet flavor.

Don’t feel confined to the vegetables included here. Use what you have and what you like. I like my vegetables with some texture so once the cauliflower is just barely tender, about 10 minutes, in goes the glaze and I take it off the heat.

Vegetable Stir-fry with Orange Soy Glaze

2 tbsp olive oil
3 cloves garlic, thinly sliced
1 medium onion, sliced
10 white button mushrooms, sliced
3 stalks celery, sliced
2 medium carrots, peeled and sliced
2 cups cauliflower florets, sliced
2 cups broccoli florets, sliced
8 – 10 spears asparagus, cut into1 inch pieces
¼ cup unsalted, dry roasted peanuts
Juice and zest of one orange
¼ cup tamari
1 tbsp cornstarch or arrowroot
2 tsp mascavo sugar (or brown sugar)

Heat the oil in a wok or skillet over medium heat. Add the garlic and cook for about one minute. Add the onion, mushrooms, celery, carrots, cauliflower and broccoli. Increase the heat to medium high and cook, stirring often, until vegetables are tender, 10 to 20 minutes. About 3 minutes before vegetables are cooked to your preference, add the asparagus.

In a small bowl, combine the orange juice, zest, tamari, cornstarch and sugar. Add the peanuts to the stir-fry, and pour in the orange soy sauce.

Stir to coat the vegetables and cook for 1 to 2 minutes more, or until the sauce is slightly thickened. Eat by itself or with rice. Serves 4 to 6.

Want to create beautiful food and product photos that you can't wait to share?!
Discover your style, control the light, and shoot using the tool you know how to use (yes, your phone included). Learn about free resources, Live Q&As with Lori, and online courses you can take from anywhere in the world!
We respect your privacy. Unsubscribe at any time.