Browsing Category

Local Foods

Slow Cooker Mushroom and White Bean Soup with Red Wine Recipe

September 4, 2013

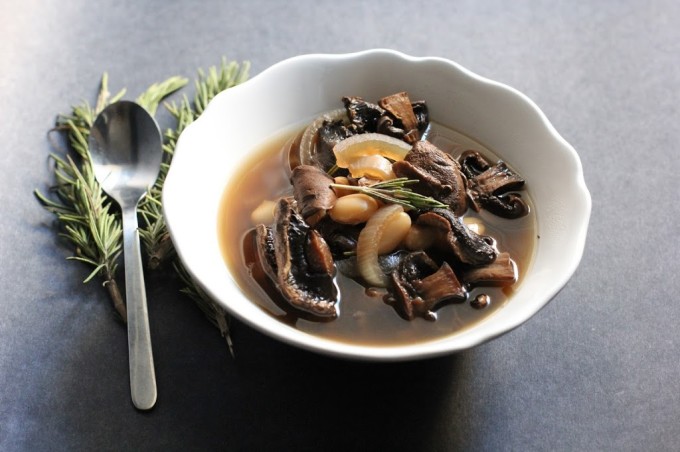
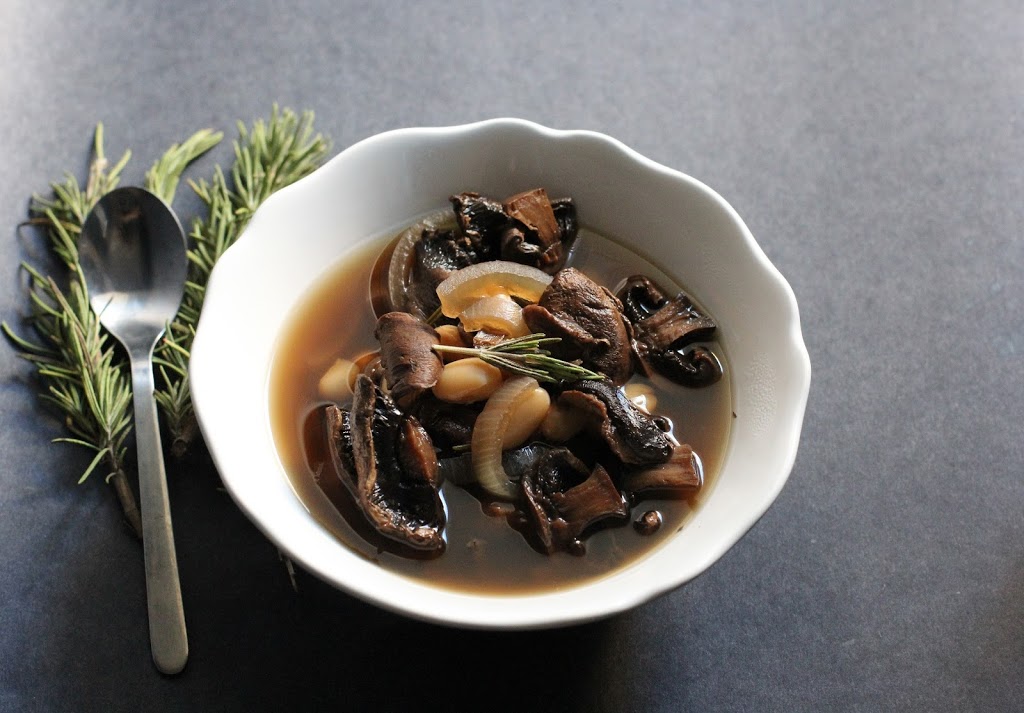
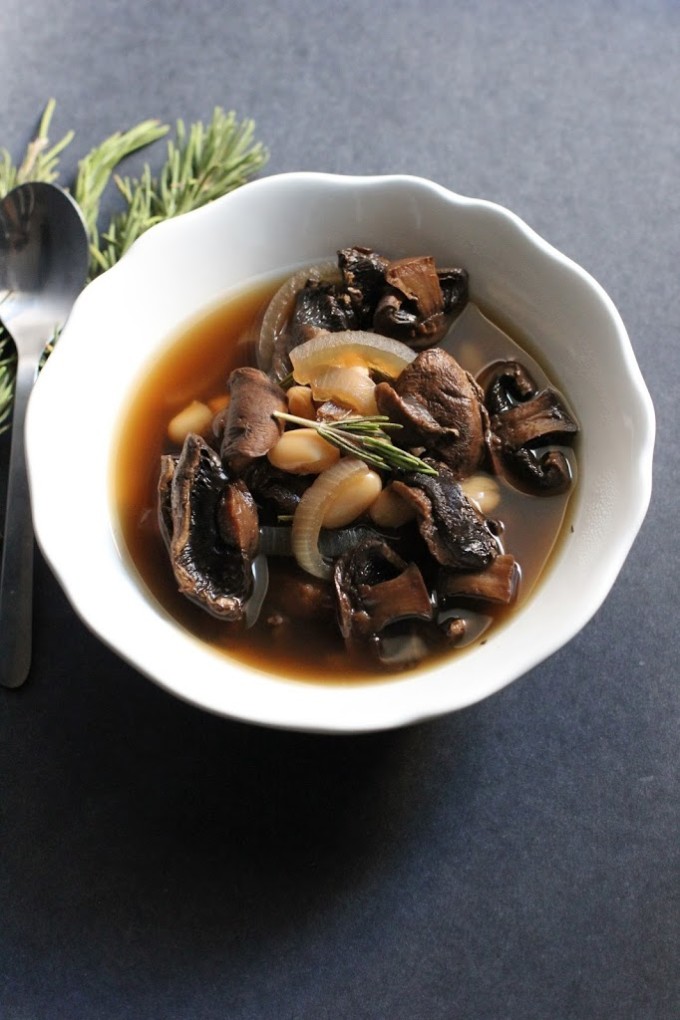
Red wine adds rich flavor to this hearty mushroom and white bean soup. It’s easy to throw together in the slow cooker making it perfect for a busy day when you need a warm and filling meal.

Slow Cooker Mushroom and White Bean Soup with Red Wine | Fake Food Free

About one year ago, I made my first road trip across the country – Lexington, Kansas City, Cheyenne, Salt Lake City, Reno, and finally Oakland. I dropped off my husband to start his new job and I went back to Kentucky to wrap things up before making the move final.

So while I haven’t been in California a full year, he has. This month marks when things really began to change. I’ve probably mentioned before that we love change. This past year of change has been rewarding, challenging, and exciting.

And of all the things I could have made to mark this anniversary, I picked soup?

Well, we just got back from a very low key, and enjoyable trip to Las Vegas over Labor Day weekend. We could really use a break from heavy food. It is also now September and my favorite season of the year (regardless of where I live) is almost here – fall!

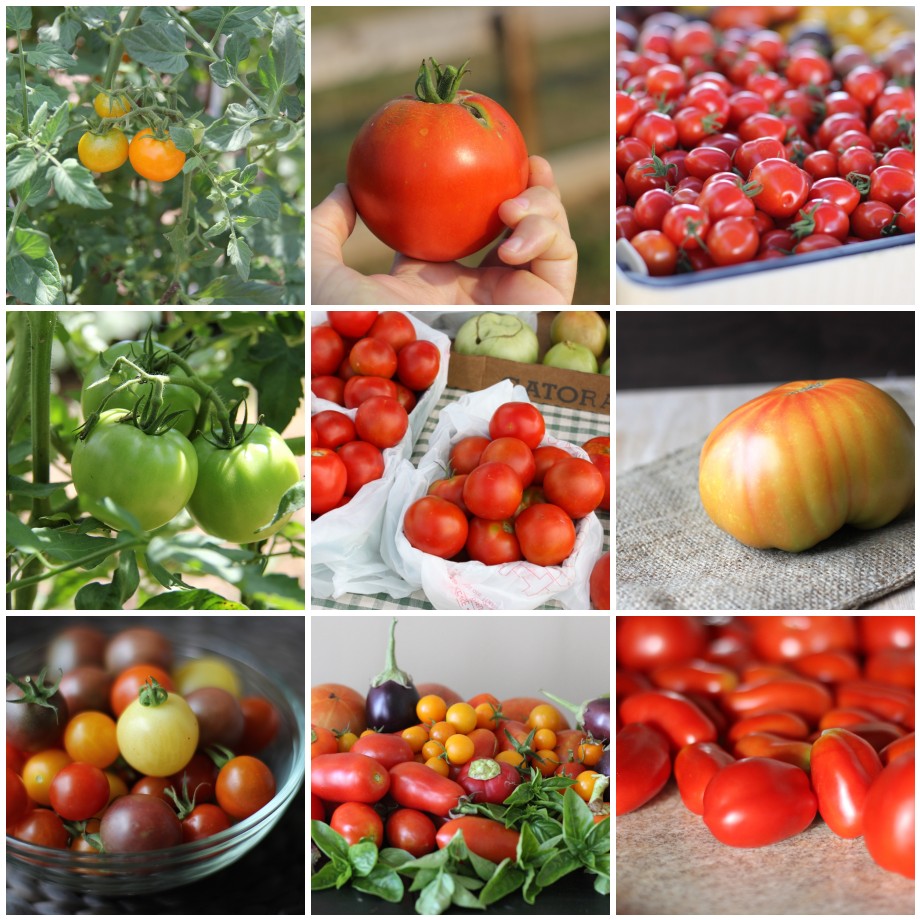
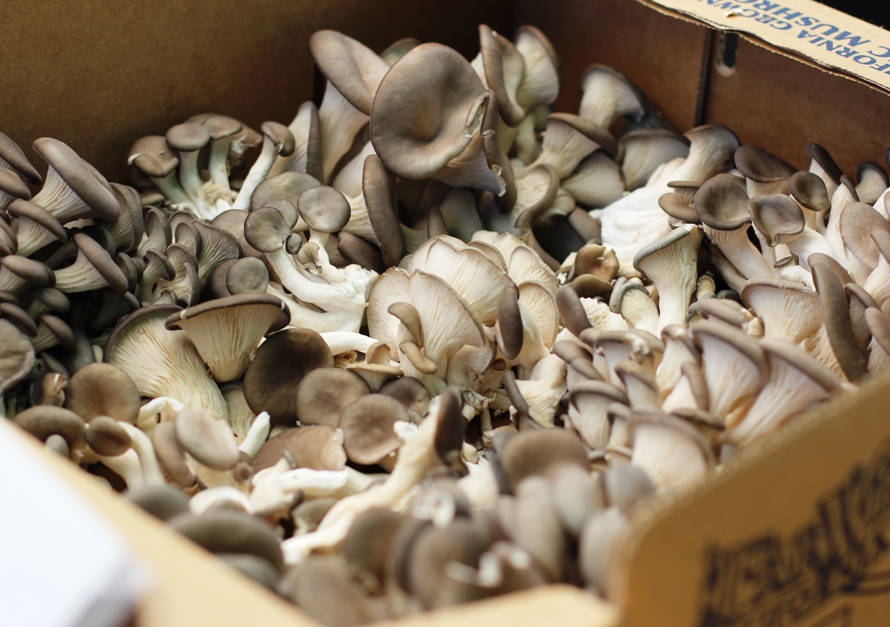
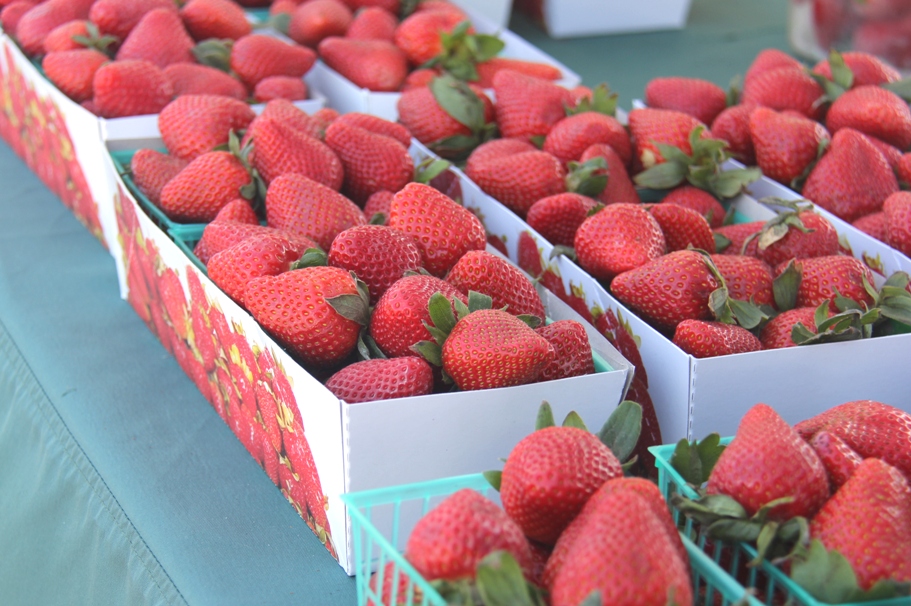
To justify things more, I love that I can now get mushrooms at the Farmers Market! I like all kinds of mushrooms, but I always default to the white button. I find that I can do so much with them – stuff them, put them in soups, add them to tacos. Don’t let anyone fool you into thinking they don’t have benefits either. As I put in my book, even white buttons have plenty of immune boosting power.


Slow Cooker Mushroom and White Bean Soup with Red Wine | Fake Food Free


I bought a bag that fortunately decided to hang on until I got back from traveling. I had to make the decision to use them now or never. When I spotted the half bottle of red wine on the counter the meal began to come together.

So grab the slow cooker! It may not be crisp and cool yet, but fall is coming! Feel free to start off the celebrations with this rich and hearty soup.

 
Slow Cooker Mushroom and White Bean Soup with Red Wine Recipe
Serves 4
Red wine adds flavor to this hearty mushroom and white bean soup. It's easy to throw together in the slow cooker making it perfect for a busy day when you need a warm and filling meal.
Write a review
Print
Ingredients
  1. 1 pound white button mushrooms, halved or sliced
  2. ½ medium yellow onion, sliced
  3. 3 cloves garlic, minced
  4. 1 quart chicken, beef or vegetable stock
  5. 1 cup red wine
  6. 1 ½ to 2 teaspoons fine sea salt
  7. ½ teaspoon ground black pepper
  8. 1 sprig rosemary
  9. 1 ½ cups (or 15-ounce can) cooked white kidney beans, rinsed and drained
Instructions
  1. Place the mushrooms, onions, garlic stock, wine ,and 1 cup of water in the bowl of the slow cooker. Add ½ teaspoon of salt and ¼ teaspoon of black pepper. Place the rosemary sprig in the bowl and stir.
  2. Cook on high for about 3 ½ hours, until the mushrooms are almost tender. Remove the rosemary and add the beans. Add an additional 1 to 2 teaspoons of salt and ¼ teaspoon of black pepper to taste. Let cook on high for 20 to 30 more minutes, and serve.
Fake Food Free https://www.fakefoodfree.com/
 
Slow Cooker Mushroom and White Bean Soup with Red Wine | Fake Food Free
 
Thanks for reading! All images and content are the property of Fake Food Free unless otherwise stated. Please do not republish full recipes and images without written permission. What is okay? Feel free to Pin images, share links to my posts or share the photo in a round-up post with the title of this recipe and a link back to the post. Confused about copyright and food blogs? Here is some helpful information on Recipe Attribution. If you want to use a photo or full recipe, just ask. I’m sure we can work something out.

Smoky Boiled Peanuts Recipe

August 27, 2013

One thing I wasn’t expecting to find at the markets here were fresh peanuts. I know that there are a few areas on this side of the U.S. where they are grown, but I was definitely closer to the peanut growing states of Virginia and Georgia when we lived in Kentucky.

Yet, I can’t remember ever coming across a fresh peanut. But then again, I wasn’t looking for them either.

When I saw the light blond shells piled up on the tables at the market, I knew right away that they were peanuts. It took me longer to figure out that they were fresh. (Often called, green peanuts.)

Never one to resist the urge to buy a new ingredient, I bagged up a few handfuls still speckled with the dirt and brought them home. Honestly, I had no idea what else to do except boil them.

After researching several recipes, I made my first batch which was a huge fail. According to a few recommendations, I soaked them in water first, drained them and then boiled them. They were much too wet and soggy for my taste.

So when I picked up another bagful last week, I skipped the extra soaking step. I covered the 1 pound of peanuts in about 5 cups of water. I added salt, garlic powder and smoked hot paprika and let them boil.

Full disclosure. I forgot about them.

I had intended to boil them for 2 hours, but I returned to the stove about 2 hours and 45 minutes later to find almost no water left in the pan. Oops.

I pulled the pan off the burner and gave them a stir to distribute some of the seasonings that had collected at the bottom. Then, I tried one. They were delicious! They really reminded me more of the pinhão (pine nut) we used to find in Brazil, like a firm bean with a nutty flavor.

So there you have it. I accidentally discovered exactly how I like my boiled peanuts. Sometimes kitchen mistakes lead to grand results. And it’s even better if those mistakes and results come without setting off the fire alarm.

Smoky Boiled Peanuts

About 1 pound of fresh, green peanuts
5 to 6 cups of water
¼ cup finely ground sea salt
¼ tsp garlic powder
¼ tsp smoked hot paprika

Add the peanuts to a large saucepan and add enough water to cover the nuts. Stir in the sea salt, garlic powder and paprika. Bring the peanuts to a boil over high heat, partially cover the pan with a lid. Reduce the heat to medium to maintain a low boil, just above a simmer.

Let cook for 2 ½ to 3 hours, until almost all of the water has evaporated. There should still be at least a half inch in the bottom of the pan.  Stir to distribute the salt. Let cool before shelling and eating. Store in an airtight container in the refrigerator for up to 2 days. 

Petrale Sole with Heirloom Tomatoes and Pesto Recipe

August 15, 2013

After 8 months on the West Coast (and with my struggles for finding farm-direct meat), we decided it was finally time to start exploring local fish. I’ve always said I wanted to live by the water where fresh fish and seafood were plentiful and now, here I am. It’s time to take advantage.

So over the past few weeks, instead of passing by the fish vendors at the Farmers Market, I’ve been stopping, looking and asking questions. Most of the fish I’m finding was caught that morning and filleted soon before it got on ice and to the market.

So far I’ve settled on some beautiful Petrale sole from two different vendors at two different markets. (I’ll branch out soon. I’m slow to take on new fish, apparently.) One pack came from Monterey Bay to the south of us and the other Bodega Bay to the north of us.

I’m not an expert in cooking or eating fish, but I really like this variety. The second set of filets was much thicker which made them ideal for baking so I decided to fancy them up a bit. I scanned some recipes on the web and a found a few that baked the fish over onions. You know I always have plenty of heirloom tomatoes around, and there was also leftover homemade pesto from the minestrone soup. With all that, this super simple recipe came together.

I hope you like it as much as I did! As I continue to explore the markets here, more fish recipes are sure to come in the future. If you have a favorite type of fish or recipe, I’d love to hear about it.

Petrale Sole with Heirloom Tomatoes and Pesto

1 tbsp unsalted butter
1 small onion, sliced
2 cloves garlic, thinly sliced
10-12 oz Petrale sole filets
¼ cup fresh pesto
1 medium heirloom tomato
4 lemon slices

Preheat the oven to 375 degrees F.

In a small skillet, heat the butter over medium high. Add the onion slices and the garlic. Reduce the heat to medium and cook for about 5 minutes, just until the onions start to become tender.

Transfer the onions to a baking dish and spread in a single layer. Top the onions with the sole filets. Spread the pesto evenly over each filet. Top the pesto with tomato slices. Add the lemon slices around the perimeter of the baking dish.

Bake for 12 to 15 minutes, until the fish turns white and flakes with a fork. Serves 2 to 3.

Bacon, Corn and Brown Rice Stuffed Squash Recipe

August 8, 2013
Summer Squash Stuffed with Bacon, Corn and Brown Rice | Recipe | Fake Food Free
 

 When I tell people that we moved here from Kentucky I get the usual response. It’s the same response I received any time we traveled while living there.

It is something similar to, “I bet this is (that was) different,” or “This must be an adjustment.”

Now, I don’t get cranky or offended. It’s not like I’m out to defend the upper southern part of the U.S. There are a lot of things that are different here in a very good way, and there are a lot of things that are the same.

Regardless of whether you live in rural Kentucky or Northern California, if you rarely go anywhere else, well, there you are. There are as many people here that haven’t seen other parts of the US as there are people who haven’t in Kentucky. So I don’t blame people for having this perception, but as you know from my blog I had myself in a pretty good food situation back East.

California wins when it comes to variety of produce, growing seasons and ethnic cuisines, but it falls way behind in something else – meat.

Oh, it’s here. It’s grass-fed and finished, pastured, organic, whatever you want. But it’s one other thing.

Impersonal.

I really dislike buying meat here. There are a few butchers, but when you add in the price of a quality product along with the fact that it’s being sold in California, ouch. The Farmers Markets have better prices for similar products, but it’s difficult to talk to people about the meat as a line 10 people deep waits behind you.

When people ask me what I miss most about Kentucky, that’s easy. The farms.

I’ve asked about buying farm direct, coming out for a visit, and so far the answer is that they only sell at the market. Although, some do have a dinner for customers one day a year.

I miss knowing the breeds, conditions and getting things like housemade prosciutto, sausage without the casing and blue/eggs that are mixed right in with the brown ones because they all come from the same group of chickens.

I know – cry me a river, Lori. I see all those Instagram and Facebook pictures of produce and landscape. Life is rough. Boo-hoo.

I get it. I’m not complaining. I realize I haven’t covered every base yet. I’m sure there are options out there. I guess my point is that I will, at least for a while, still have a reason to respond to all those who suggest Kentucky is different with – yes, yes it is.

bacon-ends


With all that being said, the meat I have ventured to get here has been very good. I finally found bacon ends last weekend at the Farmers Market. 


Bacon, Corn and Brown Rice Stuffed Squash Recipe | Fake Food Free
It called for a celebration of summer stuffed squash. Feel free to substitute any grain here. Cue ball or patty pan squash will work the best since this is a loose stuffing.


Bacon, Corn and Brown Rice Stuffed Squash

Makes: 6 stuffed squash


Ingredients

½ cup long grain brown rice
Extra virgin olive oil
6 cue ball or small patty pan (scalloped) squash
½ cup chopped pastured bacon ends
Kernels from 2 ears of corn
2 green onions, sliced, green and white portions divided
1 small bell pepper, diced
½ teaspoon finely chopped rosemary
¼ teaspoon salt
¼ teaspoon ground black pepper
½ cup finely grated cheddar cheese.


Preparation

Preheat the oven to 400 degrees. Lightly coat a casserole dish with olive oil.

Bring 2 cups of water to a boil and add the rice. Bring to a boil and reduce heat to a low boil. Cook for 15 minutes until just barely tender, drain and set aside.

Meanwhile, cut the tops off the squash and scoop out the insides with a spoon. Reserve the flesh. Lightly rub the squash with olive oil and arrange in the baking dish. Pre-bake the squash for about 10 minutes.

In a deep skillet, brown the bacon on medium-high for about 5 minutes. Cook until your desired crispness. I like mine super crispy.

Add the corn, whites of the onions (reserve greens for garnish), the bell pepper and the chopped flesh of the squash. Cook for about 5 more minutes on medium to medium-high, until most of the moisture has evaporated.

Stir in the brown rice. Add the rosemary, salt and black pepper. Stir in the cheddar cheese. Transfer the stuffing to each of the squash.

Bake for 20 to 25 minutes, until the squash is tender. Garnish with reserved onion greens. Makes 6 stuffed squash.


Thanks for reading! All images and content are the property of Fake Food Free unless otherwise stated. Please do not republish full recipes and images without written permission. What is okay? Feel free to Pin images, share links to my posts or share the photo in a round up post with the title of this recipe and a link back to the post. Confused about copyright and food blogs? Here is some helpful information on Recipe Attribution. If you want to use a photo or full recipe, just ask. I’m sure we can work something out.

13 Best Tomato Recipes

August 1, 2013

I did it again.

Every year when the end of May rolls around, I forget. Unlike other bloggers who spend weeks building up to the big day, planning giveaways and making special recipes, it passes me by, and few weeks later I think – oops, I forgot again.

I’m talking about my food blogging anniversary. Fake Food Free has been alive and well for over 5 years. It’s overwhelming to think where this blog has taken me since I began typing my first words in our apartment in Southern Brazil.

Things have evolved through my travel, adventures in food culture and gardening. My photos are a bit better than those dark point-and-shoot images I started with, and I’d like to think my recipe writing has improved as well. I’ve met amazing people, and now I’m at a place where health, food and recipe writing, and taking food photos are my work. As you’ll hear me say often – Life is good.

And it all started with this blog.

While things have changed a bit here, and I don’t get to post as much as I used to, this is certainly not a farewell post. It’s a big Cheers, Prost and Saúde to another 5 and beyond!

What better way to celebrate than with tomatoes! Well, okay, a cocktail might be better, but right now we’re in the heart of summer and all I can think about are beautiful heirlooms, sweet cherries and plump Romas.

After 5 years of blogging, I’ve created and adapted my fair share of recipes using my favorite part of this season.

Here are 13 that you must make before the 2013 tomato season passes us by! (Click on the name and it will take you to the post with the recipe.)

Roasted Garlic, Tomato and Black Bean Soup

Grilled Marinara Pasta

Honey Peach and Tomato Black Rice Salad

Hearty Tomato, Kale and Mushroom Sauce

Roasted Tomato, Black Bean and Arugula Salad

Smoky Tomato Jam

Beer Cheese Tomato Soup

Honey-Pecan Tomato Tarts with Blue Cheese

BLT Spinach Salad with Fresh Garlic Dill Dressing

Heirloom Tomatoes and Cantaloupe

Stuffed Poblano Peppers with Tomato Chile Sauce

Poblano Cilantro Salsa

Sweet and Simple Tomato Pepper Salad

Farmers Market Photo Tour

July 3, 2013
One of the best things about moving to California has been the Farmers Markets. Throughout the past six months I have been to many, but I still haven’t scratched the surface of the total number that operate each week within walking, biking and driving distance of where we live. 
Life has me pretty busy at the moment, so with no time to make a recipe in honor of the 4th of July, I thought the next best thing would be to celebrate all the wonderful foods I’ve found at the markets. Here is a photo tour of a few of my favorites. 
Over the next few weeks there are fun things to come including more reviews of outstanding cookbooks and a virgin coconut oil giveaway!
Happy Independence Day to all my readers in the States! 

Kentucky Bourbon-Vanilla Soaked Cherries Recipe

June 26, 2013
Kentucky Bourbon-Vanilla Soaked Cherries | Fake Food Free | The perfect ice cream topping or cocktail garnish!

Last week at the Farmers Market, I saw this sign.

That sad face sums up my feelings pretty well. I have enjoyed my first cherry season in California so much. I think it’s because I wasn’t expecting to have such a selection. It completely took me by surprise.

Aside from a few cherry trees here and there in Kentucky, I’ve always associated cherries with Michigan. My past experience includes picking out a few in the grocery store and barely getting enough from a tree to make a mini cherry pie. This year, I had all the cherries I wanted. I took full advantage, too. I can’t begin to estimate how many pounds I carried home throughout the season.

But alas, it is coming to an end. I know there will be other fruits to take their place, but I will miss them all the same.

Every time I carried home by big bag of joy I said I was going to make bourbon cherries. It was now or never. Well, maybe now or next season, but the pressure motivated me to get on it.

Kentucky Bourbon-Vanilla Soaked Cherries | Fake Food Free | The perfect ice cream topping or cocktail garnish!

I came across these Vanilla-Bourbon Cherries at Sweetsonian a little while back. (Aren’t her pictures gorgeous?) I wanted those same flavors so I adjusted it and then got some exact measures for the ingredients. I know I’ll want to make them again and I’m horrible at remembering what I did from recipe to recipe so I’m hoping this will help me recreate them next year.

Dark red Bing cherries make pretty soaked cherries, but as always, I was steered by the sale. These yellow-red Rainier cherries were priced to sell so my cherries look a little lighter in their bourbon bath.

I’ve had them in the fridge a little over a week and they are delicious. I’ve dropped a few in our cocktails and I hope to use them on a dessert if I can stop eating them straight from the jar.

Kentucky Bourbon-Vanilla Soaked Cherries

Inspired by Vanilla-Bourbon Cherries by Sweetsonian

Ingredients

1 pint cherries, pitted
4 tbsp sugar
3 tbsp water
1 tsp pure vanilla extract
1/3 to ½ cup Kentucky bourbon

Prep

Tightly pack the cherries into a clean pint jar leaving about ½ inch headspace.

In a small sauce pan, heat the sugar and water on medium-high. Bring it just up to a simmer and cook until the sugar dissolves and it thickens a little, about 2 to 3 minutes. Remove from the heat and stir in the vanilla.

Pour the sugar syrup over the cherries. Pour the bourbon into the jar. How much you need will depend on how tightly your cherries are packed in. Ensure that all the cherries are covered, leaving about a ½ inch headspace.

Seal the jar. Give it a shake to mix the sugar syrup and bourbon.

Store in the refrigerator for at least 3 days before eating to allow the flavors to soak into the cherries. Then they should keep in the fridge for about a month.


Thanks for reading! All images and content are the property of Fake Food Free unless otherwise stated. Please do not republish full recipes and images without written permission. What is okay? Feel free to Pin images, share links to my posts or share the photo in a round up post with the title of this recipe and a link back to the post. Confused about copyright and food blogs? Here is some helpful information on Recipe Attribution. If you want to use a photo or full recipe, just ask. I’m sure we can work something out.  

Bacon and Oyster Mushroom Stuffed Squash Blossoms Recipe

June 11, 2013

It’s surprising that with all the squash plants I’ve grown, I’ve never tried cooking with squash blossoms. I always blamed it on bad timing.

Those pretty yellow flowers would appear in early summer and I would think – No way am I picking those. I want a squash out of that. What if the plant doesn’t produce much this year?

Then (as you know if you’ve grown squash) by mid to late summer when I was buried with summer squash up to my eyeballs, I wish I had used some of those blossoms. 

I no longer have my own squash plants, but I did spot some of those pretty blossoms at the Ferry Building Farmer’s Market last weekend. I wasn’t quite sure what I would do with them, but I had oyster mushrooms, bacon, bread and tomato sauce, too, so this is how it went. And when I have my own squash plants again someday, I will definitely be picking those blossoms.

Bacon and Oyster Mushroom Stuffed Squash Blossoms

1.5 ounces oyster mushrooms, chopped
2 slices bacon, chopped
2 tbsp finely chopped onion
1 clove garlic, minced
1/3 cup bread crumbs
3 leaves fresh basil, chopped
Salt and pepper to taste
12 small to medium squash blossoms
¾ cup your favorite marinara sauce
2 tbsp grated Parmesan cheese

Preheat the oven to 350 degrees F.

Preheat a deep skillet over medium-high, add the bacon and mushrooms. Cook for about 3 minutes. Add the onion and garlic. Continue to cook until the bacon is browned and the mushrooms are tender, about 3 to 4 minutes more.

Stir in the bread crumbs and the basil. Add salt and pepper to taste. Remove from the heat.
Fill each squash blossom with about a heaping tablespoon of the stuffing, depending on the size of the blossom. Twist the end of the flower to seal.

Pour the marinara in a baking dish and spread over the bottom of the dish. Arrange the blossoms in a single layer over the sauce. Top with the Parmesan cheese.

Bake for 20 minutes or until the blossoms become tender and the cheese begins to brown. Serves 2 to 3, if the squash blossoms are on the smaller side.


 Thanks for reading! All images and content are the property of Fake Food Free unless otherwise stated. Please do not republish full recipes and images without written permission. What is okay? Feel free to Pin images, share links to my posts or share the photo in a round up post with the title of this recipe and a link back to the post. Confused about copyright and food blogs? Here is some helpful information on Recipe Attribution. If you want to use a photo or full recipe, just ask. I’m sure we can work something out.  


Coconut Bamboo Rice with Green Garbanzo Beans Recipe

May 31, 2013

I consider myself well-versed in fresh foods and in what my food looks like before it gets to my plate. I’ve grown a lot, and I have seen a lot in my travels. And that’s not to mention all the things I come across online. Yet, California continues to surprise me when it comes to produce.

I find something new to me at the Farmers Market almost every week. As you’d probably expect, I’m not shy. Many of the foods don’t have signs and at the market I go to some of the signs are only in an Asian language. As soon as something catches my attention, I walk right up to the vendor and ask what it is. I refuse to pass up on any food knowledge.

This past week, I spotted some small pods that I’d never seen before. Guess what they were. Garbanzo beans! I use garbanzo beans all the time, but I’ve never once seen the fresh version. I purchased a couple handfuls, not quite sure what I would do with them.

After posting the picture on Instagram, I got some help with how to cook them. The easiest way is to steam or boil them, and they cook rather quickly, similar to peas. I shelled and boiled mine, it took about 7 minutes or so to cook them.

It’s hard to describe the taste. They are obviously similar to the cooked-from-dried and canned versions, but they are fresher and lighter in both flavor and texture. I don’t know. Maybe it is just that green color making me think that, but either way, I loved them!

I picked up some bamboo rice (short grain rice infused with bamboo extract) a little while back and I’ve been hungry for something coconut. I used both and put together this very simple dish. It hit the spot for lunch after my mid-morning run.

Coconut Bamboo Rice with Green Garbanzo Beans

1 tsp extra virgin olive oil
¾ cup bamboo rice
¾ cup chicken or vegetable stock
¾ cup lite coconut milk (I chose lite this time because it’s thinner)
1 tbsp chopped, fresh chives
¼ tsp salt (optional)
1 cup cooked, fresh (green) garbanzo beans

Heat the oil in a large saucepan over medium, add the rice. Cook about 60 to 90 seconds, stirring often. Pour in the stock and coconut milk. Bring to a low boil. Lower the heat and simmer for about 15 minutes, stirring occasionally. Cook until the liquid is absorbed and the rice is softened.

Stir the chives and the salt into the rice. Note: if you are using salted stock you may not need the salt, so taste before adding it.

Divide the rice onto two plates and top with a ½ cup of the garbanzo beans. Serves 2.

Strawberry, Mango and Avocado Cupcakes with Strawberry Avocado Frosting Recipe

May 3, 2013


I was still caught up in the amazing California citrus season when the strawberries began to arrive at the Farmers Market. It started with one or two vendors offering a few containers. Now, they are everywhere – organic, conventional, big, small, full flats, or small pint baskets – you can get just about anything you want. 
 
I’ll admit they aren’t quite as tasty, or as rewarding, as the buckets we used to pick from our own garden, but they will certainly do. I’ve been buying loads, eating some and freezing others to use in my oatmeal when the season is over. 
 
 
With ataulfo mango season falling at the same time as the strawberries here, and with easy access to avocados, I felt compelled to combine all three.
 
I also can’t seem to get over the desire to play with avocados as a substitute for butter in my baked goods. First it was the Avocado Pound Cake with Blood Orange Glaze, and now cupcakes.
 
 
These cupcakes are soft and fruity, and the frosting? I think I may be making my frosting with avocado from here on out. I’ll admit, I tried it with just avocado and it was a little too green-tasting (for lack of a better term). The addition of strawberry puree did the trick. It sweetened it up and balanced the flavor of the avocado.
 
These don’t keep long. I’d suggest baking them just before you will need them, cool, frost and eat soon after. If you don’t plan to finish them off, keep unfrosted cupcakes in the refrigerator for only a day or two. The oils from the avocado tend to surface when they sit for over a day. 
 

Strawberry, Mango and Avocado Cupcakes with Strawberry Avocado Frosting

Makes: 12 cupcakes

Ingredients

½ cup mashed avocado (about 1 Hass avocado)
2 large eggs
1 cup raw sugar
½ cup pureed strawberries
½ cup pureed mango
1 teaspoon pure vanilla extract
1 ¼ cup unbleached, all-purpose flour
3 ½ teaspoon baking powder
1 teaspoon fine ground salt

Frosting
2 tablespoon mashed avocado
5 ¼ cups powdered (confectioner’s) sugar
½ teaspoon pure vanilla extract
1 tablespoon milk (any variety)
½ tablespoon fresh lime juice
2 tablespoon pureed strawberries
Pinch of salt
 
Prep
 
Preheat the oven to 350 degrees F. Place cupcake liners in a 12-cupcake baking pan. Spray the liners with olive oil or non-stick cooking spray. 
 
In the bowl of an electric mixer, beat the avocado, eggs and sugar until blended, 60 to 90 seconds, scraping the bowl as needed. Add the strawberry and mango purees and mix just until all ingredients are combined. Add the vanilla. 
 
In a separate bowl, whisk together the flour, baking powder, and salt. Add the dry ingredients (a little at a time) to the wet ingredients, stirring gently, just until everything is combined.
 
Transfer the batter to the cupcake tins, filling each liner with an equal amount. 
 
Bake 15 to 17 minutes, or until a toothpick inserted in the center of the cupcakes comes out clean. Remove from the oven and let cool.
 
For the frosting, add the avocado and powdered sugar to the bowl of a mixer. Using the whisk attachment, mix on medium-high until the two are combined to create a very thick paste. 
 
With the mixer on low, add the milk, lime juice and strawberry puree. Continue to mix until all ingredients come together to form a spreadable frosting. Mix in the salt. 
 
Use a small cookie dough or ice cream scoop to top each cupcake with about 1 tablespoon of frosting. Serve right away. 
 
 
Thanks for reading! All images and content are the property of Fake Food Free unless otherwise stated. Please do not republish full recipes and images without written permission. What is okay? Feel free to Pin images, share links to my posts or share the photo in a round up post with the title of this recipe and a link back to the post. Confused about copyright and food blogs? Here is some helpful information on Recipe Attribution. If you want to use a photo or full recipe, just ask. I’m sure we can work something out.  
Want to create beautiful food and product photos that you can't wait to share?!
Discover your style, control the light, and shoot using the tool you know how to use (yes, your phone included). Learn about free resources, Live Q&As with Lori, and online courses you can take from anywhere in the world!
We respect your privacy. Unsubscribe at any time.