My first New Year’s Eve in California was spent in Santa Barbara. It was just last year and we were on the fourth day of our five day cross-country move. Knowing that we didn’t want to spend that particular night in a roadside hotel, we drove a few extra miles to the beach.
It was a short trip with two pugs along so we didn’t see much of the city, but since that little taste, I’ve wanted to return. I thought I had plenty of reasons for wanting to go back, but a few days ago I found one more.
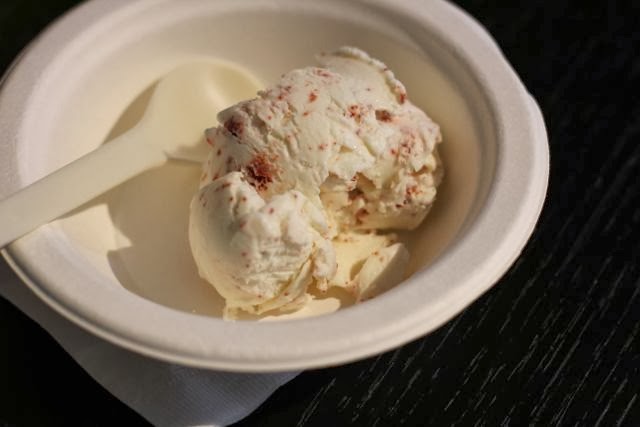
This ice cream…
I was introduced to it through the Winter Fancy Food Show that I attended last month. You can order it online, but I fully support using it as an excuse to visit California.
Despite my endeavors to make most of the foods we eat, occasionally you come across something that you simply cannot master as well. You can’t make it any more delicious or natural. This ice cream is that for me.
McConnell’s has been making their ice cream since 1949, but I have yet to come across a company that uses such great ingredients or creates a product that tastes as good as this. I know. It’s ice cream. But the texture and flavor of McConnell’s is truly outstanding.
The ice cream is made from raw milk and cream from California grass-fed cows that is pasteurized and homogenized in-house. It’s then combined with cage-free organic eggs, some pure cane sugar and all kinds of natural, local ingredients like organic fruits and nuts.
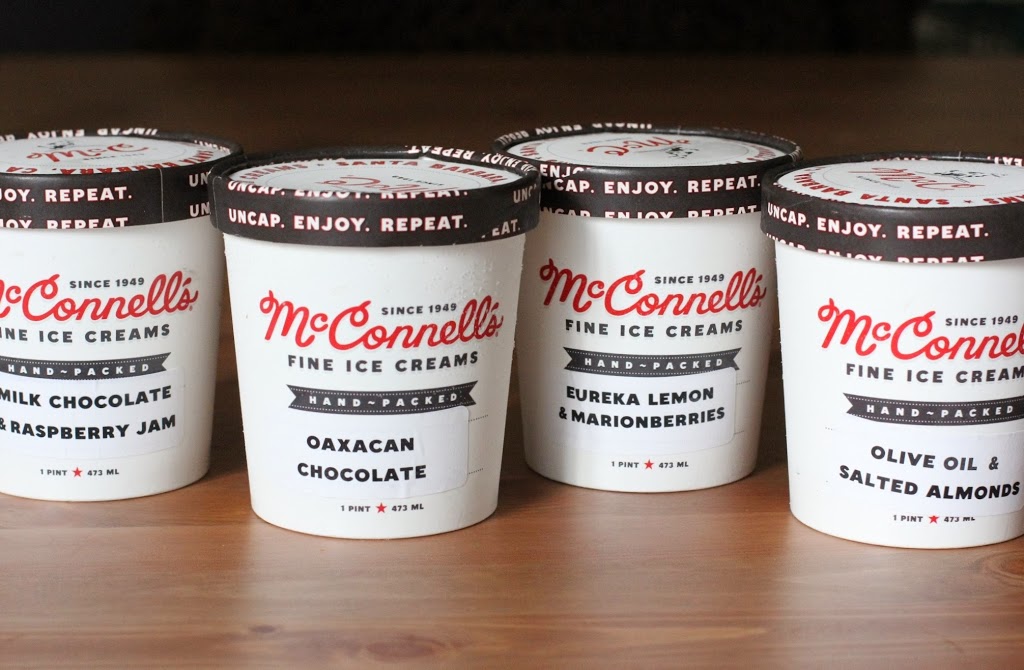
I got four varieties to try:
Olive Oil & Salted Almonds – Mild and creamy. Vanilla lovers will enjoy its simplicity.
Milk Chocolate & Raspberry Jam – Smooth chocolate meets fresh raspberry swirl.
Eureka Lemon & Marionberries – It’s like California and the Pacific Northwest came to a party in my mouth.
Oaxacan Chocolate – A flavor so rich and complex (with hints of cinnamon) that you’ll keep taking bites just to analyze it some more.
While I was completely intrigued by the Oaxacan Chocolate, I decided that the Eureka Lemon & Marionberries was my favorite. It was tough to choice!
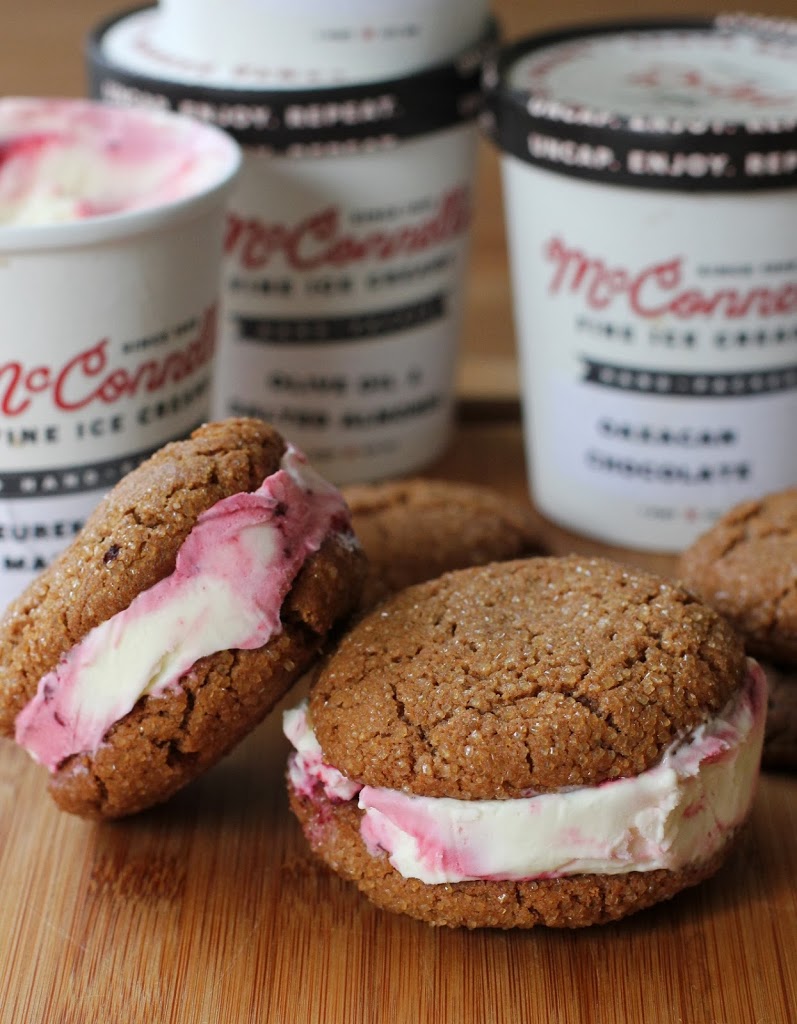
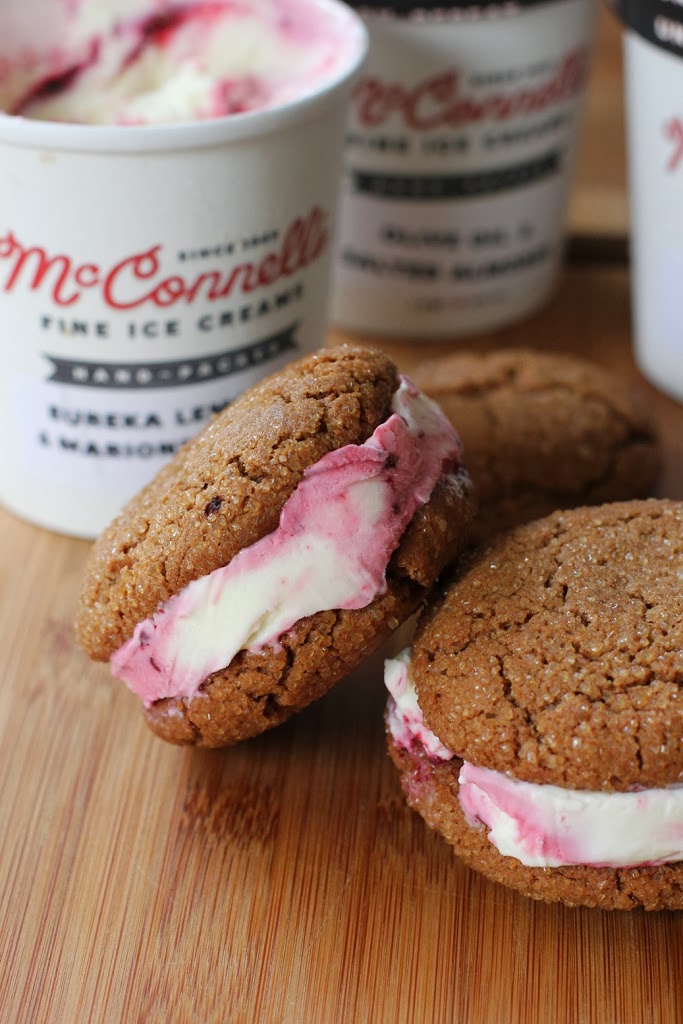
This ice cream needs nothing more than a spoon, but I thought I would use it in a Valentine’s Day dessert. I tested out a cookie recipe with whole grains, raw cane sugar and California butter to complement all the natural ingredients in the ice cream. The goal was a mildly flavored cookie that’s sweetness or flavor wouldn’t overpower the ice cream. These were perfect.
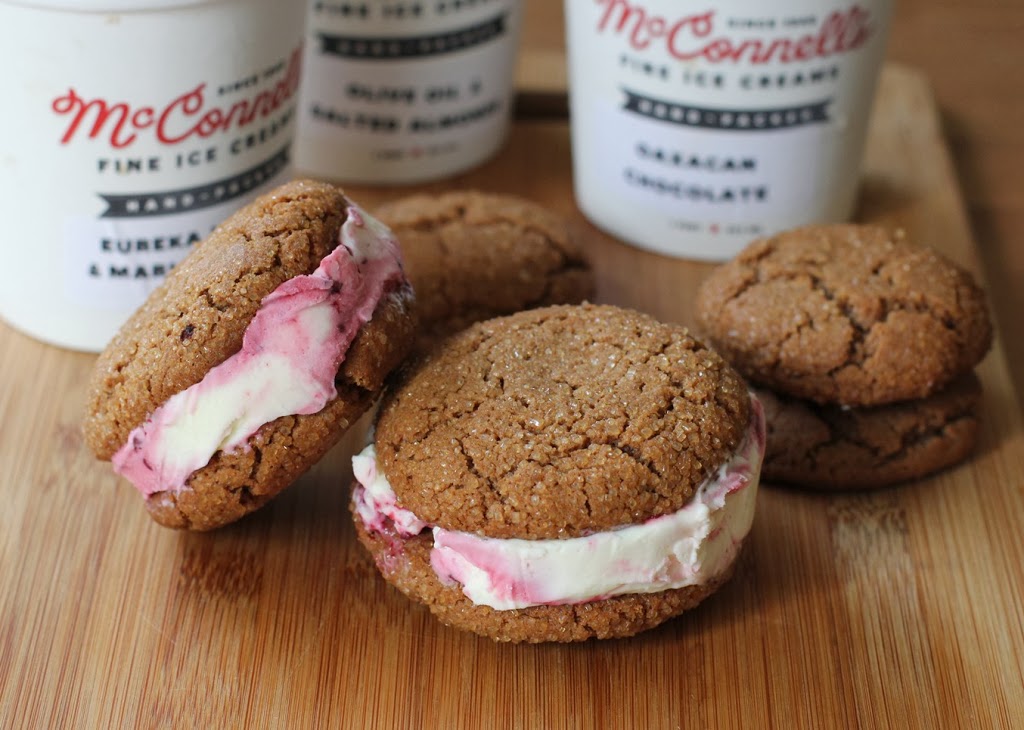
Whole Grain Chocolate Cookie and McConnell’s Fine Ice Cream Sandwiches
Makes: 6 ice cream sandwiches
½ cup unsalted butter, softened
¾ cup raw sugar
1 large egg
2 tbsp unsweetened cocoa powder
1 tsp cream of tartar
½ tsp baking soda
¼ tsp salt
1 ¼ cup white whole wheat flour
½ cup raw sugar for rolling the cookies
1 pint Eureka Lemon & Marionberries McConnell’s Fine Ice Cream (or your favorite flavor)
Preheat the oven to 375 F.
In a mixer fitted with the paddle attachment, beat the butter and sugar on medium speed for about 30 seconds. Scrape the sides of the bowl as needed, and increase the speed to medium-high. Beat for about 2 minutes or until well combined.
Reduce the speed to medium and mix in the egg. Mix in the cocoa powder. Scrape the sides of the bowl as needed.
Mix in the cream of tartar, baking soda and salt. Slowly add the flour, a little at a time. Mix just until all ingredients are combined.
Scoop out the dough and roll into generous golf ball size portions. Roll in the raw sugar and place on an ungreased baking sheet. Place only 6 to 9 cookies on each baking sheet. Press the cookies slightly flatten them.
Bake for 12 minutes or until the edges are lightly browned and centers of the cookies are somewhat firm. Cool for 1 minutes and transfer to a cooling rack to cool completely.
Once cooled, allow the ice cream to soften at room temperature for about 5 minutes. Place six of the cookies bottom-side up on a flat surface.
Top with a generous ¼ cup of ice cream. Place the remaining six cookies on top, bottom-side down, to create the sandwich. Gently press the cookies so that ice cream spreads to the edges. Depending on how generous you are with the ice cream. You may have some leftover. I suggest eating it.
Wrap the sandwiches in plastic wrap and refrigerate for at least 3 hours before serving.
Disclosure: I received this product for review purposes. I was not required to blog about it and I received no compensation for doing so. All thoughts and content here are my own. It’s really good ice cream!