Browsing Category

Local Foods

Bourbon Sweet Potato Waffles with Maple Cinnamon Butter

November 14, 2010

Bourbon Sweet Potato Waffles with Maple Cinnamon Butter | Fake Food Free

Towards the end of last week we were able to catch up on the DVR. One show we’ve been anxiously awaiting was the recent Iron Chef America episode on the Food Network. While I didn’t intend to keep with the theme of my last post, the secret ingredient just happened to be bourbon!

Since I still have some sweet potatoes from my Dad’s garden in the kitchen, I perked up when I saw that Iron Chef Cat Cora was roasting some sweet potatoes for one of her dishes. The final creation was a bourbon sweet potato waffle.

Can you guess what I made for Sunday breakfast this weekend?

I used a combo of whole wheat flour, white whole wheat flour and maple syrup to make a hearty, slightly sweet waffle. A little nutmeg and cinnamon in the batter gave it a mild holiday flavor.

Bourbon Sweet Potato Waffles with Maple Cinnamon Butter | Fake Food Free

I decided to top it off with a simple, sweet butter made with cinnamon and maple syrup. If you add the butter when the waffles are warm, it will melt down into a cinnamon sauce and you won’t need any additional syrup at all.

Bourbon Sweet Potato Waffles with Maple Cinnamon Butter | Fake Food Free

 
Bourbon Sweet Potato Waffles
 
Makes: 6 to 8 waffles
 
Ingredients
 
2 tbsp unsalted butter
1 cup whole wheat flour
2 cup white whole wheat flour
1 tbsp baking powder
¼ tsp ground nutmeg
¼ tsp ground cinnamon
1 tsp salt
2 cups milk (any variety)
2 large eggs
1 tsp pure vanilla extract
¼ cup maple syrup
2 tbsp bourbon
¼ cup mashed sweet potato


Prep

Preheat your waffle iron and melt the two tablespoons of butter. This will be used to brush on the iron before cooking the waffles.

In a large bowl, sift together the flours, baking powder, nutmeg, cinnamon and salt. Set aside.

In a separate bowl, whisk together the milk, eggs, vanilla, maple syrup and bourbon. Whisk in the sweet potato vigorously to break up any clumps.

Slowly add the dry ingredients to the wet ingredients, stirring gently to incorporate. Once the batter is mixed, brush butter on the waffle iron and pour by ¼ to 1/3 cup portions onto the hot waffle iron. Cook about 3 to 4 minutes, until the waffled is puffed and slightly browned. Makes 6 to 8 waffles. Top with maple cinnamon butter when warm. (recipe below)

 
Maple Cinnamon Butter
 
Makes: About 1/4 cup 
 
Ingredients

½ stick unsalted butter, softened
2 tsp maple syrup
¾ tsp ground cinnamon

Prep

Stir all ingredients together until combined. You can also use a small food processor to blend the ingredients. Add more cinnamon or syrup to taste if desired. Makes about ¼ cup.

Spiced Sweet Potato Cupcakes with Cream Cheese Frosting

October 22, 2010

Sadly, all the late heat and dry conditions we had this year left no winter squash to be found in our garden. While my dreams of homegrown pumpkins, butternut squash and spaghetti squash were left shattered, not all was lost in the area of orange autumn veggies.

When my parents came to visit to celebrate my birthday and attend the World Equestrian Games, they brought with them a huge bucket of sweet potatoes! My Dad’s green thumb prevailed despite the conditions and some beautiful taters resulted.

I’m noticing a lot of bloggers keeping with a theme this time of year – pumpkin, apples, acorn squash – so I thought I’d go a different route and create my own little ode to the sweet potato. My next few posts will highlight these root veggies with their versatile ability to be eaten savory or sweet.

First up, cupcakes!

I have a favorite banana cake recipe that I’ve tweaked throughout the years. It is quick, easy to substitute whole grain flours and minimally refined sugars, and has been a no-fail go-to when we need dessert or to use up bananas.

I decided to change the recipe even further this time by adding sweet potato, ground ginger and cinnamon. I was worried I might end up with more of a muffin than a cupcake, but these goodies are cake all the way.

They seemed to be calling for cream cheese frosting, so I answered with a nice dollop on top. I didn’t list the recipe for the frosting because it is nothing too extraordinary. I used my recipe from the Joy of Cooking, but any cream cheese frosting will do.

Spiced Sweet Potato Cupcakes

1 cup demerara sugar
½ cup unsalted butter, softened
½ cup pureed sweet potato
2 eggs
1 tsp vanilla
1 cup white whole wheat flour
1 tsp baking soda
½ tsp salt
¼ tsp ground ginger
½ tsp ground cinnamon

Preheat the oven to 375 degrees F and prep a cupcake/muffin tin with 12 paper liners.

In a mixing bowl, using the paddle attachment beat the butter and sugar until mixed and fluffy, about 3 minutes. Add in the sweet potato and continue to mix until combined. Add the eggs and the vanilla. Mix until all ingredients are combined.

In a separate bowl combine the flour, baking soda, salt, ginger and cinnamon. Gradually add the dry ingredients to the mixing bowl. Mix just until combined.

Divide the batter among the 12 muffin cups. Bake for 15 to 17 minutes, until the cupcakes are browned and a toothpick inserted into the center comes out clean. Be careful not to over bake.

Remove the cupcakes from the pan and place on a cooling rack. Allow the cupcakes to cool completely before topping with your favorite frosting.

P.S. Thanks so much for all the well wishes. I’m starting to feel much better. I was away for a training this week for work and came back craving time in my kitchen. Being ready to bake again is a sure sign that I’m on the road to recovery!

Spiced Whole Grain Apple Pie

September 15, 2010
I feel like pie is a dessert that I will always be experimenting with. It’s been several years since I made this hearty spiced whole grain apple pie, but it’s a seasonal favorite! 
 Spiced Whole Grain Apple Pie Recipe | Fake Food Free
 
I will admit that apple pie isn’t my absolute favorite. Any other time of year, I’d prefer lemon or chocolate, but right now I’m all about apple. It isn’t a great year for apples around here. There was some hail damage at the local orchard early in the season and then all this heat. Fortunately I was still able to stop by and pick up a few recently.
 
While apples are the highlight of my season at the moment, the highlight of this post is pie crust. I struggle with finding a good pie crust and with timing it correctly. I like butter crusts, but most need to be refrigerated, often overnight, before you can roll them out.
 
Spiced Whole Grain Apple Pie Recipe | Fake Food Free
 
I finally got ahead of the game and made a crust with some of my favorite ingredients. I refrigerated the dough for about 3 or 4 hours and it worked out nicely. It baked up with what I would consider acceptable flakiness and held together well during cutting and serving. The butter and grains blended well, and gave a nice earthly flavor to match the apples and mascavo sugar.
 
This one may not win any awards for the perfect pie crust, but considering it is whole grain with some flaxseed thrown in, I think it’s pretty darn good.

Spiced Whole Grain Apple Pie Recipe | Fake Food Free

Spiced Whole Grain Apple Pie

Ingredients: 

Crust (makes 2 – 9 inch)
2 cups white whole wheat flour
½ cup brown rice flour
2 tbsp flaxseed meal
1 cup butter, cold, cut into cubes
1 tsp salt
½ cup water

Pie Filling
4-5 apples, peeled, cored and sliced
½ – ¾ cup mascavo sugar
2 tbsp white whole wheat flour
½ tsp ground allspice
1 tsp ground cinnamon
2 tsp spiced rum
2 tbsp butter

Prep:

In a large bowl, sift together the flours and flaxseed. Add the butter and blend with two knives or a pastry blender until the butter is incorporated and in pea-sized pieces. Stir in the salt. Add the water a little at a time and stir to combine the dough. Divide in two pieces and wrap in plastic wrap. Refrigerate 3 to 4 hours, up to overnight.

Preheat the oven to 400 degrees F. In a bowl, combine the apples, sugar (depending on how sweet you want your pie), flour, allspice, cinnamon and rum. Stir to combine and set aside.

Roll each piece of dough on a floured surface to create a 9 inch circle. Transfer one piece to your pie plate, pressing it gently to fit. Pour in the apple mixture and top with pieces of the butter. Place the top crust over the pie filling and pinch the ends around the edge of the pie, removing any excess crust.

Cut slits in the top crust. Decorate with dough cutouts, if desired. Brush the top of the crust with milk or melted butter. Bake for 35 to 45 minutes, or until the crust is browned and filling is bubbly. Allow to rest for 10 minutes. Serve warm or at room temperature.

Thanks for reading! All images and content are the property of Fake Food Free unless otherwise stated. Please do not republish full recipes and images without written permission. What is okay? Feel free to Pin images, share links to my posts or share the photo in a round up post with the title of this recipe and a link back to the post. Confused about copyright and food blogs? Here is some helpful information on Recipe Attribution. If you want to use a photo or full recipe, just ask. I’m sure we can work something out.  


Good Meat: Cookbook Review and Pig Candy!

September 8, 2010

One word that seems to be synonymous with meat is slab. When I think of a steak, I think of a slab of meat. Similarly, when I received the cookbook – Good Meat: The Complete Guide to Sourcing and Cooking Sustainable Meat – I had the exact same thought.

This is one slab of a cookbook! A thick, hardback of 400 pages that is filled with valuable information, delicious recipes and stunning photography from cover to cover.

Anyone else excited by this book simply by reading the title? I was, and the title pretty much says it all.

Inside you will find everything you wanted to know about grass-fed beef and pastured meat and eggs – what it is, definitions of common terms used when discussing it, how to cook it, and the tools you’ll need to do so. It is described not only as a cookbook, but as a guide and that is spot on. This book is as much a necessary reference for meat in general as it is a collection of recipes.

We don’t eat an overabundance of meat, in fact, I would say our diet is at least 70% vegetarian, but we do eat meat and enjoy it. With the exception of the occasional order while traveling, when we do include meat in our meals it is from local farms utilizing sustainable practices and those which treat the animals as humanely as possible. Fortunately we have a lot of options that fit these criteria here in Kentucky.

Despite my frequency of preparing meat, I always struggle with recipe ideas. It’s just never been my strong point. Well, that could all change after browsing this book. The author, Deborah Krasner, a James Beard Award winning cookbook writer, covers beef, lamb, pork, rabbit, poultry and eggs, and even provides a recipe section for side dishes.

A taste of the recipes include:

Beef and Lamb Meat Loaf
Baked Cured Ham Steak with Honey, Onion Confit, and Bourbon
Roast Chicken with Apples Sausage, and Cider
Sicilian Rabbit Agrodolce
And yes, if you are the adventurous type, there are recipes for sweetbreads, tongue and gizzards.

What I love about this book:

  • The book opens with multiple, homemade spice rubs that are used in many of the recipes to follow.  
  • The recipes are clearly written with straight forward instructions, one recipe per page. 
  • The recipes incorporate a variety of cultural cuisines including French, Indian, North African, Chinese and Cuban. 
  • There isn’t a photo with each recipe, but the photography included is outstanding from farm scenery to completed dishes. There are also pictorial descriptions of meat cuts for each meat type.  
  • The author touches on ethical topics for those of us who care deeply about animals, but still feel that some are meant to be a source of food. One example is her short section on the topic of naming animals.

What I’m not so crazy about:

I really like to make sure I look at cookbooks with a critical eye and mention the good with the bad. I have to be honest, though; there is nothing I don’t like about this cookbook.

If I had to stretch it, maybe I would go with the fact that it is really difficult for me to see a cute calf on one page and a slab of beef on another, but that doesn’t make the photography or the book any less spectacular. The book is also very large and difficult to keep open with the recipe in view while cooking, but I find that with multiple cookbooks in my collection.

Did I mention that there are dessert recipes in this meat cookbook? I got to test out the Pig Candy recipe and I absolutely love that name. Pig Candy is a peanut brittle-type candy that has the spiciness of crushed red pepper and the saltiness of pastured bacon.

I really wanted to make this recipe with brown rice syrup because I’ve heard that it is a good substitute for corn syrup. However, I couldn’t find it at the markets I went to so I stuck with corn syrup that did not also have HFCS in it. I’m not sure how much of an improvement that is, but I used what I had to work with. In addition, I used Demerara sugar instead of white sugar.

The result? Well, I think I burnt it a bit, and the Demerara did make it much darker. I am a true amateur candy maker and I need a lot more practice so I am going to chalk it up to that. However, despite the fact that I slightly burnt it and it isn’t perfect, we still can’t keep our hands out of it around here.

This recipe is brilliant, in my opinion. Add another one to your holiday baking list!

Pig Candy
Reprinted with permission from Abram Books

Peanut brittle made with crisp pastured bacon and a little red pepper—what could be bad about that? Try this with a glass of Bourbon or cocktails, or serve it at a Super Bowl party—either way, it’s memorable.

MAKES ABOUT 1 POUND BRITTLE

2 tablespoons unsalted butter, softened, plus more for greasing the baking sheet and spatula
1 cup sugar
1⁄2 cup light corn syrup
1⁄2 teaspoon sea salt or smoked salt flakes
1⁄4 cup water
1 cup roasted unsalted peanuts
1⁄4 teaspoon crushed red pepper flakes, or more to taste
1⁄2 cup crumbled crisp-cooked pastured pork bacon (about 6 slices)
1 teaspoon baking soda

Butter a silicone baking liner or cookie sheet, as well as an offset spatula or icing knife, and set aside.

Using a 1-quart saucepan, heat the sugar, corn syrup, salt, and water over medium heat and cook until the sugar dissolves, stirring with a silicone spatula. Stir in the nuts, red pepper, and bacon pieces.

Cook the mixture until it registers 300 to 310 degrees on a candy thermometer—it will form a long thread when you pull the spatula out. Depending on the pan and the efficiency of the burner, this can take up to 20 minutes.

Remove the pan from the heat and carefully but thoroughly stir in the 2 tablespoons butter and the baking soda (take care—the mixture will foam). Immediately pour the mixture onto the prepared pan and, using the offset spatula or an icing knife, spread it into an even layer as thinly as possible. When the brittle is cool enough to handle (but still warm and pliant), use your hands (gloves can help) to stretch and pull it even thinner.

When the brittle is cool, break it into pieces and serve, or store in an airtight tin.

Disclaimer: This cookbook was sent to me free of charge. I was under no obligation to review it and received no compensation for doing so.

Stuffed Poblano Peppers with Tomato Chile Sauce

August 25, 2010
Stuffed Poblano Peppers with Tomato Chile Sauce Recipe | FakeFoodFree.com

Peppers are plentiful all over the Farmer’s Markets in central Kentucky right now. The varieties don’t get especially exotic, but I have been impressed by the diversity of the selection. In addition to colorful banana peppers and poblanos, I have seen some Hungarian wax peppers and habaneros. That’s in addition to the Anaheims, jalapenos, bell and cayenne peppers we have in our garden.

Mixed peppers at the Lexington, Kentucky farmers market 

I made it to the Lexington Farmer’s Market this past weekend and I bought some small poblanos which put me in the mood for some pepper stuffin’. I finally decided to go with some pastured Heritage breed pork sausage I had left over for the stuffing and mixed it with a cornbread-like filling.If you haven’t used poblano peppers they are mild, especially once you remove the seeds and veins to stuff them. I did detect a little bit of heat in a couple bites, but it was not overwhelming at all.

Next, I needed a sauce. I decided to wing it a bit and cook down some tomatoes and onions for a puree. I haven’t cooked with our cayenne peppers at all so I added a half of one to the mix.

I was thrilled with the sauce. It ended up much sweeter than I had anticipated, but it went well with the mild heat from the cayenne. Once it got on the stuffed poblanos, it was even better!

Stuffed Poblano Peppers Recipe


The only thing I might change about this recipe in the future is to add just a touch more milk to the cornbread filling. I thought I had plenty and worried it wouldn’t bake well, but it actually ended up drying out more than I would have liked. Otherwise, this is going in the make-again folder.

Stuffed Poblano Peppers with Tomato Chile Sauce


Sauce:
1 large tomato, peeled and diced (about 1 ½ cups)
2 small Anaheim peppers, sliced
¼ cup onion, diced
1 clove garlic, sliced
½ large cayenne pepper, sliced
1 tsp salt

Peppers:
6 small poblano peppers, halved, seeds and veins removed
¾ cup cornmeal
1 tbsp white whole wheat flour
2 tbsp onion, minced or grated
1 tsp salt
¼ tsp black pepper
½ tsp cumin
¾ cup milk
½ cup cooked sausage, crumbled
¼ cup shredded cheese (I used Farmer’s cheese)

Stuffed Poblano Peppers Recipe

In a medium sauce pan, bring all the ingredients to a boil on medium-high heat. Reduce slightly to a simmer, cover partially with a lid and allow to cook down for about 15 minutes, stirring occasionally.

Once all the vegetables are very tender, transfer to a blender. Puree until a smooth sauce results. Transfer back to a sauce pan and add the salt. You can set it aside and heat it back up later, or keep it at a low simmer while you make the peppers.

Preheat the oven to 400 degrees F. Coat a baking dish will olive oil and line the peppers, cut side up in the dish.

In a medium mixing bowl, stir together the cornmeal, flour and onion. Add the salt, black pepper and cumin. Slowly add the milk a little at a time. You want the batter about the same consistency as it would be for cornbread or brownies. Stir in the sausage.

Spoon the cornmeal mixture into the peppers and divide evenly. Sprinkle each pepper with cheese. Bake for 18 to 20 minutes, or until the cheese begins to bubble and brown. Serve with the warm sauce. Makes 3 to 4 servings.


Thanks for reading! All images and content are the property of Fake Food Free unless otherwise stated. Please do not republish full recipes and images without written permission. What is okay? Feel free to Pin images, share links to my posts or share the photo in a round up post with the title of this recipe and a link back to the post. Confused about copyright and food blogs? Here is some helpful information on Recipe Attribution. If you want to use a photo or full recipe, just ask. I’m sure we can work something out.  


Bacon and Brussels Sprouts Pasta with Parmesan

August 13, 2010

Our local Farmer’s Market is small. We have about 20 members and an average of 5 to 8 sell on Saturdays and often only 2 or 3 on Sundays. Despite the size, it is amazing the amount of produce you can get your hands on by stopping by.

I’ve been helping out with media for the market this year and I enjoy heading out early when I can and chatting with the farmers and vendors. I have learned a lot about growing practices in Kentucky through my conversations. I usually try to help them get set up as we talk, which for me secretly means I get to go through their available produce first.

This led me to discover the small bag of Brussels sprouts one of the farmers had available on Tuesday. It was just a cup or two, and I immediately bought them as soon as I discovered the bag. I have only had Brussels sprouts on a couple occasions and have never cooked with them, but inspired by all the recipes on the web, I’ve had my eye out for some.

First of all, when you buy them from the farm, they don’t look like the ones in the supermarket. I wish I had taken a before picture, but let’s just say there was a ton of peeling off outer leaves and trimming stems involved. I ended up being very happy that my bounty included only a couple handfuls.

Once cleaned, however, they looked beautiful and I couldn’t wait to get cooking!

A few months ago I picked up a discounted pack of pastured heritage breed bacon pieces from St. Asaph farm. These are the little bits they trim off the pretty bacon. They are perfect for beans, or in this case, a pasta dish with Brussels sprouts.

I checked out a few recipes on the web and finally decided to modify the Braised Brussels Sprouts in Bacon and Shallots from White on Rice Couple. What I really needed from this recipe was the cooking method which worked out wonderfully.

I tossed the final dish with some whole wheat pasta and stirred in some freshly grated parmesan. The bacon was slightly crispy and the sprouts nice and tender. This is a dish I will be making more of as the Brussels sprouts become more available this fall!

Bacon and Brussels Sprouts Pasta with Parmesan
Modified from Braised Brussels Sprouts from White on Rice Couple

10 ounces dry whole wheat pasta
½ to ¾ cup bacon, chopped into small pieces
¼ cup onion, diced
2 cloves garlic, minced
1 ½ cups Brussels sprouts, halved if large
½ cup chicken stock
¼ cup grated parmesan

Cook the pasta according to package directions, drain, reserving ¼ cup pasta water, and set aside. In a deep skillet add the bacon and cook over medium-high heat. Cook for 5 to 7 minutes, you really want the fat to immerge in the pan.

Once bacon is browned, quickly stir in the onion, garlic and Brussels sprouts. Stir well and lower heat as necessary to avoid burning the garlic. Pour in the chicken stock and simmer on medium heat, stirring often, until the Brussels sprouts are tender about 5 more minutes.

Add the pasta to the skillet along with the reserved pasta water. Stir to incorporate all ingredients. Turn off the heat and stir in the parmesan cheese. Serves 3, for us anyway.

Vegetable Fried Rice

August 6, 2010

Is anyone else experiencing a cooking low right now? I’m feeling uninspired and I blame it on the current season. Just weeks ago I was still giddy over garden goodness and content with fresh salads, light vinaigrettes combined with the occasional grilling.

The grilling is still interesting, and for that matter I could bake and bake, but I am stumped for main courses to cook. Nothing sounds good at all.

While part of me is saying – it’s still summer, enjoy fresh and light meals, another tiny voice which grows by the day is saying – fall is right around the corner. I think about pumpkin, casseroles, stews and dumplings, and then I realize it is still much too hot for all that heavy food. As a result, I got nothing.

How will I combat this problem? Well, I’ve decided that I will devote much of the month of August to making other people’s recipes. I’ve been pulling out the cookbooks and revisiting all the great food blogger recipes I have bookmarked.

Otherwise I’m going to try to combine the two seasons – light and summery with filling and comforting. That is how I decided on Vegetable Fried Rice.

My mom made the best fried rice when I was growing up. I’ve made it myself before, but after enjoying it last week I have no idea why I don’t make it more often.

I used a variety of vegetables from our garden and tossed in some shiitake mushrooms. (Those came from Indiana.) The eggs are from friend nearby who has her own chickens and runs a small sustainable homestead at Wonder of Life Farm.

The rice is white. Why? Well, because I love white rice. I eat plenty of whole grains on a regular basis so I have no issues with including white rice from time to time. Brown rice has its place, and feel free to substitute it here, but when traveling all around Southeast Asia I rarely saw it eaten. White rice is more traditional to me so that is what I stick with.

This dish didn’t pull me out of my cooking blahs completely, but I think it was a good start. Now I’m off to check out some more cookbooks, two of which I hope to review for you next week.

Vegetable Fried Rice

1 tbsp olive oil
2 cloves garlic, minced
1 small candy onion, diced
½ cup shiitake mushrooms, chopped
1 small zucchini, diced
1 red bell pepper, chopped
½ orange bell pepper, chopped
2 Anaheim peppers, sliced
3 cups cold, day old rice
2 eggs
3 tbsp tamari

In a large, deep skillet heat the oil and add the garlic and onion. Cook for 1 to 2 minutes. Add the mushrooms and zucchini and cook about 2 minutes more. Finally add the peppers and continue to cook until all vegetables are tender.

Add the rice and stir to incorporate, heating the it through. Push all of the ingredients to one side of the pan and add the two eggs to the empty side of the skillet.

Break the yolks with your spatula and allow the eggs to cook for 30 to 60 seconds. Once they are almost cooked through, stir them into the rest of the rice, distributing the egg evenly.

Stir in the tamari and you are ready to serve. Add salt and pepper to taste if you desire. I find the tamari is enough for me. Serves about 4.

Blueberry Peach Upside-down Cakes

August 5, 2010

Last fall, before we even moved back to the U.S., I was already excited about blueberry picking. I hadn’t been in almost 3 years and I was determined that I would load the kitchen with an abundance of blueberries picked at a nearby orchard.

As the summer went on, I began to lose hope that I’d make it to the orchard. It is about 1 ½ hours away and there never seemed to be a convenient weekend. When there was, it was typically on Sunday when the place was closed.

A couple weeks ago, my nephew came to visit for a few days and I had just found out about another orchard that was a little closer to where we are living, Reed Valley Orchard. It appeared that blueberries were long gone, but they had an overabundance of Freestone peaches. With a day free and lots of time to spend together, we set off to check this place out.

After, about an hour, and 4 miles creeping along a one lane road, part gravel, we finally found it. I immediately knew it was worth the trip. In addition to the rustic, little building full of fruit preserves and crafts, it was fruit-tree city. It turns out that Reed Valley has just about everything in its respective season – cherries, blackberries, raspberries, pears, nectarines, peaches, plums, pumpkins and apples.

I was excited enough about the peaches, but when I rounded the corner and saw a girl sorting through blueberries (yes, blueberries!) I was ecstatic! It turns out they had about one row still bearing. My lucky day!

We started with the peaches and the amount on the trees was incredible. You could have just walked around holding out your hand and one was bound to fall into it. We filled up our baskets with no problem. That is, after I spend about 15 minutes taking pictures.

Next were the blueberries. We had quite the bucket to fill up and I think my nephew and I both got a good idea of just how small blueberries are when you are trying to fill a whole bucket. It took a very long time, but I wasn’t leaving without more than I knew what to do with.

I picked up some of these too which I’d never had before – Donut Peaches. I guess they also go by the name Saturn Peaches. The orchard only has a few of these trees so they were picked that morning and available in the store. They had that distinctive peach flavor, but a firmer flesh.

This was the total damage, along with a box of peaches considered seconds for making jam.

The donut peaches we ate fresh, and I showed you the jam I made with seconds this past week. I almost made it through the entire bucket of blueberries before I separated some out for freezing. Most of the other peaches we’ve eaten fresh as well, but I had a strong urge to bake something. I rarely ignore these types of urges and this time cake was calling my name.

I found a pineapple upside-cake recipe in my trusty Betty Crocker Cookbook Bridal Edition. I reduced and changed the type of sugar, reduced the butter and changed the flour.

Then I decided I wanted mini-cakes. You know, because mini anything is just too darn cute to pass up. I used the large, six-muffin pan my mom got for me recently. The kind that is ideal for mini-meatloaves. A little big for a muffin, but not bad for dinner or dessert.

Voila – Blueberry Peach Upside-down Cakes. I’m really happy with how these turned out. Next time I may add a few more blueberries, but the cake was nice and tender, and the dessert as a whole wasn’t overwhelmingly sweet. I think the raw sugars and whole wheat flour really work to balance this. Now, I’m thinking about which fruit is next. Maybe plums…

Blueberry Peach Upside-down Cakes
Cake modified from Pineapple Upside-Down Cake, Betty Crocker Cookbook

1 peach
½ cup blueberries, 30-40
½ cup mascavo sugar
¼ cup unsalted butter
½ cup demerara sugar
¼ cup unsalted butter, softened
1 egg
¾ cup milk
1 ½ tsp baking powder
¼ tsp salt
1 1/3 cup white whole wheat flour
Preheat the oven to 350 degrees F. Slice the peach into 12 slices, you’ll need 2 for each cake. In a saucepan, combine the mascavo sugar and a ¼ cup of the butter. Cook over medium heat until the butter is melted and the sugar dissolved.
Pour the sugar syrup evenly into each of the 6 slots. Sprinkle 5 to 6 blueberries in each and top with two slices of peach in a single layer.
In a mixing bowl, cream together the sugar and the butter until combined, then add the egg. Mix in the milk. Next add the baking powder, salt, and flour. Mix just until combined. Divide the batter evenly and pour over the fruit.
Bake for 20 to 25 minutes or until the cake is firm in the center. You can use the toothpick test. Remove from the oven and place a cookie sheet, top down, over the muffin tin. Flip the muffin tin and the cookie sheet. Allow the muffin tin to rest there for about 5 minutes so the syrup will run down over the cake.

Gently remove the muffin tin from the cakes. Serve warm or at room temperature.

Sweet and Simple Tomato Pepper Salad

July 30, 2010
 A simple summer salad recipe with garden tomatoes and peppers. 

Living in Brazil taught me a lot about food and cooking. First I had to overcome the mini-stove and let go of my perceptions of must-have ingredients. Then the learning and appreciation began.

The lesson I’m remembering this summer is that the simpler a food, the more delicious it can be. A single, fresh ingredient, whether meat or plant, matched with one spice, an herb or an oil can bring out more natural flavor than a recipe that includes 25 exotic ingredients.

I felt like I understood the concept of simple food before our move, but being exposed to local Brazilian cuisine made me realize I had a lot left to learn.

The main place that this lesson was reiterated to me was the churrascaria, those famous Brazilian barbecues (or churrasco if you are describing the cooking style or going to one at a home). I feel incredibly fortunate that I was able to experience this type of dining and food from the source, and not at an overpriced Estados Unidos version, as authentic as they might be.

It starts with the meat. The meat is seasoned with salt. A lot of salt (as in bags of the stuff), but still, just salt. Now this may not be the case everywhere, but it was at the barbecues we attended at the houses of friends.

These barbecues whether at a restaurant or a residence also included what would translate in the States as a salad bar buffet. However, not the layer-your-ingredients type of salad bar, but plates of vegetables in simple oil-based marinades, vinegar and herbs. Pastas were also included at restaurants and my favorite was always the spaghetti ao alho e óleo– spaghetti with garlic and olive oil. Again, pretty simple.

Cherry tomatoes from our Kentucky garden

Now that we are being invaded by loads of cherry tomatoes I remember a lot about how we enjoyed tomatoes in Brazil. I’ve never especially disliked tomatoes, but I was never the type of person who could sit down and eat just a tomato with salt and pepper either.

Then, in Brazil, I came across tomatoes quartered, drizzled in olive oil and fresh lime juice, topped with either parsley or cilantro and seasoned with salt and pepper. Wow, there was something about that citrus juice and those herbs that made a tomato so much better!

I am crazy about the little orange cherry tomatoes we have in our garden this year. They are so sweet you think you just popped a sugar cube in your mouth. In an effort to avoid taking away from their already delicious flavor, I’ve been including them in simple salads that mimic the flavors we had in Brazil.

Tomato Pepper Salad Recipe | Fake Food Free


This specific salad isn’t exactly the same, but I wanted to use all the ingredients from our garden with lots of color. I decided to switch out the lime juice for lemon this time, and parsley for fresh basil. Any variety of peppers will do, but I used a combination of orange, red and yellow because I am thrilled that we have a few from the garden.

If you want to go all out, I highly suggest using aged goat cheese. That is my absolute favorite, but unfortunately I just ran out of it last week, so here I’ve used feta which is good in a pinch.

Enjoy the simple flavors of summer!

Sweet and Simple Tomato Pepper Salad 

4 cups cherry tomatoes, quartered
½ candy onion, thinly sliced
1 cup thinly sliced bell peppers (I used a combo of orange, red, and yellow)
5 to 7 fresh basil leaves, chopped
3 tablespoons fresh lemon juice
3 tablespoons olive oil
1/3 cup crumbled feta or aged goat cheese
Salt and pepper to taste

The preparation is easy on this one. Simply combine all the ingredients in a bowl, stirring gently. Cover and refrigerate for at least 30 minutes before serving. Sprinkle on more basil or cheese just before serving if desired. Makes 6 to 8 servings.


Sweet and Simple Tomato Pepper Salad Recipe | FakeFoodFree.com


Thanks for reading! All images and content are the property of Fake Food Free unless otherwise stated. Please do not republish full recipes and images without written permission. What is okay? Feel free to Pin images, share links to my posts or share the photo in a round up post with the title of this recipe and a link back to the post. Confused about copyright and food blogs? Here is some helpful information on Recipe Attribution. If you want to use a photo or full recipe, just ask. I’m sure we can work something out.  

Gardening 2010: Lessons Learned

July 28, 2010

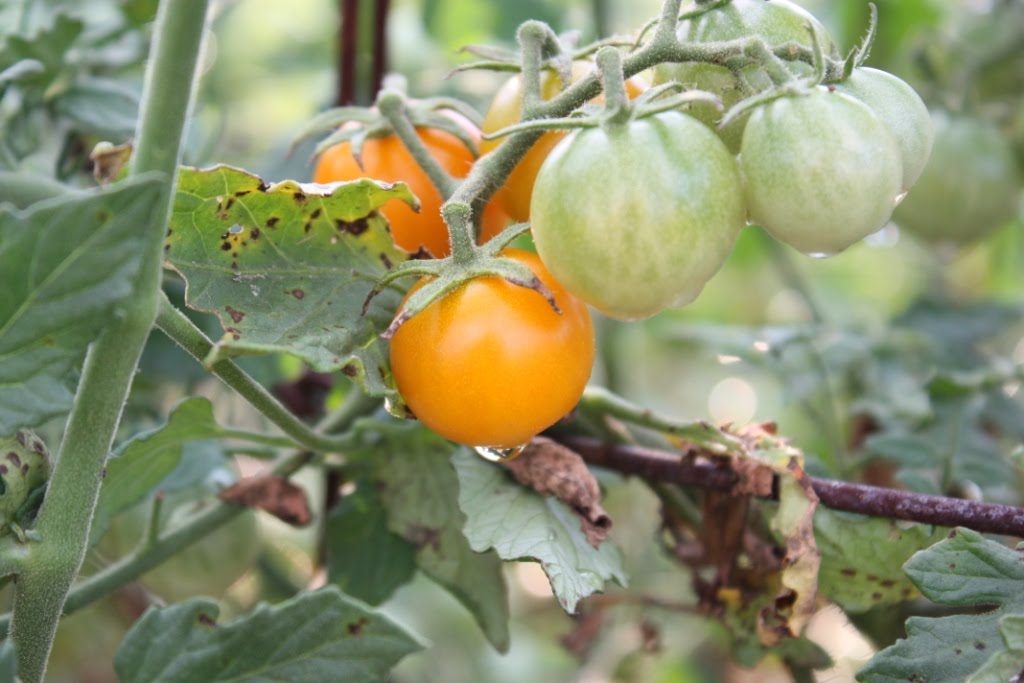
As the beginning of August approaches, we are still knee deep in gardening goodness. I’ve learned a lot this season. There were many mornings I thought it would be easier to forget it and buy from the Farmer’s Market. However, I have to admit that the feeling you get when you prepare or eat something you grew yourself is incredibly rewarding.

We still have quite a bit of the season to go because we are planning some fall crops. We are hoping the melon, pumpkins and spaghetti squash begin producing soon, too.

Even though there is more to come, I’ve done a little reflecting on what this first year with a large garden has taught me. Whether it’s just for a laugh or it proves helpful, here are my gardening lessons learned.

Grass is a powerful, powerful plant. It grows incredibly well everywhere except where you would like it to.

The garden which we would prefer to be grass-free is like a fertile home for the green stuff. It threatened to take over the strawberries several times, succeeded in doing so with the potatoes and nearly took over the corn. The more we pull the more it grows. Yet, we have some completely bear spots in our new yard. Though we transfer sod and plant new seed, it seems the grass would rather be in the garden among friends.

Not only do you need the time to plant and pick it, but you need the time to cook and eat it too.

We’ve been pretty good at managing our gardening time. Between some early mornings and working late in the evenings, the weeding and picking has been under control all season. Then, I realized that what was being picked needed to be eaten. Believe it or not, that is when things got crazy.

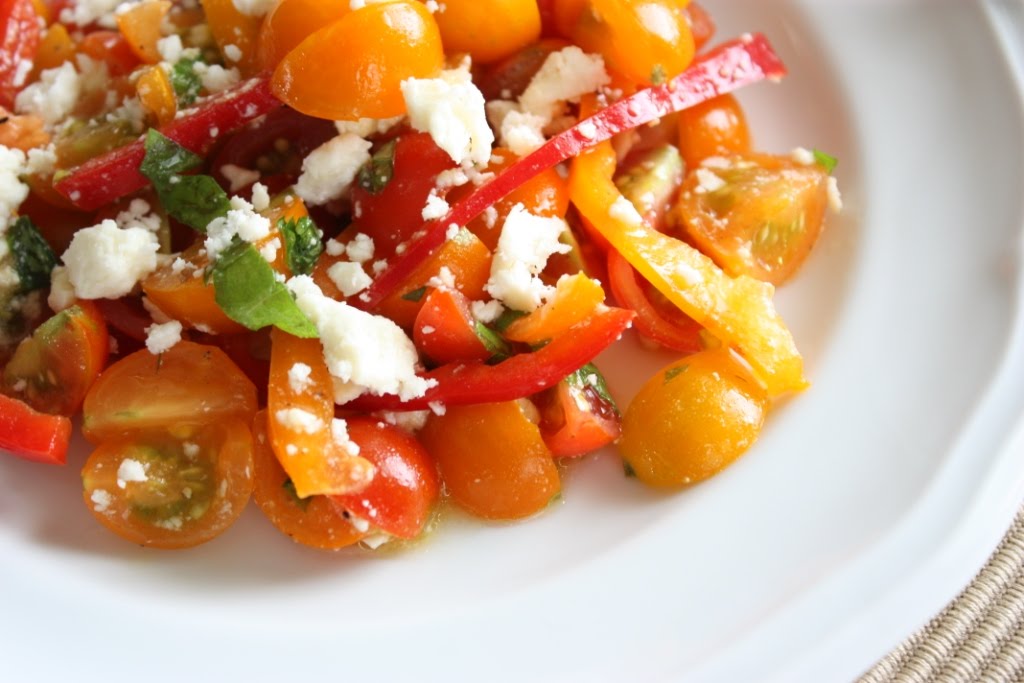
If we head to a cookout for one evening or I meet a friend for lunch one afternoon, the produce piles up like crazy and I get behind. Now, this isn’t exactly a bad problem to have but one can only eat so many cherry tomatoes.

Garden gifts aren’t as easy as I thought they would be.

We moved to a house with a big yard for a big garden. The problem? All our neighbors have gardens, all my friends who don’t are about 40 minutes away, and I work from home. I envisioned gifting all our extra produce. I had no idea it would be such a difficult task.

My garden plans are as exotic as my tastes for food.

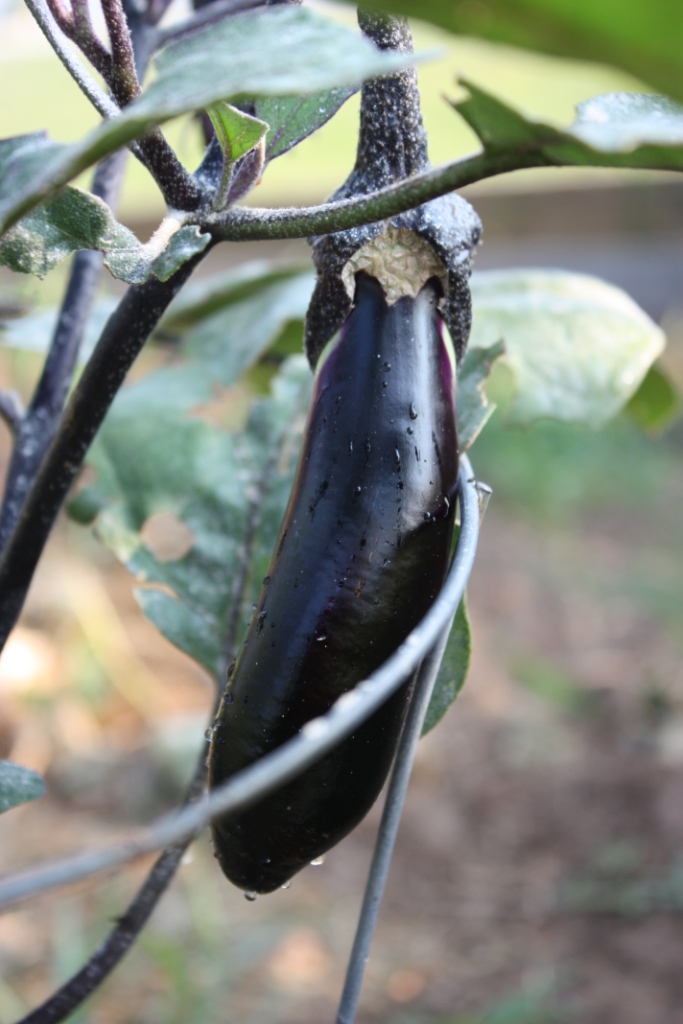
This year we planted a lot of basics – tomatoes, squash, corn, bell peppers, hot peppers, potatoes. Then we got a few out of the ordinary plants (for around here) too – celery, artichoke and asparagus (which won’t produce for a while) and a Japanese eggplant.

As I’ve read gardening stories online and witnessed things at the area farmer’s markets I have my sights set incredibly high for next year. I’m thinking lots of heirloom tomatoes, more varieties of eggplant, Thai chiles, bok choy, and tomatillos to name a few things.

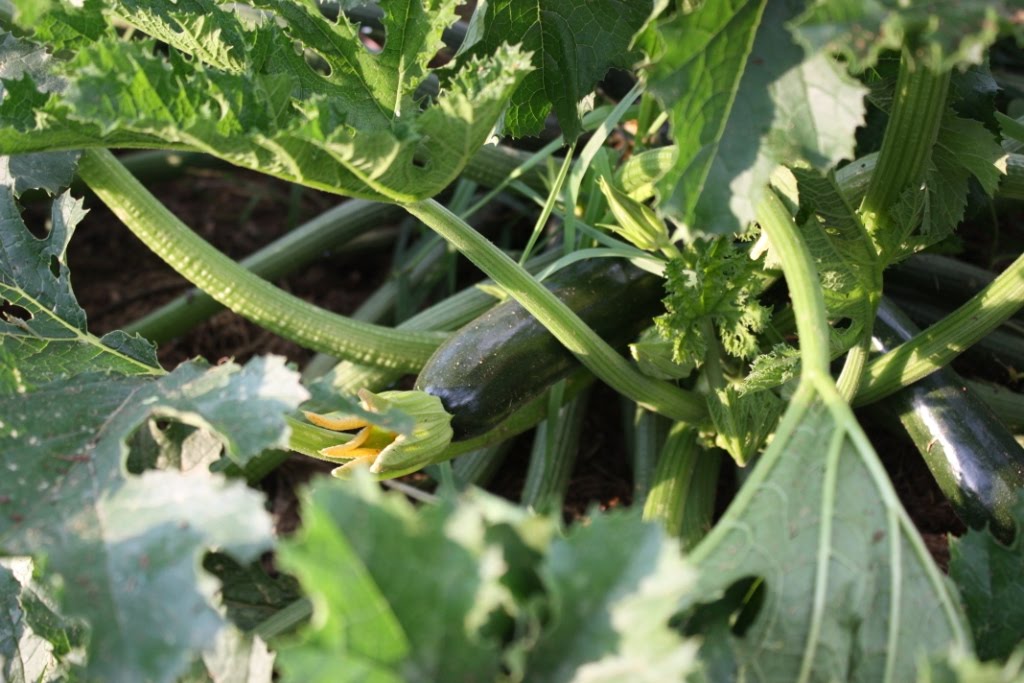
Cucumbers and zucchinis are enormous plants.

They seem to just keep growing and growing. The one cucumber plant that actually lived has taken over all of the space we had planned for three of them.

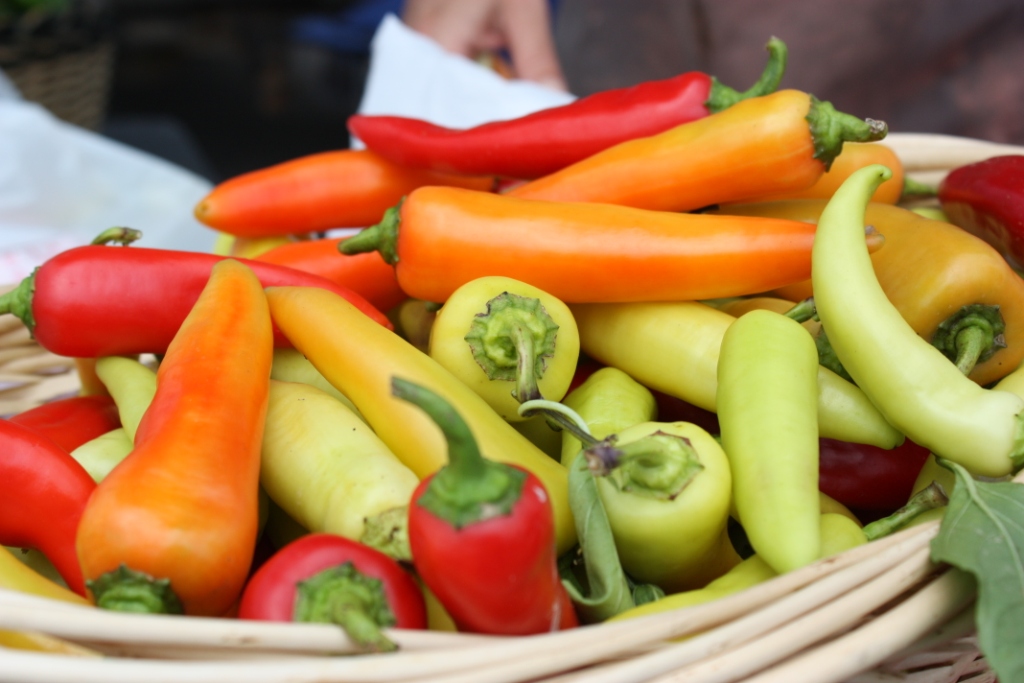
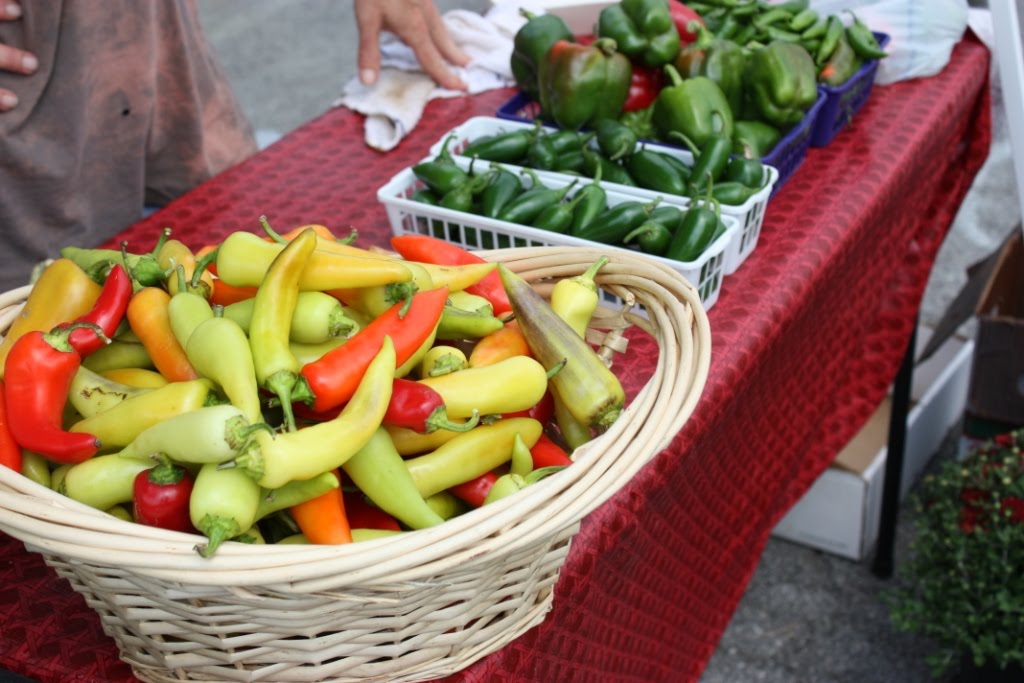
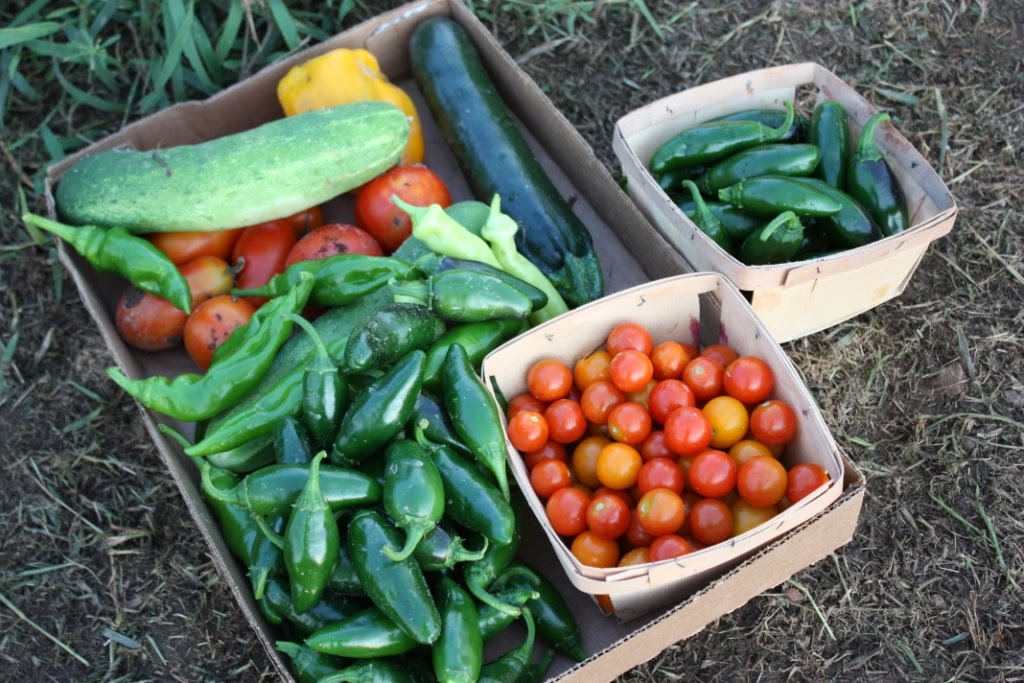
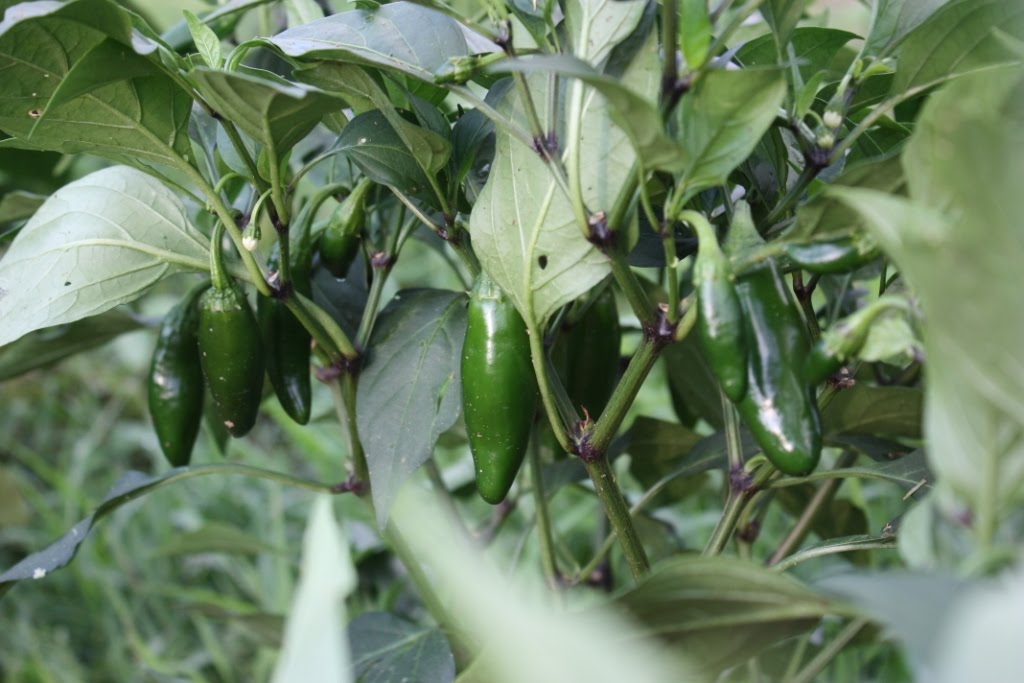
If you put nine jalapeno plants in your garden, beware.

Why would you only buy one small jalapeno plant when they come in packs of 9 for a mere $3? Seems crazy, right? That is, until you begin to drown in a sea of hot peppers.

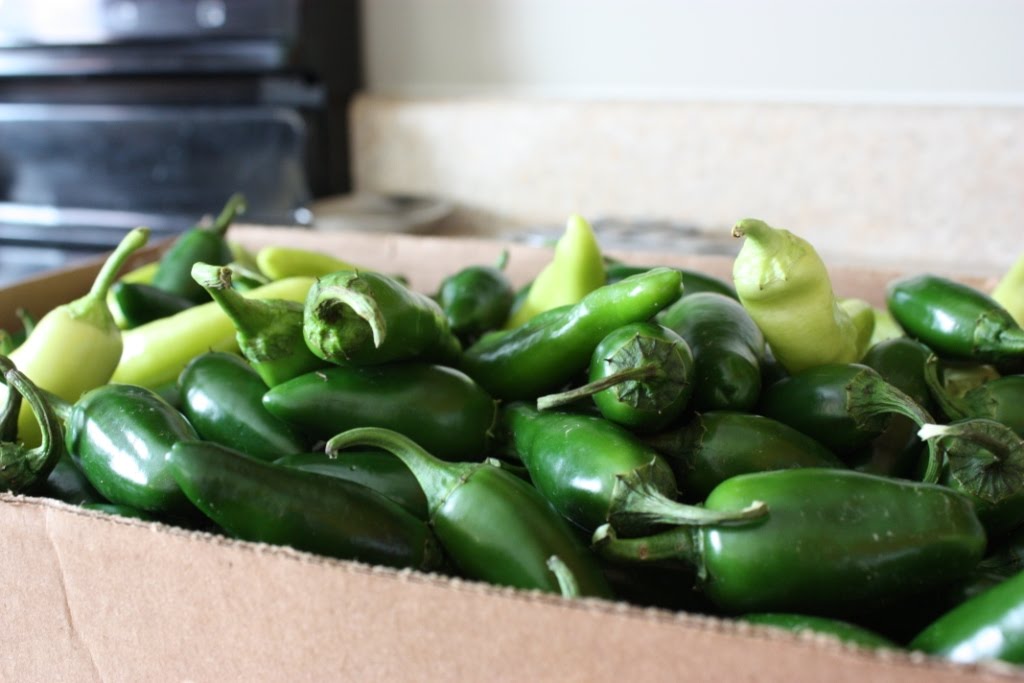
I wish I could put into words my glorious visions of all the perfect jalapenos I would preserve and salsa I would make. I was so excited when the first few began to ripen. And then more began to ripen, and more, and more. I have never seen so many jalapenos in my life. Box after box has been entering our kitchen and new blooms show that they are not stopping anytime soon.

I’ll talk about my canning experiences more later, but my first batch failed miserably. Although, future batches got better, I can’t help but look at the boxes sitting in the kitchen and dread slicing them. The bright side is that I’ve found a few new recipes for canning beyond the standard pickled jalapeno so hopefully some creativity will inspire me. One thing I do know is we will be having one spicy winter around here!

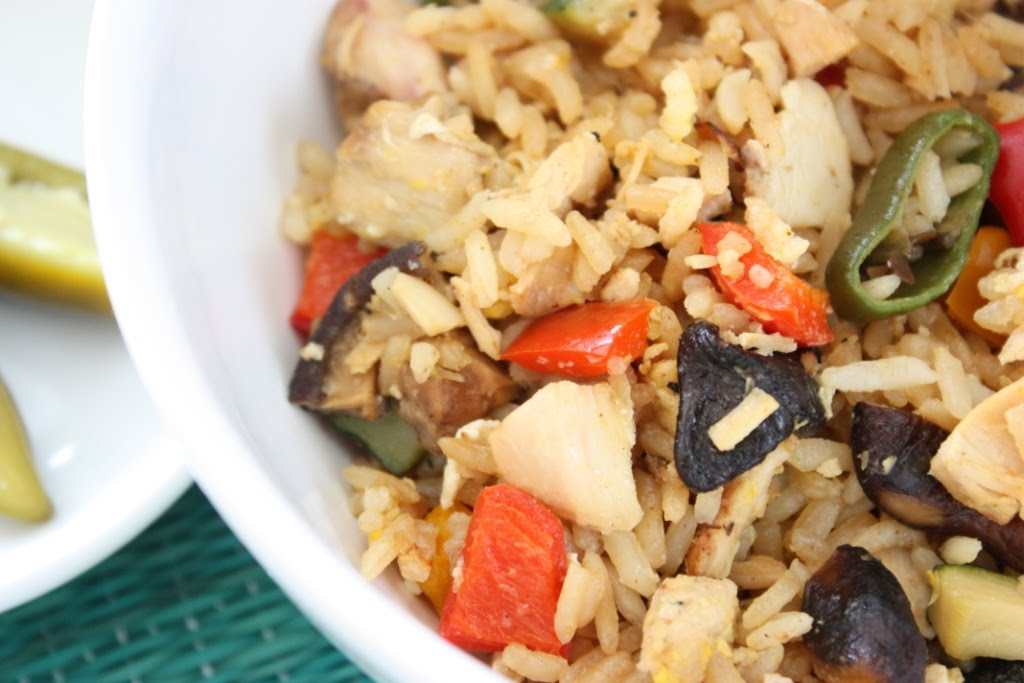
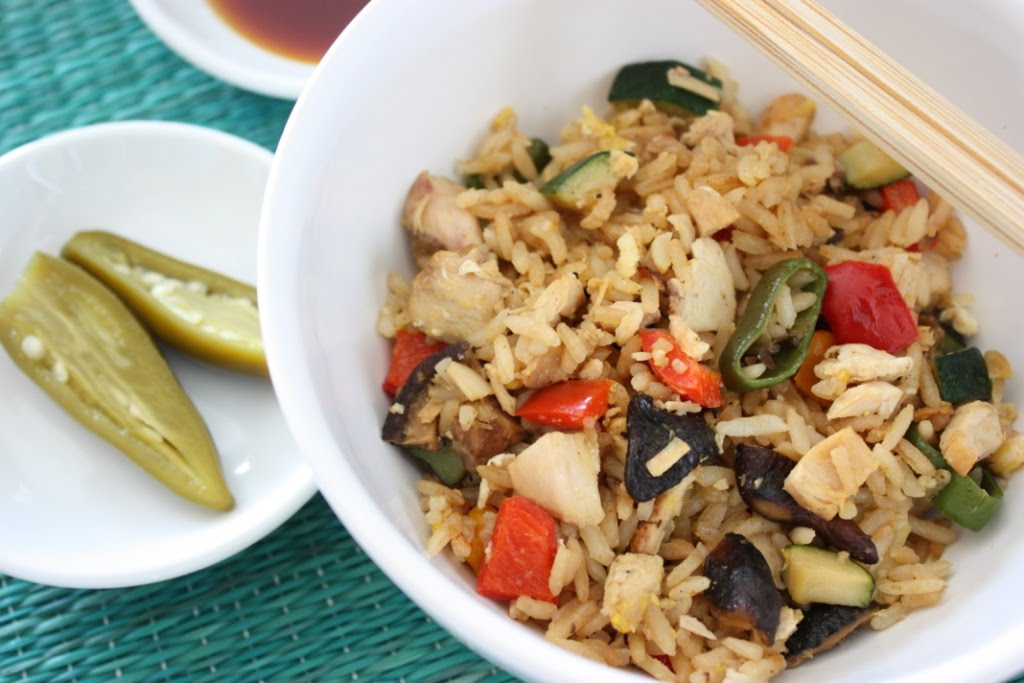
In addition to jalapenos there are a few other specific items we are drowning in; namely, cherry tomatoes and zucchini. I’ve been trying to make all that I can with them so the next few posts will be devoted to those recipes.

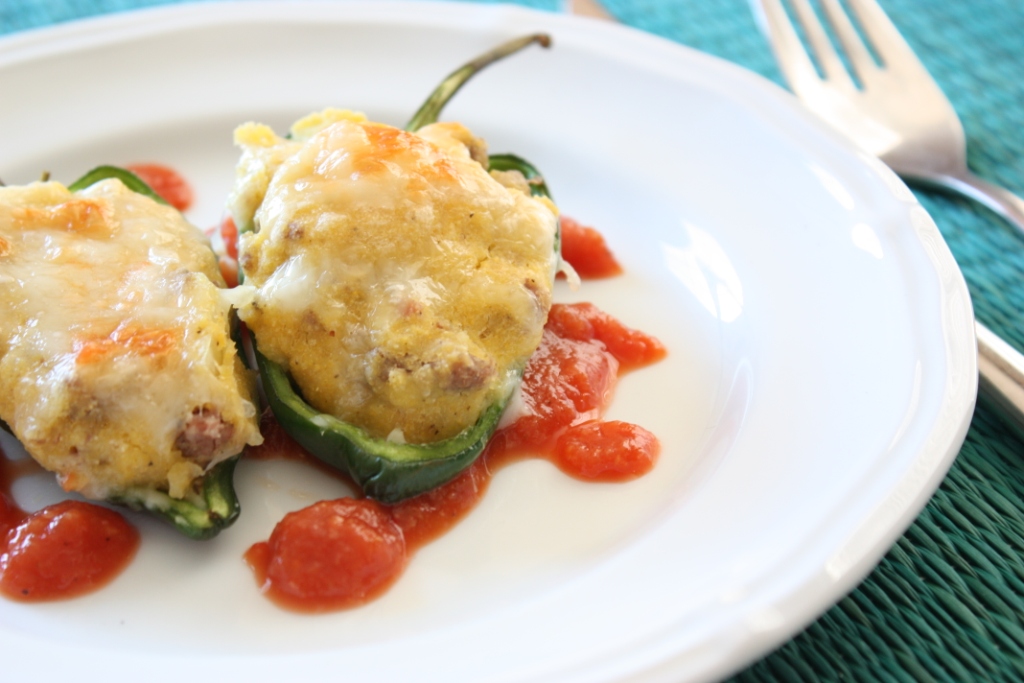
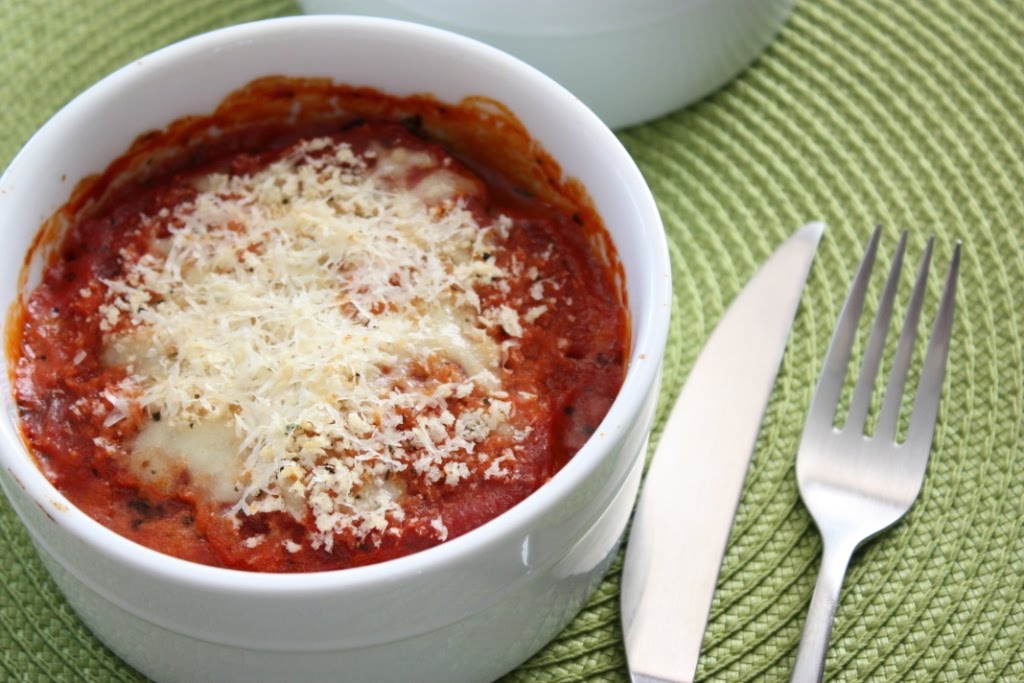
First up – Baked Zucchini and Japanese Eggplant. I really like making individual servings of casserole-type dishes so that is what I did here. This dish is great with or without a side of pasta.

Baked Zucchini and Japanese Eggplant

1 cup Panko bread crumbs
1 tsp dried basil
¼ cup + 2 tbsp Romano cheese, grated
½ tsp sea salt
¼ tsp black pepper
Olive oil
2 medium zucchini, sliced
2 Japanese eggplant, sliced
2 cups marinara (any type, preferably homemade, will do)
1 ½ cups whole milk mozzarella

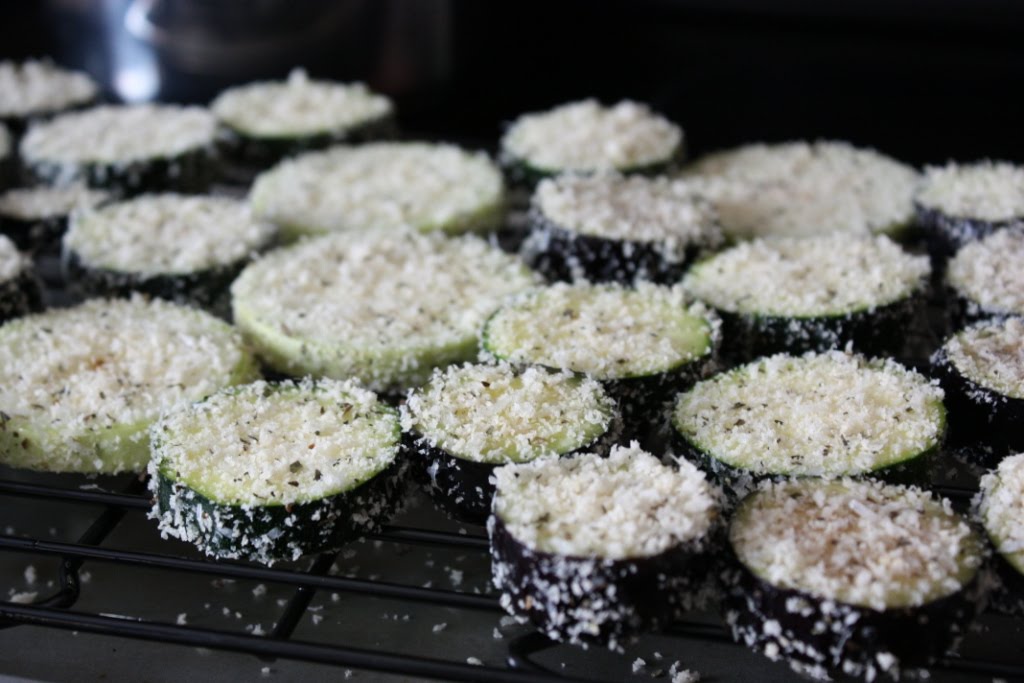
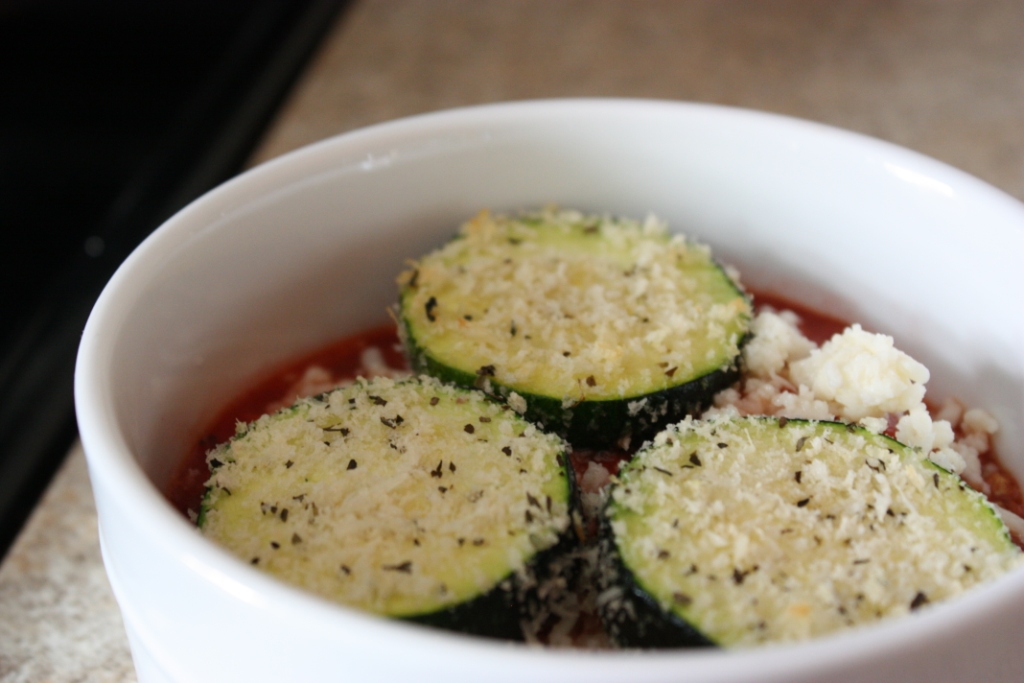
Preheat the oven 400 degrees F. Place a cooling rack on top of a baking sheet. On a plate, combine the bread crumbs, basil, 2 tbsp of Romano cheese, salt and pepper. Drizzle the slices of zucchini and eggplant with olive oil, and spread to coat each piece.

Place each slice in the bread crumb mixture and press to cover evenly, arrange on the cooling rack. Bake for 12 to 15 minutes or until the vegetables are slightly tender. Remove from the oven and set aside.

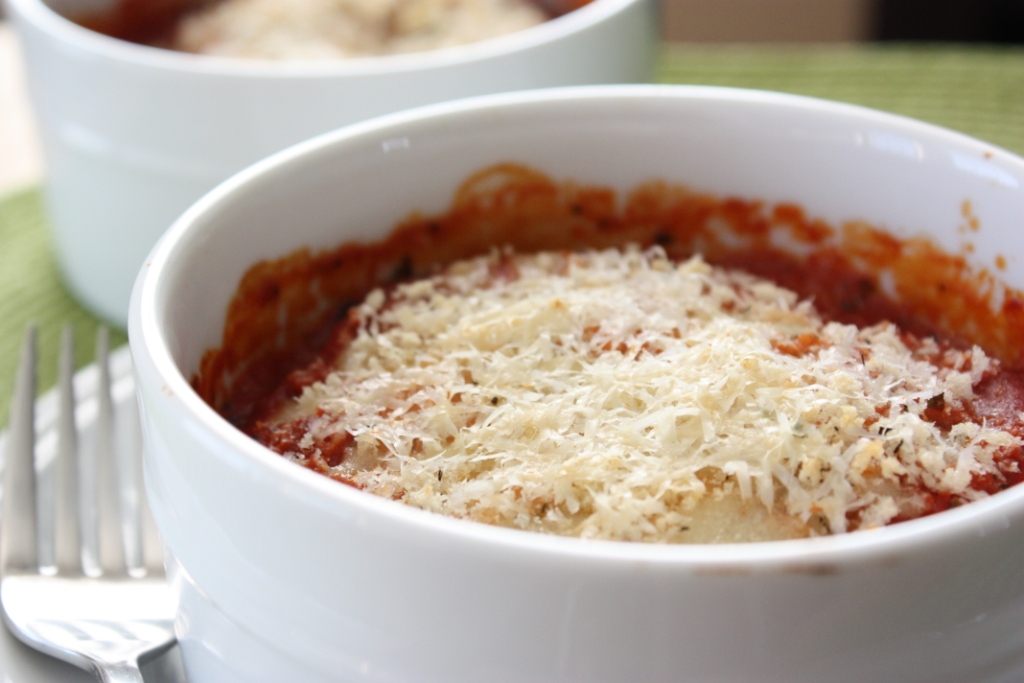
On a separate baking sheet arrange four, 4 to 5 inch wide ramekins. Spread 2 tbsp of sauce in each one. The order I used was zucchini, sauce, mozzarella, eggplant, sauce, mozzarella and Romano so you can divide up each of the ingredients per layer and ramekin. Sprinkle the top with any remaining bread crumbs.

Bake for 12 to 15 minutes or until the cheese melts and begins to brown, and the sauce is bubbly. Allow to cool for 5 minutes and serve in the individual ramekins.

Want to create beautiful food and product photos that you can't wait to share?!
Discover your style, control the light, and shoot using the tool you know how to use (yes, your phone included). Learn about free resources, Live Q&As with Lori, and online courses you can take from anywhere in the world!
We respect your privacy. Unsubscribe at any time.