Browsing Category

Grains Nuts and Seeds

Vegetable Orzo Salad

March 12, 2012

Winter-warming comfort foods have left my mind completely. In their place, I see visions of grills, picnics, sandwiches, salads, and green gardens. It’s like the spring switch has been flipped and there is no going back. 
Spring veggies haven’t emerged in the garden, but I had to make something that would indicate to my brain and stomach that it is just a matter of time. I don’t make pasta salad often, but every now and then it makes one delicious lunch, especially when you load it with as many vegetables as possible. 
I love orzo in pasta salads because it feels like a lighter choice. Those small pieces don’t sit as heavy as macaroni or rigatoni. Any variety of vegetables can be added to this salad. I’m planning for some asparagus in a few weeks that will make a nice addition. 
If you like your pasta salads with a little more dressing, you can double the dressing recipe. Only a small amount is used, but this is a mayo based dressing. If you aren’t into mayo, I have a feeling plain Greek yogurt would work too.
Vegetable Orzo Salad
3 cups orzo, cooked and cooled
1 cup broccoli florets, chopped
1 cup cauliflower florets, chopped
1/8 cup onion, finely chopped
15 black olives, halved
15 green olives, halved
2 generous tbsp mayo
1 tbsp red wine vinegar
1 ½ tsp mascavo sugar (or white)
Salt and pepper to taste
Place the orzo and veggies in a large bowl. In a small bowl, whisk together the mayo, red wine vinegar, sugar, salt, and pepper.
Pour the dressing over the salad and toss to coat. Best served cold. Makes 6 servings.
Pin It

Blood Orange Bulgur Wheat Salad with Honey, Meyer Lemon & Cilantro Dressing

February 6, 2012
 
This grain salad combines sweet blood orange with bulgar wheat and a honey, citrus and herb dressing. 
 
Blood Orange Bulgur Wheat Salad with Honey, Meyer Lemon & Cilantro Dressing | Fake Food Free

I like a straight forward recipe name; something easy to remember and easy to write, if necessary. But sometimes it simply isn’t possible. Sometimes you must name all the ingredients that lie within because they are all too good to be left out.

Take this salad for example. Every part of it makes my taste buds happy. Leaving out any of the above listed ingredients wouldn’t express to you just how exciting it is. Start with the citrusy cilantro, followed by local honey, and then the excitement really begins with the Meyer Lemons. Consider it off the charts once the blood oranges come into play.

So I apologize for that long title, but I hope you will find every part of this salad as tasty as I did.

Blood Orange Bulgur Wheat Salad
Makes: 2 servings
 
Ingredients:
 
1 ½ cups cooked bulgur wheat
2 ribs celery, sliced
2 green onions, sliced
¼ cup fresh cilantro, chopped
¼ tsp salt
2 blood oranges, sliced
 
Prep
 
Combine all ingredients except the oranges in a mixing bowl and toss to combine. Top with the dressing (recipe below), and toss to coat. Divide salad onto two plates and top with orange slices. Serve room temperature or cold. Makes 2 servings.
 
Honey Meyer Lemon Cilantro Dressing
 
Ingredients:
 
Juice and zest of 1 Meyer lemon
2 tbsp extra virgin olive oil
1 tbsp honey
2 tbsp fresh cilantro, chopped
Pinch of salt
 
Prep
 
In a small bowl, whisk together the lemon juice and oil. Slowly whisk in the honey. Stir in the cilantro and salt. Pour over the bulgur wheat salad.
 
Blood Orange Bulgur Wheat Salad with Honey, Meyer Lemon & Cilantro Dressing | Fake Food Free

Pin It


Coconut Lime Granola

January 25, 2012

This is how it goes down. 
You open the webpage and think to yourself – what is this?  You scroll down the page, and you spot something. Your brain says – oooooohh, pretty!
Click, repin, and you’re a goner.
The next thing you know two hours have passed, and you have a visual list of things you want to make, how you want to decorate, and where you want to travel. 
Yes, this is Pinterest
When I was younger I used to carefully cut photos out of magazines and paste them on the pages of notebooks. These were my plans, my inspirations, and they most often had to do with fitness goals or dream houses.
It dawned on me today that Pinterest is my modern version of this; the adult me keeping dreams and inspiration alive. Note: This is my positive spin on the fact that I’m addicted. 
I’m not quite sure how to create a natural transition from Pinterest to granola; other than the fact that I probably have some granola recipes pinned on my boards. 
Here it goes anyway. 
Limes are one of the things I miss most about Brazil. I used to go to the market and get a bag of 10 or 12 of the best tasting limes for about 44 cents U.S. Needless to say, 44 cents per lime was tough to handle when we returned to the U.S. So when they are on sale, I stock up. 
I love the combination of lime and coconut, and have included it in breads, but never in granola. So I tried it. Aside from it being a fabulous way to use up some limes, it’s also the perfect excuse to bake with some coconut oil. The flavors came out so well, and it has added quite a positive spin to my yogurt this week. 
Coconut and Lime Granola
¼ cup molasses
¼ cup maple syrup
Juice and zest of 2 limes
¼ cup virgin, cold pressed coconut oil, melted
4 cups old fashioned rolled oats
1/3 cup unsalted sunflower seeds
½ cup raisins
½ cup raw almonds, chopped
1 cup shredded, unsweetened coconut
½ tsp sea salt
Preheat the oven to 325 degrees F.
In a small bowl, whisk together the molasses, maple syrup, lime juice, lime zest and coconut oil. Set aside.
In a large bowl, stir together the oats, sunflower seeds, raisins, almonds, coconut and salt. Pour the molasses mixture over the oats and stir to coat. 
Turn the granola out onto an ungreased baking sheet. Spread in a single layer. Bake for 40 minutes, stirring every 10 to 15 minutes. Cool and store in an air tight container. Makes about 6 cups. (I like to stir in a little plain coconut before serving to add some color and a different texture.)
Pin It

Whole Wheat Black Sesame Cookies

January 22, 2012
Black Sesame Cookies | Fake Food Free | A simple cut-out cookie made with white whole wheat flour, raw sugar and nutty black sesame seeds.  
I’m looking for some variety in my baked goods. I’m not sure why I’m so bored of chocolate chip cookies and standard flavors, like vanilla. Perhaps it’s all the time I spend exploring on the Internet. Yes, that could be it. 
 
I see apricot, rhubarb, mocha, green tea, red bean and…black sesame. I came across these cookies towards the end of last year and had every intention of making them for the holidays. That didn’t happen, so I revisited the goal this weekend.
 
I’m a big black sesame fan, and if you like anything with a slightly nutty flavor, you will be too. I adapted the recipe from one of my favorite food bloggers, Green Cilantro (unfortunately, the blog hasn’t been updated since 2013). Ideal with coffee, tea, or milk, these cookies are only slightly sweet; perfect for an afternoon snack or post-run treat, whatever the case may be.
 
Black Sesame Cookies | Fake Food Free | A simple cut-out cookie made with white whole wheat flour, raw sugar and nutty black sesame seeds.
 
Whole Wheat Black Sesame Cookies
Adapted from Black Sesame Cookies by Green Cilantro
Makes: About 30 small heart cookies
 
Ingredients 
 
2/3 cup unsalted butter, softened
½ cup raw sugar
1 large egg
2 tsp 2% milk 
½ tsp baking soda
½ tsp salt
2 cups white whole wheat flour
2 tbsp black sesame seeds
 
Prep
 
Preheat the oven to 350 degrees F. In a mixing bowl, cream the butter and sugar until well blended, about 1 minute. Mix in the egg and milk. 
 
In a small bowl, combine the baking soda, salt and flour. Gradually add the dry mix to the wet ingredients with mixer on low. Mix on medium until the dough comes together in a ball. 
 
By hand, stir or knead in the black sesame seeds. Place the dough between two pieces of wax or parchment paper and roll to about a ¼ inch thickness. Place the dough on a baking sheet and refrigerate for 1 to 2 hours. 
 
Cut into shapes and bake on an ungreased cookie sheet for 8 to 9 minutes; just until the edges are slightly browned. Let cool for 1 to 2 minutes and then transfer the cookies to a rack to cool completely. 
 
Black Sesame Cookies | Fake Food Free | A simple cut-out cookie made with white whole wheat flour, raw sugar and nutty black sesame seeds.
 
 Thanks for reading! All images and content are the property of Fake Food Free unless otherwise stated. Please do not republish full recipes and images without written permission. What is okay? Feel free to Pin images, share links to my posts or share the photo in a round up post with the title of this recipe and a link back to the post. Confused about copyright and food blogs? Here is some helpful information on Recipe Attribution. If you want to use a photo or full recipe, just ask. I’m sure we can work something out. 

Wheat Berry Salad with Fresh Cranberries and Orange Maple Dressing

January 10, 2012
I first made this wheat berry salad to brighten up a long winter, but with the flavors of fresh cranberries and maple syrup it makes a great side dish for the holiday season or any time of year!
 
Wheat Berry Salad with Fresh Cranberries and Orange Maple Dressing | Fake Food Free | A delicious cold grain salad for Thanksgiving, the holiday season or any time of year!
 
I consider citrus season a bright spot in a long winter. When everything is brown and wilted, citrus shows up with its bright oranges and yellows. 
 
It’s the one time of year when I gladly say – send my fruit on over from Florida and California. Because let’s be honest. No orange, lemon or grapefruit trees are going to be popping up anytime soon in Kentucky. 
 
Well, except for my dwarf Meyer Lemon trees in the back room. I have full confidence that I may get a lemon from them one day, but they have a long way to go. 
 
An added bonus to citrus season is that if you are lucky, you still have some holiday ingredients hanging around such as fresh cranberries. I was in the mood for a cold grain salad this week, and the combination of tart, fresh cranberries and the sweet juice of an orange seemed the perfect match. The kale and maple syrup were added for good measure.
 
Wheat Berry Salad with Fresh Cranberries and Orange Maple Dressing
Makes: 4 to 6 servings
Write a review
Print
Ingredients
  1. 1 cup whole, fresh cranberries
  2. 3 cups cooked wheat berries
  3. 3 green onions, whites and greens sliced
  4. 1 large leaf of kale, stem removed and very thinly sliced
  5. Juice of half an orange
  6. 1 ½ tablespoons maple syrup
  7. 1 tablespoon olive oil
  8. 1 teaspoon apple cider vinegar
  9. ½ teaspoon fine ground sea salt
  10. ¼ teaspoon ground black pepper
Instructions
  1. Place the cranberries in a small food processor. Pulse until chopped into small pieces; about the size of the wheat berries. Transfer to a mixing bowl.
  2. Add the wheat berries, green onion and kale to the bowl. Toss the ingredients to combine.
  3. In a small bowl, whisk together the orange juice, maple syrup, olive oil, cider vinegar, salt and pepper. Pour dressing over the wheat berry salad. Toss to coat. Serve at room temperature or cold.
Fake Food Free https://www.fakefoodfree.com/
 
Wheat Berry Salad with Fresh Cranberries and Orange Maple Dressing | Fake Food Free | A delicious cold grain salad for Thanksgiving, the holiday season or any time of year!
 
Thanks for reading! All images and content are the property of Fake Food Free unless otherwise stated. Please do not republish full recipes and images without written permission. What is okay? Feel free to Pin images, share links to my posts or share the photo in a round up post with the title of this recipe and a link back to the post. Confused about copyright and food blogs? Here is some helpful information on Recipe Attribution. If you want to use a photo or full recipe, just ask. I’m sure we can work something out.  

Crunchy Peanut Butter Date Balls

November 30, 2011
A few weeks ago I put out a call out for bloggers interested in the 2nd Annual International Holiday Cookie Exchange. I’m excited to say that we had nearly 20 people respond and they are all now sharing recipes and baking away.
The idea behind the exchange is to share cookies or candies without the shipping; so we share recipes instead. Over the next couple weeks those participating will be posting about the recipes they received from a fellow blogger.
So now it’s my turn. There is no way I could help host such a fun event without participating myself!
My recipe comes from Melissa of My McDonald Meal. Melissa just happens to be a fellow Kentucky Food Blogger and friend. If you haven’t checked out her blog, definitely stop by. She creates delicious, real food recipes that are kid-friendly and approved by her beautiful daughters.  
When Melissa sent me the recipe, she wrote:
I tend to stick with old time favorites when it comes to holiday cookies; not something you would likely see on my blog during the rest of the year… I’m going with a favorite of mine from my childhood. — Date Balls. Sounds kind of boring but I found a way to kick these up a notch!
I have to say, while I’ve heard of Date Balls, I had never made them. I’ve used dates in a few recipes, but they aren’t a staple for me. So, long story short, I had no idea what to expect.
Well, Melissa wasn’t kidding when she said she kicked these up a notch. Wow, they are so good! I’d be tempted to say that even if you are not a date fan, you will like these. The flavor of the nuts and peanut butter really come through and the cereal adds a great crunch.
I got a little creative with my dark chocolate; a different style depending on how much you like – a drizzle, half and half or a solid dip.
Crunchy Peanut Butter Date Balls
Recipe from My McDonald Meal
1 cup natural peanut butter (crunchy or smooth)
1 cup confectioners’ sugar
1 cup finely chopped almonds
1 cup brown rice crispy cereal (you can use regular rice crispy cereal too) 
1 cup finely chopped dates (pits removed)
1 tbsp unsalted butter, melted
4 oz. dark chocolate
Mix peanut butter and sugar together in a large bowl. Add in almonds, cereal, dates, pour in butter and combine.
Scoop out rounded tablespoons of mixture to make balls and place on a wax paper coated cookie sheet. Place balls in freezer for about 10-15 mintues. Melt chocolate in a double boiler. When balls are ready, dip the top of them in the melted chocolate and let cool. Makes about 50-60 balls. (I made mine a bit larger and came out with about 30). 
Stay tuned for the official round-up of the International Blogger Holiday Cookie Exchange the week of December 12! There will be lots of great ideas for your cookie tray.

Fried Egg over Kale and Quinoa

November 15, 2011

The words big breakfast lead one to conjure up all types of vivid images. Maybe it’s omelets with bacon and toast, waffles with country ham or biscuits and sausage gravy. Or, if you are anywhere near the vicinity of the southern US it might mean all of the above.

As much as I enjoy all of our traditional breakfast favorites, I also love redefining the big breakfast. Considering that I can barely go a day without eating kale in one form or another it’s no surprise that I’m now having it in the morning. Greens with eggs and grains have recently climbed the ranks as a favorite breakfast which can also easily pass as lunch and dinner.

I went to a farm to table breakfast a couple weeks ago and was greeted with sautéed kale over grits topped with a fried egg. Morning meal contentment right there.

I decided to recreate it at home and since I already had some cooked quinoa on hand from the Cranberry Orange Quinoa Stuffing, I thought I’d use that instead of grits.

I learned a little tip at that breakfast from the chef who was preparing our meal – add a splash of apple cider vinegar to your greens to perk up the flavor. I’d never done that before, but it gives the greens a nice tang. It doesn’t take much. Just a splash in the pan a few minutes before they are done cooking is perfect.

I’ve just come around to undercooked eggs, i.e. a runny yolk. It’s taken me a while, but I now find when I use farm fresh, local eggs and they are served over something like greens or grits that I love them. No worries if they aren’t your thing, just take the egg to your desired doneness.

Then, if you are like me, you’ll want to drizzle whole thing with your favorite hot sauce. My hot sauce of the hour is Sriracha which is amazing with sautéed greens.

Fried Egg over Kale and Quinoa

1 tbsp olive oil
1 to 1 ½ lbs kale, stem removed and chopped
½ large onion, thinly sliced
10 – 15 white button mushrooms, sliced
¼ cup chicken or vegetable stock
Splash of apple cider vinegar
1 tbsp sunflower seeds (optional)
½ tsp sea salt
¼ tsp black pepper
¼ tsp crushed red pepper
4 farm fresh eggs
1 cup cooked quinoa, seasoned to taste

In a large skillet, heat the olive oil over med-high heat. Add the kale and turn to coat in the oil. Add the onions and mushrooms. Cook 3 to 5 minutes. As the kale begins to wilt, add in the chicken stock and simmer until it evaporates gently turning the kale to cook it down further. Add the apple cider vinegar.

Stir in the sunflower seeds if using. Cook 1-2 minute more. Season with the salt, pepper and red pepper. Remove from heat and set aside.

In a non-stick skillet, fry all 4 eggs to your desired doneness. Top will a little ground black pepper on each side.

On each plate, place ¼ cup quinoa, ¼ of the kale and one egg. Top with hot sauce and serve warm.

Pin It

Cranberry Orange Quinoa Stuffing with Pecans in an Acorn Squash

November 11, 2011

The first smells of Thanksgiving drifted through our kitchen this week. I’m talking about that aroma of celery, onion and sage cooking on the stove; the very core of the standard stuffing.

From that point, stuffing can go just about any direction. This time mine headed straight towards cranberry, orange and quinoa and then took a right turn and hopped directly into an acorn squash.

I used the unseasoned croutons I made from leftover Pain de Mie Complet and instead of using all bread as I would with my usual stuffing; I substituted some of it with cooked quinoa. Pecans added a little crunch and I loaded mine with cranberries. You can adjust most of the ingredients to your liking and perhaps add some diced apple or apricots, use walnuts or change the flavors with a sprinkle of cinnamon.

I was a little unsure of what the result would be, but was pleasantly surprised. This could easily make the Thanksgiving table both for flavor and appearance, but we used it as a main course and training for the big day.

Cranberry Orange Quinoa Stuffing with Pecans in an Acorn Squash

1 small acorn squash
2 tbsp butter or olive oil
½ lg onion, diced
2 ribs celery, sliced
2 cloves garlic, minced
Zest and juice of one orange
1 ¼ tsp poultry seasoning
¼ tsp dry mustard
¼ tsp celery salt
½ tsp salt
¼ tsp black pepper
1 cup unseasoned croutons
½ cup cooked quinoa
1 – 1 ½ cups chicken or vegetable stock
1/3 cup chopped pecans
½ cup dried cranberries

Preheat the oven to 400 degrees F. Prep the squash by splitting it in half. Remove the seeds. Gently pierce the flesh with a fork. Drizzle and coat with olive oil. Place in a greased baking dish and sprinkle with a bit of salt. Set aside.

In a large skillet, melt the butter or heat the oil over medium-high heat. Add the onion and celery and cook for about 3-4 minutes. Add the garlic and cook an additional 2 minutes. Next, stir in the orange zest, poultry seasoning, dry mustard, celery salt, salt and pepper. Cook 1 minute.

Turn off the heat and add the croutons and quinoa. Stir in the orange juice and then add the stock one ½ cup at a time. The amount of stock you need will depend on the type of bread pieces you use. Mine were chopped fine so I used about 1 cup. You want the stuffing to absorb all the liquid, but be moist enough so that you can firmly stuff it into the squash. It should be able to hold its shape when pressed together.

Once the stock is added, stir in the pecans and cranberries. Evenly divide the stuffing and use a spoon to transfer and gently stuff the mixture into each half of the acorn squash.

Bake for 30-35 minutes or until the squash is tender when pierced with a fork. Serves 2 as a main course and 4 as a side dish.

Need some more ideas for ways to stuff your acorn squash? Check out A Healthy Passion and Find Your Balance Health.

The Vegetarian Option: Cookbooks for Christmas

November 10, 2011

This is the second in my series of Cookbooks for Christmas with the purpose of sharing a few gift ideas for the foodie in your life. Be sure to check out the review and recipe for my first post The Fundamental Techniques of Classic Bread Baking.

I’d estimate that about 75% of our meals each week are vegetarian which means I often find myself in a rut. Just the other night I was standing in the kitchen idea-less with a few winter vegetables in front of me and a couple options for grains to bulk them up.

Then just as I thought I would be swallowed in a boring, repetitive sea of vegetable stir-fry and rice, along comes this cookbook – The Vegetarian Option by Simon Hopkins accompanied by gorgeous photography by Jason Lowe.

This cookbook is perfect for the person who almost has the basics mastered and is ready to incorporate some more challenging and internationally-inspired combinations. The chapters are divided by vegetables such as Cauliflower & Broccoli, Cabbage & Chard, Spinach & Sorrel and Beets & Turnips.

The reader is greeted in each chapter with a bit about how to handle the vegetable in the kitchen and then turns the page to be awed by the final results. Most of recipes are filling enough for main courses or they can be used as side dishes. Fair warning if using them as a side dish, though. They might steal the show all together.

Just to give you a few examples of what you’ll find between the covers, for the adventurous there is New-crop Garlic Saffron & Tomato Quiche, Asian Fried Turnip Paste or Spinach Mousse with Parmesan Cream. If you are looking for some basics you will also find it full of simple, yet creative salads, stock recipes and condiments.

Personally, my eyes lit up when I saw the recipe for Asian Scallion, Radish & Cucumber Salad with Cashews & Vermicelli . You will rarely hear me use the word dazzled, but my goodness, I was dazzled by this recipe.

As I mixed together the ingredients for the nutty, spicy dressing and poured it over my bowl of mixed vegetables I wondered how it was going to come together. One bite and I was sold – crunchy, nutty, refreshing with just a touch of spiciness from the radishes and ginger.

Just a note before you get started. The ginger syrup used in the dressing needs to be made the night before. Also, I found that while it won’t have the same full flavor, if you are short on time and ingredients tahini can work as a substitute for the homemade sesame paste.

Asian Scallion, Radish & Cucumber Salad with Cashews & Vermicelli

Serves 4
Before you start, you will need on hand both ginger syrup and sesame paste. Also, feel free to add more of one ingredient or another, and to adjust the sweet-sharp balance of the dressing.

1/4 pound dried thread vermicelli (or glass noodles)
2 heaping tablespoons unsalted cashew nuts
salt
a little sunflower oil
6 radishes, trimmed
6 scallions, trimmed
1 cucumber, 7 inches long
generous handful each of cilantro and mint leaves
1 or 2 large red chilis, sliced

for the dressing

1 tablespoon ginger syrup (see below)
1 tablespoon sesame paste (see below)
juice of 2 limes
1 tablespoon Asian fish sauce or light soy sauce
1 tablespoon sesame oil

to garnish

2 teaspoons toasted sesame seeds

Snap the vermicelli into shorter lengths, one-third of the original, folded skein.

Soak in cold water for about 30 minutes, or until well softened. Drain and return to the bowl. Now cover with boiling water, and fork and lift the noodles around for a few minutes until they have become silky, soft, and tender (eat one). Drain, rinse in cold water, and set aside.

In a small skillet, gently toast the cashews with a little salt in a little oil until golden all over. Cool, and then crush each cashew lightly with the back of a knife. Reserve.

Cut the radishes into quarters or rounds, the scallions into diagonal shreds, and the cucumber into thick matchsticks. Tip the prepared vegetables into a large bowl and add the vermicelli. Tear the cilantro and mint leaves into smaller pieces and add to the salad with the chili. Mix together with your hands to distribute everything evenly.

Now whisk the dressing ingredients together in a small bowl. Add to the salad and mix together once more with two forks, lifting and dropping the salad so that all is evenly dressed. Pile onto a shallow serving dish and sprinkle the crushed cashews and sesame seeds over. Best eaten pleasantly chilled, with warm sake or ice-cold beer.

Ginger Syrup

2 cups (scant) granulated sugar
11/2 cups water
finely pared zest of 1 lemon (use a potato peeler)
11/2 cups peeled and coarsely grated fresh ginger

Dissolve the sugar in the water in a pan over medium heat, then bring to a boil and cook for 2 minutes. Immediately add the lemon zest and ginger and stir together. Bring back to a boil for a few seconds and then pour into a bowl. Cover and leave to infuse overnight.

The following day, add 2 tablespoons water and warm through until liquid and pourable. Strain through a sieve and press on the solids with the back of a ladle to extract all the ginger and lemon flavors. Pour the syrup into a screw-top jar and store in the refrigerator until needed, where it will keep for several weeks.

Sesame Paste

Makes about 1 ¾ cups
You need a powerful, small food processor to make this paste. For the best flavor, I feel it is important to use Asian brands of chili and sesame oils.

2/3 cup sesame seeds
3 tablespoons finely grated ginger (juice saved!)
1 large garlic clove, peeled
2 tablespoons light soy sauce
4 tablespoons mirin (Japanese cooking wine)
1 to 2 tablespoons chili oil
1/3 to 1/2 cup sesame oil, plus a little extra to serve
2 tablespoons lemon juice
1/2 cup warm water
1 to 2 tablespoons sugar, to taste

Lightly toast the sesame seeds in a dry pan over medium heat until fragrant, and
cool slightly. Tip into a small food processor and add all the other ingredients.

Grind and pulse until you have a paste that is fully emulsified and super-smooth.

Disclosure & Credit: This cookbook was sent to me free of charge. I was not required to write about it and received no compensation for doing so. All recipe reprinted with permission from Abrams Books.

**************************************************************************************

Today is the last day to sign up for the 2nd Annual International Blogger Cookie Exchange! Come join us!

Cookbooks for Christmas: The Fundamental Techniques of Classic Bread Baking

November 1, 2011

If you aren’t quite ready for the holiday season, don’t stop reading. I’m not either. I do, however, have several great cookbooks to review for you that just might get you thinking about gifts for your foodie friends even if that foodie friend is yourself. So I’m beginning a series that will extend through December – Cookbooks for Christmas. If holiday celebrations aren’t a tradition in your house, these books can certainly work for any occasion. As I keep telling my husband, it’s impossible to have too many cookbooks!

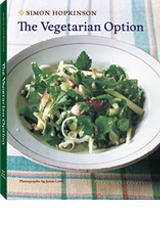
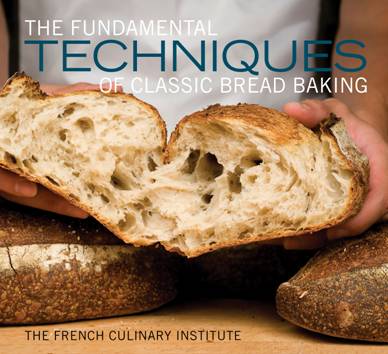
When I learned that The Fundamental Techniques of Classic Bread Baking from The French Culinary Institute was available I jumped at the chance to get a copy. Why? Because I need it. Not want it, but desperately NEED it.

Bread and I go way back, but as I’ve mentioned before I can never seem to master exquisite skill at home.

I worked in a bakery for several years. In addition, to customer service and sales, I was the go-to nutrition and ingredient person. Every time a question was asked such as, “How many calories, carbs or protein are in this type?” or “What are the grains in this one?” It would be followed by my coworkers turning to me and saying, “Lori?”

I could rattle off grams and kilocalories followed by an extensive list of grains. Not sure why this type of information sticks with me, but it has a lot to do with why I studied nutrition. Everyone has their thing, and for me, food and nutrition just clicks.

When it came to the actual bread, I was on the oven side of things. Someone else prepared the sponge and dough, while I worked on the kneading team and eventually became a baker.

So…I can definitely shape your loaf and tell you when your bread is done baking.

What I struggle with is measuring your ingredients and making your bread rise correctly.

See, I needed this book.

I haven’t been exposed too much in the way of professional culinary training, speaking specifically about the training provided in this cookbook. This book is science – the flour, the yeast, the sugar. The role of all ingredients required for baking the perfect loaf of bread are explained.

The truth is it might overwhelm someone new to baking. That being said, it also contains essential information that someone new to (or familiar with) baking needs to know. So, I say, take a chance and help educate.

In addition to the abundant information about baking terminology, tools, shapes, cuts and techniques are the recipes. Sigh. The recipes.

French, German and Italian recipes. The real deal with gorgeous photos to accompany many.

Some I was familiar with such as Challah, Rye, Stollen and Panettone . Others were new discoveries like La Mouna, Pane Siciliano Semolina and Landbrot mit Sauerkraut. The last section even covers some gluten-free varieties.

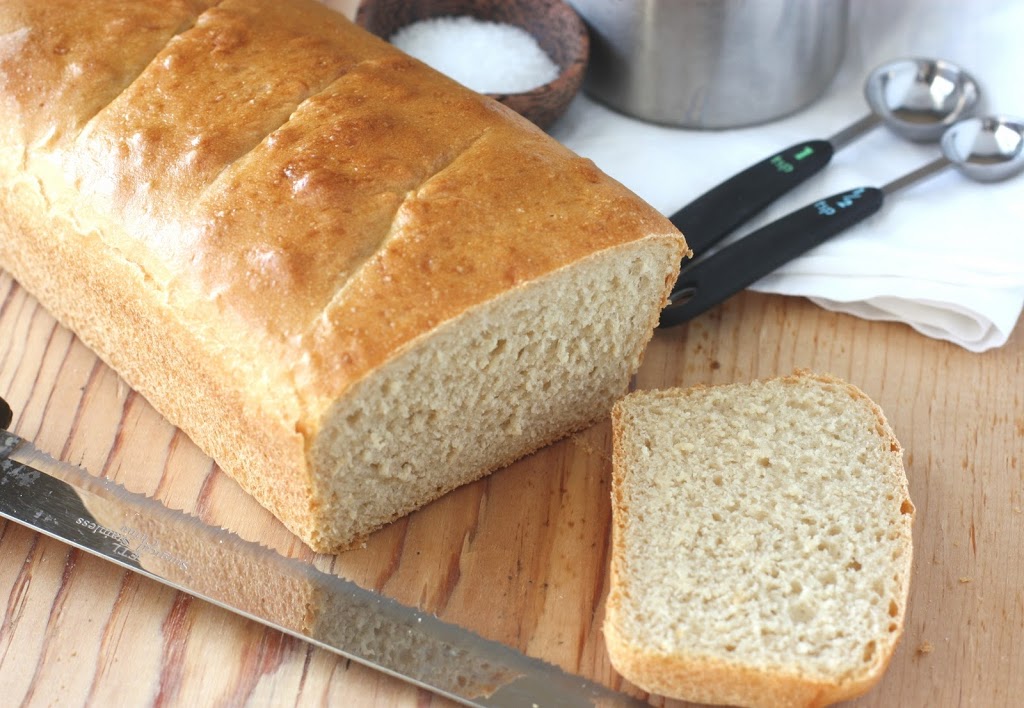
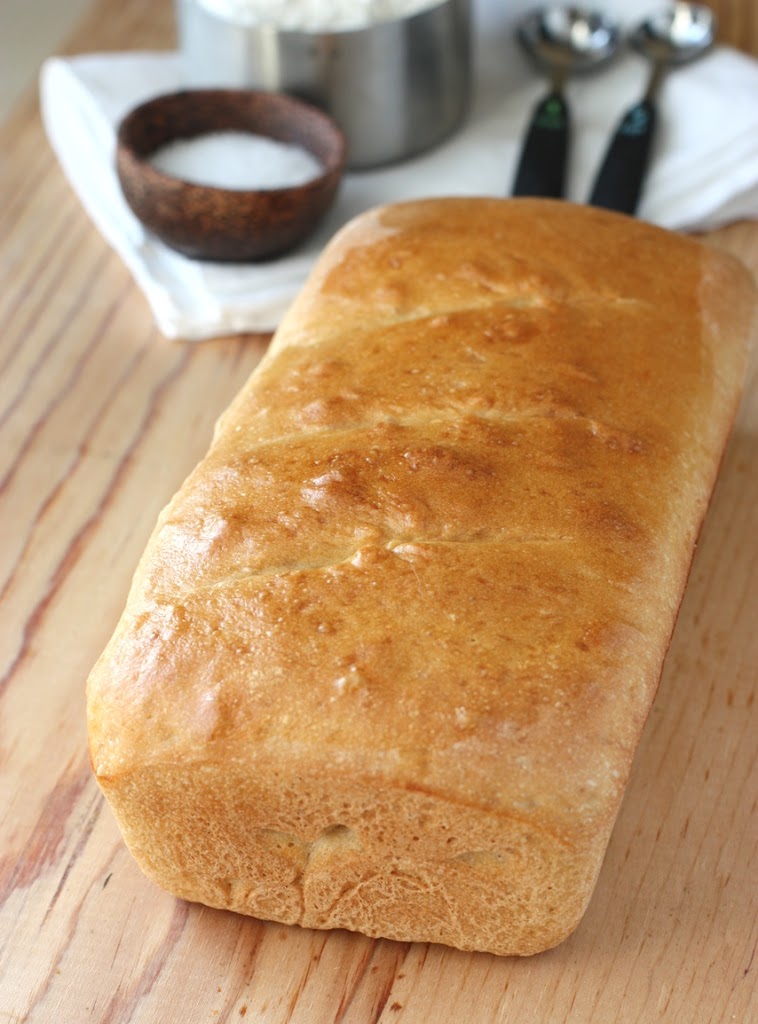
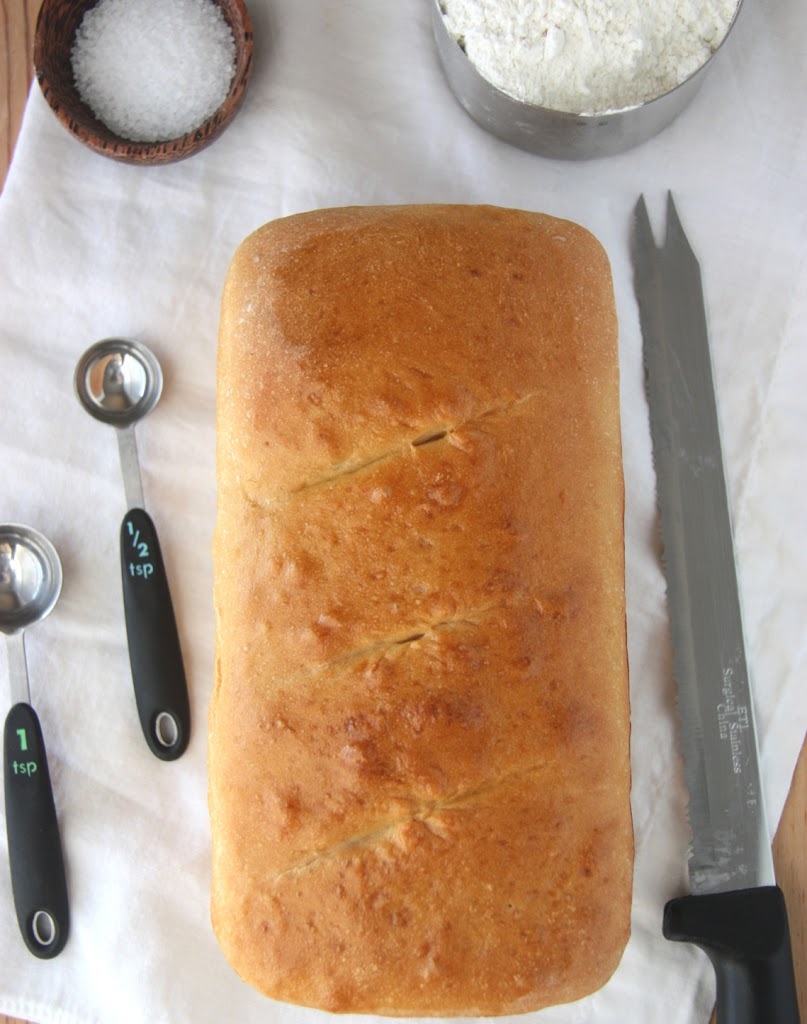
I decided to select one that was fairly straight forward and simple to start with – Pain de Mie Complet.

The process itself could not have been easier. It can be made in a weekend afternoon with little else than letting it rise the appropriate amount of time.

And back to that rising thing.

The result? I really like the flavor of this bread. We’ve been using it for grilled sandwiches and toast this week. I’ll be making it again, along with several other recipes from this book.

However, my result was far from perfect. I needed a bit more puff to my loaf, but otherwise we ended up with a delicious bread. And of course, now I have an excuse to make it again.

Pain de Mie Complet

Reprinted with permission from Abrams Books

Makes 2 loaves
Estimated time to complete: 5½ hours
Improved mix
Desired dough temperature (DDT): 75°F (25°C)

Ingredients

Bread flour    276 grams / 9¾ ounces (Baker’s Percentage 50%)
Fine whole wheat flour    276 grams / 9¾ ounces (50%)
Water    359 grams / 122⁄3 ounces (65%)
Powdered milk    22 grams / ¾ ounce (4.06%)
Unsalted butter    28 grams / 1 ounce (5%)
Cool heavy cream    17 grams / 2⁄3 ounce (3%)
Salt    14 grams / ½ ounce (2.5%)
Fresh yeast    8 grams / 1⁄8 ounce (1.56%)

Total    1000 grams / 2 pounds 31⁄3 ounces (181.12%)
Oil for greasing bowl
Flour for dusting
Butter for greasing pans
1 large egg for egg wash

Equipment

Scale
Digital thermometer
Standing electric mixer fitted with the hook
Large bowl or container
Bowl scraper
Plastic film
Two 9-inch loaf pans
Small bowl
Whisk
Pastry brush
Wire racks

Prepare the mise en place, taking care that the cream is about 60°F (15°C).

Combine the bread and fine whole wheat flours with the water, powdered milk, butter, heavy cream, salt, and yeast in the bowl of a standing electric mixer fitted with the hook. Mix on low speed for about 4 minutes, or until blended. Increase the mixer speed to medium and mix for about 8 minutes, or until the dough is smooth and almost shiny. Check the gluten development by pulling a window. Lightly oil a large bowl or container.

Scrape the dough into the prepared bowl. Cover the bowl with plastic film and set aside to ferment for 1 hour.

Lightly flour a clean, flat work surface.

Uncover the dough and divide it into two 500-gram / 18-ounce rounds on the floured surface. Cover with plastic film and bench rest for 15 minutes.

Lightly butter two 9-inch loaf pans.

Uncover the dough and, if necessary, lightly flour the work surface. Gently press on the dough to degas and carefully shape each round into a bâtard. Place each bâtard into a prepared loaf pan, seam side down. Cover with plastic film and proof for 90 minutes.

About an hour before you are ready to bake the loaves, preheat the oven to 350°F (177°C).

To make the egg wash, combine the egg with 14 grams / 1 tablespoon water in a small bowl, whisking to blend.
Uncover the dough and, using a pastry brush, lightly coat the top of each loaf with the egg wash.

Transfer the loaves to the preheated oven. Bake for 35 minutes, or until the crust is golden brown and shiny and the sides are firm to the touch.

Remove from the oven. Then, turn the loaves from the pans and transfer to wire racks to cool.

Disclosure: A review copy of this cookbook was sent to me free of charge. I was not required to post about it and received no compensation for doing so.

Want to create beautiful food and product photos that you can't wait to share?!
Discover your style, control the light, and shoot using the tool you know how to use (yes, your phone included). Learn about free resources, Live Q&As with Lori, and online courses you can take from anywhere in the world!
We respect your privacy. Unsubscribe at any time.