Browsing Category

Grains Nuts and Seeds

Roasted Corn Salad and Gardening at Gastronomical Sovereignty

September 10, 2012

It wasn’t my intention to take such a long break from the blog. I’ve been traveling, and posts (and internet access) didn’t go as planned. I’m back, though, and ready to get in the kitchen! I also have a few delicious meals to share with you from our 2,500 mile cross-country trip.

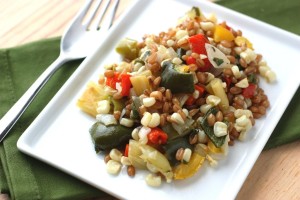
Today you will find me over at Gastronomical Sovereignty talking about gardening and sharing my favorite roasted corn and pepper salad with wheat berries!

Come say hi, and check out Kristy’s great blog while you are at it!

Chocolate Almond Oatmeal Cookie Recipe

August 25, 2012


Don’t worry. I’m not going to make myself sound crazy by telling you that I’ve already started holiday baking. But I’m not going to lie either. I may have started thinking about holiday cookies, and I may have already browsed my baking list from last year to see what I want to repeat. Maybe.

Okay, I’m not ready for the holidays, but I am ready for fall. Instead of going straight into the pumpkin and sweet potatoes, I thought I’d ease in, at least in terms of recipes. A little comforting oatmeal, nuts, and something to satisfy a chocolate craving.

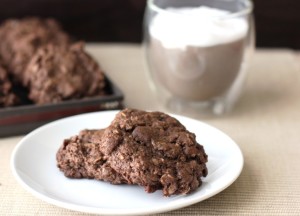
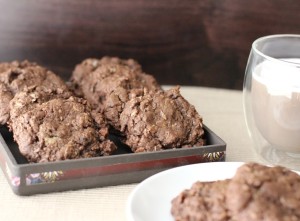
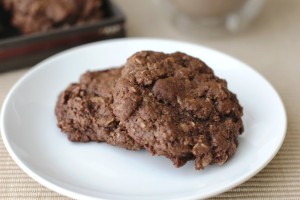
This was my first time using almond butter in cookies and I loved the result. My husband described these as having the flavor of a no-bake cookie, yet lighter, and of course, baked. Despite it still being summer, these were worth firing up the oven.

Chocolate Almond Oatmeal Cookies

1 cup (2 sticks) unsalted butter, softened
3/4 cup mascavo (or muscovado) sugar
3/4 cup Demerara (or raw) sugar
2 eggs
1/4 cup raw, unsalted almond butter
1 tsp almond extract
1 1/2 cups white whole wheat flour
2 cups old fashioned rolled oats
1/2 cup cocoa powder
1 tsp baking soda
1/2 tsp salt
1/2 cup chopped almonds

Preheat the oven to 350 degrees F.

In the bowl of a mixer add the butter and sugars. Mix on medium to medium high and cream well; about 2 minutes. Mix in the eggs, and add the almond butter and almond extract. Mix for one minute more.

In a separate bowl, stir together the flour, oats, cocoa, baking soda and salt. Slowly add to the wet ingredients, mixing on low. Mix just until all ingredients are incorporated. Stir in the almonds.

Using a cookie scoop or spoon, place the cookies on an ungreased cookie sheet. Bake 8 minutes. Remove from the baking sheet and place on a cooling rack. Makes 2 to 2 1/2 dozen cookies.


Grilled Marinara Pasta Recipe

August 12, 2012

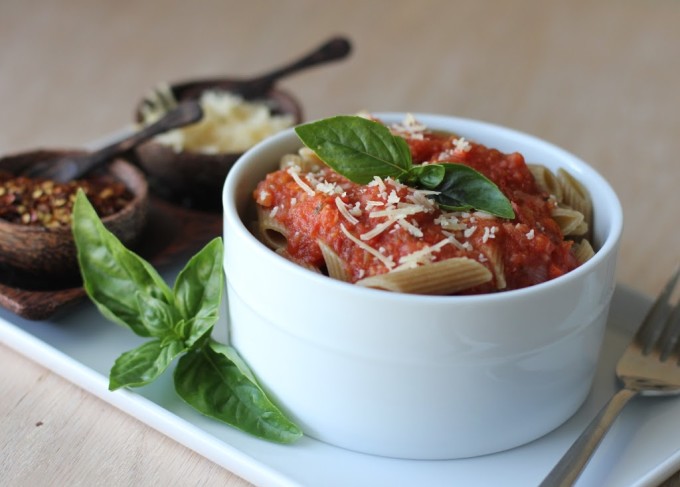
This recipe is one of the most creative things we’ve made on the grill. Grilling tomatoes in packets and then turning those tomatoes into marinara results in a unforgettable smoky sauce.

Grilled Tomato Marinara Sauce | Fake Food Free
 
We’ve been making grill packets all summer so when I was thinking of how I could put a twist on a classic tomato sauce, they were the first thing to come to mind. Packets of potatoes, onions, peppers and summer squash work on the grill, so why wouldn’t tomatoes, right?
 
I have to admit when I got all the grilled veggies pureed and took a taste, I was disappointed. The flavor I wanted just wasn’t there.

But then I added salt.

The next bite popped in my mouth! The salt brought out the smoky flavor from the grill which is exactly what I was hoping for.

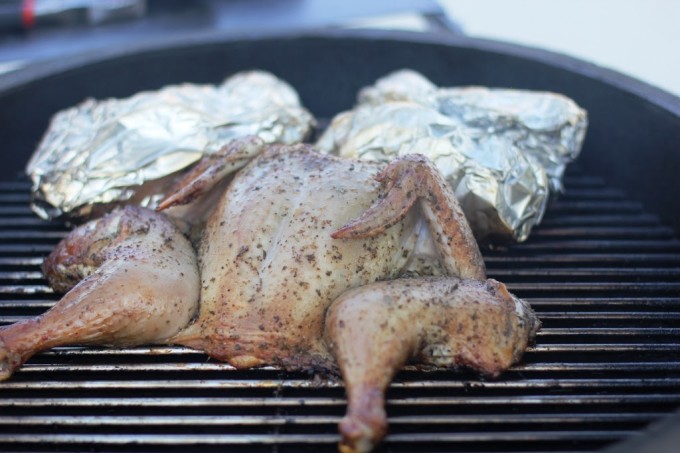
A few packets of tomato may not be enough for heating up a large grill, but this marinara is the perfect thing to make when you have the grill up and running for other things. (We grilled ours while making a chicken this weekend.) Then you can quickly throw the sauce together and freeze it for another day, if it doesn’t fit on your current menu.

Grill packets with tomatoes for marinara.

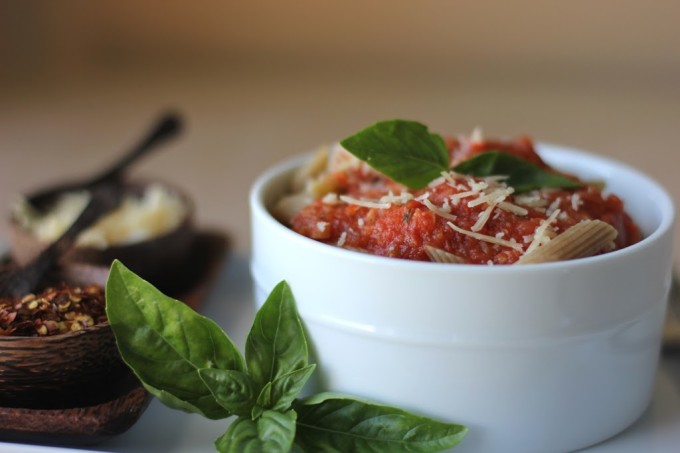
This ends up being a basic marinara for any type of pasta. I am a huge fan of homemade, but I went for a quick meal this weekend and used a whole wheat penne.

The veggies only need to be roughly chopped for the grill packets. They’ll be going straight to the blender to puree so there is no reason to spend a lot of time on the prep.

I’ll be doing this with our tomatoes for the rest of the season! The flavor is so much more interesting than when I roast the veggies in the oven.

Grilled Tomato Marinara Sauce | Fake Food Free

Grilled Tomato Marinara Pasta Recipe
Makes: 4 to 6 servings
Write a review
Print
Ingredients
  1. 1 medium onion, chopped
  2. 4 cloves garlic, peeled
  3. ~2.75 lbs. tomatoes, cored and chopped
  4. 1 red or green bell pepper, cored and chopped
  5. ~15 leaves fresh basil
  6. 1 tablespoon olive oil
  7. 1/2 tablespoon balsamic vinegar
  8. 1 teaspoon fine ground sea salt
  9. 1 lb. pasta, cooked
  10. Extra basil and shaved parmesan for serving
Instructions
  1. Preheat the grill to 325 degrees F.
  2. You will need 3 large pieces of aluminum foil, about 14 to 16 inches long. You want the veggies wrapped well, so be generous.
  3. Divide the onion, garlic cloves, tomatoes, bell pepper and basil evenly on each of the three pieces of foil. Drizzle some of the olive oil over the vegetables in each packet and move the veggies around a bit to coat them.
  4. You can use any packet making techniques, but I fold the long sides in first. Then I pull the two ends together in the center to meet and roll them down, smashing things together as I go. As long as you have a sealed packet, you'll be fine. Need help? Here's a post with instructions.
  5. Place the packets on the grill, and close the lid. Let cook for 30 to 40 minutes, until the veggies are tender. Remove them from the grill and transport them into the kitchen.
  6. Once they are cool enough to touch, place the veggies in the blender in batches. Puree until smooth and pour the puree in a soup pot on the stove. Turn on low heat, and add the balsamic vinegar and the salt. Stir occasionally. You are only warming the sauce again until you are ready to eat it. (If you plan to freeze it, you can skip the heating, mix in the vinegar and salt and portion it for freezing.)
  7. Place the pasta in a serving bowl. Pour the sauce over pasta, and garnish with basil and parmesan cheese.
Fake Food Free https://www.fakefoodfree.com/


Thanks for reading! All images and content are the property of Fake Food Free unless otherwise stated. Please do not republish full recipes and images without written permission. What is okay? Feel free to Pin images, share links to my posts or share the photo in a round up post with the title of this recipe and a link back to the post. If you want to use a photo or full recipe, just ask. I’m sure we can work something out.

Black Rice and Sausage Stuffed Patty Pan Squash Recipe

August 8, 2012

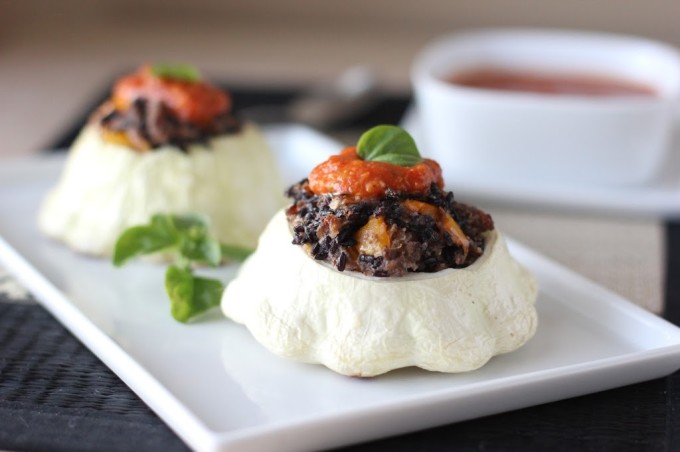
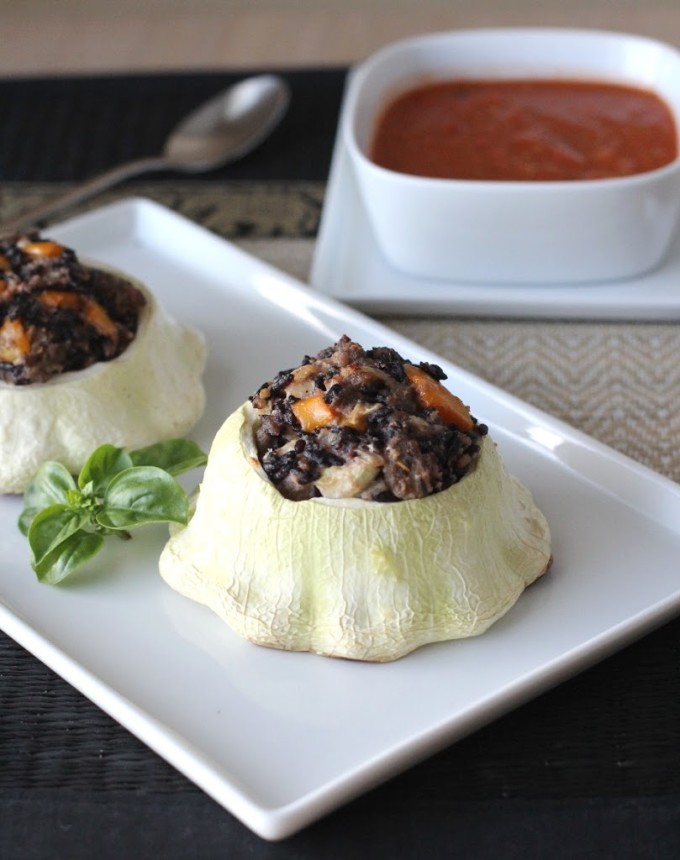
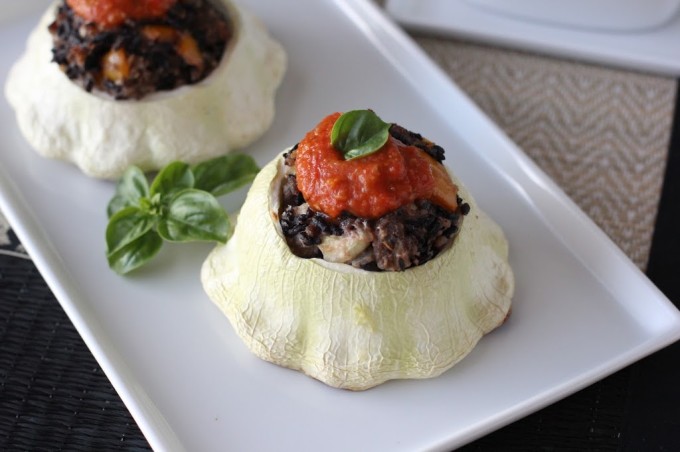
I was so happy when we were finally able to grow squash in our own garden. I love stuffed patty pan squash! This squash filled with zesty sausage and nutty black rice has been a favorite since I first made it in 2012.

Black Rice and Sausage Stuffed Patty Pan Squash Recipe | Fake Food Free

I love that I made the decision to start a food blog a little over four years ago. But I’m not the only one that will tell you – the fun has a way of fading to stress from time to time. Pressures of creativity, uniqueness, pretty pictures, and “what if they don’t like me?” can rear their ugly heads.

These are the times when you have to remember that, while we would all like to be wildly successful, it’s important not to lose yourself along the way. This is supposed to be a happy place!

When I stop worrying about numbers and return to why I started blogging, I realize that these are the posts that are visited the most often on my site. I love how this changes from season to season. It reminds me that, yeah, the post I did two years ago does have some value.

Right now the top post on my blog is Patty Pan Squash Stuffed with Basil Orzo. I made it a few years ago after first discovering this veggie. Everyone seems to want advice for how to tackle patty pan’s pretty, yet hard to handle, shape in the kitchen.

 
Black Rice and Sausage Stuffed Patty Pan Squash Recipe | Fake Food Free


I’ve felt challenged to come up with a new stuffing since I made that first patty pan, but here we finally have it. A bonus this time is that the squash came straight from the garden!

I’m continuing the recent trend of using black rice, but with pastured heritage breed sausage, this recipe doesn’t leave out the meat-lovers.

It’s tasty on it’s own, but if you have some warm marinara on hand to spoon on top, it’s even better!

Black Rice and Sausage Stuffed Patty Pan Squash Recipe
Serves: 4 to 6
Write a review
Print
Ingredients
  1. 4 to 6 patty pan squash
  2. Extra virgin olive oil
  3. 1/2 lb. ground pastured pork sausage
  4. 2 yellow bell peppers, chopped
  5. 1/2 large onion, chopped
  6. 1 1/2 cups cooked black rice
  7. 1/4 cup Panko bread crumbs
  8. 3/4 cup ricotta cheese
  9. 1/2 teaspoon fine ground sea salt, or to taste
  10. 1/4 teaspoon ground black pepper, or to taste
  11. Marinara for topping (optional)
Instructions
  1. Preheat the oven to 400 degrees F. Grease a 9 x 13 inch baking dish lightly with olive oil.
  2. The recipe will fill 6 small squash or 4 larger squash. Wash the squash. Slice off the top on the stem side, and using a spoon, gently scoop out the insides. Don't scoop all the way through the bottom. You want to create a cup to hold the filling. Chop up the squash you scooped out and set it aside.
  3. Lightly coat the squash cups in olive oil and pierce with a fork in a few spots. Bake the squash for about 15 minutes, until they begin to soften. Remove from the oven and set aside.
  4. In a large skillet, brown the sausage over medium-high heat about 5 minutes. Add the bell peppers, onion and the chopped squash you scooped out. Cook until the sausage is no longer pink, 3 to 5 more minutes.
  5. Stir in the rice, bread crumbs and ricotta into the sausage. Add the salt and pepper. You can taste the filling at this point and add more salt and pepper, if you'd like.
  6. Once the filling is cool enough to handle, divide it evenly into each squash. Pile it high and press gently with a spoon so that it is packed in.
  7. Bake for 20 more minutes, or until the squash is tender when pierced with a fork. Top with marinara before serving, if desired.
Fake Food Free https://www.fakefoodfree.com/


Black Rice and Sausage Stuffed Patty Pan Squash Recipe | Fake Food Free


Thanks for reading! All images and content are the property of Fake Food Free unless otherwise stated. Please do not republish full recipes and images without written permission. What is okay? Feel free to Pin images, share links to my posts or share the photo in a round up post with the title of this recipe and a link back to the post. Confused about copyright and food blogs? Here is some helpful information on Recipe Attribution. If you want to use a photo or full recipe, just ask. I’m sure we can work something out.  

Honey Peach and Tomato Black Rice Salad Recipe

July 31, 2012

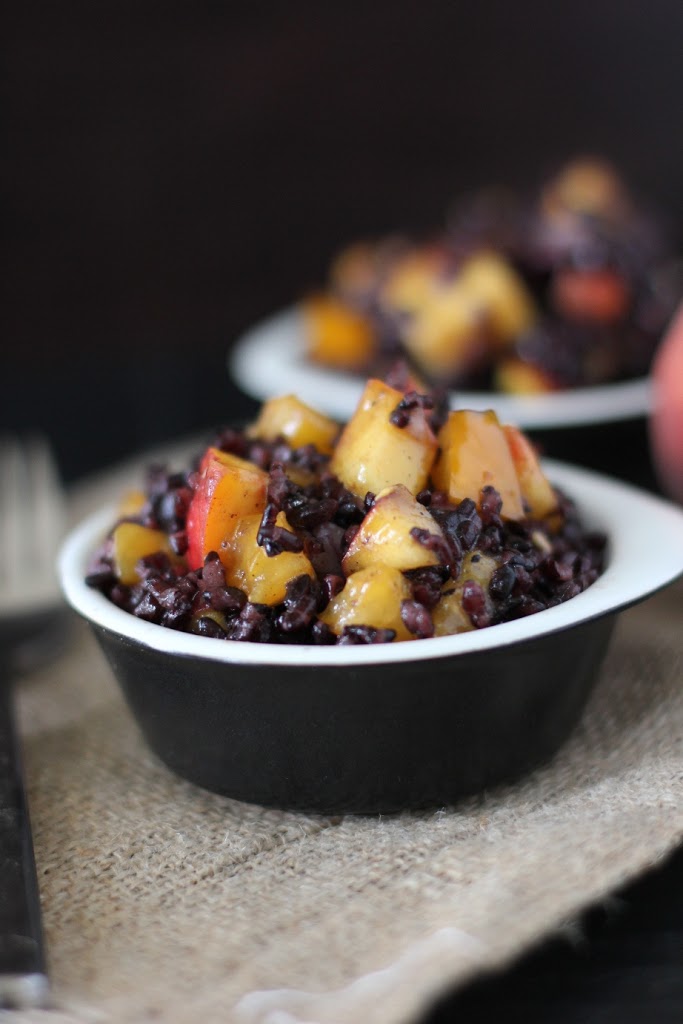
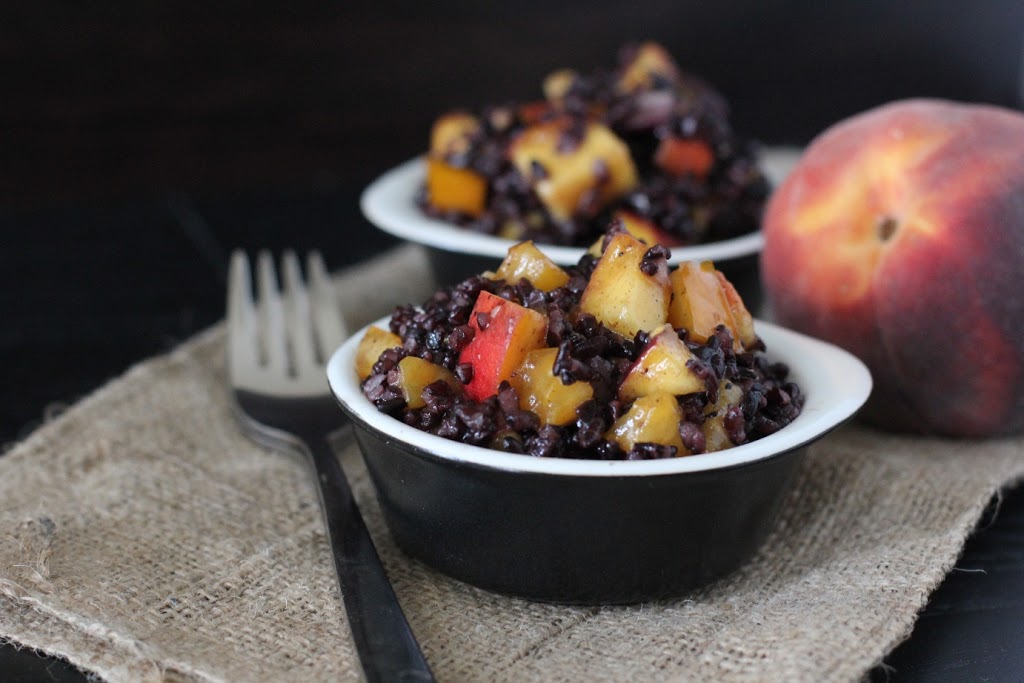
Don’t let this combination of ingredients scare you! This black rice salad is full of sweet and savory flavors that uses some of my favorite produce of the summer season!


Honey Peach and Tomato Black Rice Salad Recipe | FakeFoodFree.com

If I had to pick my favorite kind of rice it would be sticky rice. Although, black rice, also known as Forbidden rice, comes in a close second.

The idea of even having a favorite variety seems a bit crazy to me considering that five years ago I only knew of two kinds – white and brown. That’s what a little travel and food blogging will do for you. If nothing else, it opens you up to the world of rice.

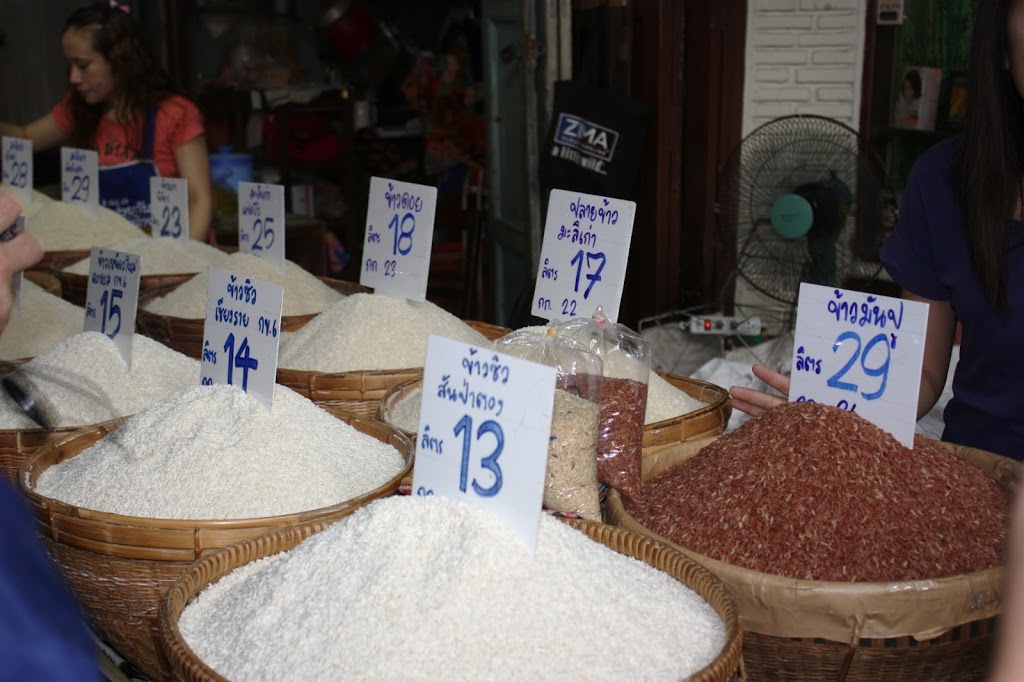
Rice at a market in Chiang Mai, Thailand
 

Jasmine, basmati, glutinous, purple glutinous – and those are just a handful of the varieties I’ve been exposed to the past few years. Black rice really stands out among the crowd because of its purple color, and aromatic, nutty flavor. 

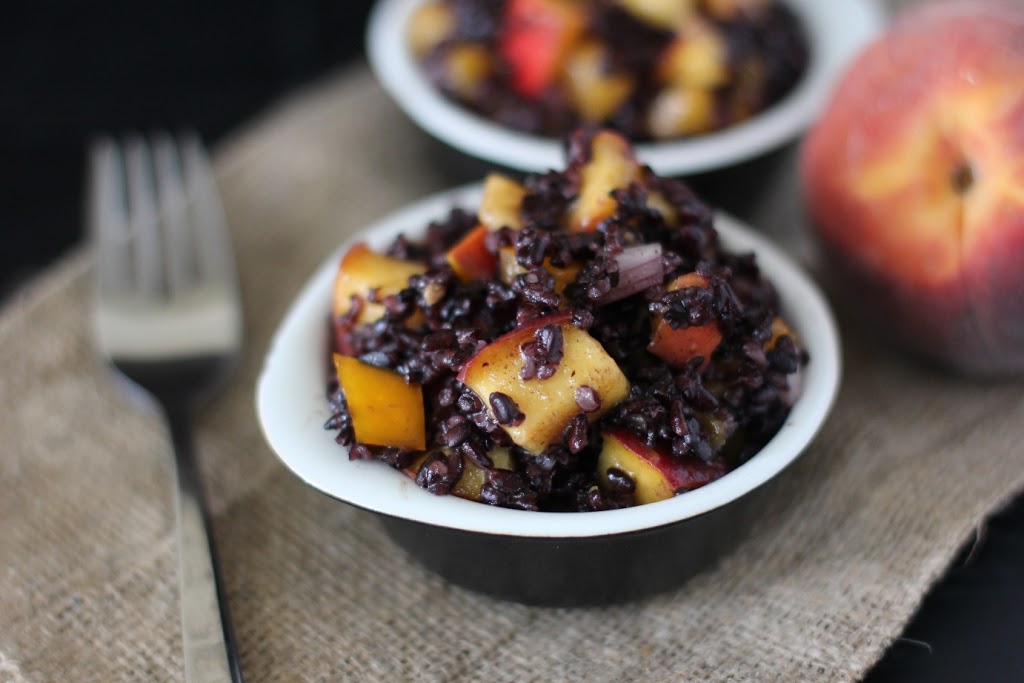
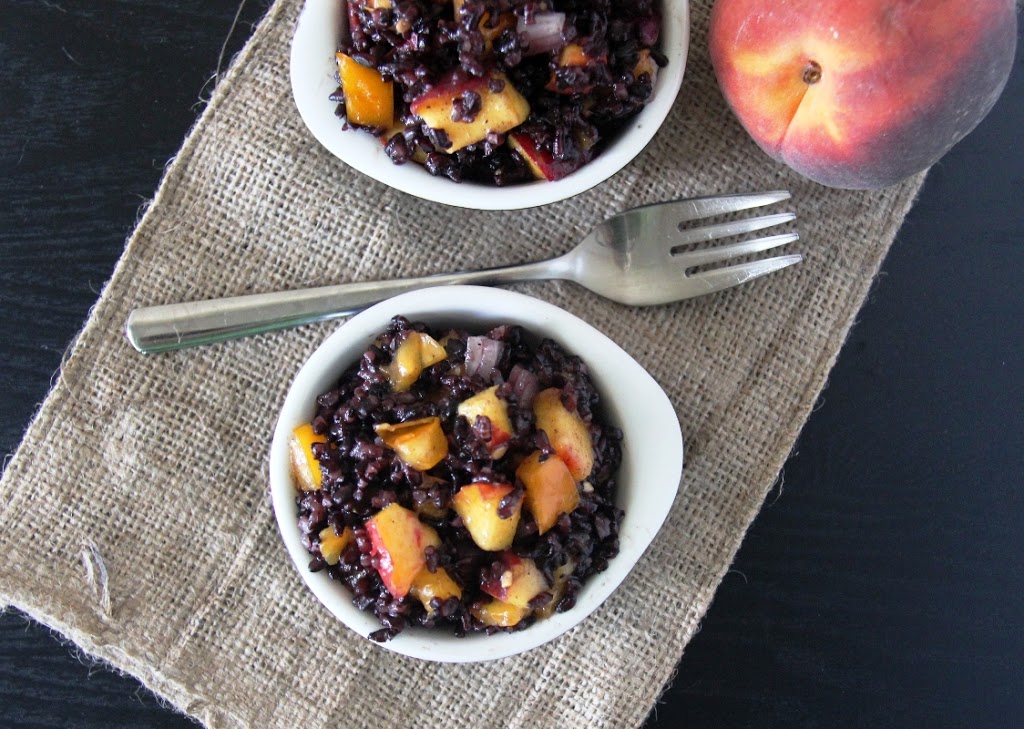
A sweet and savory snack or side recipe with black rice, peaches, and tomatoes in a honey dressing!

I’ve had some sitting in the pantry for a while, and I finally cooked it up this past weekend. Since, for me, summer is the season for cold grain salads I thought I’d give it a try with some local fruits.

A natural, savory and sweet snack recipe made with black black rice, peaches, and tomatoes in a honey dressing. At FakeFoodFree.com

I matched up the peaches from the farmer’s market with some of the yellow tomatoes that are growing like wildfire in our garden. The nutty rice called for something a little tangy and sweet as the dressing so a little lemon juice and honey did the trick.

Honey Peach and Tomato Black Rice Salad
Serves 4 to 6
Write a review
Print
Ingredients
  1. 1 ½ cups chopped peaches
  2. ½ cup chopped yellow or orange tomato
  3. 2 tablespoons chopped red onion
  4. 2 cups cooked black rice, cooled
  5. 2 tablespoons honey
  6. Juice of ½ a lemon
  7. 2 tablespoons extra virgin olive oil
  8. ¼ teaspoon salt
Instructions
  1. In a medium bowl, stir together the peaches, tomato, onion, and black rice. In a small bowl, whisk together the honey, lemon juice, olive oil and salt.
  2. Pour the dressing over the black rice salad and toss to coat. Cover and refrigerate for 30 minutes before serving.
Fake Food Free https://www.fakefoodfree.com/


Honey Peach and Tomato Black Rice Salad Recipe
 

Beginner Homemade Pasta Making

June 23, 2012

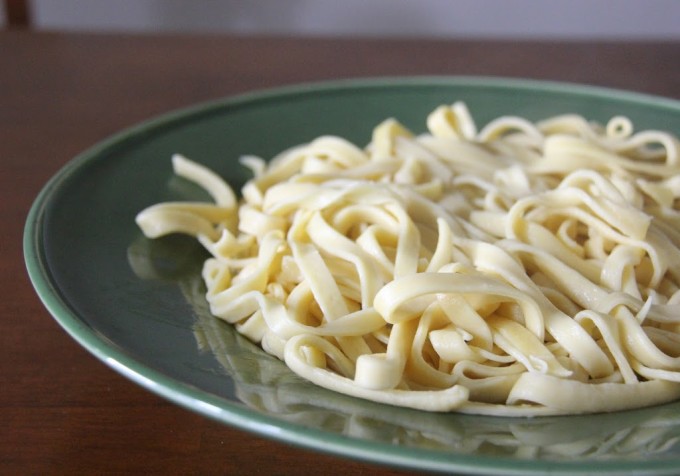
Beginner Homemade Pasta Making | Fake Food Free

The problem with making your own foods is that you regularly discover new things and you realize you can never go back to the package or prepared version. Salsa, guacamole and hummus from scratch beat any store-bought I’ve tried. Homemade corn and flour tortillas will change your world. And making your own pasta results in something that can barely be described in words.

I’d be lying if I said I no longer use dry pasta, but sitting down to a bowl of it does trigger some feelings of disappointment. The texture, flavor and even the look of homemade pasta is worth getting excited over.

I do shy away from making it from time to time because it feels like too much work, but each and every time I follow through, it’s completely worth it.

Ever since I made Hearty Tomato, Kale and Mushroom Sauce I’ve been meaning to do a pasta post. As you can tell, I’m not a step-by-step blogger. This is mostly because I’m not a step-by-step cook. But it’s also because a step-by-step post requires the perfect marriage of a well lit kitchen with the time to stop and photography each step. I rarely have both.

A few weekends ago, I had daylight in the kitchen and the time so I finally documented my pasta making. I was reminded again how much I love this stuff!

Notice that this is a beginner guide. Very, very beginner. I’m still learning, and at times my noodles can be down right ugly. But they still taste good.

      Beginner Homemade Pasta Making | Fake Food Free

 A few tips for your pasta making:
  • Be patient. Dough gets stuck, it stretches out. Try, try again. 
  • If you don’t have an electric pasta attachment, get a helper. I’ve made it with a manual machine by myself before and it’s doable, but tough.
  • Most books will tell you to avoid flouring the dough too much because it makes it gummy after cooking. I try to limit it, but still find I need to flour to keep it from sticking to the table and the machine.
  • Don’t be a perfectionist. Ugly noodles taste good, too. 
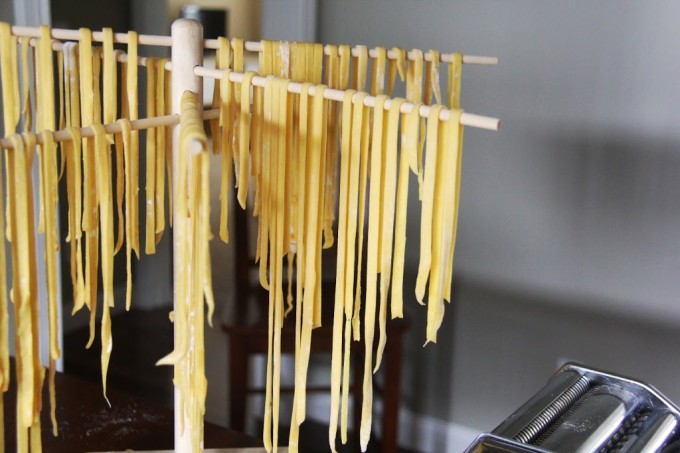
  • You don’t have to have a pasta dryer. You can lay the pasta out flat to dry. But I like hanging it on a dryer. 

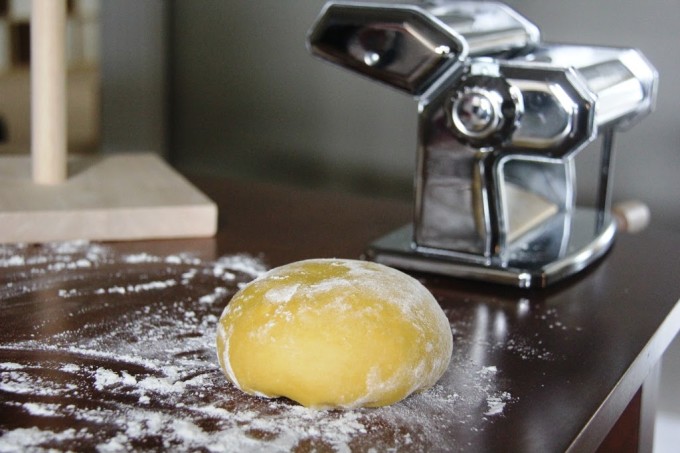
Pasta dough is simple. Just about every recipe is flour and egg.

 In a food processor, combine:
2 cups unbleached, all-purpose flour
3 large eggs
I’ve used white whole wheat flour as a substitute and it works well, but results in a dryer dough. 
 
Pulse until dough resembles peas, and holds together when pressed between your fingers. You can add a half teaspoon of cold water if it is too dry. Continue to add water until it reaches the above state.
 
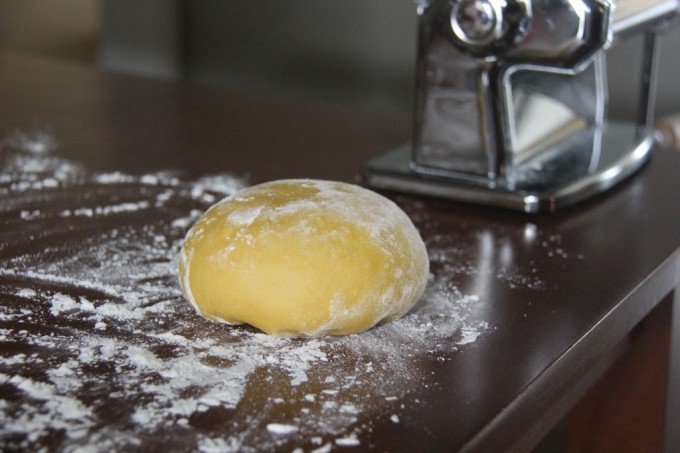
Turn the dough out onto a floured surface, and knead until it is smooth, about 2 minutes. Cover in a sheet of plastic wrap or a damp towel and let rest for 15 minutes.
 
Beginner Homemade Pasta Making | Fake Food Free
 

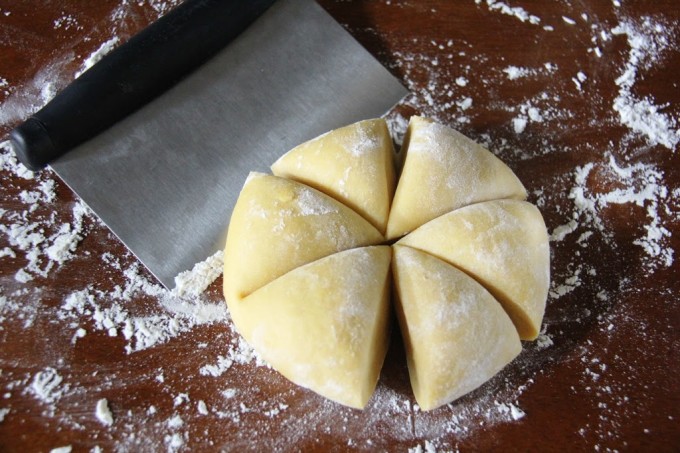
Cut the dough into six equal pieces. Roll those pieces into a ball and flattened into an oval. It’s ready for pressing. 

Beginner Homemade Pasta Making | Fake Food Free
 
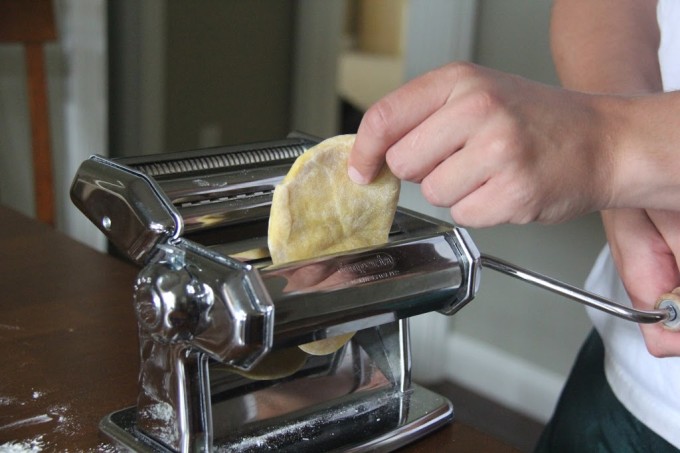
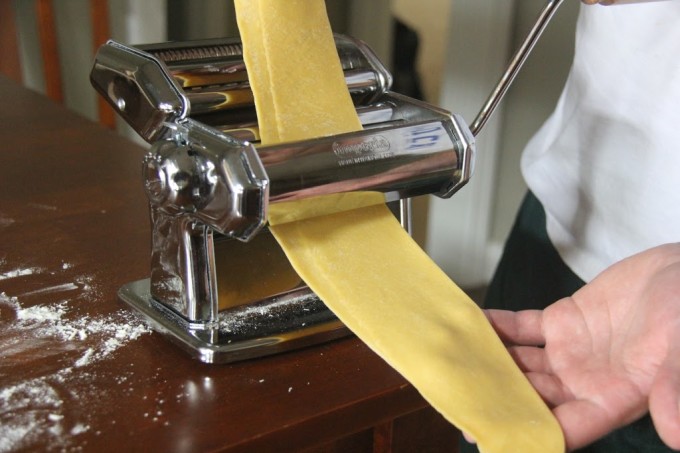
Set the pasta maker to the largest setting, meaning the rollers are as wide as they get. 
Slowly turn the crank and feed the dough through. I do this about 3 times on this setting, folding the pasta each time There is no rhyme or reason to my folding. Sometimes I fold end to end, others, horizontally.
 
Beginner Homemade Pasta Making | Fake Food Free
Next, take the pasta maker setting down two notches. This is as far as I go, feel free to make if thinner. Feed the dough through once. You should end up with a long piece of dough that is just a little shorter in width the an the pasta maker rollers.

Beginner Homemade Pasta Making | Fake Food Free
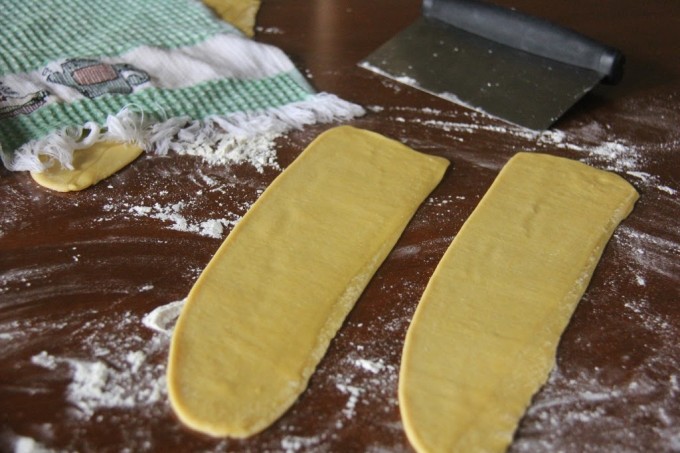
Lay the pasta sheets on a floured surface and cover with a damp towel. Continue the process with the remaining five pieces of dough.

Beginner Homemade Pasta Making | Fake Food Free
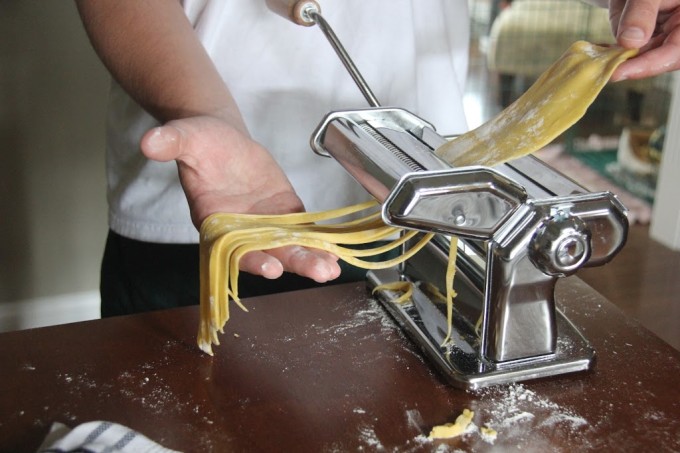
The next step is to cut the pasta and this is where help comes in handy. Choose the cut you would like based on your maker. I always make fettuccine. I’ve tried spaghetti, but it got stuck in the maker so I stick with what works.

Beginner Homemade Pasta Making | Fake Food Free
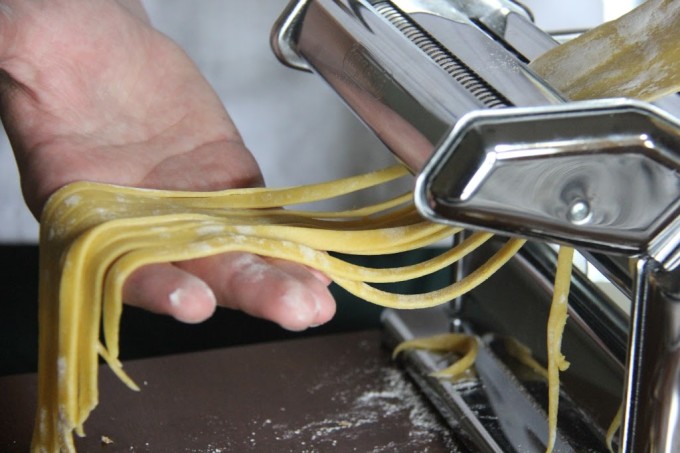
Turn the handle to feed the pasta sheet through the cutter and gently catch and pull the noodles from the other side.

Beginner Homemade Pasta Making | Fake Food Free
Place the noodles on a drying rack. This is where you can pull apart some that stuck together and spread it out evenly to dry.

Beginner Homemade Pasta Making | Fake Food Free
 
Repeat with the remaining sheets.
I know that you can freeze fresh pasta, but every time I make it, it goes straight to the pot. I let it dry for about 15 minutes while the water comes to a boil.
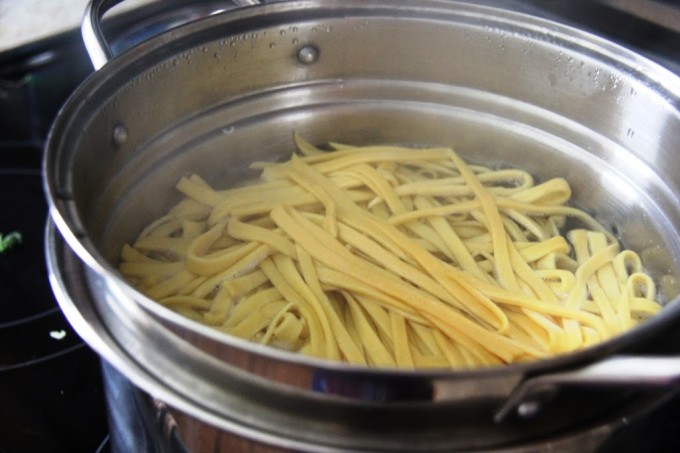
I use a large pasta pot with the inset colander. Bring the water to a boil, salt if it’s your thing, and add the pasta. 
 
Beginner Homemade Pasta Making | Fake Food Free

Don’t stir the pasta right away to keep from breaking it up. After it has cooked about 2 minutes and it’s almost done, I use tongs to separate it a bit and make sure all of it has been sufficiently dunked in the water. The pasta should be done in 3-4 minutes. 

Beginner Homemade Pasta Making | Fake Food Free
 
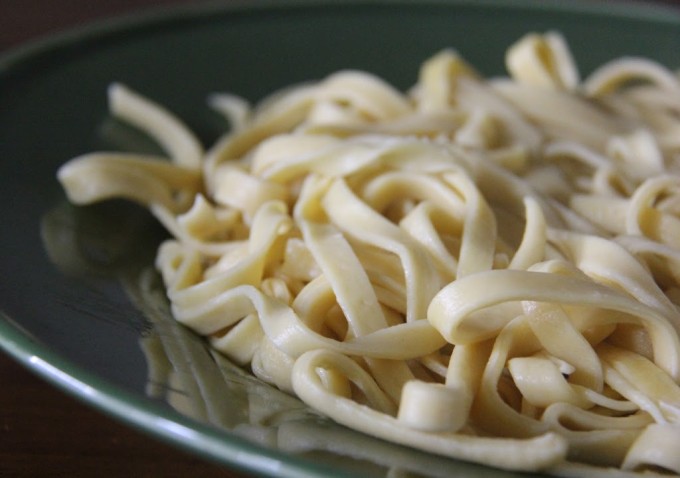
Drain and serve. Makes about 1 pound to serve 4. 
 
Need more ideas for what to top it with? These are a few of my favorite pasta recipes, and homemade pasta can easily be substituted for any type.
 
Thai Basil Pesto with Cherry Tomatoes and Meatballs
Lemon Feta Shrimp
Bacon and Brussels Sprouts Pasta with Parmesan


Bringhe – Memories of Philippine Kitchens

June 4, 2012

I regularly revisit the goal to challenge myself in the kitchen by experimenting with cuisines from different areas of the world. I don’t always accomplish this goal, but over the past several months I’ve been happy with the variety around here. Foods from South Africa, West Africa, Ireland, Thailand, the Caribbean, and Italy have all found their way into posts.
I owe a lot of this to cookbooks. My most recent endeavor? A closer look at Filipino cuisine.
Other than the Filipino barbecue recipe learned from my husband’s college friend, I have no experience with the cuisine. I’ve not stepped foot in a Filipino restaurant (only because I’ve yet to have the opportunity), and while we entertained the idea of making Manila a stop on our Southeast Asia trip in 2009, it wasn’t meant to be on that adventure. 
So needless to say, I had a lot to learn. After reading this cookbook, I have been thoroughly educated.
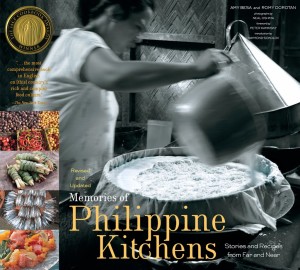
Memories of Philippine Kitchens: Stories and Recipes from Far and Near by Amy Besa and Romy Dorotan is a history book of traditional dishes. I received a revised and updated copy for review just a few weeks ago. The beautiful photos take you there – to the market stalls, to the rustic kitchens – you can almost feel the ingredients your hands and smell them cooking. The recipes make you wonder how you can bring such time-honored practices into your own kitchen; a challenge I welcome.
While taking a journey through geographic regions of the Philippines by way of food, the book introduces the reader to unfamiliar regions, and foods that seem different, but familiar at the same time. Dishes such as the classic Chicken Adobo, sweet Bibingka, and Lumpia. These names only mention the type of food or style of cooking. The recipes and variations seem endless.
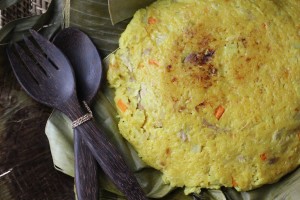
I stopped turning the pages at the province of Pampanga – The Rice Heartland of Luzon. This led me to the Arayat Kitchen where I found Bringhe. The book describes this dish as Filipino paella. I took a quick look at the ingredients, and set out to find some banana leaves which I finally located last week.
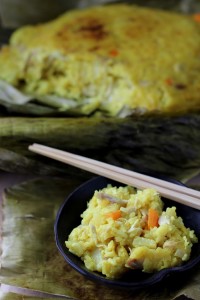
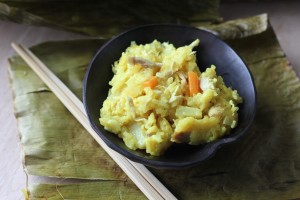
I feared steaming a dish in leaves in a wok on my very U.S. American stove would be a difficult task, but this recipe was a breeze. The results were a dinner of nutty sticky rice in coconut milk complete with vegetables and pastured chicken. 
A one-pot meal at its finest.
There are very few times you find a book with so much of a culture within its pages. This book has a prominent place on my food history and culture bookshelf. 
I’m off in search of my next food culture challenge, and considering how many more recipes I want to try in this book, I have a feeling it will be Filipino once again. 
Bringhe
Reprinted with permission from Abrams Books 

Bringhe is a Filipino version of paella, made with glutinous rice and steamed in banana leaves.
Serves 4 to 6
One 3 1/2-pound chicken
1 large onion, quartered
Banana leaf sections, for lining the wok
2 tablespoons canola oil
3 garlic cloves, sliced
1 medium onion, diced
1 red bell pepper, diced
1 large carrot, diced
1 large russet potato, peeled and diced
One 1-inch piece fresh turmeric, peeled and grated
(or 1 teaspoon ground turmeric)
2 cups glutinous rice, soaked overnight in water
to cover, drained well
About 2 cups coconut milk
4 tablespoons fish sauce, or to taste
Place the chicken and quartered onion in a large saucepan and add water to cover. Bring to a boil over high heat, then reduce the heat and simmer, uncovered, until the chicken is tender, about 40 minutes. Remove the chicken, strain, and reserve the broth. Set the chicken aside to cool, then remove the meat from the bones and shred it. Set aside.
Wipe the banana leaves with damp paper towels to clean them. Run them through a flame on both sides to soften them a bit. Grease a large wok (or 2 small woks) and line it with a double layer of banana leaves.
In a large sauté pan over medium heat, warm the oil. Add the garlic, diced onion, and bell pepper and sauté until the onion is translucent, about 5 minutes. Add the carrots and potatoes and cook until softened, about 5 minutes. Add the turmeric and stir for 1 minute, until aromatic.
Add the rice and cook, stirring, until thoroughly coated with the oil, about 5 minutes. Add 1 1/2 cups of the coconut milk, 1 1/2 cups of the reserved chicken stock, and the fish sauce. Bring to a simmer and cook, stirring frequently, until all the liquid is absorbed. 
Add another 1/2 cup coconut milk and 1/2 cup stock and continue to stir until the liquid is absorbed. This should take about 20 minutes—the rice should be tender but al dente. If the rice isn’t cooked through, add more coconut milk and stock. Continue to cook, stirring, until the liquid is absorbed and the rice is cooked through. Add the shredded chicken and cook until warmed through, about 3 minutes.
Fill the prepared wok (or woks) with the rice mixture, smooth the top to create an even layer, cover with the lid or foil, and place over medium heat. Cook without stirring for 20 minutes, or until a golden brown crust that holds the dish together is formed at the bottom of the dish. If the crust hasn’t formed, raise the heat to medium-high and cook for another 5 to 10 minutes to form the crust. Invert onto a large serving plate, remove the banana leaves, and serve.
Disclosure: A copy of this cookbook was sent to me for review purposes. I was not required to write about it, and received no compensation for doing so. Opinions expressed here are my own.

Coconut Milk Flap Jacks: CakeLove in the Morning

April 18, 2012

I appreciate a big breakfast. 
I didn’t realize exactly how much until a few months into our time living abroad. I knew that not every country celebrated the morning meal the way we do in the U.S., or in countries such as Ireland or the U.K.  But I was taken aback by the confused looks I got when describing pancakes, omelets, bacon, biscuits, and grits to our new friends. 
Brazil is a bread or pastry and coffee culture when it comes to breakfast. In many ways, I guess we are around here too, except for the weekends. Oh the weekends! Or rather, the weekend breakfast!
So when I get a cookbook that highlights this meal you can imagine my excitement. This time it was CakeLove in the Morning by Warren Brown.
Cake? In the morning? I’m in!
I’ll admit when I first looked through this cookbook, I thought it might be best for a beginner in the kitchen. With recipes such asApple-Cranberry Oatmeal and Zucchini Bread, it provides excellent instruction for the basics.
But then I took a closer look. 
I’ve reviewed one of Warren Brown’s cookbooks before and I used to watch his show on the Food Network. While I remembered that he is a lawyer turned baker, it had escaped me that he has a degree in public health and practiced health care law. 
My point? Upon my closer look at the book, his background in health is evident. 
His recipes have a delightful combination of healthy, whole ingredients from buckwheat flour to yams, and I was even introduced to a new oil that I have yet to explore, rice bran oil. This book would be perfect for health-minded beginners, but it has plenty to keep those of us who cook a bit more interested as well.
Aside from baked goods such as White Chocolate Waffles and Chocolate Chip Bacon Pancakes, there are several savory breakfast recipes, and condiments to go with it all – Dairy-free Butternut Squash Frittata, Breakfast Lasagna (I know! Isn’t that a great idea?), Jalapeno Honey Butter. And you can’t forget cake in the title; there are a few of those too. 
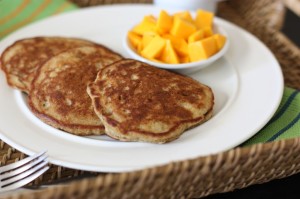
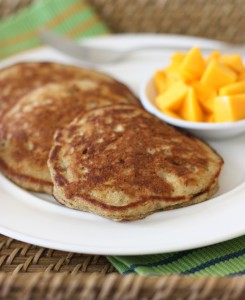
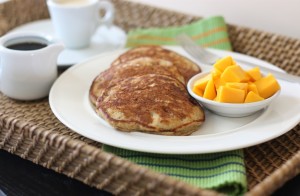
I went with a traditional favorite that had an interesting twist – Coconut Milk Flap Jacks. This whole grain recipe uses whole wheat and buckwheat flours, oats, honey and, of course, coconut milk. 
I am no expert pancake maker, and these turned out beautifully. They were light and fluffy despite the hearty grains. I agree with the recipe description that the pancakes bring the flavor of the Caribbean. That’s why I added a little mango on the side!
This one is perfect for Mother’s Day brunch, and you can serve them with the cookbook on the side because it would make a great gift.

Coconut Milk Flap Jacks

From Cake Love in the Morning by Warren Brown, reprinted with permission for Abrams Books
Serves: 4
1 cup (about 6 ounces) banana, mashed
1 cup coconut milk (or milk)
1 egg
2 tablespoons fresh lemon juice
2 teaspoons honey
1 teaspoon vanilla extract
1 cup whole-wheat flour
¼ cup whole rolled oats
2 tablespoons buckwheat flour
1 tablespoon superfine sugar
1 ½ teaspoons baking powder
½ teaspoon baking soda
¼ teaspoon salt
1 tablespoon butter or vegetable oil
Cinnamon and Allspice to sprinkle
Preheat the oven to 275 degrees F to keep the finished pancakes warm.
Combine the banana in a medium bowl with the coconut milk, egg, lemon juice, honey, and vanilla extract. Set aside for 5 minutes.
In a large bowl, whisk to combine the whole-wheat flour, oats, buckwheat flour, sugar, baking powder, baking soda, and salt.
Gently fold the liquid ingredients into the flour mixture, but don’t fully combine. Let the batter rest for 10 minutes to soften the oats.
Meanwhile, heat a large skillet or griddle over medium heat. When the surface is hot, add the butter or vegetable oil and spread it out.
Using a ¼-cup measure, drop 4 to 6 pancakes into the pan. Flip when bubbles appear, after about 3 to 4 minutes. 
Cook for another minute, then remove the pancakes to a heat-resistant plate in the warmed oven.
Sprinkle with a dusting of cinnamon and allspice and serve with warmed maple syrup. 

Disclosure:  A review copy of this book was sent to me by Abrams Books. I was not required to post about it and received no compensation for doing so. I only review books and products that I enjoy enough to have in my own kitchen.  

Shrimp and Asparagus with Coconut Sticky Rice

April 11, 2012

This shrimp and asparagus dish is something I made when I first learned how to cook with sticky rice after our a trip to Thailand.  

          Shrimp and Asparagus with Coconut Sticky Rice Recipe | FakeFoodFree.com

I didn’t know sticky rice existed until 2009. Even after I discovered it in Thailand, we got back to Kentucky and I couldn’t find it anywhere. When I did finally locate it, first in Chicago, then eventually in Lexington, I went a little overboard. Looking back I think I was making up for lost time since I spent the majority of my life without it.

There are two large bags of white sticky rice sitting in my pantry accompanied by a small bag of purple sticky rice.  My new found access has taught me that it takes two people a long time to use up that much rice.

So my thought process in meal planning tends to be – what can I make that would go with sticky rice?

Coconut Sticky Rice topped with shrimp and asparagus | Recipe at FakeFoodFree.com

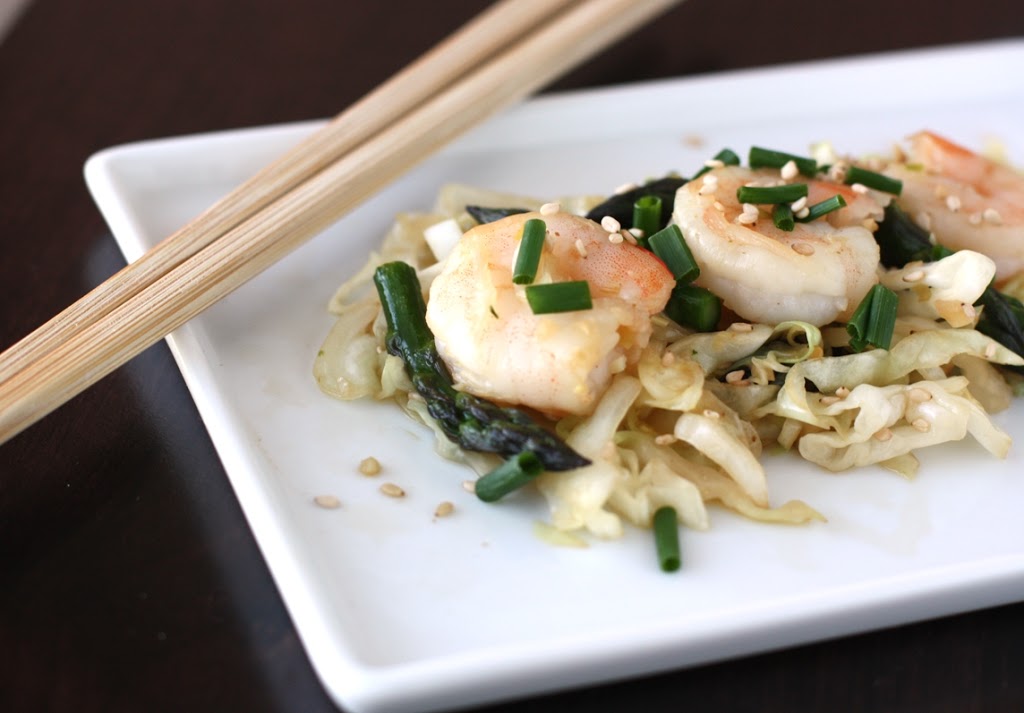
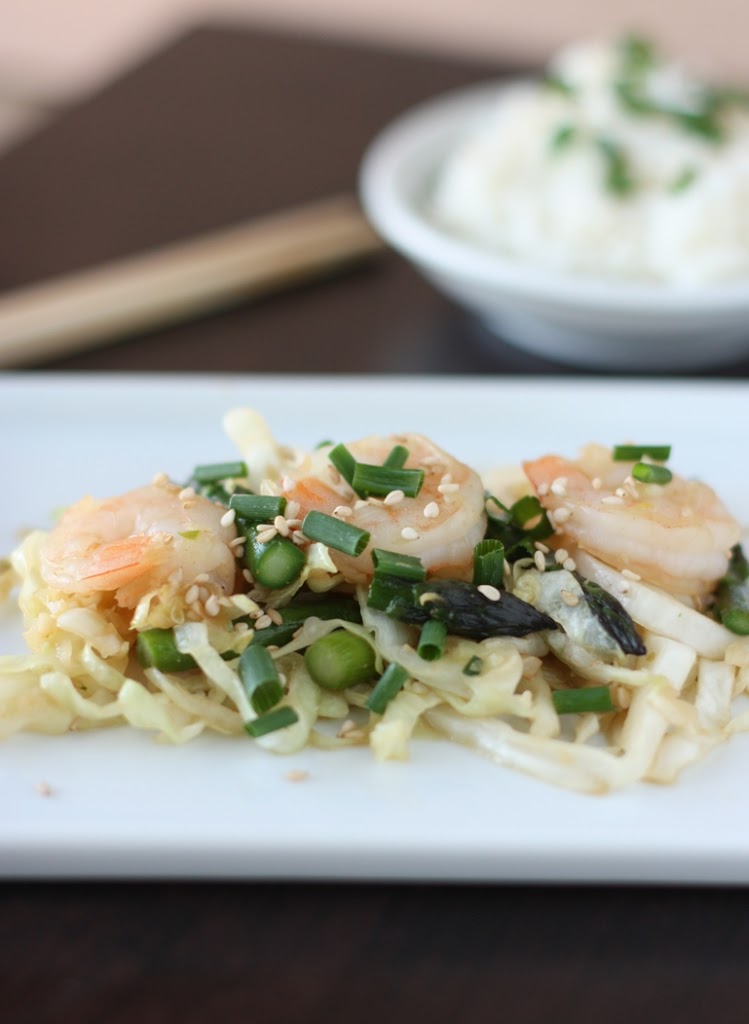
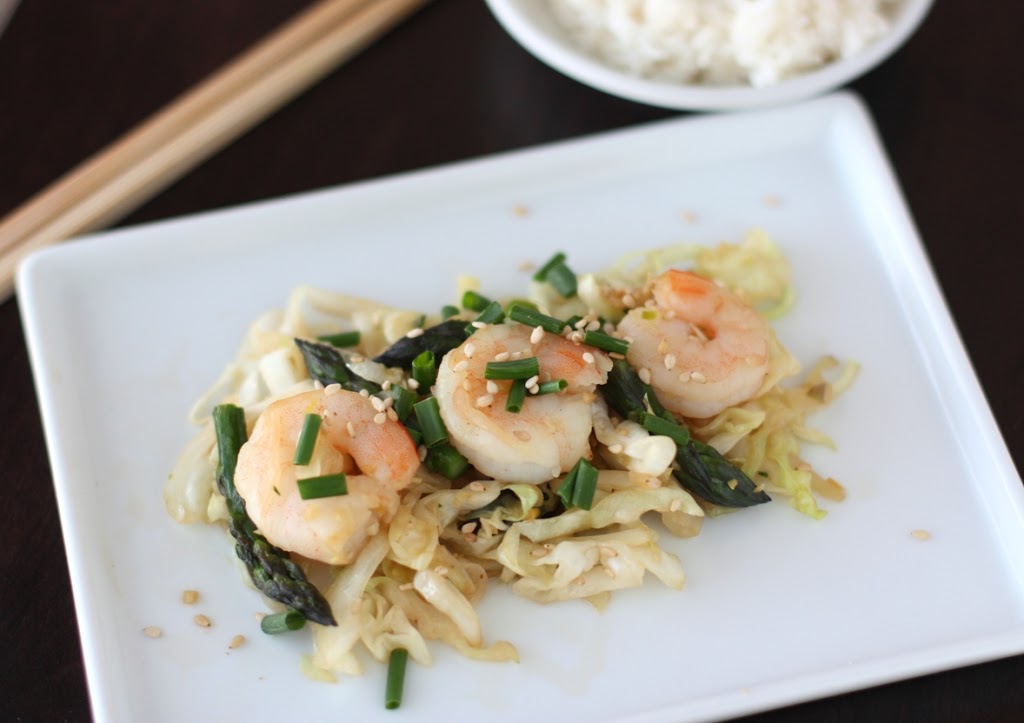
This time I threw together a little stir fry using up some asparagus from the garden, some cabbage and shrimp. I recently learned that you can freeze lemongrass so I was able to preserve my last purchase before it went bad. That went into the mix as well. I love coconut sticky rice, and it is easy to get the flavor by stirring in a small amount of coconut milk before serving.

This dinner could not be easier. Soak your rice the night before, and then let it steam while you chop everything and toss it in the wok. A bamboo steamer is ideal, but a metal vegetable steamer works fine, too.

Shrimp and Asparagus with Coconut Sticky Rice Recipe | FakeFoodFree.com
Shrimp and Asparagus with Coconut Sticky Rice
Serves 3
This recipe is something I came up with after learning how to cook sticky rice after a trip to Thailand.
Write a review
Print
Ingredients
  1. 1 tablespoon virgin coconut oil
  2. 2 cloves garlic, minced
  3. 2-inch piece lemongrass, minced
  4. 2 teaspoon fresh ginger, minced
  5. 1 teaspoon dark sesame oil
  6. ½ pound asparagus, cut into 1 inch pieces
  7. 10 to 15 shrimp, cleaned
  8. 2 cups cabbage, thinly sliced
  9. 1 tablespoon tamari or soy sauce
  10. 1 tablespoon toasted sesame seeds
  11. 2 tablespoons fresh chives, chopped
  12. 1 ½ cups sticky rice, steamed
  13. 3 tablespoons coconut milk
  14. Dried, unsweetened coconut for garnish
Instructions
  1. In a wok, heat the coconut oil over medium-high heat. Add the garlic, lemongrass, and ginger. Cook for 1 to 2 minutes. Sprinkle with the sesame oil. Add the asparagus and cook 1 to 2 minutes more, or until the pieces begin to turn bright green. Add the shrimp and continue to cook.
  2. When the shrimp are almost opaque add the cabbage and cook just until it wilts slightly. Add the soy sauce and toss to coat the vegetables and shrimp. Sprinkle with the sesame seeds and chives. Set aside.
  3. Gently stir the coconut milk in to the rice and divide into 3 servings. Sprinkle with the unsweetened coconut. Serve with the shrimp and vegetables on top of the rice or on the side.
Fake Food Free https://www.fakefoodfree.com/


Thanks for reading! All images and content are the property of Fake Food Free Productions, LLC and Lori Rice unless otherwise stated. Please do not republish full recipes and images without written permission. What is okay? Feel free to Pin images, share links to my posts or share the photo in a round-up post with the title of this recipe and a link back to the post. Confused about copyright and food blogs? Here is some helpful information on Recipe Attribution. If you want to use a photo or full recipe, just ask. I’m sure we can work something out.
Broccoli and Pastured Bratwurst over Pumpkin Quinoa

March 23, 2012

Quick and easy. That’s the motto for cooking around here right now. It’s not that I don’t want to cook. Well, okay, maybe just a tiny bit. I’m going through that seasonal transition thing when, despite a love of cooking, you still need a break.
That aside, it is more that other things are taking up my time. Fun things like this:
Gardening season has arrived, and we are prepped and ready to go. So far kale, Brussels sprouts, arugula, and radishes have been planted. The strawberries are blooming, and asparagus is popping up.
Longer days mean I’d rather be outside than in the kitchen, but that will soon change when the plants start producing.
For now, it’s quick and easy.
My husband picked up some smoked local, pastured bratwurst from Marksbury Farm Market. There is something I like about broccoli and sausage together so I combined the two once again. We are still on a mission to clean out the pantry, and I found some quinoa hidden behind the rice. I promise I try to keep it organized, but grains have tendency to get lost in there.
The quinoa needed a little something. I had frozen a small amount of leftover pumpkin that I roasted with rosemary over the winter, so that got stirred in. The result was a bowl that balanced comfort food with spring vegetables and grilling season!
Broccoli and Pastured Bratwurst over Pumpkin Quinoa

1 tbsp olive oil

½ large onion, sliced
4 cups broccoli florets
3 smoked bratwursts, sliced
Salt and black pepper to taste
1 cup quinoa, cooked
¾ cup pumpkin puree
Salt to taste
In a large skillet or wok, heat the oil over medium-high. Add the onions and cook until almost translucent, about 4-5 minutes. Add the broccoli, and continue to cook until it reaches your desired doneness. That’s about 5 minutes for me. Add the bratwursts and cook about 1 minute longer, just to heat the sausage through. Add salt and pepper to taste.
Stir the pumpkin into the hot quinoa. Salt to taste. Place the quinoa on a plate or in a bowl, and top with the broccoli and sliced brats. Serves 4.  
Want to create beautiful food and product photos that you can't wait to share?!
Discover your style, control the light, and shoot using the tool you know how to use (yes, your phone included). Learn about free resources, Live Q&As with Lori, and online courses you can take from anywhere in the world!
We respect your privacy. Unsubscribe at any time.