Browsing Category

Grains Nuts and Seeds

Baking Bread and Handmade Pottery

January 3, 2011
Baking Bread and Handmade Pottery | Fake Food Free | This recipe uses handmade pottery baker bowls for baking bread. It's the perfect amount for two to three people.

I’ve mentioned before that I lack skills for baking bread. I can come up with creative ideas and I can knead and shape dough like nobody’s business, but when it comes to pulling a light, fluffy, crusty loaf out of the oven I fail just about every time.

However, something is telling me that my luck may improve this year.

Way back in August, I went to the Woodland Art Festival. A fantastic event, by the way, if you happen to be in the area when it is hosted. There were booths full of handmade pottery and I’m quickly learning that this may be my new thing. I find pottery so interesting – both how it is made and the gorgeous end products.

Baking Bread and Handmade Pottery | Fake Food Free

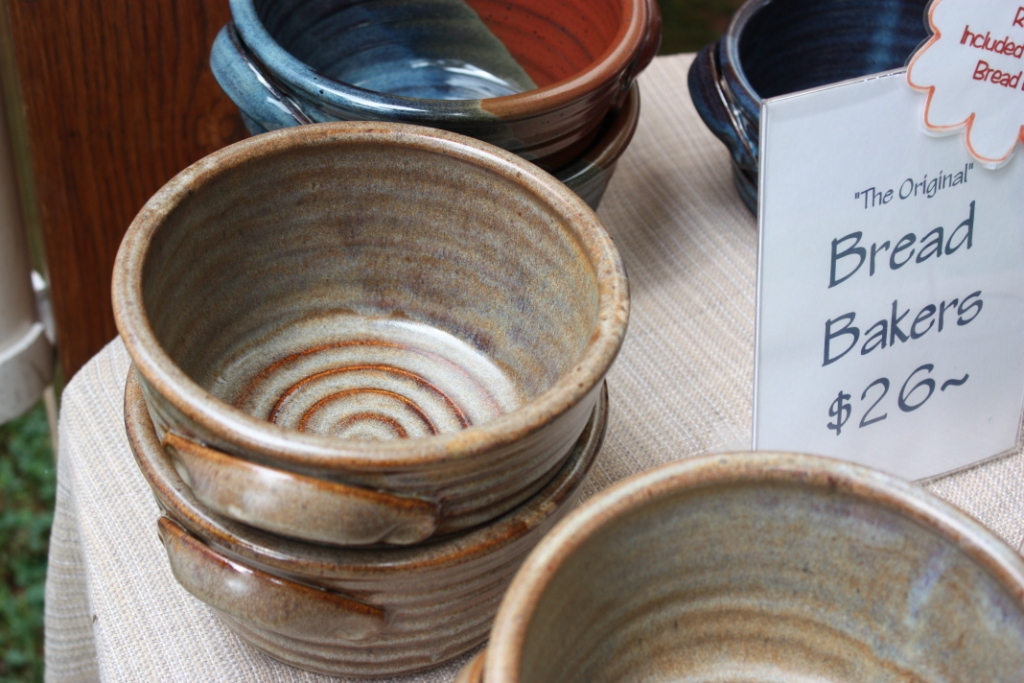
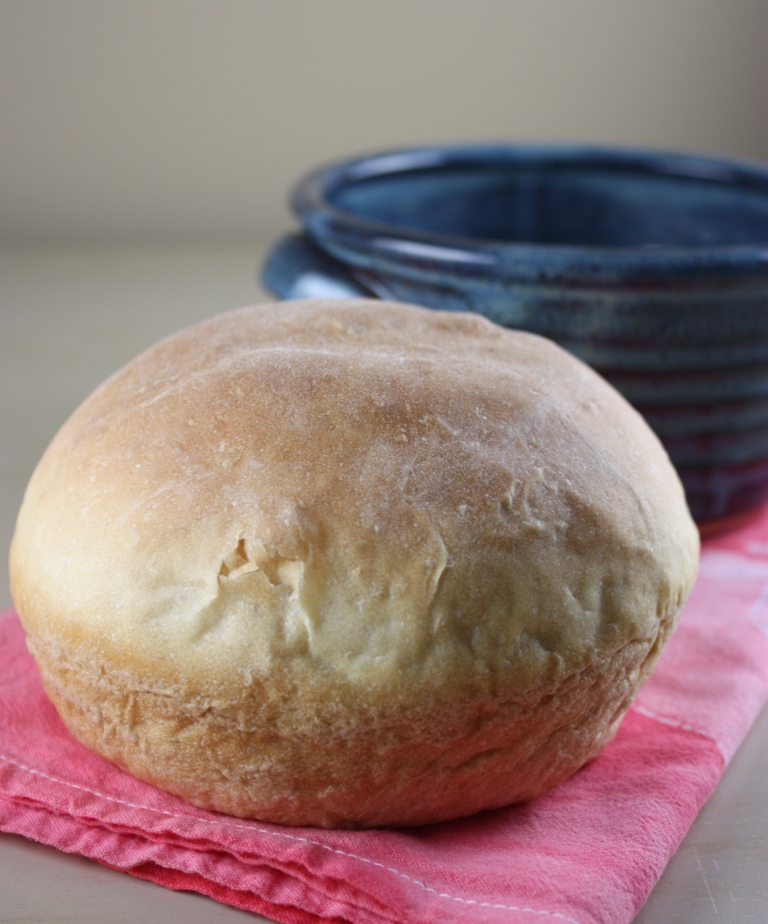
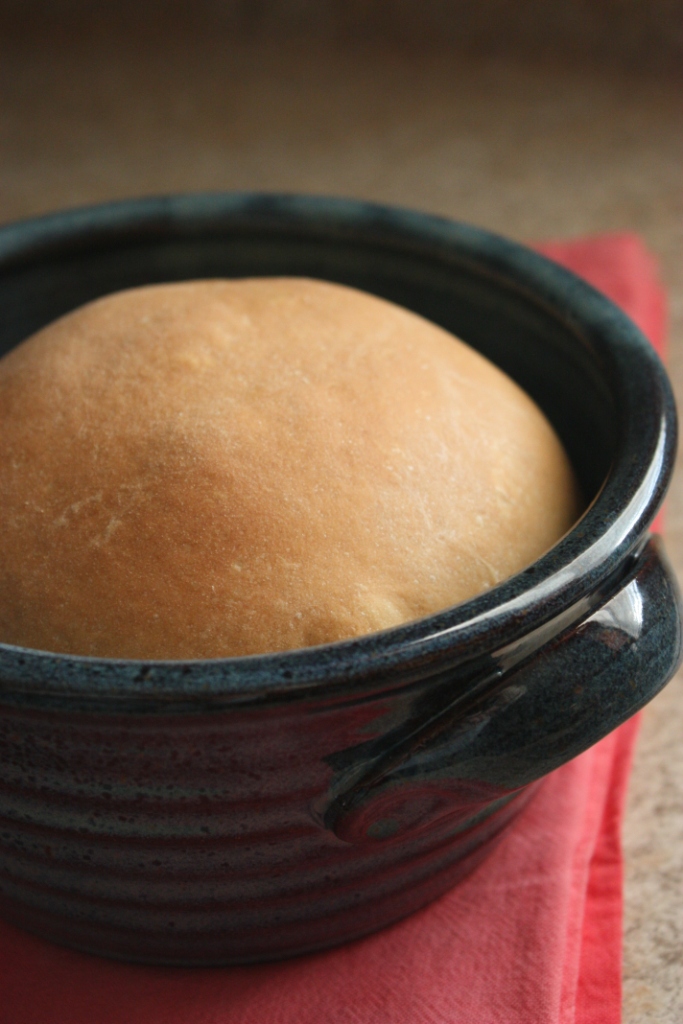
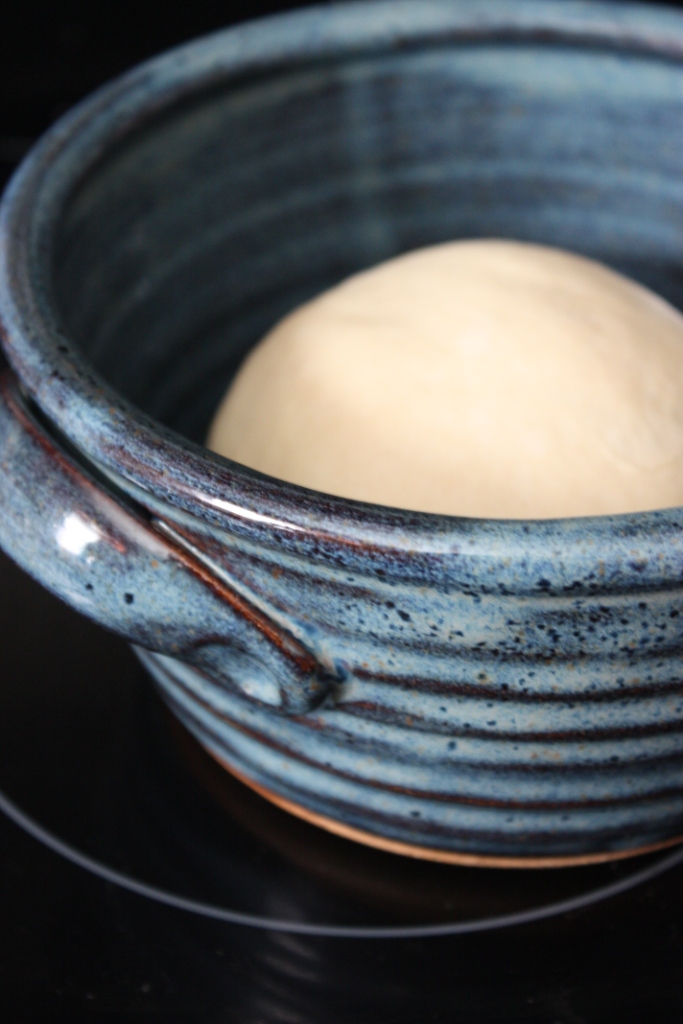
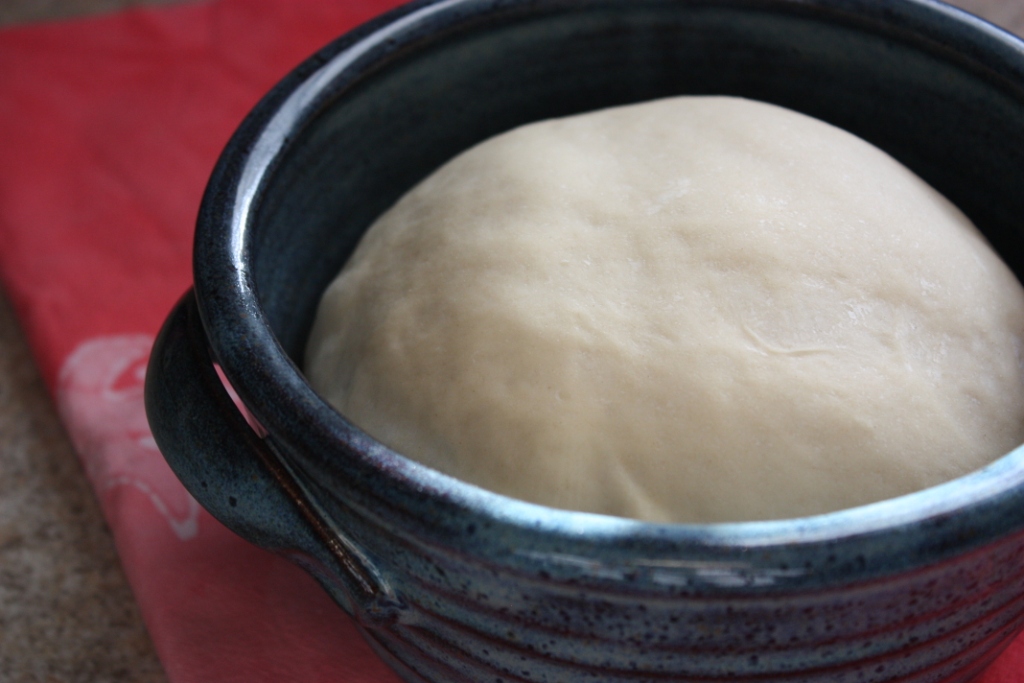
About halfway through my browsing I found these bread baking bowls from Neal Pottery out of Lebanon, OH. I simply could not pass them up so I bought one for myself and one for my mom which we just gave to her for Christmas.

Baking Bread and Handmade Pottery | Fake Food Free

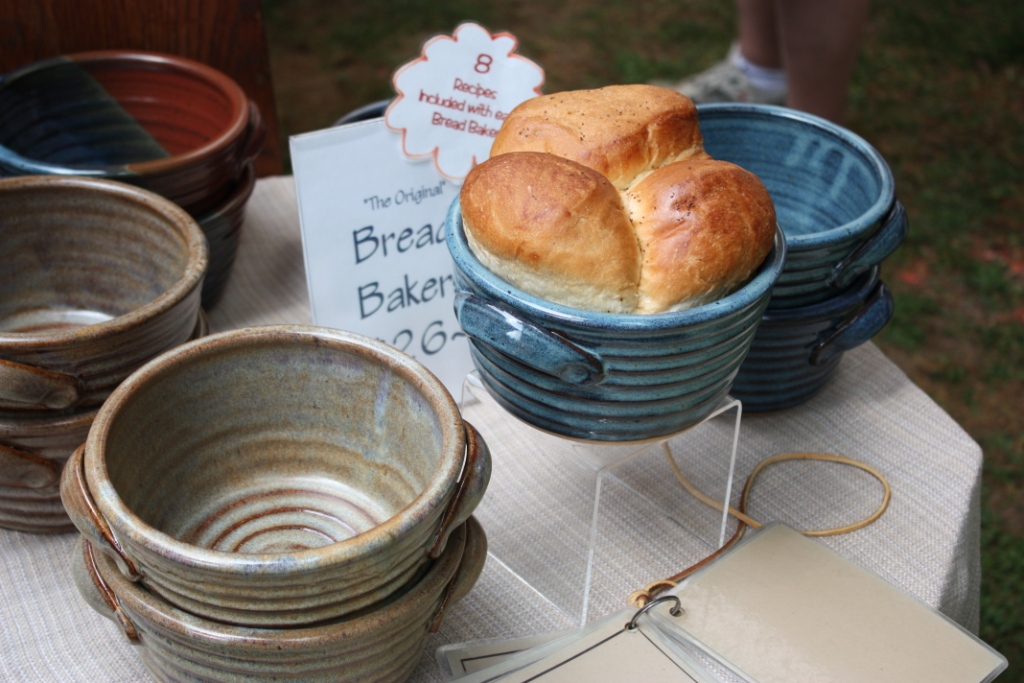
There are two reasons that this piece of functional art is so outstanding. It is super easy to use when making bread and it makes a small amount. Just about right for 2 to 3 people.

Mine has been sitting in the cabinet all autumn, but my mom was on the ball as soon as she received hers. She also happens to be an expert baker, if I haven’t mentioned it before, so it was no surprise that her loaf turned out great.

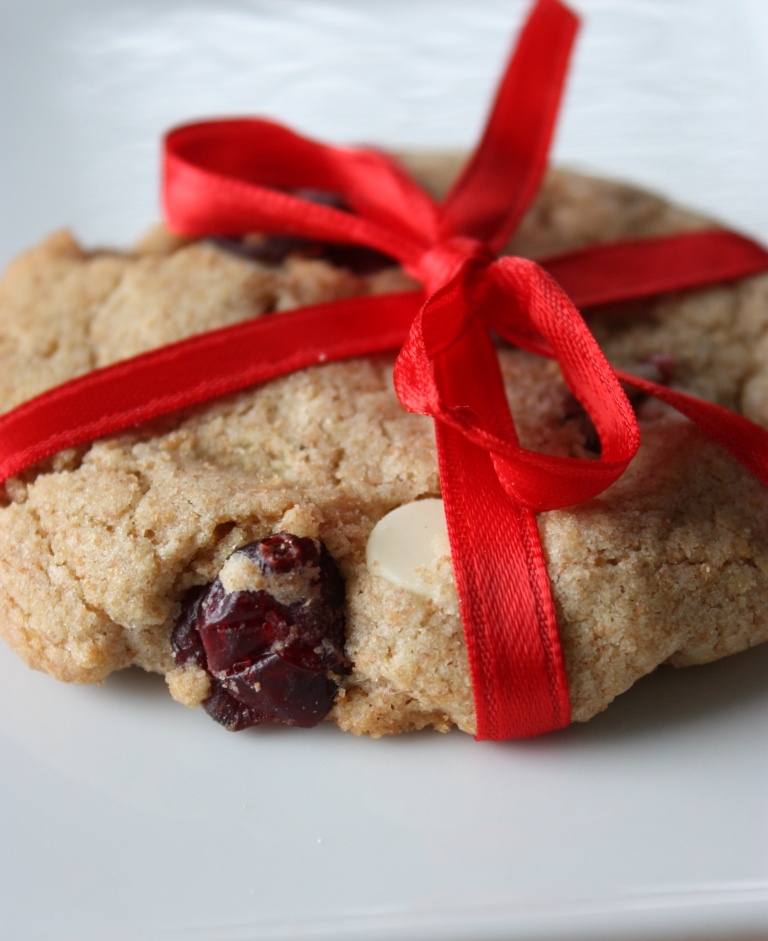
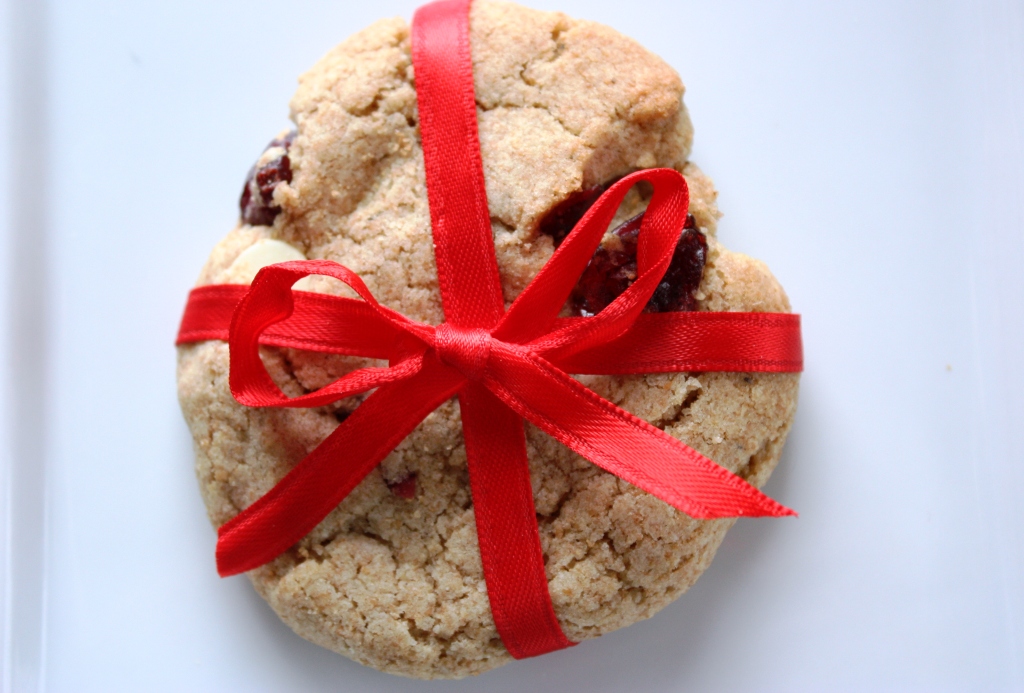
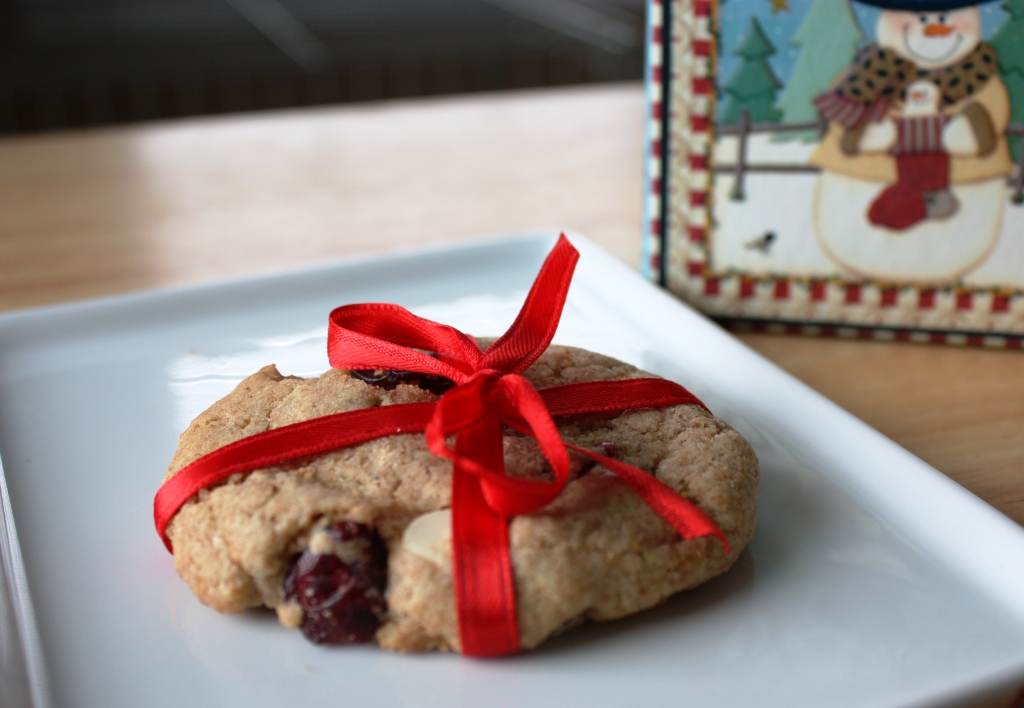
I wasn’t convinced that I would have success, but I thought it was about time I attempted. Since we had pasta for NYE, I decided to bake a loaf to serve with our olive oil and herb dipping sauce.

The baking bowl came with 8 recipes, some more complicated than others. I decided to take the recipe that was originally for Greek olive bread and omit the added ingredients. So basically, I wanted to make a loaf of unbleached white bread. I also added a little bit of sugar, because I have a hard time grasping bread recipes without sugar to feed the yeast and have little success with them.

Baking Bread and Handmade Pottery | Fake Food Free | This recipe uses handmade pottery baker bowls for baking bread. It's the perfect amount for two to three people.

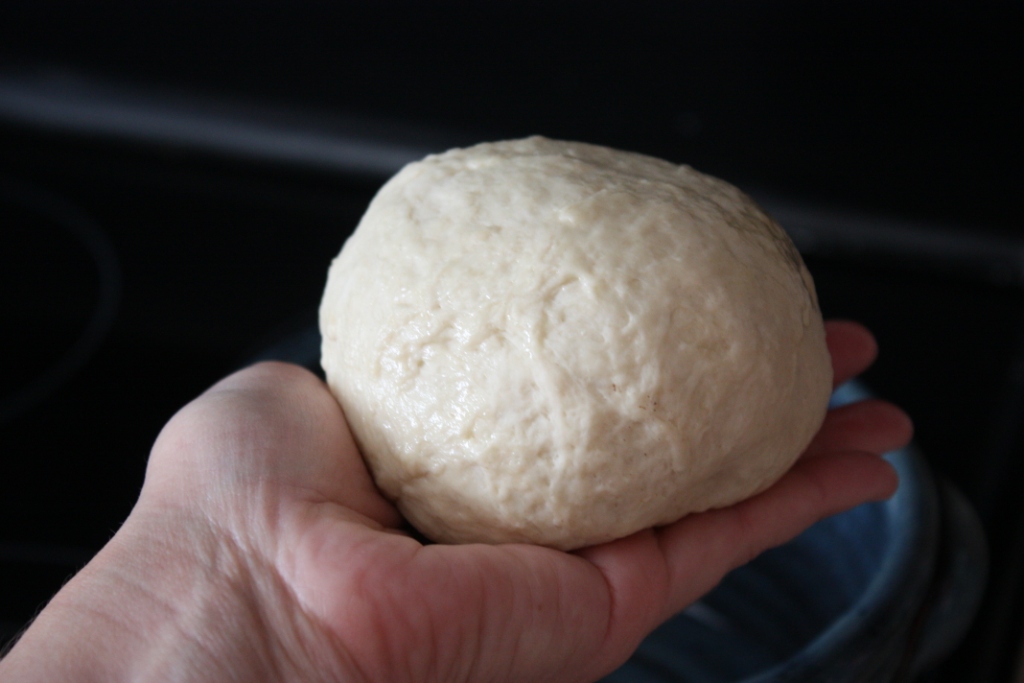
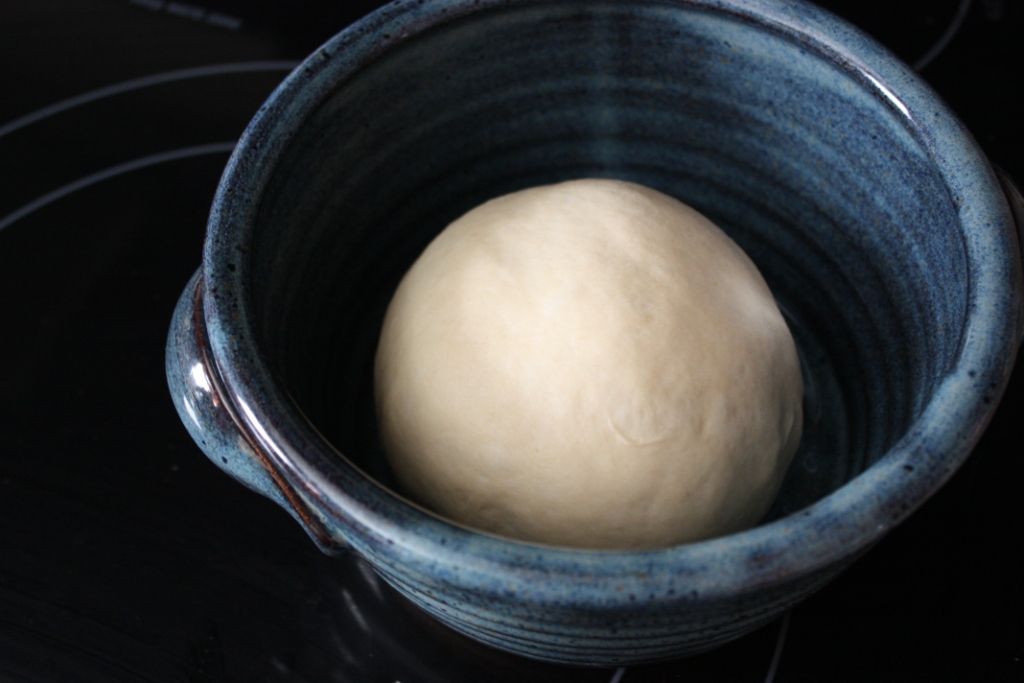
The steps are so simple. Mix the bread dough, knead the dough by hand for a few minutes, place it back in an oiled mixing bowl, rise for an hour. Punch down, knead again for a few minutes, place in the oiled bread baking bowl, let rise to double.

Baking Bread and Handmade Pottery | Fake Food Free | This recipe uses handmade pottery baker bowls for baking bread. It's the perfect amount for two to three people.

Bake for 45 minutes and viola! It turned out perfectly! It was a really unexpected surprise given my history with bread.

Baking Bread and Handmade Pottery | Fake Food Free | This recipe uses handmade pottery baker bowls for baking bread. It's the perfect amount for two to three people.
 
If you need bread for two, this is a great option. You could easily substitute a small loaf pan or a casserole dish or large ramekin for the bread bowl. However, if you come across one of these bowls, it is a great buy. It bakes some great bread and looks darn cute sitting out in the kitchen.
 

Basic White Bread in a Bread Baking Bowl

Makes: 1 small loaf, about 2 to 3 servings

Ingredients

1/2 pkg dry yeast
1/2 cup lukewarm water
1 tsp mascavo sugar
1 1/2 cups unbleached white flour, plus extra for kneading
1 1/2 tsp olive oil, plus extra for the bowl
1/2 tsp salt

1 small bread baker pottery bowl, about 6.5 inches in diameter and 3.5 inches deep

Prep

In a small bowl combine the yeast, water and sugar. Let sit a 5 to 7 minutes, until it blooms.

In a medium bowl, stir together the flour, olive oil and salt. Add the liquid ingredients and mix until a dough is formed. Add a more water by the teaspoon if it is too dry to form into a ball.

Turn the dough out onto a floured surface and knead until smooth, about 2 or 3 minutes. From the dough into a ball. Coat the inside of the mixing bowl with olive oil. Place the dough back in the bowl and cover with a clean dish towel. Let rise until doubled in size, about 1 hour.

Place the dough on a floured surface, punch down and knead for about 2 to 3 more minutes. Roll into a ball. Lightly oil the pottery bowl and place the dough in the bowl. Cover with a dish towel and let rise until doubled in size again.

Place the bread and baking bowl in a cold oven, set the temperature to 350 degrees F and bake for about 45 minutes. Mine was perfect right when the timer went off.

I checked out the Neal Pottery website and they have started selling some of their products (bread baking bowls included) on their Etsy site. You can check them out there if you are interested, or check out their art show appearance listing to purchase one in person.
 
Baking Bread and Handmade Pottery | Fake Food Free | This recipe uses handmade pottery baker bowls for baking bread. It's the perfect amount for two to three people.
 
Thanks for reading! All images and content are the property of Fake Food Free unless otherwise stated. Please do not republish full recipes and images without written permission. What is okay? Feel free to Pin images, share links to my posts or share the photo in a round up post with the title of this recipe and a link back to the post. Confused about copyright and food blogs? Here is some helpful information on Recipe Attribution. If you want to use a photo or full recipe, just ask. I’m sure we can work something out.  

Holiday Baking – Oh Nuts Giveaway

December 5, 2010

Remember back in the summer when I received that great package of nuts and dried cherries from Oh Nuts?

I used them to make Cherry Lemon Pistachio Scones and Chocolate Cashew Shortbread. Both are great for the holiday season.

Well, Oh Nuts has given me the opportunity to share the love so I’m giving away a $25 gift certificate to a lucky winner.

There are 3 ways you can enter. Please leave a comment for each of the things you do so that your efforts will be counted when I select the random winner.

Entries (via comments) will be accepted through midnight EST on December 14, 2010. I’ll announce the winner by December 15, 2010. I’ll need to reach you if you win, so only entries with a valid email address so will be counted.

3 Ways to Enter

Go to the Oh Nuts Christmas Gift Baskets or Hanukkah Gifts page. Let me know in the comments which you like most by leaving the name of the item along with the url.

Check out the Oh Nuts Facebook Page. Post the url and name of your fave gift from the pages above. Please post “I am here via Fake Food Free” for the comment to qualify.

Follow @ohnuts on Twitter. Tweet about the contest using “Win a free Hanukkah Gift from http://bit.ly/6nIsCi Follow @ohnuts & Retweet to enter” or “Win a free Christmas Gift from http://bit.ly/dUpizt Follow @ohnuts & Retweet to enter “

Remember: Leave a comment for each of the 3 things that you do.

Disclosure: Oh Nuts is providing this gift certificate to one winner at random, free of charge. I was under no obligation to blog about this contest. By offering this to my readers, I also received a gift certificate from Oh Nuts.

Whole Wheat Double Chocolate Cranberry Cookies

December 2, 2010

I rarely bake with solely whole wheat flour. I think you probably know why. Who wants to sit down to a glass of milk and a hockey puck?

I love the complex flavor of whole wheat flour, but when it comes to cookies it leaves a lot to be desired regarding texture. That was until I came across the Chocolate Chip Cookies recipe in Good to the Grain by Kim Boyce.

These cookies call for only whole wheat flour. I was skeptical, but I decided to give them a try. I changed them up a bit adding two kinds of chocolate and dried cranberries for some festive color.

Wow, who knew a whole wheat cookie could be so great! Honestly, I’d prefer these over a traditional white flour cookie. They are that good!

It takes a bit of effort to get them to spread well. I scooped the dough out by the heaping tablespoon and then gently flattened them just a bit to help them out. If you do that, you’ll end up with big, beautiful, whole grain cookies.

Whole Wheat Double Chocolate Cranberry Cookies

Adapted from Chocolate Chip Cookies, Good to the Grain by Kim Boyce

3 cups whole wheat flour

1 ½ tsp baking powder

1 tsp baking soda
1 ½ tsp salt
1 cup unsalted butter, softened
1 cup brown sugar
1 cup sugar
2 eggs
2 tsp vanilla
½ cup dark chocolate chips
½ cup white chocolate chips
¾ cup dried cranberries

Preheat the oven to 350 degrees F. In a medium bowl, whisk together the flour, baking powder, baking soda and salt. Set aside.

In a large bowl, cream the butter and sugars until light and fluffy. Add the eggs one at a time and mix until incorporated. Mix in the vanilla.

Slowly mix the dry ingredients into the wet, adding a little at a time, just until incorporated. Stir in the chocolate chips and cranberries. Scoop by the tablespoon and place on a baking sheet pan.

Bake for 16 to 20 minutes until the cookies are evenly baked and slightly browned. Remove from the oven, cool cookies on a wire rack. Makes about 24 large cookies.

Cranberry Oat Bars

November 21, 2010

Happy Thanksgiving week!

There will be plenty of cooking going on in a few days, but I had to start in on the celebrating this weekend by pulling out some cranberries!

Thanksgiving would not be complete without cranberries for me. It is one fruit that I really missed while we were living in Brazil despite my access to a tropical fruit wonderland at the time. I just really missed that tart, tangy flavor that only belongs to the cranberry.

I eat dried cranberries almost every day and I stock up on the fresh during this time of year keeping them in the freezer until I’m ready to make a recipe like this one.

I’ve made these oat bars before, substituting different fruits. The original is made with blueberries and it came from Bryant’s Blueberries, a farm just outside of Louisville, KY. I’ve modified it over time using whole grain flours and a variety of sugars.

You can use just about any berry with these as well as peaches. This time of year, the cranberry is perfect. These bars are sweet enough for dessert, but wholesome enough for breakfast.

Cranberry Oat Bars
Adapted from Blueberry Oat Bars, Bryant’s Blueberries

1 ¾ cups old fashioned oats
1 ½ cups white whole wheat flour
¾ cup muscovado sugar
½ cup walnuts, chopped
½ tsp baking soda
¾ cup unsalted butter, melted
2 cups fresh or defrosted cranberries
½ to ¾ cup demerara sugar
2 tbsp water
1 tbsp arrow root powder
1 tbsp lemon juice

Preheat the oven to 350 degrees F. In a medium bowl combine the oats, flour, muscovado sugar, nuts and baking soda. Pour in the melted butter and stir to mix well. You should have a moist, but crumbly mixture. Reserve about ¾ cup of the mixture.

Grease a 9 x 13 inch baking dish. Press the remaining oat mixture into the baking dish. Spread it evenly and press it firmly into the pan. Bake for 10 minutes.

In a sauce pan combine the cranberries, ½ cup of sugar (add more if you want it sweeter) and water. Bring to a boil, then simmer, covered for about 2 minutes. Stir to break up the berries.

Stir together the arrow root, lemon juice and water to make a paste. Add the paste to the cranberries and stir until the fruit is thickened. Remove from heat.

Spread the fruit over the oat crust leaving just about a ¼ inch edge on all sides. Crumble the reserved topping evenly over the fruit. Bake for 18 to 20 minutes or until the edges of the crust begin to brown. Cool the pan on a wire rack. Once cooled completely, cut into bars. Makes 15 bars.

Wild Mushroom Mac and Cheese

November 17, 2010

It seems to be the battle of the carbs in our kitchen lately. I’m trying hard to keep my carb selections smart as I clean up my diet before we enjoy a Jamaica vacation filled with unlimited food and rum in just a few short weeks. Meanwhile, my husband will be running a challenging trail marathon the first weekend of December.

Now, you see my dilemma. Him – lots of carbs and calories in general. Me – not needing so many of either at this specific time of the year.

Over last weekend I came to the conclusion that he could use some mac and cheese, and I’ve been craving it. So I struck a deal with my craving – use whole grain, healthy ingredients, and quality ingredients with lots of flavor. I also paired it up with a side of broccoli, cauliflower and bok choy sautéed in virgin coconut oil.

I had some wild mushrooms left over from the Marx Foods Mushroom Recipe Challenge so I decided to use up the Lobster Mushrooms (my new favorite) and Matsutake. This turned out to be a great flavor combo with the sharp cheddar and sweet smoked Swiss cheese.

Now, I will admit. This isn’t a gooey, cheesy mac and cheese which I often prefer. It is more of a casserole, but it has definitely taken care of the craving and the “carbs wanted” sign around here.

Wild Mushroom Mac and Cheese

2 oz dried wild mushrooms
1 box (~14 oz.) whole wheat pasta
1 tbsp olive oil
¼ cup onion, diced
2 cloves garlic, minced
2 tbsp unsalted butter
2 tbsp white whole wheat flour
2 cups milk
1 cup sharp cheddar cheese, finely shredded
¼ cup smoked Swiss, finely shredded
Salt and pepper to taste
¼ cup bread crumbs
1 tbsp butter

Place the mushrooms in a bowl and cover with 2 cups boiling water. Allow to soak for at least 20 minutes. Cook pasta according to package directions, drain and set aside.

Squeeze mushrooms and pat dry. Chop. Heat olive oil in a skillet over medium-high heat. Add the mushrooms, onion and garlic. Cook for about 5 minutes, or until the onions are translucent and browned. Set aside.

In a saucepan, melt the butter over medium heat. Whisk in the flour to create a roux. Slowly whisk in the milk. Whisk vigorously to avoid any clumps. Continue to cook and stir until the milk thickens slightly. Remove from heat. Reserve about 2 tbsp of cheese and stir the rest into the milk until melted. Stir in the mushrooms and onions, then salt and pepper to taste.

Preheat the oven to 375 degrees F. Grease a casserole dish with butter. Melt the 1 tbsp of butter and combine it with the bread crumbs for a topping.

Combine the pasta with the cheese sauce, stir well. Transfer the mixture to the baking dish. Top with the reserved cheese and bread crumbs. Cover the baking dish with a lid or foil, and bake for about 15 minutes. Remove the covering and bake for an additional 5 minutes until the toppings are browned. Makes 6 to 8 servings.

Almond Banana French Toast

November 2, 2010

The breakfast craving: sweet, crunchy, nutty, warm.

I suppose lots of breakfast foods could have satisfied, but I just couldn’t get my mind off French toast.

Speaking of that, when I was younger we always called French toast egg bread. I can’t really even remember when I learned the more widely accepted term for one of my favorite breakfasts. My mom would ask what we wanted on the weekends and “egg bread” was usually my answer.

This past weekend, after being under the weather for most of the month of October, I finally had my appetite back and wanted to step up the French toast a bit. And of course I had those cravings I mentioned to fulfill.

Almond butter, raw almonds, and yet another banana that desperately needed to be eaten came to the rescue. The result was sweet, crunchy, nutty and warm Almond Banana French Toast topped with a little pure maple syrup.

Almond Banana French Toast

2 slices whole grain bread (I used Great Harvest Honey Whole Wheat)
1 tbsp almond butter
1/2 very ripe banana, sliced
1 egg
1 tsp milk
1/4 tsp cinnamon
2 tbsp raw almonds, finely chopped

Spread the almond butter on one slice of the bread and top with banana slices. Place the other slice of bread on top of the banana and press firmly.

In a shallow bowl, whisk together the egg and milk, then stir in the cinnamon. Place the chopped almonds on a plate next to the bowl of egg. Preheat a nonstick skillet on medium-high heat.

Dip the banana almond butter sandwich in the egg mixture. Flip and press firmly so the bread absorbs the egg. Once the bread is saturated, about 20 seconds on each side, place the sandwich on the plate of almonds.

Press the bread into the almonds so they stick well, flip and coat the other side. Place in the skillet and cook about 90 seconds on each side, until the bread and almonds are browned, all the egg is cooked and the sandwich is heated through. Top with a little maple syrup. Serves 1.

Spicy Cornbread Muffins

September 27, 2010

Full meals have become a rarity around here. I find I’m always making one pot dinners, heating up some pasta with a sauce or stirring together a soup. If you haven’t been following my tweets or Facebook, you may not know that one of the biggest sporting events in the world is taking place right here in Lexington, Kentucky for the next 3 weeks.

The Alltech FEI World Equestrian Games have come to the US for the first time and they are right in our backyard. In addition to that, the company my husband works for is heavily involved which means crazy schedules and high stress levels around our house.


One of the many painted horses at the Kentucky Horse Park. This one is a map of all the horse farms in the area.


Sculpture in the courtyard made for the Games.


Opening ceremonies Saturday night. (Yes, a wide angle lens is on my wish list!)


Fortunately, last night we sat down to one of those rare, full meals. As a result I felt the need for some type of roll or muffin, and given the fact that we are finally creeping into real fall weather, cornbread seemed just the thing; spicy cornbread that is.

I made some substitutions to the cornbread recipe on the back of the cornmeal package, added some spices and gave it some extra kick with shredded Habanero Havarti cheese. This was a specialty cheese we picked up at a creamery in northern Indiana, Fair Oaks Farm.

This cheese is so good, and hot! Sprinkling a bit here and there is all you need which is why it has lasted so long.

I left the sugar out of the original recipe to make them completely savory. I also tried cutting out the butter, but as a result I thought they were a little dry. So I’d recommend keeping the butter in, or substituting virgin coconut oil.

These muffins make a great side for barbeque or chili. You might even consider slathering on some peach jam like I did for a sweet and spicy combination!

Spicy Cornbread Muffins

Adapted from Martha White Golden Cornbread

2 farm fresh eggs
1 cup milk
¼ cup butter or coconut oil, melted
1 ½ cups yellow cornmeal
1 cup white whole wheat flour
2 ¼ tsp baking powder
¾ tsp salt
½ tsp ground cumin
½ tsp chili powder
¼ cup sharp cheddar cheese, shredded
¼ cup Habanero Havarti cheese (or pepper jack), shredded
12 pickled jalapeno slices (optional)

Heat oven to 400 degrees F and grease a 12-muffin tin.

In a large bowl, whisk together the egg and milk. Stir in the butter or oil.

Gently stir in the cornmeal, flour, baking powder, salt, cumin and chili powder. Add the cheese and stir just until combined.

Divide batter into 12 muffins. If using, place a jalapeno slice on each muffin. Bake for 12 to 15 minutes, or until the muffins are browned and a toothpick inserted in the center comes out clean.

Gingered Pear Quinoa with Walnuts

September 23, 2010

I think I have a problem. I tend to go a little crazy when it comes to buying grains. Wheat berries, couscous, Israeli couscous, millet, brown rice, white rice, sticky rice, oats and quinoa. There have even been occasions when I lost track of which grain was which since I buy them from the bulk bin.

See, I told you I have a problem.

I keep buying because every time I’m in the store I have great ideas of what I will make. Not to mention that if it is a hard grain to find at a great price, I just can’t resist.

As I get settled into the new job I’m finding my cooking creativity is suffering. I trust it will return, but right now I’ve got lots of grains and no cooking going on.

Last night I was motivated, though. Weak as it may have been, I made an attempt to use up my rations. I turned to the red quinoa.

Gingered Pear Quinoa with Walnuts Recipe | Fake Food Free

Not in the mood for savory, I went sweet. And not just sweet, but an autumn-inspired sweet. I’m amazed at how well quinoa turns out with fruits and other sweet additions. The nutty flavor comes out and it tastes like it was meant to be.

I sautéed pears with mascavo sugar, cinnamon, ginger and walnuts. Once tossed with some cooked red quinoa, it became this morning’s perfect breakfast. The best meal I’ve had all week!

Gingered Pear Quinoa with Walnuts Recipe | Fake Food Free

Gingered Pear Quinoa with Walnuts

Makes: 2 servings

Ingredients

 1 tablespoon unsalted butter
2 tablespoons mascavo sugar
½ teaspoon cinnamon
½ teaspoon fresh ginger, grated
1 pear, cored and chopped
2 tablespoons walnuts, chopped
1 cup cooked, red quinoa

Prep

Melt the butter and sugar in a skillet on medium heat. Add the cinnamon and ginger and cook until bubbly.

Add the chopped pear, and stir to coat with the sugar mixture. Cook about 1 minute, careful to keep the pears somewhat firm. Add the walnuts.

Stir in the quinoa and serve warm. 


Thanks for reading! All images and content are the property of Fake Food Free unless otherwise stated. Please do not republish full recipes and images without written permission. What is okay? Feel free to Pin images, share links to my posts or share the photo in a round up post with the title of this recipe and a link back to the post. Confused about copyright and food blogs? Here is some helpful information on Recipe Attribution. If you want to use a photo or full recipe, just ask. I’m sure we can work something out.

Cranberry Pumpkin Granola

September 19, 2010

I can’t remember the last time I made granola, which means it has been way to long! With an overabundance of rolled oats at the moment I decided an autumn-inspired granola would be just the thing to use them up.

After seeing a variety of granola recipes online and in cookbooks that called for about a ½ cup of oil or butter, I decided to half that and replace part of it with pumpkin puree. This was from thawed, frozen puree I’m still using up from late last winter so it had a very thin consistency.

The sweetener of choice was maple syrup which worked out great. I didn’t add any other sweetener, but the dried cranberries I used were sweetened with sugar.

Once baked and browned, this granola has a spiced, slightly sweet flavor with a nutty background from the walnuts, pecans and sunflower seeds. We’ve been eating it up as a snack, cereal and yogurt topping, and after enjoying it so much I think it may be worthy of food gift status this holiday season!

Cranberry Pumpkin Granola

¼ cup unsalted butter
¼ cup pumpkin puree
½ cup maple syrup
4 cups old-fashioned rolled oats
¼ cup roasted, unsalted sunflower seeds
2/3 cup dried cranberries
½ cup chopped nuts (I used pecans and walnuts)
½ cup unsweetened, shredded coconut
¼ tsp ground cloves
¼ tsp ground nutmeg
½ tsp ground cinnamon
½ tsp finely ground sea salt

Preheat the oven to 300 degrees F. In a saucepan, melt together the butter, pumpkin and maple syrup. Cook on medium for 5 minutes.

In a large bowl combine the oats, sunflower seeds, cranberries, nuts and coconut. Pour in the maple syrup mixture and stir to coat all the ingredients. Add the spices and salt and stir to incorporate.

Grease two medium sized baking sheets with butter. Divide the granola on the two sheets and spread evenly in a single layer. Bake for 45 minutes, stirring every 15 minutes. Rotate pans on the oven rack as needed. Remove from the oven once dried and browned. Cool and store in an airtight container for up to a week. Makes about 6 cups.

Lemon Rosemary Thumbprints with Peach Jam

September 4, 2010

I’m happy to say that Fake Food Free has transitioned to the Substack Newsletter called Every Corner of the World.

I hope to see you there.

 Lemon Rosemary Thumbprints with Peach Jam | Fake Food Free  

One of my favorite cookies that show up at our holiday cookie exchange is a creative combination of lemon and rosemary in a shortbread. A former coworker of mine brings these cookies and I usually get to go home with all the extras. We both love them, but others seem to be resistant to the savory herb flavor in something that is supposed to be strictly sweet.

It is surprising how delicious the rosemary tastes in the cookies. It isn’t an overwhelming flavor, but more of a crisp, refreshing background to the sweet lemon shortbread. I’ve been meaning to make these cookies for a while, but just haven’t gotten around to it.

All that time thinking about them has given me the opportunity to get creative. First, let’s talk about the jam.

I’ve wanted to try some jam with alternative sweeteners all summer, but I’ve been afraid of ruining all that wonderful fresh fruit if it didn’t turn out well. When I came across Stone Fruit Preserves from The Cilantropist, I finally decided to give it a try. The recipe already had honey in it so I added demerara sugar instead of white sugar.

I also cooked it according to other jam recipes I’ve used, boiling it hard for about 15 minutes. I canned the majority of it and left about a ¼ cup as refrigerator jam which I used in the cookies.

For the cookies, I decided to try out some brown rice flour which I have never baked with before. I really like the texture it gave to the cookies. They have almost a cornmeal-like feel in the mouth. I wouldn’t go overboard with it though. A little adds nice texture, but too much makes them gritty.

The rosemary adds that same refreshing flavor as the cookies I enjoy from our holiday party. Despite the fact that there is rosemary, lemon and peach going on here it all blends nicely for one delicious thumbprint cookie. Feel free to substitute any type of jam. I think a lemon curd would be tasty with them, too.

Lemon Rosemary Thumbprints with Peach Jam | Fake Food Free

Lemon Rosemary Thumbprints with Peach Jam

Jam modified from Stone Fruit Preserves at The Cilantropist
Cookies modified from Jam Thumbprint Cookies by Ina Garten

Makes: About 18 cookies

Jam Ingredients

Peach Jam/Filling

2 lb. peaches, peeled, pitted and chopped
1 cup demerara sugar
¼ cup local honey
Juice of ½ a lemon

Jam Prep

Combine all ingredients in a heavy soup pot. Bring to a boil and cook, stirring often, for 15 minutes. You can check to make sure the jam has set up by spooning some on a plate and putting it in the freezer for a couple minutes. If it is thick and spreadable when you get it out, it is ready. Process as you would any jam if you choose to can it, otherwise, place it in a sealable container and store in the refrigerator for up to a week. Makes about 4 cups.

Cookie Ingredients

3/4 cup unsalted butter, softened
½ cup demerara sugar
½ teaspoon vanilla
1 cup brown rice flour
¾ cup white whole wheat flour
½ teaspoon fine ground sea salt
1 teaspoon lemon juice
1 teaspoon lemon zest
½ tablepsoon fresh rosemary, chopped

Cookie Prep

In a mixer, cream together the butter and sugar on medium to medium-high for about 2 minutes. Add the vanilla. Slowly mix in the flours, salt, lemon juice and lemon zest. Finally, mix in the rosemary. Form the dough into a ball, wrap in plastic wrap and refrigerate for at least 30 minutes.

Preheat the oven to 350 degrees F. Roll the dough into about 1 inch balls, maybe just a little larger. Place on an ungreased cookie sheet. Flatten the cookies slightly and make a small indentation in the center with your thumb. Fill the spot with about 1/8 to ¼ tsp of jam. Be carefully not to fill the space too full or it will bake out of the cookie.

Bake for about 12 minutes or until the cookies are firm and slightly browned. Let cool on the baking pan for about 2 minutes and carefully transfer to a cooling rack to allow the jam to set before serving. 

Lemon Rosemary Thumbprints with Peach Jam | Fake Food Free
 
 
Thanks for reading! All images and content are the property of Fake Food Free unless otherwise stated. Please do not republish full recipes and images without written permission. What is okay? Feel free to Pin images, share links to my posts or share the photo in a round up post with the title of this recipe and a link back to the post. Confused about copyright and food blogs? Here is some helpful information on Recipe Attribution. If you want to use a photo or full recipe, just ask. I’m sure we can work something out.  
Want to create beautiful food and product photos that you can't wait to share?!
Discover your style, control the light, and shoot using the tool you know how to use (yes, your phone included). Learn about free resources, Live Q&As with Lori, and online courses you can take from anywhere in the world!
We respect your privacy. Unsubscribe at any time.