Browsing Category

Gardening

Heirloom Tomatoes and Cantaloupe

July 30, 2011

After consuming unspeakable amounts of pork, chips, scones and stout in Ireland, this past week was full of cold grain salads, fruits and vegetables. I was back to my kitchen and garden, and not only was I craving some lighter foods, but what was left of the garden needed to be used up.

Things are dry and hot and we’ve lost several plants, but there are still some things hanging on. Mainly peppers and cherry tomatoes, and the other tomatoes are very slowly beginning to ripen.

Alma Paprika Peppers

The last of the Patty Pan, Merlot Peppers, Bell Peppers, Poblano Peppers and San Marzano Tomatoes

I’ve also been taking advantage of the great deals being offered by producers around here. This week I picked up white and golden peaches, an outstanding cantaloupe and lots of sweet corn.

So before I continue with more from Ireland (I still have 2 more posts) I thought some recipe posts were in order. Or at least, foods I’m making in my kitchen. I say that because this fresh salad really has no recipe.

We finally got two Mr. Stripey tomatoes from the garden this week. I’m so excited because they are by far my favorite. Since I’ve seen plenty of recipes that use watermelon with tomatoes, I thought maybe my Mr. Stripey would go well with the cantaloupe. If nothing else, I knew the color would be gorgeous.

Turns out that the flavor combination is pretty awesome as well. Just slice up an heirloom, thinly slice some super sweet cantaloupe, add a little sea salt and pepper and then top it with a little basil if desired (I used Thai basil).

Pin It

Baking with Coconut Oil: Gooseberry Pie

July 12, 2011

Gooseberries are one of those fruits that we always had growing in our backyard, but that no one else outside our family seemed to know anything about it. To me it seemed that gooseberries to others were like currants to me. They knew of them, but had never had the opportunity to experience them.

It didn’t really hit me how unpopular gooseberries were in our area until I came across them in Brazil. Not the fruit, though, the flavor. We started seeing groselha flavored popsicles and juices. There was even a groselha beer, also a bit of a girlie beer, where they put a shot of groselha syrup in the mug.

Thanks to my trusty translating book I quickly learned that groselha was gooseberry and it was something I’d known most of my life.

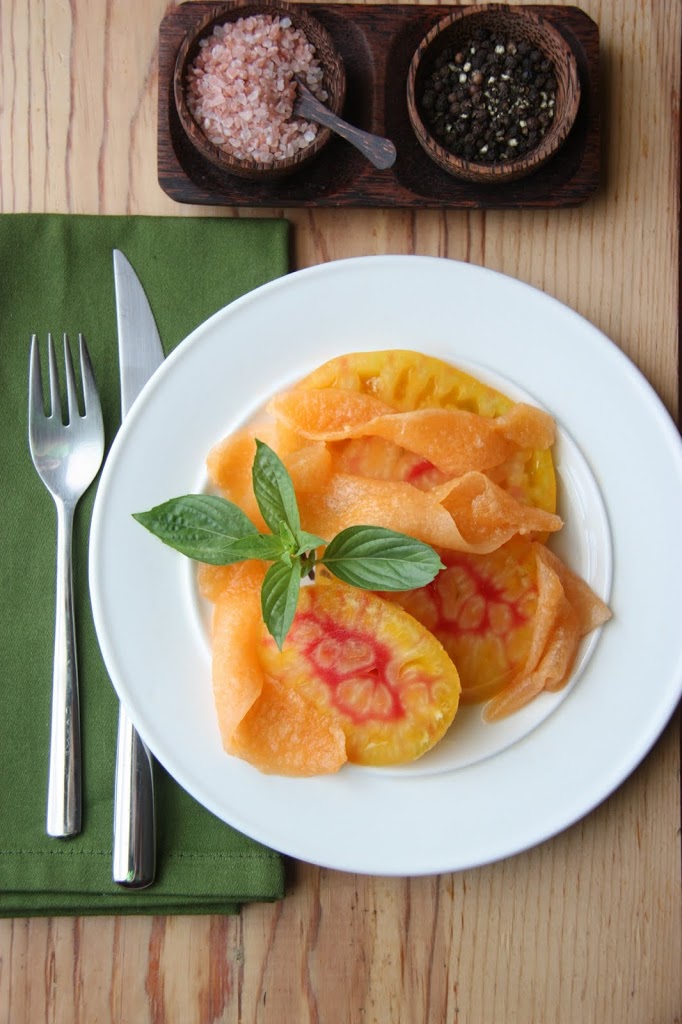
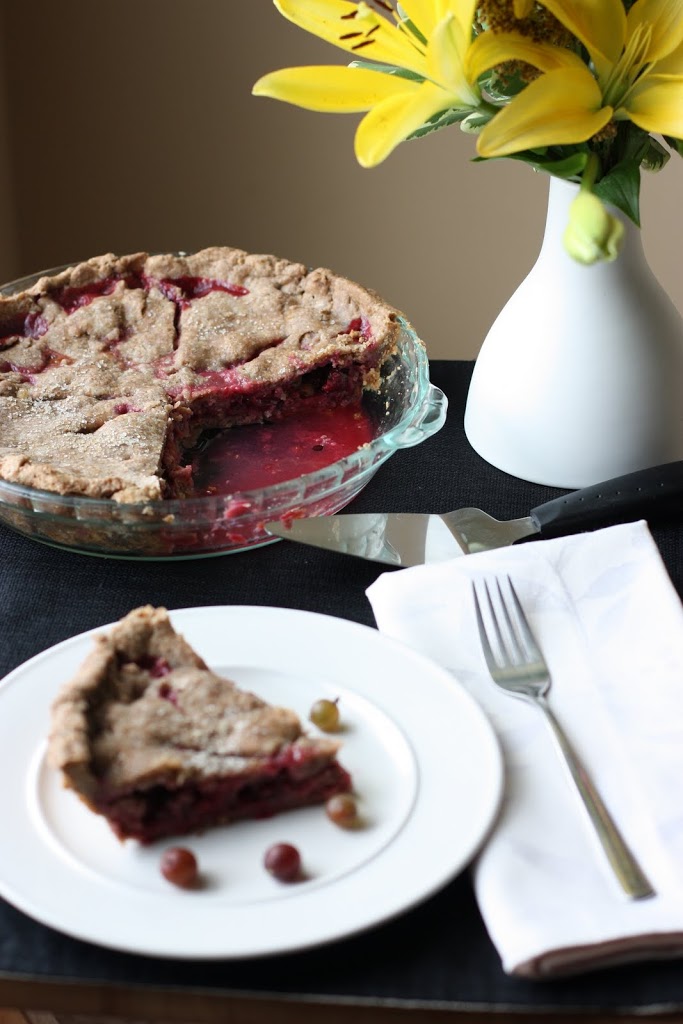
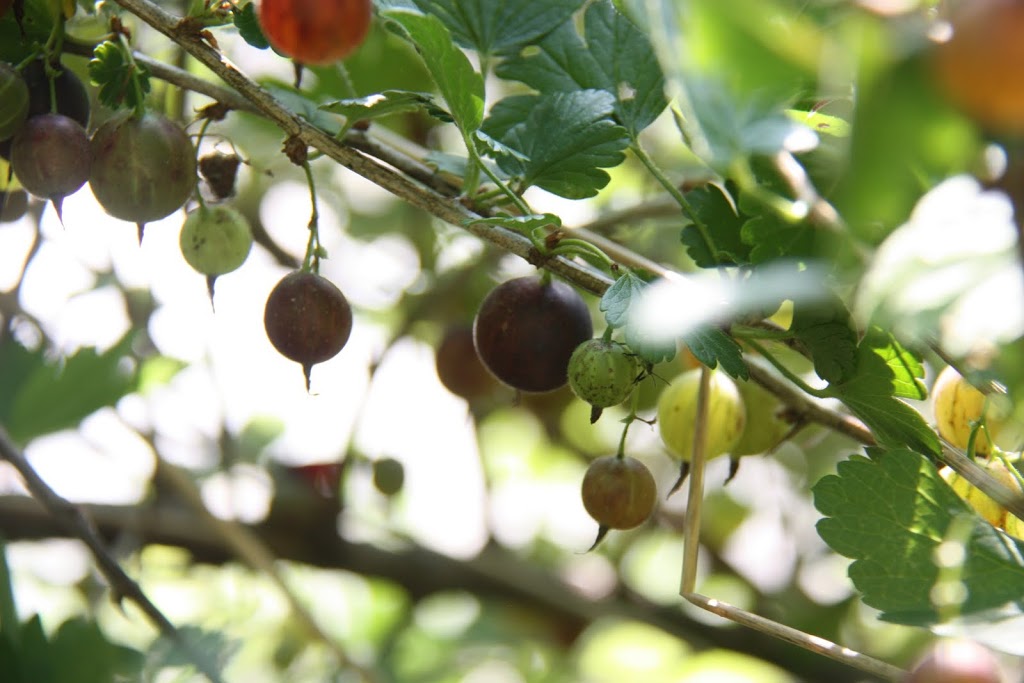
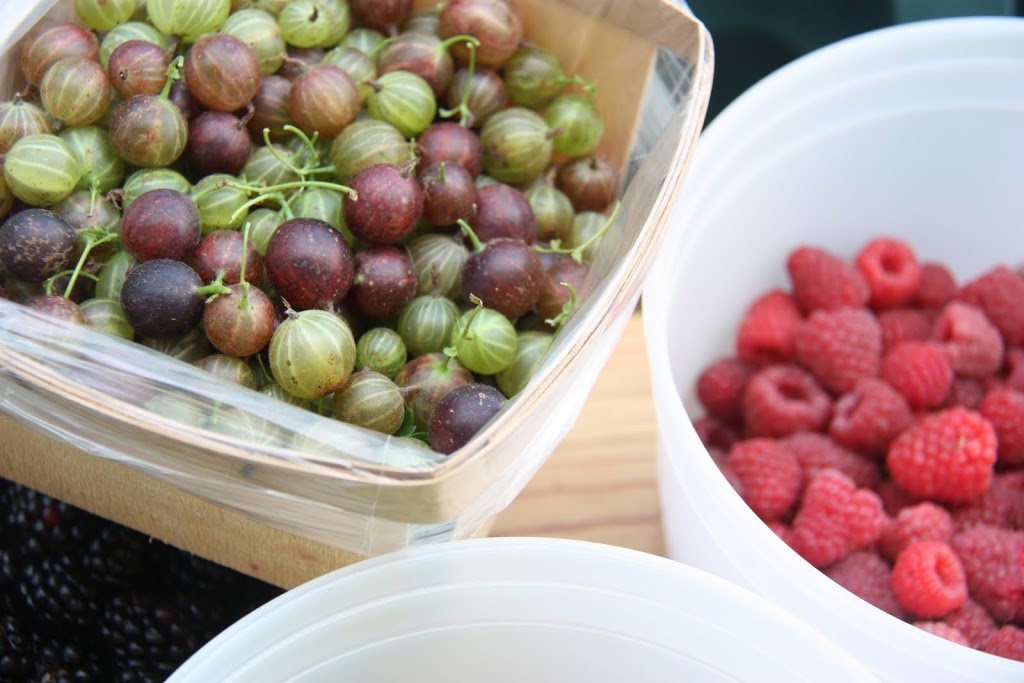
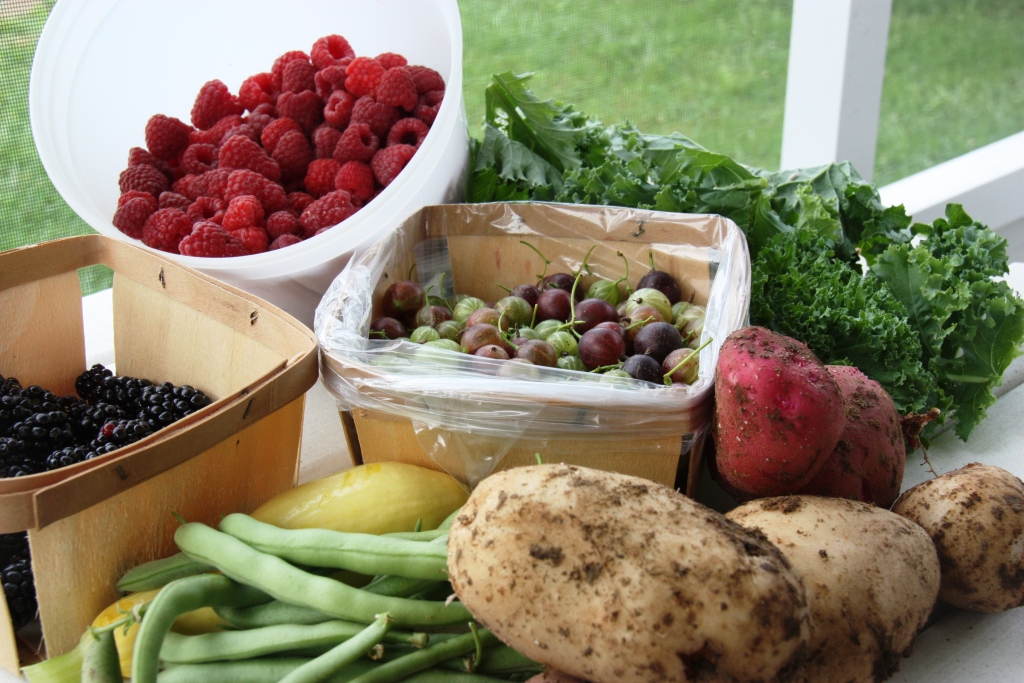
My parent’s gooseberry bushes are the red variety and when I was visiting recently I brought a small container back with me. A gooseberry is difficult to describe. Its flavor isn’t very distinct to me, just sweet. The skin and flesh are like that of a commercial grape, but the seeds inside are more like a blueberry. They are very difficult to pick due to the large thorns, but with gloves we managed to get a container full. Taking my mom’s advice we mixed both the purple/red and the ones that were still a little green.

Having the gooseberries to use up gave me an opportunity to try out a new pie crust. I’d wanted to try to make one with only virgin coconut oil for a while. Given the season and that my oil is in the fridge right now to prevent it from being a liquid, using it for the pie was quite the task.

I set the jar in warm water until it softened just a bit and then I had to do some serious digging to get it out and at the right texture. I wanted it to be firm enough to cut, but somewhat soft like butter. After a lot of work, I finely got it the way I wanted it and got working on my pie.

I had planned to make the pie all gooseberry, but I had just a few blackberries and raspberries that were threatening to go bad so I threw those in as well. I knew the berries would be good so the real test was the pie crust.

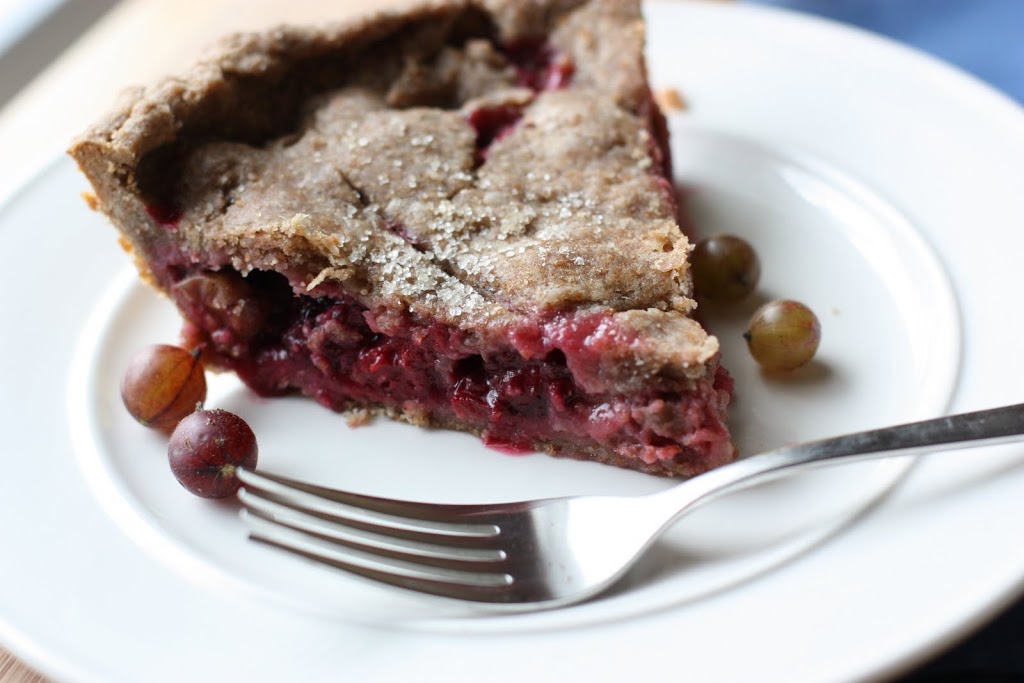
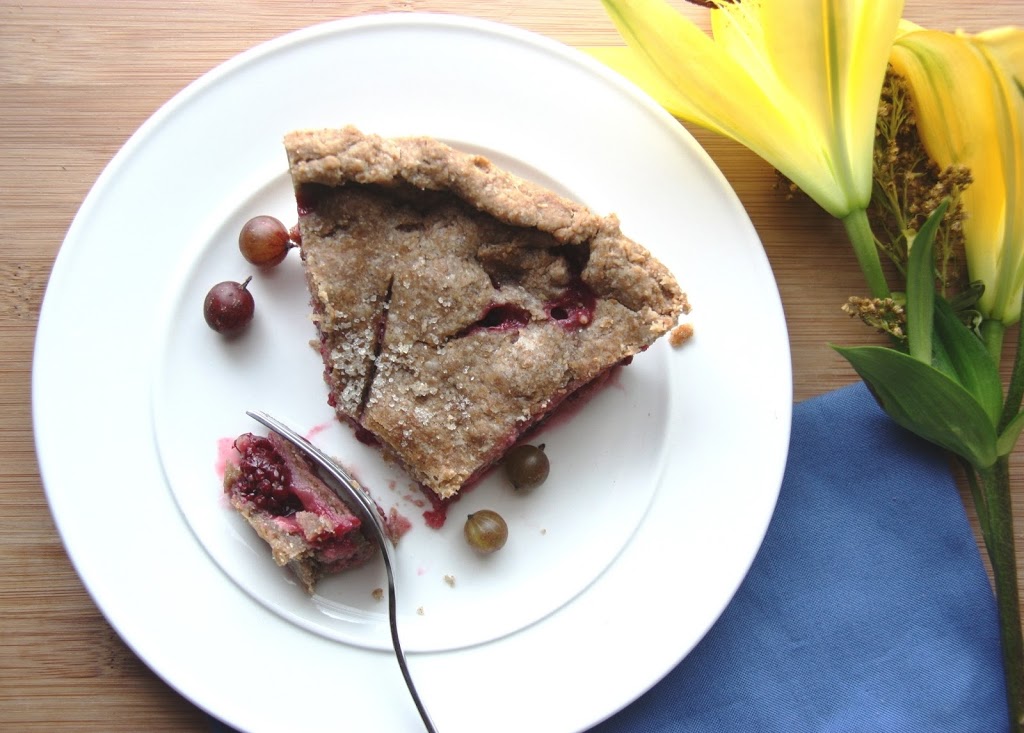
I’m going to go ahead and claim success. We really liked it. It was nice and flakey with that mild sweetness you get from coconut oil. Any combination of flours would work. I just happened to have white whole wheat and buckwheat around so I gave them a try. This crust is a nice break from an all butter version. It makes for a hearty, whole grain pie.

Gooseberry Pie with a Coconut Oil Crust

Crust: (enough for a 9-inch, two-crust pie)

2 cups white whole wheat flour
½ cup buckwheat flour
1 tsp salt
1 cup virgin coconut oil, cubed (about the texture of cold butter)
½ cup cold water

Filling:

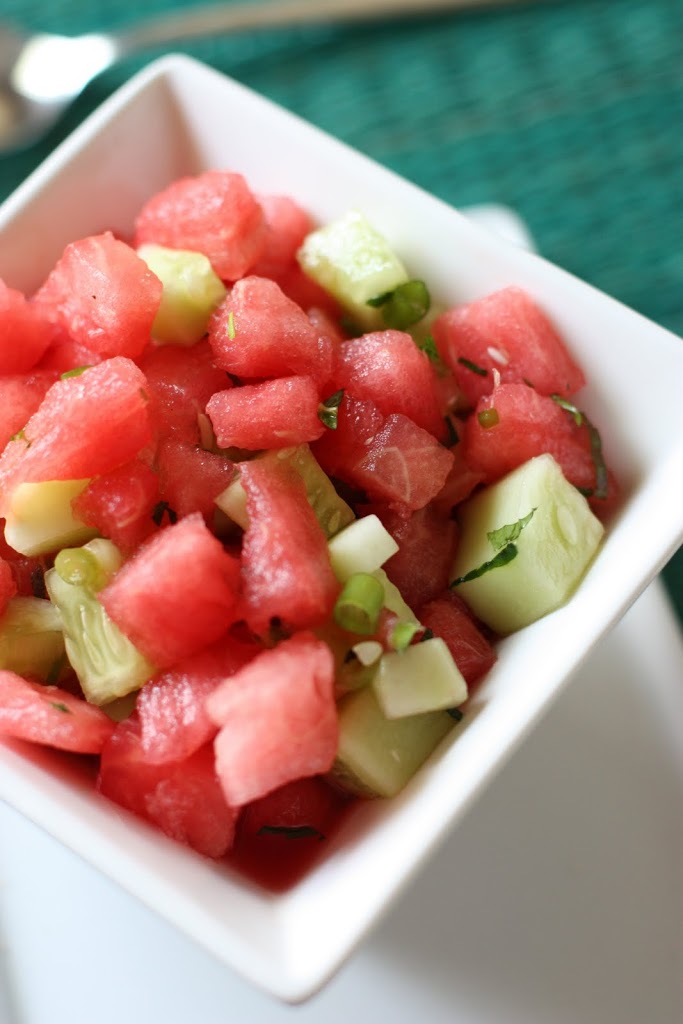
3 ½ cups gooseberries (or any mixture of berries)
¼ cup raw sugar
1 ½ tbsp white whole wheat flour
1 tsp vanilla

In a bowl, mix the flours and salt. Add the semi-solid coconut oil and blend with a pastry blender until the oil is incorporated with pea-sized pieces.

Slowly add the water a little at a time and mix by hand until a dough is formed. Divide into two equal parts, wrap in plastic wrap and refrigerate for about 30 minutes. Remove from the fridge and roll out between two pieces of plastic wrap to the appropriate size for your pie pan.

Preheat the oven to 400 degrees F. In a bowl, combine the berries and toss with the flour and sugar until all the fruit is well coated. Stir in the vanilla.

Place the bottom crust in your pie pan and prick gently with a fork. Add the berry mixture. Cover with the top crust and cut slits in the top for baking. Sprinkle the top with about a teaspoon of raw sugar if desired.

Bake for 35 to 45 minutes. The crust should begin to brown and be firm and the berries should be bubbly. Remove, let sit for about 10 minutes and serve or allow to cool to room temperature. Serves 8.

*************************************************************

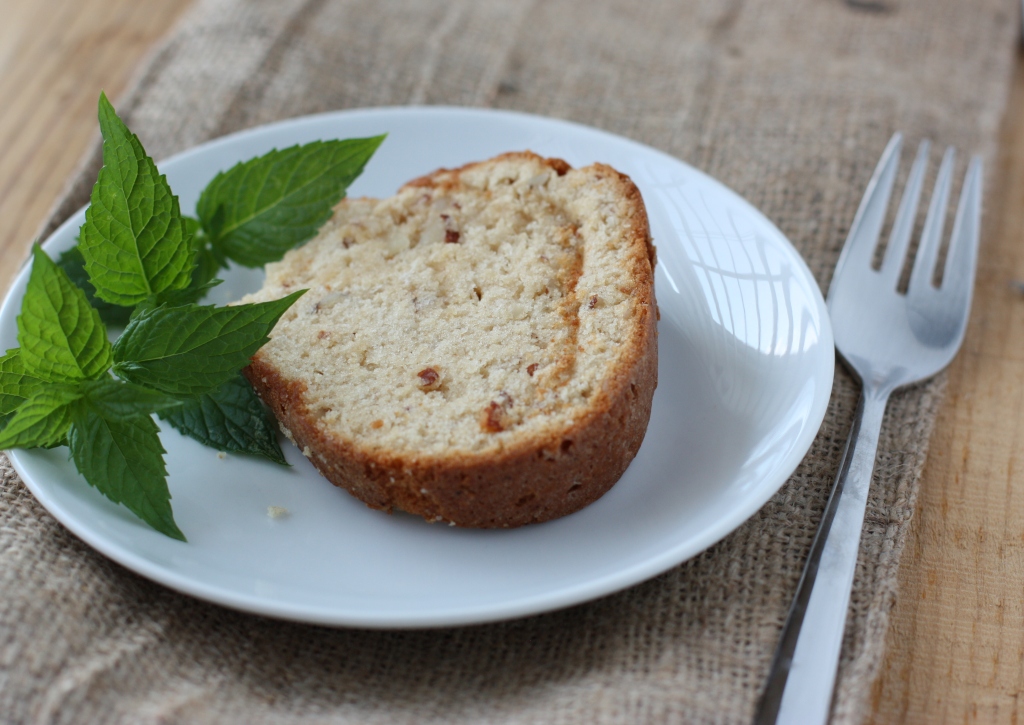
This post is a bit of a two-part because I have another fun recipe to share with you. My friend Jada, who is going on 10, developed a newfound interest in all things Abraham Lincoln this past school year. So this summer, Jada did a great presentation all about his life and included Abe Lincoln’s favorite cake. She consulted me, the food blogger, to find out if I thought the recipe was as good as she did. Oh, yes it is.

Jada made the cake with her family this week and her mom brought me some to work. I promised to photograph it and share this beautiful, and mighty tasty, cake with you. So here you go, and if you are interested in the recipe, quite a few bloggers have featured it. Obama Foodorama and Frugal Housekeeping are two of them. Thanks, Jada!

Cucumber Watermelon Salad with Honey and Mint

July 9, 2011

Have you ever come up with a new idea only to realize, well, it’s really not a new idea? That happens to me a lot when I’m making food in my kitchen. This is kind of how it goes down in my head.

This ingredient would work so well with that. This one I’m not sure about, but let’s throw it in anyway. Oh wow, it does taste pretty good. Let’s get a photo and put it on the blog.

Then, feeling pretty proud of myself, I sit down to write the post. Most of the time I Google my recipe combinations (after I’ve made them) because I want to know what is already out there and never want it to look like I am claiming another person’s work as my own.

So I Google, and there it is. Lots of other people have thrown this combination together before, some within the last few weeks. Sigh, slowly the balloon begins to deflate.

Take this watermelon salad for example.

We bought a watermelon for our BBQ last weekend and barely any of it was eaten so it has been taking up valuable space in my fridge all week. My husband and I aren’t huge watermelon fans so I’ve been trying to find creative ways to use it.

Then these massive Asian cucumbers we planted began to ripen in the garden. Look at these things! They are as long as my forearm. They just happen to taste amazing as well with a unique sweetness.

I’ve seen the watermelon salads with things like tomatoes, feta cheese and onions around the web, so I thought why not throw in some cucumber.

Rest assured many people thought of this great idea before I did.

But with every recipe comes a little different twist. With this one I love the way the sweet honey and savory green onion work together along with the sea salt. The mint adds a little burst of unexpected flavor making it even more refreshing.

Cucumber Watermelon Salad with Honey and Mint
2 cups watermelon, cubed

1 ½ cups cucumber, peeled and cubed
2 green onions, greens and partial whites sliced
1 tbsp fresh mint, chopped
2 tsp olive oil
1 tsp honey
1/8 tsp sea salt
Pinch of black pepper

In a bowl, combine the watermelon, cucumber, green onions and mint. Add the olive oil and honey. Stir to combine. Sprinkle on the salt and pepper. You can eat it right away or refrigerate it for up to a couple days. As it sits more juice will form from the melon and cucumber. Serves 3 to 4.

Grilled Green Beans with Dill Feta Sauce

June 27, 2011

This past weekend I took a quick trip to Indiana to surprise my mom for her birthday. It was a huge success in two ways. First, she was surprised; second, I was able to take any and all extra garden goods back with me to my Kentucky kitchen.

Our garden seems to be pouting a bit about the fact that we got it in around 3 weeks later than normal. Peppers and squash are slowly immerging from ours, but my parent’s garden is already flourishing.

This has a lot to do with the greenest thumb that exists in the world. It happens to be attached to my Dad’s hand.

I’m amazed at how tall his pepper plants are, at the diameter of the squash plants and how the cucumbers and melon plants have multiplied since our last visit over Memorial Day.

We opted out of growing our own potatoes this year, so I was happy to take all they had to offer. Kale is still growing strong there so I loaded up on a bag, cleaned the remaining raspberries off the bushes and took all the blackberries that had ripened thus far. We topped that off with a yellow squash and green beans. There were also lots of gooseberries whose recipe destiny I’m still contemplating.

Yesterday evening my husband decided he would try out some pastured pork spare ribs we got on sale from the local meat market. We were interested in tossing on some BBQ and finishing them off on his ceramic grill.

That needed to be matched up with lots of vegetables, so I decided the first of the harvest I’d tackle would be the green beans. We both aren’t raving green bean fans so I needed to find a creative way to cook them. Simply steamed wasn’t going to cut it.

Since just about everything else from the meal was on the grill I thought, why not grill the green beans too. So I slicked them up in some olive oil and my husband tossed them into a grill pan where they stayed for about 7 to 10 minutes. I took them off the grill when they were still firm, but beginning to brown and blister (in a good way).

I wanted to match them up with something slightly cooling to balance the smoky flavor. This sauce made with feta, dill and Greek yogurt was perfect. Not only did it go well with the green beans, but I think it will become my standard veggie dip from here on out.

Grilled Green Beans with Dill Feta Sauce

½ pound green beans, cleaned
Olive oil
½ cup plain Greek yogurt
1 tbsp crumbled feta cheese
1 tbsp fresh dill, chopped
1 tbsp fresh chives, sliced
1 tsp fresh lemon juice
Salt and Pepper to taste

Lightly sprinkle the green beans with olive oil and stir to coat. Gently sprinkle with salt and pepper to taste. Place the green beans in a grill pan and grill at about 325 degrees F for 7 to 10 minutes.

In a small food processor, combine the yogurt, feta, dill, chives and lemon juice. Pulse until a creamy sauce forms. Add salt and pepper to taste.

Remove the green beans from the grill, place on a serving platter and top with the feta sauce. Serves 2 to 3.

Grilled Pizza – Six Ways

June 4, 2011

You say grilling season, I say…pizza!

Yes, I know that other things like pork chops, hamburgers and veggie skewers may come to mind, but I have officially decided that my absolute favorite thing to grill is pizza.
We have a ceramic grill and those mesquite wood chips infuse the crust and toppings with a flavor that words can’t describe. From savory to sweet, there isn’t any kind of pizza that I don’t like grilled.
On Memorial Day, I was determined to kick off the grilling season with this favorite. Knowing that I’d be traveling this week for work I made up two batches of dough and lots of flavor combos so that my husband would have some leftovers during the week.
I have a favorite pizza dough that I make every time from Food Embrace (formerly Off Her Cork). I’ve mentioned it before and you can find the recipe there. I often switch the flour combos up and this time I used (for a double batch) 2 cups of unbleached white flour and 6 cups of white whole wheat flour. This dough rises every time without fail and it grills up so well.
I had the garden in mind for these combinations. Arugula is just beginning to grow, but I couldn’t wait any longer so I picked a few pieces early for one of my favorite pizzas. The loads of kale we have came in handy, too. Herbs were perfect for the cheese pizza and the strawberries came into play for the dessert pizzas.

I had picked up some local, grassfed brisket that had been smoked a few days prior and it was a bit too fatty for us. Not knowing what else to do with it besides sandwiches, I was so glad my husband came up with the great idea of dicing up the lean portions and using it for the pizzas.

Below are all the combos from this round of grilling. No measuring necessary. I eyeballed it all and used the amount I wanted based on my preferences. I divided the dough into 7 portions and we had 6 different topping combinations. All were different in size which is the fun of pizza making!
Although you might want to ignore the guava and cheese pizza. We had a bit of a mishap with the dough and it is more of an H than a circle or oval.
I love taking a few photos when my husband isn’t paying attention and this one depicts the necessary beverage for pizza grilling. We had picked up some imports earlier in the day.
Using plenty of olive oil and cornmeal to coat the dough, the grill was heated to about 350 degrees F and my husband grilled one side of the dough for about 3 minutes. The pizza dough is then flipped onto a tray and comes inside for toppings. So we are putting the toppings on the partially cooked side. Then it goes back on the grill for another 3-5 minutes with the uncooked side down. This way, the rest of the dough bakes as the toppings melt.
You’ll notice that all the photos are grill-side shots. Time is of the essence when grilling pizza because it will cool quickly. I was so hungry for pizza that no time could be wasted for photos once it was slid off the grill!

Kale and Mushroom
Red sauce (any of your favorites will do)
Sauteed kale and mushrooms (toss in a skillet with olive oil until kale is wilted)
Mozzarella

Arugula and Sundried Tomato
Mozzarella
Sundried tomatoes, thinly sliced
Arugula, chopped if leaves are large

Cheese and Herbs
Red Sauce
Mozzarella
Cheddar
Fresh oregano leaves
Fresh thyme leaves

Brisket and Blue Cheese

Red Sauce
Cheddar
Mozzarella
Blue cheese
Smoked brisket, finely diced

Peach and Strawberry

Peach preserves (I used what I had canned last year)
Strawberries, sliced
Mozzarella
Romeu e Julieta (Guava and Cheese)
Goiabada (guava paste, chopped, or guava jam)
Mozzarella

Strawberry Rosemary Shortbread

June 3, 2011
Strawberry Rosemary Shortbread Recipe | Fake Food Free

One thing that frustrates me most is the lack of time to post. That is preceded only by the lack of time to cook and take photos. Usually I’m really good at making time, but June is turning out to be one crazy month.

That being said, I should also probably mention that I am so excited it’s June! Summer is finally here, perhaps not by calendar date, but certainly by weather. The garden is growing, the mornings are muggy and the days are long.

I used to despise the heat of summer. But there is something about living in South America and now having my own garden that has made me give summer it’s due. I actually kind of like it now.

Although, it does mean one, very sad thing – we have seen the last of the fresh strawberries. I have no reason to complain. We got many more than we ever expected, but I can often be found in the kitchen saying – what am I going to do without my strawberries! They have been my go to snack for weeks.

Before they were gone, I tried out a strawberry shortbread. I’m loving the flavors of herbs in my sweets so it didn’t take me long to decide on adding rosemary.

It doesn’t take much to make a good shortbread which is why they are one of my favorite cookies. The small amount of strawberry puree in these turn them just barely pink and have a slight strawberry flavor that doesn’t overpower the rich, buttery shortbread. Every now and then you’ll get a tiny burst of earthy rosemary flavor.

Strawberry Rosemary Shortbread Recipe | Fake Food Free

Strawberry Rosemary Shortbread
Makes 12 to 14 cookies
Write a review
Print
Ingredients
  1. ½ cup unsalted butter, softened
  2. ¼ cup Demerara sugar
  3. 2 tablespoon pureed strawberries
  4. ½ teaspoon finely chopped fresh rosemary
  5. 1 cup white whole wheat flour
Instructions
  1. In an electric mixer, cream the butter and sugar together on medium-high, about 2 minutes. Mix in the strawberry and rosemary. Finally add the flour and mix just until combined.
  2. Shape the dough into a log and wrap with plastic wrap. Refrigerate for about 30 minutes, until firm. Preheat the oven to 350 degrees F.
  3. Slice cookies at about ¼ inch thickness and place on an ungreased cookie sheet. Bake 12 to 15 minutes or just until slightly firm in the middle and the edges are browned.
Fake Food Free https://www.fakefoodfree.com/
Strawberry Rosemary Shortbread Recipe | Fake Food Free
 
Thanks for reading! All images and content are the property of Fake Food Free unless otherwise stated. Please do not republish full recipes and images without written permission. What is okay? Feel free to Pin images, share links to my posts or share the photo in a round up post with the title of this recipe and a link back to the post. Confused about copyright and food blogs? Here is some helpful information on Recipe Attribution. If you want to use a photo or full recipe, just ask. I’m sure we can work something out.  

Garden 2011

May 24, 2011

Every time I walk outside I think – Welcome to year two of the garden!

In case you are wondering, year two is outstanding.
Year one you have lots of plants that aren’t bearing yet and it feels like forever until they actually will. You have more failures than successes, and at times you wonder if fighting all the weeds is worth it.

Oh, but year two? Year two is wonderful.


At least it is for us so far. Plants returned from last year and are producing more than we expected. We were able to evaluate what we really wanted to plant, what we could skip and pick up at the farmer’s market and what new things with which we wanted to experiment.

The garden feels more organized. We even built a trellis so the cucumbers could grow up instead of out, and threw in an official compost bin that looks a bit nicer in the yard.

 
Yes, year two is a good year.
Starting out, I knew I wanted to try some different varieties of plants, things I knew we wouldn’t have easy access to at markets. I feared I’d have to start everything from seed (which I’m awful at, by the way) until I stumbled upon Proper Plants via advice from a friend who also happens to be a horticulture expert.
Proper Plants is located in Lexington, KY and even after seeing on their website that they had over 50 varieties of tomatoes and peppers I wasn’t prepared for what I would encounter. Every time I saw a plant I had been wanting, like tomatillos and paprika peppers, I literally let out a little squeal. It was gardener heaven. 
I left with 19 pepper plants and 10 eggplant and tomato plants combined. In addition, lots of herbs. It was the most self control I’ve ever had to exercise when buying something as simple as plants.
Below is a list of all the wonderful things we have planted this year or that returned from last year along with a bit of a photo tour.
 Believe it or not, due to our layout and the plants we chose this year, we still have more space!

What else do you think we should grow?

Asparagus

Arugula, Dwarf Blue Curly Kale, Romaine and Bibb Lettuce

Peppers – Lilac, Merlot, Poblano, Cherry, Better Belle, Red Knights, Goliath Goldrush,  Anaheim, Mandarin, Paprika, Mariachi, Pinata, Centennial, Scotch Bonnet, Thai Chili, Sweet and Hot Banana


I can’t wait to have purple peppers!

Tomatoes – San Marzano, Mr. Stripey, Sweet Cherry


Tomatillos

Dealing with some early blight and bugs, but the plants are recovering nicely.

Japanese Eggplant, Thai Perch Eggplant

Patty Pan Scalloped Squash, Grey Zucchini

Asian Cucumber
Arugula

Dwarf Pak Choy

Parisienne Carrots
Strawberries, Raspberries, Blackberries, Blueberries (won’t bear until next year)
Yokahoma and Rouge Vif D’Etamps Pumpkins

Herbs – Sweet and Thai Basil, Lemon Verbena, Celery Leaf, Chocolate Mint, Italian Flat Leaf Parsley, Oregano, Chives, Thyme, Mint, Cilantro, Rosemary


I can’t wait to try this chocolate mint in a dessert!
This celery leaf allows you to add a little celery flavor without adding large pieces.
 

Fig tree


My dad gave us this fig tree. I hear they need special care, but can grow well in our area if given it.


A few garden fresh recipes:

Sweet and Simple Tomato Pepper Salad
Patty Pan Squash Stuffed with Basil Orzo
BLT Pizza with Spicy Chipotle Mayo
Whole Jalapenos with Honey and Allspice
Stuffed Poblano Peppers with Tomato Chile Sauce

Spring Garden Cobb Salad

May 22, 2011

I’ve been inspired by cobb salads lately. It could be because of all the beautiful colors, but I really think it’s all those fresh ingredients arranged in tidy rows. Things around here have felt very hectic lately and I must be craving organization. This has to be the most organized way to eat a salad, don’t you think?

  Spring Cobb Salad with strawberries and asparagus | Fake Food Free

 As I was thinking of making one, I soon realized I could make my own version of the cobb salad completely from our garden with a little help from local farms.

Kind of fun, right? I love the challenge of creating meals entirely from the garden.

First, we have the very last of our asparagus quickly blanched and seasoned with salt and pepper. Next is a hardboiled egg from Wonder of Life Farm nearby. This is followed by lettuce, strawberries and finely chopped kale. This version is without meat and cheese, but a delicious combination, nonetheless.

I debated on what type of dressing to use and I finally ended up topping it with homemade honey mustard dressing which included Kentucky honey. I was unsure of the combination of flavors, but the dressing pulled it all together. This proved to be a wonderful way to kick off what I’m officially marking as salad season!

Spring Cobb Salad with strawberries and asparagus | Fake Food Free

Spring Garden Cobb Salad

Makes: 1 serving
 
Ingredients 

½ cup chopped asparagus (one-inch pieces)
1 hardboiled egg, sliced
½ cup chopped bibb lettuce
2/3 cup strawberries, sliced
½ cup finely chopped kale
2 tablespoons of your favorite honey mustard dressing (or a dressing of your choice)

Prep

Heat a small pan of water to a boil. Add the asparagus and cook 1 to 2 minutes. Remove from the stove, drain and immediately rinse or cover in cold water. Add salt and pepper to taste.

Arrange the asparagus on the plate followed by the sliced egg, bibb lettuce, strawberries and kale. Top with your favorite dressing and enjoy! Makes one large salad.

Spring Cobb Salad with strawberries and asparagus | Fake Food Free
 
Thanks for reading! All images and content are the property of Fake Food Free unless otherwise stated. Please do not republish full recipes and images without written permission. What is okay? Feel free to Pin images, share links to my posts or share the photo in a round up post with the title of this recipe and a link back to the post. Confused about copyright and food blogs? Here is some helpful information on Recipe Attribution. If you want to use a photo or full recipe, just ask. I’m sure we can work something out.  

Strawberry Rhubarb Bread

May 21, 2011

One of the best gifts anyone can give me is an ingredient. While others may want a ready-made food – a cookie, a bread, etc. I’d much rather have the berries, the chocolate or the oil, which I will then turn into the final product.

Yeah, I’m that person on your gift list that doesn’t take much work at all.

So I was thrilled earlier this week when a friend gave me some rhubarb. As I mentioned last spring with my rhubarb experiments I was never a fan of it growing up, but as I’ve learned of more things to do with it, I actually kind of like the stuff.

Another source of my rhubarb inspiration has been Two Peas and Their Pod. Maria shares her love of rhubarb in her recipes such as the Rhubarb Apple Bread which got me thinking about how to use my rhubarb.

Strawberry Rhubarb Bread Recipe | Fake Food Free

Since we have so many strawberries, I just had to go with the classic combination. So I played around with a few ingredients and came up with a bread of my own.

There is something about a slice of seasonal quick bread and a cup of coffee on a beautiful Saturday morning that makes the entire weekend complete!

Strawberry Rhubarb Bread Recipe | Fake Food Free

Strawberry Rhubarb Bread
Adapted from Rhubarb Apple Bread from Two Peas and Their Pod

Makes: 1 loaf

Ingredients

 1 ½ cups white whole wheat flour
1 teaspoon baking soda
½ teaspoon salt
1 teaspoon cinnamon
¼ teaspoon ground allspice
1 egg
¼ cup plain Greek yogurt (I use 2% or full-fat)
3 tablespoon butter, melted
¼ cup mascavo sugar
¼ cup Demerara sugar
1 teaspoon pure vanilla extract
2/3 cup whole or 2% milk
¾ cup rhubarb, finely chopped
1 cup strawberries, finely chopped

Topping
1 tablespoon Demerara sugar
1 teaspoon cinnamon

Prep

Preheat the oven to 350 degrees F. Grease an 8×4 inch loaf pan. (I used coconut oil.) (I also used one mini loaf pan and one 8×4 so I could give a small loaf away. My larger loaf was just a little smaller than yours will be. )

In a medium bowl, stir together the flour, baking soda, salt, 1 teaspoon cinnamon and ground allspice. Set aside.

In an electric mixer fitted with the paddle attachment, mix together the egg and yogurt. Blend well on medium speed. Be sure your butter has cooled and slowly add that to the yogurt and egg.

Add ¼ cup of Demerara sugar and the mascavo sugar, mix on medium-high for about 2 minutes. Mix in the vanilla and milk.

Slowly add the dry ingredients to the mixing bowl. Mix on low just until the flour is incorporated. Remove the bowl from the mixer and gently fold in the rhubarb and strawberries, being careful not the break up the berries too much.

Pour the batter into the prepared baking pan. Mix the remaining Demerara sugar and cinnamon for the topping. Sprinkle it evenly over the loaf. Bake for 35 to 40 minutes until a toothpick or knife inserted in the center comes out clean. (My mini loaf took 20 minutes and the less full 8×4 took 30 min.)

Strawberry Rhubarb Bread Recipe | Fake Food Free
 
 
Thanks for reading! All images and content are the property of Fake Food Free unless otherwise stated. Please do not republish full recipes and images without written permission. What is okay? Feel free to Pin images, share links to my posts or share the photo in a round up post with the title of this recipe and a link back to the post. Confused about copyright and food blogs? Here is some helpful information on Recipe Attribution. If you want to use a photo or full recipe, just ask. I’m sure we can work something out.  

Strawberry Pecan Pancakes

May 15, 2011

Here come the strawberries! I say that with excitement and a fair amount of warning. Excitement because our fridge is overflowing with little red bites of sweetness and warning because recipes may be very strawberry-centric for a while.

See this container? Take that times about five. And that’s just within the last week with many more to come. Awesome, right?

Strawberry Pecan Pancakes | Fake Food Free

After some discussion we decided not to make jam this year. I made a ton of peach jam last year and even after giving most of it away, we still have too much. With the amount of sugar added to it, we find that we just don’t eat it that often so we think strawberry jam isn’t the way to go for us this year.

But, pancakes, ice cream, salads and bowl after bowl of fresh sliced berries? Yeah, that will work. All the extras will be frozen for use in baked goods and smoothies later this year.

Let’s start with these pancakes. They begin with a base of white whole wheat flour and ground flax seed. Strawberry puree adds the seasonal flavor and chopped pecans give you a bit of a crunch in each bite. Top with chopped fresh berries and maybe a little maple syrup and breakfast is complete.

Strawberry Pecan Pancakes | Fake Food Free

I think I’ve mentioned this before, but I do have to give my husband credit for the beautiful griddle job on these tasty cakes. I can mix up a good batter, but when it comes to actually cooking pancakes I am a destroyer. I burn them every time. So this recipe was very much a group effort complete with pugs swiping a few pieces of strawberry that fell on the floor during the process.

Strawberry Pecan Pancakes | Fake Food Free

Strawberry Pecan Pancakes

Makes: 6 pancakes

Ingredients


1 large egg, slightly beaten
1 cup whole or 2% milk
1 tablespoon mascavo sugar
2 tablespoons ground flax seed
1/3 cup fresh strawberries, pureed
½ cup pecans, chopped
3 teaspoons baking powder
½ teaspoons salt
1 cup white whole wheat flour
Virgin coconut oil for the griddle

Prep

In a mixing bowl, whisk together the egg, milk and sugar. Stir in the flax seed, strawberry puree and pecans. Next mix in the baking powder and salt. Gently stir in the flour until all ingredients are combined.

Heat a griddle over medium to medium-high heat. Add about a teaspoon of coconut oil, if desired. Work in batches and drop the batter by a heaping ¼ cup into the skillet. Once the batter begins to bubble, flip and cook the same amount of time on the other side. Serve warm with fresh strawberries and maple syrup. 

Strawberry Pecan Pancakes | Fake Food Free
 
Thanks for reading! All images and content are the property of Fake Food Free unless otherwise stated. Please do not republish full recipes and images without written permission. What is okay? Feel free to Pin images, share links to my posts or share the photo in a round up post with the title of this recipe and a link back to the post. Confused about copyright and food blogs? Here is some helpful information on Recipe Attribution. If you want to use a photo or full recipe, just ask. I’m sure we can work something out.  
 
Want to create beautiful food and product photos that you can't wait to share?!
Discover your style, control the light, and shoot using the tool you know how to use (yes, your phone included). Learn about free resources, Live Q&As with Lori, and online courses you can take from anywhere in the world!
We respect your privacy. Unsubscribe at any time.