Browsing Category

Fruits and Vegetables

Vegetarian Bell Pepper Adobo (Adobong Sili) Recipe from The Adobo Road Cookbook

June 4, 2013
  

Over the years, one of my favorite things about having this blog has become reviewing cookbooks. There are a lot of great cookbooks out there. To be honest, I have never reviewed any that were bad. But what makes a cookbook excellent to me, what makes it stand out among all the others, is when I can sense the passion for the food as I read the pages.

Lately I’ve had the opportunity to review several, but what I don’t always get to do is interact with the authors. Since our move to the Bay Area, one thing I am loving is that I can meet some of these cookbook authors at cookbook signings in the city.

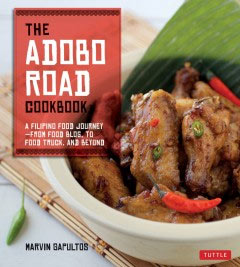
That was the case with The Adobo Road Cookbook: A Filipino Food Journey-From Food Blog, to Food Truck, and Beyond by Marvin Gapultos (also the author of Burnt Lumpia). I received a review copy of the book and I was invited to the book signing at Omnivore Books. Having the chance to read it before the signing, I could not wait to learn more about the passion behind this book.

Yes, this book falls in the excellent category for me. The stories behind each recipe make you want to start creating, and continue to savor, family food memories of your own.

We haven’t been to the Philippines yet, but I’m continually intrigued by this cuisine. The tangy adobos and tasty lumpias, I’ve been wanting to try more dishes and The Adobo Road stepped right in with plenty of opportunities to do so. The best part is that the the recipes have a unique quality of being authentic without overwhelming the cook.

I enjoyed myself so much at the signing. Marvin described more about how the book came to be, and about the work that went into translating family cooking and memorized steps into a measured and written recipe that he could share with readers.

I knew what I was going to make prior to the signing, but I was even more encouraged when someone in the group asked what a person new to Filipino food should cook for the first time. His answer? An adobo. When I told Marvin that I hoped to make his Vegetarian Adobo for the blog, he told me more about his grandfather’s dish and how he hasn’t found the exact pepper used, but that this was incredibly close.

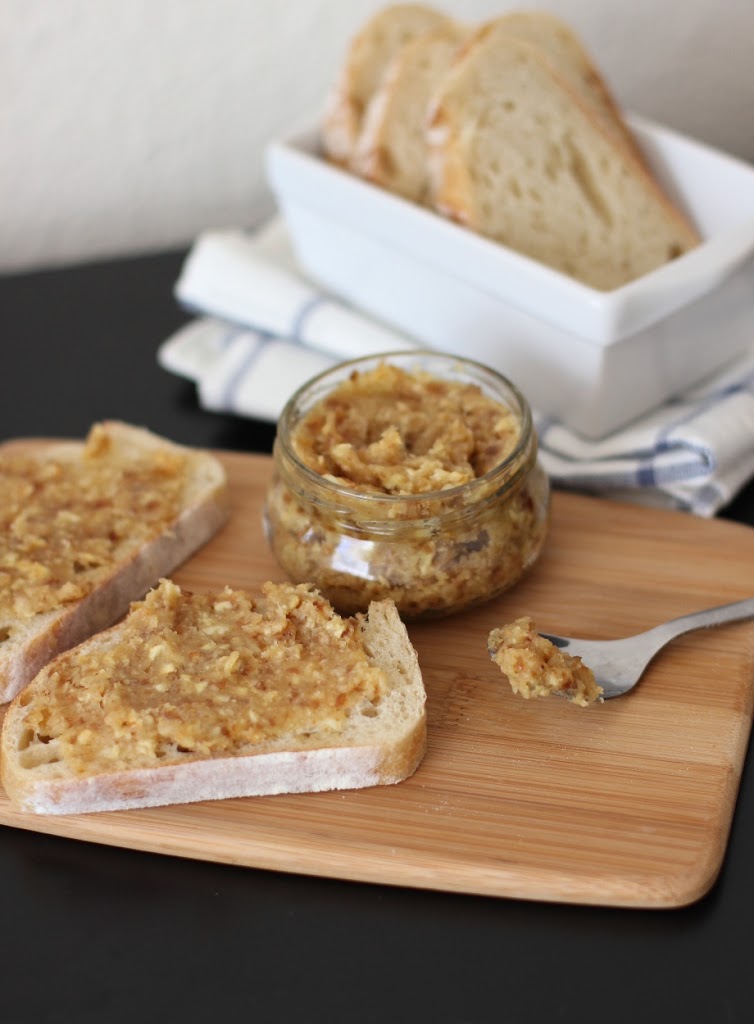
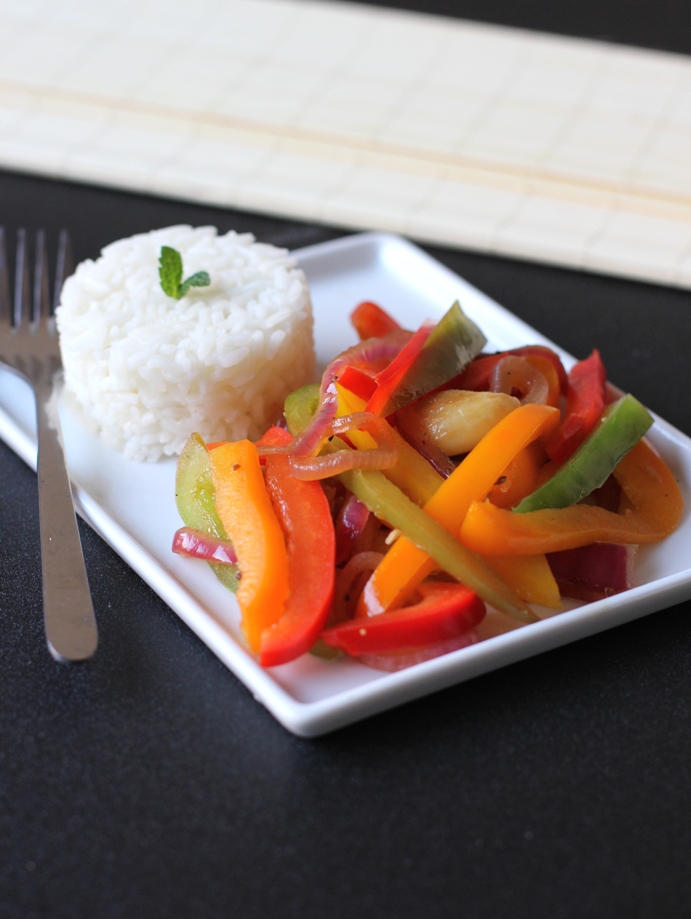
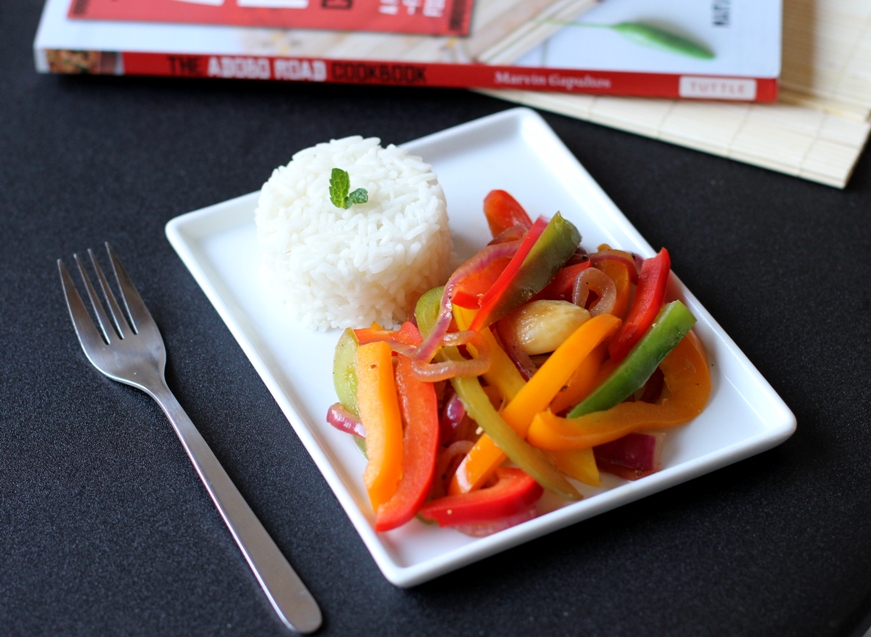
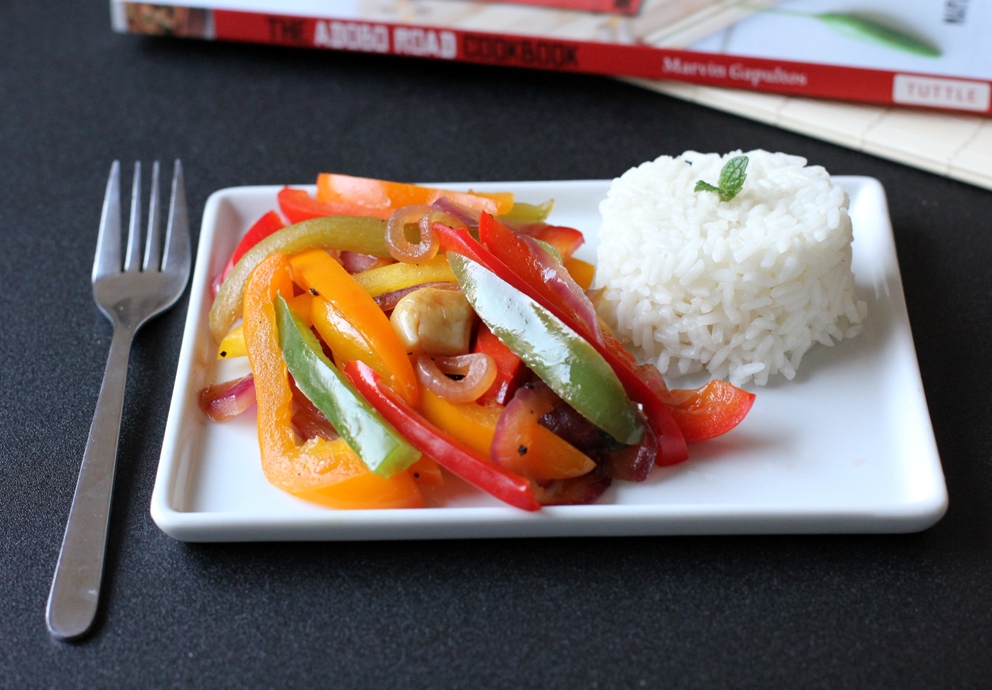
I’ve never made adobo before and the Vegetarian Bell Pepper Adobo (Adobong Sili) stood out for me due to it’s flavor and simplicity. In fact, I thought that it might be too simple or not as exciting as I hoped.

I underestimated its potential. I loved this dish! I wanted it to be as authentic as possible so I ordered the coconut vinegar online. I really think the slightly sweet flavor of this made the adobo. I’m so glad I decided to get it. Especially because it means there are more adobo dishes in my future.

If you’ve considered trying to make Filipino foods in your kitchen, definitely start with this book. The best way to describe it is easy authentic with plenty of passion to get you inspired!

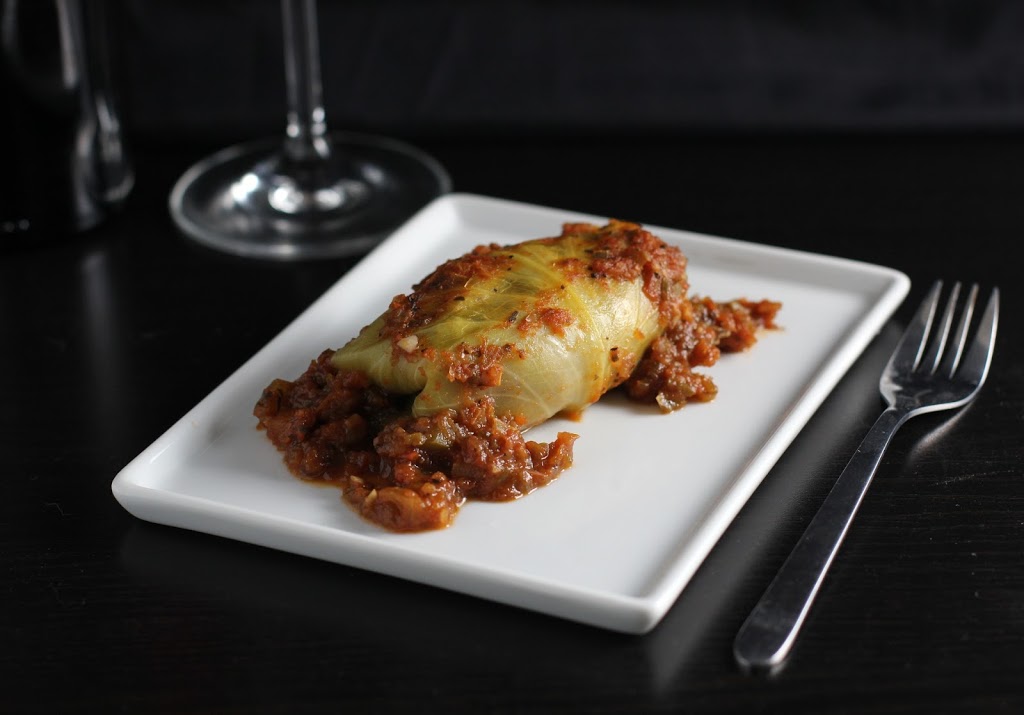
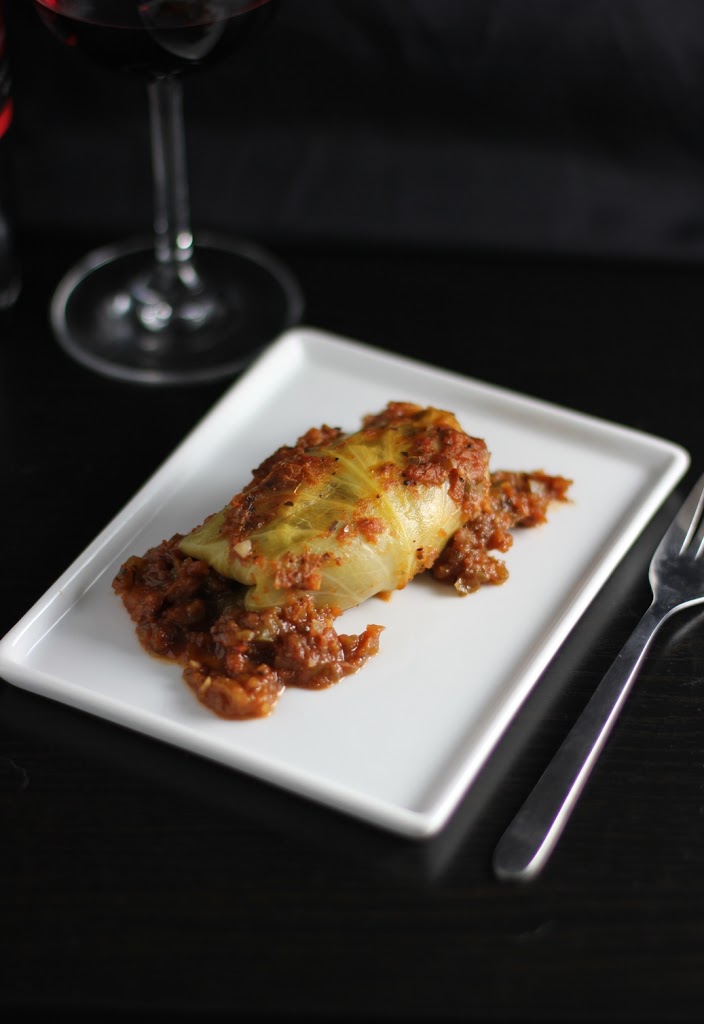
Vegetarian Bell Pepper Adobo  Adobong Sili

Copyright © 2013 Marvin Gapultos. Reprinted with permission from Marvin Gapultos and Tuttle Publishing.

Serves 4–6

Prep Time: 15 minutes

Cooking Time: 30 minutes

2 tablespoons oil
1 red onion, thinly sliced
5–6 cloves garlic, smashed with the side of a knife and peeled
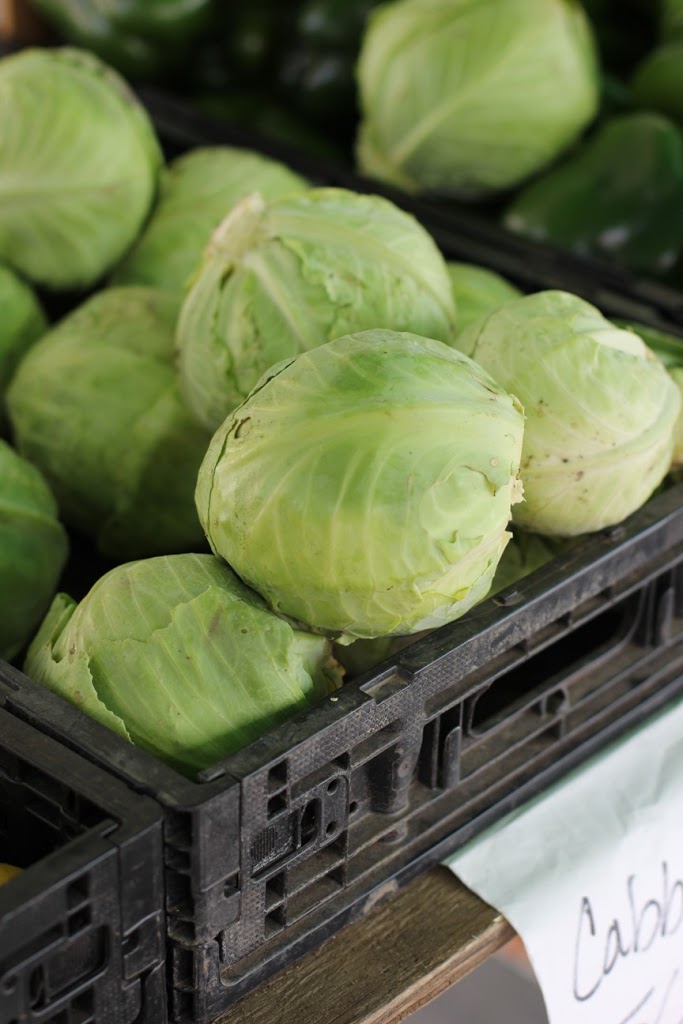
4 bell peppers of differing colors (green, red, yellow, orange), deseeded and cut into thin strips
¼ cup (65 ml) Filipino coconut vinegar, or distilled white vinegar
¼ cup (65 ml) soy sauce
¼ cup (65 ml) water
1 tablespoon brown sugar
1 teaspoon freshly ground black pepper
1 bay leaf

Heat the oil in a large sauté pan over moderately high heat. Add the onion and garlic and sauté until the onion is soft and translucent, 3–5 minutes. Toss in the bell peppers and sauté until they just begin to soften, 3–5 minutes.

Pour in the vinegar, soy sauce and water, stirring to scrape up any browned bits from the bottom of the pan. Stir in the brown sugar and black pepper, and add the bay leaf. Increase the heat to high and bring the liquid to a boil.

Reduce the heat to low, and simmer uncovered for 20 minutes, or until the bell peppers become tender but not mushy. Discard the bay leaf and serve the adobo with steamed white rice.

From the book:

Adobo: What’s in a name?
Despite foreign influence on Filipino cuisine, Filipino adobo is indigenous and unique to the Philippines, existing before colonial rule. In the Philippines, “adobo” refers to a technique, rather than a singular dish. In the Spanish context, adobo generally refers to a marinade used to flavor meats, whereas Mexican adobo refers to any number of spices. In all likelihood, Spanish colonists simply applied their term to what the Filipinos were already cooking and eating because it was similar in appearance to Spanish adobo, though not prepared the same way.

Disclosure:  This book was sent to me for review purposes. I was not required to post about it and received no compensation for doing so.

Grapefruit Moon from Beer Cocktails by Howard and Ashley Stelzer

May 16, 2013

I think it was last year. Or maybe the year before. I was reading one of those food trend articles. You know, the ones that tell us what we will be eating, drinking, making, and demanding from restaurants in the coming year. This particular article was declaring that beer cocktails would soon be in

I was pretty excited about this prediction. I mean, they were right about cupcakes and bacon, so they must be right about beer cocktails. Yet, I think I’ve only come across one beer cocktail on a menu since reading that article. Perhaps we dine at the wrong places, but considering how our food explorations have increased this year, I’m surprised I haven’t found more. 
Just where are these beer cocktails?
Guess what. I found them! And they aren’t at your favorite restaurant. They are in the book Beer Cocktails by Howard & Ashley Stelzer

I’m now calling this my – drinks of summer – book. It’s filled with 50 beer cocktails and I won’t be surprised if we try them all. It’s a must-have to keep in your bar at home when you want to break out of the sangria and mojito ruts of the summer season. And there are quite a few recipes that will carry you on into the holiday season.You might just want to run out and get a copy now so you can close out American Craft Beer Week with a bang.

The recipes are categorized by beer type – ale, lager, stout, etc. Some are a simple combination of beer and a spirit. Others include fruits, juices, preserves and syrups. Many will make you question – will those ingredients actually taste good together? Yes, they will. Let me prove my point. 

I’m crazy for grapefruit. Love it. So when I came across the Grapefruit Moon I knew I had to try it. This time it wasn’t because it has bourbon in it. That was just a bonus. 
I’ll admit I was skeptical about the combination right up until my first sip. After that, I was sold. So was my husband. He’s actually hijacked the book for a while to pick out our next drink. 
So go ahead and stop searching for those supposedly trendy beer cocktails. Get this book and start making them at home. You can start with the Grapefruit Moon.

Grapefruit Moon

Recipe © 2012 by Howard & Ashley Stelzer and used by permission of The Harvard Common Press
Serves 1

Ice cubes
1 ½ ounces bourbon
1 ½ ounces freshly squeezed grapefruit juice
1 tablespoon simple syrup or maple syrup (I used maple)
3 ounces stout
1. Fill a cocktail shaker halfway full with ice cubes. Add the bourbon, juice, and syrup, and shake well.
2. Fill a pilsner glass with crushed ice, and strain the mixture into the glass. Top with the stout, and serve.

 Disclosure:  This book was sent to me for review purposes from The Harvard Common Press. I was not required to write about it and I received no compensation for doing so. Thoughts are my own.

Strawberry, Mango and Avocado Cupcakes with Strawberry Avocado Frosting Recipe

May 3, 2013


I was still caught up in the amazing California citrus season when the strawberries began to arrive at the Farmers Market. It started with one or two vendors offering a few containers. Now, they are everywhere – organic, conventional, big, small, full flats, or small pint baskets – you can get just about anything you want. 
 
I’ll admit they aren’t quite as tasty, or as rewarding, as the buckets we used to pick from our own garden, but they will certainly do. I’ve been buying loads, eating some and freezing others to use in my oatmeal when the season is over. 
 
 
With ataulfo mango season falling at the same time as the strawberries here, and with easy access to avocados, I felt compelled to combine all three.
 
I also can’t seem to get over the desire to play with avocados as a substitute for butter in my baked goods. First it was the Avocado Pound Cake with Blood Orange Glaze, and now cupcakes.
 
 
These cupcakes are soft and fruity, and the frosting? I think I may be making my frosting with avocado from here on out. I’ll admit, I tried it with just avocado and it was a little too green-tasting (for lack of a better term). The addition of strawberry puree did the trick. It sweetened it up and balanced the flavor of the avocado.
 
These don’t keep long. I’d suggest baking them just before you will need them, cool, frost and eat soon after. If you don’t plan to finish them off, keep unfrosted cupcakes in the refrigerator for only a day or two. The oils from the avocado tend to surface when they sit for over a day. 
 

Strawberry, Mango and Avocado Cupcakes with Strawberry Avocado Frosting

Makes: 12 cupcakes

Ingredients

½ cup mashed avocado (about 1 Hass avocado)
2 large eggs
1 cup raw sugar
½ cup pureed strawberries
½ cup pureed mango
1 teaspoon pure vanilla extract
1 ¼ cup unbleached, all-purpose flour
3 ½ teaspoon baking powder
1 teaspoon fine ground salt

Frosting
2 tablespoon mashed avocado
5 ¼ cups powdered (confectioner’s) sugar
½ teaspoon pure vanilla extract
1 tablespoon milk (any variety)
½ tablespoon fresh lime juice
2 tablespoon pureed strawberries
Pinch of salt
 
Prep
 
Preheat the oven to 350 degrees F. Place cupcake liners in a 12-cupcake baking pan. Spray the liners with olive oil or non-stick cooking spray. 
 
In the bowl of an electric mixer, beat the avocado, eggs and sugar until blended, 60 to 90 seconds, scraping the bowl as needed. Add the strawberry and mango purees and mix just until all ingredients are combined. Add the vanilla. 
 
In a separate bowl, whisk together the flour, baking powder, and salt. Add the dry ingredients (a little at a time) to the wet ingredients, stirring gently, just until everything is combined.
 
Transfer the batter to the cupcake tins, filling each liner with an equal amount. 
 
Bake 15 to 17 minutes, or until a toothpick inserted in the center of the cupcakes comes out clean. Remove from the oven and let cool.
 
For the frosting, add the avocado and powdered sugar to the bowl of a mixer. Using the whisk attachment, mix on medium-high until the two are combined to create a very thick paste. 
 
With the mixer on low, add the milk, lime juice and strawberry puree. Continue to mix until all ingredients come together to form a spreadable frosting. Mix in the salt. 
 
Use a small cookie dough or ice cream scoop to top each cupcake with about 1 tablespoon of frosting. Serve right away. 
 
 
Thanks for reading! All images and content are the property of Fake Food Free unless otherwise stated. Please do not republish full recipes and images without written permission. What is okay? Feel free to Pin images, share links to my posts or share the photo in a round up post with the title of this recipe and a link back to the post. Confused about copyright and food blogs? Here is some helpful information on Recipe Attribution. If you want to use a photo or full recipe, just ask. I’m sure we can work something out.  

Ginger Coconut Soup with Wai San and Shrimp Recipe

March 26, 2013

Wai San is a potato-like root vegetable that I discovered at an Oakland Farmers market several years ago. It turned out to be delicious addition to this ginger coconut soup!

I watched the mass of shoppers hover around the table for at least 10 minutes before I mustered up enough courage to elbow my way in and take a look. I was surprised to see a knobby, speckled, skinny root vegetable staring back at me. I had no idea what it was and given all the hustle around me, I doubted I’d get an answer even if I asked.


I walked away, but it didn’t take long for my curiosity to get the better of me. Finally, on my last lap through the Farmers Market there was a lighter crowd swarming the vendor. I stepped up, analyzed the unfamiliar root, and I caught his eye. I asked what it was. He responded twice with the proper name, and I’m sure my face revealed that not only could I not hear over the people, but that I also couldn’t understand him.

His next response was, “Chinese potato. You cook it like potato in a soup.

Sold. I grabbed up a handful and he nodded in acknowledgement that I only needed a few for soup.


After a bit of research, I think I finally found the name for this new-to-me vegetable. I say – I think – because it wasn’t easy to come by. I have found a couple of blogs which identify it as Wai San.

It’s long and thin, and almost looks like it has dots. Check.

When it’s peeled, its starch is sticky and a little glue-like. Check.

It boils up like a potato, yet it has a blander flavor. Check.

If you happen to know it by another name, please let me know in the comments. I’d love to learn more about it.

This being my first attempt at cooking with Wai San I didn’t want to get too adventurous. I stuck to the recommendation for soup, and I wasn’t let down.

Cut into small pieces, it takes less time to cook than potato. It has a similar texture, but it’s less starchy. It’s almost like a cross between a carrot and a potato, but with little flavor. That is, until you mix it with the ginger, coconut milk, and shrimp in this soup. Then it becomes all kinds of delicious.

 
Ginger Coconut Soup with Wai San and Shrimp Recipe
Serves 4
Wai San, a potato-like root veggie, makes a delicious addition to this soup. If you can't find it in your area, any type of potato can be substituted. Adjust the cooking time to cook until the potato you use is tender.
Write a review
Print
Ingredients
  1. 1 tablespoon extra virgin olive oil
  2. 1 small yellow onion, diced
  3. 4 cloves garlic, minced
  4. 2 stalks celery, sliced
  5. ½-inch piece of ginger, peeled and grated
  6. 1 ½ cups peeled and chopped Wai San
  7. 1 (13.5 ounce) can coconut milk
  8. 3 cups seafood stock
  9. ½ pound cooked shrimp, chopped
  10. ½ teaspoon sea salt
  11. ¼ teaspoon ground black pepper
  12. 2-3 green onions, sliced for garnish
Instructions
  1. Heat the olive oil over medium-high in a large soup pot. Add the onion, garlic and celery. Cook, stirring often, for 2 to 3 minutes, or until the vegetables begin to soften. Add the ginger. Add the Wai San and cook 1 more minute.
  2. Pour in the coconut milk and seafood stock. Bring to a low boil and then reduce the heat to a simmer. Allow the soup to simmer about 5 minutes or just until the Wai San is tender.
  3. Add the shrimp, salt, and pepper. Cook just until the shrimp are heated through, about 1 minute. Top each bowl of soup with green onions and serve warm.
Fake Food Free https://www.fakefoodfree.com/


Guinness Braised Kale with Roasted Potatoes and Poached Eggs Recipe

March 13, 2013
Guinness Braised Kale with Roasted Potatoes and Poached Eggs Recipe | Fake Food Free
 
It’s that time of year. The time when food bloggers everywhere pull out the Guinness, Bailey’s, Jameson and potatoes to create an Irish-inspired recipe for St. Patrick’s Day. I’m no exception.
 

If you’ve read my blog much at all you know that Ireland has a special place in my travel-loving heart. I’ve had the opportunity to visit three times, exploring gorgeous landscape, overdosing on amazing food and drink and even meeting bloggers. So I can’t let March 17 pass without making something that uses a few flavors from Ireland. I’m always tempted by the incredible desserts that pop up on other blogs, but I decided to go savory. This is a super simple meal, but the Guinness adds a deep flavor to the kale that tastes so good with the eggs and potatoes. Bonus, it’s perfectly suitable for breakfast, lunch or dinner.


Guinness Braised Kale with Roasted Potatoes and Poached Eggs

Makes: 4 servings

Ingredients

10-12 red or white new potatoes, quartered
2 tbsp extra virgin olive oil, divided
2 tsp dried dill
½ tsp sea salt
¼ tsp ground black pepper

1 lb. kale, stemmed and chopped
3 cloves garlic, minced
¼ cup Guinness Extra Stout beer
¼ tsp sea salt

4 poached eggs

Prep

Preheat the oven to 425 degrees F.

In a large bowl, combine the potatoes, 1 tablespoon of the olive oil, dill, sea salt and black pepper. Stir to coat the potatoes with the oil and spices. Transfer the potatoes in a single layer on a baking sheet.

Bake for 15 minutes. Remove from the oven and stir the potatoes. Return to the oven and bake 15 to 25 more minutes, or until the potatoes are tender with crispy edges.

While the potatoes are baking you can prepare the kale. Heat the remaining tablespoon of oil in a large skillet over medium-high. Add the kale and garlic. Cook for about 1 minute, stirring to coat the kale in the oil.

Add the beer. Cook 30 seconds more, or until the kale begins to wilt.  Remove from the heat and stir in the sea salt.

To assemble, divide the potatoes into 4 serving bowls, top with ¼ of the kale and finish it off with a poached egg. Serve warm. 

 
Guinness Braised Kale with Roasted Potatoes and Poached Eggs Recipe | Fake Food Free

I leave you with two short PSAs for this Irish holiday that we all enjoy so much in the States. # 1 It’s St. Paddy’s Day, not St. Patty’s Day. I learned this just a few short years ago, but definitely click on that link. #2 Skip the green beer and order a Guinness (or a Kilkenny, or a Smithwicks, or a Bulmer’s Cider).

Sláinte!

Thanks for reading! All images and content are the property of Fake Food Free unless otherwise stated. Please do not republish full recipes or images without written permission. What is okay? Feel free to Pin images, share links to my posts or share the photo in a round up post with the title of this recipe and a link back to the post. Confused about copyright and food blogs? Here is some helpful information on Recipe Attribution. If you want to use a photo or full recipe, just ask. I’m sure we can work something out.

Sweet Cinnamon Date and Roasted Parsnip Spread Recipe

March 10, 2013


A few years ago I attended a cooking show with the Voltaggio brothers back in Lexington. They did several interesting creations during that show, but one that has stuck in my mind since was a roasted parsnip and date spread for toast. 
Confession:  I don’t love dates or parsnips. I can handle dates in moderation and the less sweet variety. Parsnips are a little too earthy for me, but I can handle them roasted with other root vegetables. 
So why did this combination stay in my head for 2 years? You got me. I have no idea.
I think maybe it is because I’m always looking for something that is low in added sugar that can fulfill my crazy sweet tooth. 
At the Farmers Market on Friday, I happened to come across both parsnips and dates, and I was reminded of that combination once again. I bit the bullet and bought both to see if I would even like this intriguing creation. 
I’m thankful to California that I now have several varieties of dates to choose from. Back in Kentucky it was usually Medjool dates or the diced kind coated in sugar that are sold during the holidays. And I’m thankful to the vendor who had them all labeled – sweet, less sweet, more sweet, etc. I like it simple.
I picked up a variety that she had labeled, Caddy Candy. Although now I’m wondering if my memory serves me right because I can’t find that name associated with dates anywhere. But for what it’s worth, these are less sweet. 
So I roasted up the parsnips, just like they did in the show, and then blended them with dates in the food processor. I wanted a little more flavor so I added a little cinnamon, some vanilla and a little olive oil to help with consistency. 
This is such a great combination! Even for someone who doesn’t like dates and parsnips. It’s a naturally sweet spread perfect for sourdough toast. I can see it working with oatmeal, pancakes and waffles, too.

Sweet Cinnamon Date and Roasted Parsnip Spread

2 medium parsnips, peeled and cubed (about 1 to 1 ½ cups)
Pinch of sea salt
8 to 10 medium-sized whole, pitted dates
½ tsp vanilla
¼ tsp ground cinnamon
1 to 2 tsp extra virgin olive oil (optional)
Preheat the oven to 400 degrees F.
Spread the parsnip cubes in a single layer on a baking sheet. Spray or drizzle with just a little of the olive oil. Add just enough to lightly coat them and keep them from sticking. Sprinkle them with the pinch of salt. 
Roast for 20 – 25 minutes, or until they begin to brown and are tender all the way through. Remove from the oven and set aside to cool.
Transfer the parsnips to a small food processor. Add the dates. Pulse until a spread begins to form. Add the vanilla and cinnamon. Pulse until smooth (or as smooth as you can get it). Add 1 to 2 teaspoons of olive oil as you puree if you want a thinner, more spreadable consistency. Makes about ¾ cup. 

Stuffed Cabbage Roll Recipe

March 6, 2013

I’m into my third month living in California, and aside from the typical missing of friends, family and horses, things are going wonderfully. Ok, a move across the country probably doesn’t include missing horses for most people, but it does when you move from Kentucky.
We’re fully unpacked, the house in Kentucky finally sold and I’m happy to say I actually feel kind of settled. As a result, we looked ahead to our travel schedule for the year. I feel a little like my entire life in California is one big travel adventure; there is so much to see here. But I’ve been aching for Europe. 
Christmas 2012 was a bit of a bust. There was no Christmas tree and very little baking due to all the packing. We squeezed in a quick trip to celebrate with family only to have it cut short by an impending snow storm. Three days later we were on a cross-country drive to California. 
I won’t lie; I’ve done my fair share of pouting ever since. I know many people are overwhelmed by the stress of the holidays, but I absolutely love that time of year. So when we talked about where we would travel this year, I insisted that Christmas be a big part of it. 
As a result, we are now scheduled for one of my ultimate, must-do, bucket list worthy experiences – the Christmas markets in Europe! Not to mention that this will be preceded by a few days in New York City to see the tree there. Then we will head over to Vienna, still one of my favorite cities in the world, and then off to Krakow, Poland. 
I don’t want to wish a year away, but I can’t hide my excitement for this trip!
In addition to all the Christmas action, my husband comes from Polish descent so we are very excited to finally travel there. And I have my mind on Polish recipes. I thought it was high time I try my hand at stuffed cabbage rolls.
Aside from the multiple steps, they are much easier to make than I expected, and this is coming from someone who is awful at rolling foods. Burritos, spring rolls, wraps – I might get one good looking roll out of 10. I’m happy to say that cabbage rolls are very forgiving when it comes to rolling them up.
This isn’t exactly a traditional recipe. It’s one I made by combining a quick look at recipes on the web with what I had on hand in the kitchen.

If you’ve never made stuffed cabbage, there are quite a few things going on at once, which I wasn’t expecting. You have to boil the head of cabbage, make the sauce, and then add some of that sauce to the filling. Just take your time and you won’t get overwhelmed. I suggest getting your cabbage leaves cooked and separated, and then concentrating on the rest of the recipe. 

Grass-fed Beef Stuffed Cabbage Rolls Recipe

1 small head green cabbage
Sauce
1 tbsp olive oil
1 green bell pepper, cored and diced
1 onion, diced
2 cloves garlic, minced
14 ounces diced tomatoes (fresh will work, no-salt-added if you used canned)
¼ cup red wine
1 tbsp mascavo sugar (or brown sugar)
1 tsp dried basil
1 tsp salt
¼ tsp ground black pepper
Filling
½ of the sautéed vegetables from the sauce (see preparation below)
½ lb grass-fed ground beef
1 cup cooked rice
2 tbsp cabbage roll sauce (above)
1 tbsp hot sauce
½ tsp salt
¼ tsp pepper
Preheat the oven to 375 degrees.
Cabbage
Fill a large soup pot ¾ full with water. Bring to a boil. Remove any dirty or bruised outer leaves of the cabbage. Place the whole head of cabbage in the boiling water. Let it boil about 2 minutes, or until the outer leaves begin pull away from the head. 
Remove the cabbage from the water (I used a ladle). Use kitchen shears to cut off the outer leaves at the stem. They should be partially cooked and flexible. Set them aside to dry and cool. Return the head of cabbage to the boiling water. Repeat this process until you have 10 to 12 cabbage leaves.
Reserve 1 to 2 cups of the cabbage cooking water.
Sauce
For the sauce, heat the olive oil over medium-high. Add the onion, garlic and bell pepper. Cook for about 3 minutes, or until the vegetables begin to brown and soften. Remove half of the vegetables from the pan and place in a glass mixing bowl. (This is for your filling.)
Back to the skillet, add the tomatoes and wine. Cook, stirring often, for 2 to 3 minutes. Add the sugar, salt, basil and pepper. Cook 1 more minute. Stir in the 1 cup of reserved cabbage water.  
Transfer the sauce to a blender and puree until smooth. Add more cabbage water if you want a thinner sauce. (I used only the 1 cup.) Pour the sauce back in the skillet to keep it warm.
Filling
Add the ground beef and rice to the bowl with the reserved vegetables. Add 2 tablespoons of the finished cabbage roll sauce, hot sauce, salt and pepper. Use a fork or your clean hands to mix the filling well. 
Assembly
First spoon about ¼ cup of the tomato sauce into a 5 quart Dutch oven and spread it over the bottom of the pan. 
Place a cabbage leaf on the counter top with the inside facing up (it should curve up like a cup), and put about ¼ cup of the filling towards the stem end of the leaf. You will have to judge how much filling to use based on the size of your leaves. I had a huge variation so I used anywhere from 2 tablespoons to a ½ cup. Just ensure that it isn’t so much that it squeezes out the side.
Fold in the both sides, and starting with the stem end, roll the leaf around the filling. Place seam-side down in the Dutch oven. Repeat the process with the remaining leaves.
Pour the sauce over the cabbage rolls, and cover the pot with the lid. Bake for 50 to 60 minutes, or until the cabbage has softened and the meat is cooked through and no longer pink. Serves 3 to 4.

Avocado Pound Cake with Blood Orange Glaze Recipe

March 1, 2013
Avocado Pound Cake with Blood Orange Glaze | Fake Food Free


I started the New Year off with a sense of adventure. After a long break from blogging due to our move, I was ready to jump right into some baking experiments. 

I did. And I failed. 

For a few weeks our apartment was filled with dry, gritty donuts and collapsed cakes. So I claimed 2013 the year of cooking, not baking. 

But then I got the bug again. The kind of bug that sees an avocado sitting on the counter and wonders if I can use it in place of butter or oil in a recipe. Not that I don’t fully embrace butter. I was simply up for a challenge. 

The first challenge was getting the right consistency. After blending the avocado and mixing it with sugar, eggs and flour I seemed to be on the right track. It even looked pretty when I took it out of the oven.

Avocado Pound Cake with Blood Orange Glaze
The next challenge was getting it out of the pan. Even though the avocado has a good amount of fat, I was using a non-stick pan and I greased it, given my track record, I wasn’t hopeful. I’m pretty sure I cheered when it slid right out of the pan.

Avocado Pound Cake with Blood Orange Glaze | Fake Food Free
 
The final result? You can replace the butter or oil with avocado. At least with this recipe you can. I ended up with a dense, sweet pound cake, with a tiny hint of avocado flavor and a burst of citrus from the glaze. 
 

Avocado Pound Cake with Blood Orange Glaze

Makes: 6 to 8 servings

Ingredients

1 avocado, peeled and pitted, pureed
1 cup raw sugar (turbinado or Demerara)
¼ cup mascavo sugar (you might be able to substitute brown sugar)
2 large eggs
1 teaspoon pure vanilla extract
½ teaspoon baking powder
¼ teaspoon salt
1 cup unbleached all-purpose flour
 
Glaze
1 tablespoon blood orange juice
½ teaspoon orange zest
5 tablespoons confectioners’ sugar 
 
Prep
 
Preheat the oven to 350 degrees F. Grease a small loaf pan. I used a mini loaf pan, the size that comes with a 4 piece set. The cake expands so this was easily enough for 6 to 8 slices once it was baked. 
 
Add the pureed avocado, the raw sugar and the mascavo sugar to the bowl of a mixer. Beat on medium for about 45 seconds. Add the eggs and beat for about 30 seconds. Mix in the vanilla. 
 
Add the baking powder and salt. Slowly mix in the flour just until all ingredients are combined. 
 
Pour the batter into the prepared baking pan. Place the pan on a baking sheet. Bake for 40 to 45 minutes, or until a knife inserted in the center comes out clean.
 
This is a dense pound cake so make sure to use the knife test to ensure it is baked through. The top of the bread will darken quite a bit.
 
Place the loaf pan on a cooling rack to cool for about 10 minutes. Remove the cake from the pan and allow to cool completely.
 
In a small dish, stir together the glaze ingredients, adding the powdered sugar one tablespoon at a time. You might decide you like a thinner or thicker consistency, so add more or less sugar to your liking. 
 
Poor the glaze over the cooled pound cake and let set before slicing and serving. 

Avocado Pound Cake with Blood Orange Glaze | Fake Food Free
Thanks for reading! All images and content are the property of Fake Food Free unless otherwise stated. Please do not republish full recipes and images without written permission. What is okay? Feel free to Pin images, share links to my posts or share the photo in a round up post with the title of this recipe and a link back to the post. Confused about copyright and food blogs? Here is some helpful information on Recipe Attribution. If you want to use a photo or full recipe, just ask. I’m sure we can work something out.  
 

Sautéed Purple and Lacinato Kale Salad with Almond Dressing Recipe

February 20, 2013
I should probably warn you that the phrase “we explored a new Farmer’s Market” is likely to become common on the blog. That’s because there are 8 throughout the week within a 5 minute drive (some within a short walk), and probably 10 more within 15 to 20 minutes. So far I have only been to 2. I have a lot of exploring to do.
So…
We explored a new Farmer’s Market this past weekend. This time, in Berkeley, and I stumbled upon a beautiful box of purple kale. As much as I consider myself a kale connoisseur with the few varieties I’ve grown and the many kale recipes you find on this blog, I now realize I have been living a lie.
I knew there were other kale varieties, but I had no idea they were so pretty, so different in texture, so…tasty. I asked on my Facebook page who had tried purple kale, and I’m in the minority. Apparently, you all have been enjoying it without me for quite some time. Well, I was ready to join the club. 
Along with purple kale, I have wanted to try Lacinato (Dinosaur) kale for at least a year or two and I was finally granted the opportunity. After staring at these leafy greens (and purples) in my kitchen for a couple days, I finally decided that I couldn’t get too fancy with the preparation. I needed their true flavors and colors to come out. 
The Lacinato is top left.
 I’m not a huge fan of raw kale. Massaged in oil it’s okay, but I prefer it to be stirred around a skillet even if it’s only for a few minutes. I tossed this sautéed kale salad in a super easy dressing of almond butter with a slight tang from rice vinegar. So far I’ve eaten it warm, room temperature and cold, and I have yet to find a way I don’t like it. 

Sautéed Purple and Lacinato Kale Salad with Almond Dressing  

1 1/2  tbsp olive oil
2 cloves garlic, minced
1 lb. Lacinato kale, chopped
½ lb. Purple kale chopped
2 tbsp raw almond butter
2 tbsp sesame oil
1 tbsp rice vinegar
2 tsp mascavo sugar (or brown sugar)
¼ tsp sea salt
Heat the olive oil in wok or skillet over medium-high. Add the garlic and the kale. Stir to coat the kale in oil. Add 2 tablespoons of water to help gently wilt the kale. Cook about 2 minutes total, allowing the water to cook off, and remove the kale from the heat. 
In a small dish, mix together the almond butter, sesame oil, rice vinegar, sugar and salt. Transfer the kale to a bowl and pour on the dressing. Toss to coat. Top with roasted almonds before serving if desired. Serves 4-6. 

Double Chocolate Orange Cookies Recipe

February 8, 2013

These chocolate orange cookies bring together two of my very favorite ingredients!

Double Chocolate Orange Cookies | Fake Food Free 
Did you ever buy those chocolate oranges? They came in the shiny foil and when you whacked it on the counter top it broke into appropriately imprinted orange slices. 
 
I think they were introduced around Christmas or Easter one year and we went crazy for them. I don’t know if they are still available, but I owe them all the credit for introducing me to the flavor combination of chocolate and orange. 
 
I don’t want to be so bold as to say that it ranks up there with chocolate and peanut butter, but if I had to pick a fruit to go with my chocolate, orange just might be it. 
 
Valentine’s Day is coming up, and while I know it isn’t everyone’s favorite holiday, I am adamant about the fact that one should, at the very least, embrace a holiday that focuses so heavily on chocolate. Forget the love, the pink, the hearts if you must, but my goodness, eat some chocolate!
 
I’m here to help you out with this recipe. A lot of chocolate, a little orange, some whole grains and raw sugar. Nice and simple, but the perfect way to celebrate Valentine’s Day.
 
 
Double Chocolate Orange Cookies | Fake Food Free


Double Chocolate Orange Cookies Recipe

Makes: 18 cookies

Ingredients

½ cup unsalted butter, softened
¾ cup raw sugar
1 large egg
½ tsp vanilla
1 tsp fresh orange juice
Zest of 1 orange
½ tsp baking soda
¼ tsp salt
¼ cup unsweetened cocoa powder
¾ cup whole wheat flour
½ cup dark chocolate chips
 
Prep
 
Preheat the oven to 350 degrees F.
 
In the bowl of a mixer, cream together the butter and sugar, about 1 to 2 minutes. Scrape the sides of the bowl and add the egg. Mix until incorporated. Add the vanilla, orange juice and orange zest, mix about 30 seconds more. 
 
Add the baking soda, salt and cocoa powder. Mix until the cocoa powder is distributed throughout the dough. With the mixer on low, add the flour a ¼ cup at a time. Mix just until it is incorporated. Stir in the chocolate chips.
 
Use a small cookie scoop or tablespoon to transfer the dough to a standard baking sheet. Bake for 8 minutes. Allow to cool on the baking sheet 1 to 2 minutes and transfer to a cooling rack to cool completely. 
 
 
Thanks for reading! All images and content are the property of Fake Food Free unless otherwise stated. Please do not republish full recipes and images without written permission. What is okay? Feel free to Pin images, share links to my posts or share the photo in a round up post with the title of this recipe and a link back to the post. Confused about copyright and food blogs? Here is some helpful information on Recipe Attribution. If you want to use a photo or full recipe, just ask. I’m sure we can work something out.
 
Want to create beautiful food and product photos that you can't wait to share?!
Discover your style, control the light, and shoot using the tool you know how to use (yes, your phone included). Learn about free resources, Live Q&As with Lori, and online courses you can take from anywhere in the world!
We respect your privacy. Unsubscribe at any time.