Browsing Category

Desserts Sweets

Strawberry, Mango and Avocado Cupcakes with Strawberry Avocado Frosting Recipe

May 3, 2013


I was still caught up in the amazing California citrus season when the strawberries began to arrive at the Farmers Market. It started with one or two vendors offering a few containers. Now, they are everywhere – organic, conventional, big, small, full flats, or small pint baskets – you can get just about anything you want. 
 
I’ll admit they aren’t quite as tasty, or as rewarding, as the buckets we used to pick from our own garden, but they will certainly do. I’ve been buying loads, eating some and freezing others to use in my oatmeal when the season is over. 
 
 
With ataulfo mango season falling at the same time as the strawberries here, and with easy access to avocados, I felt compelled to combine all three.
 
I also can’t seem to get over the desire to play with avocados as a substitute for butter in my baked goods. First it was the Avocado Pound Cake with Blood Orange Glaze, and now cupcakes.
 
 
These cupcakes are soft and fruity, and the frosting? I think I may be making my frosting with avocado from here on out. I’ll admit, I tried it with just avocado and it was a little too green-tasting (for lack of a better term). The addition of strawberry puree did the trick. It sweetened it up and balanced the flavor of the avocado.
 
These don’t keep long. I’d suggest baking them just before you will need them, cool, frost and eat soon after. If you don’t plan to finish them off, keep unfrosted cupcakes in the refrigerator for only a day or two. The oils from the avocado tend to surface when they sit for over a day. 
 

Strawberry, Mango and Avocado Cupcakes with Strawberry Avocado Frosting

Makes: 12 cupcakes

Ingredients

½ cup mashed avocado (about 1 Hass avocado)
2 large eggs
1 cup raw sugar
½ cup pureed strawberries
½ cup pureed mango
1 teaspoon pure vanilla extract
1 ¼ cup unbleached, all-purpose flour
3 ½ teaspoon baking powder
1 teaspoon fine ground salt

Frosting
2 tablespoon mashed avocado
5 ¼ cups powdered (confectioner’s) sugar
½ teaspoon pure vanilla extract
1 tablespoon milk (any variety)
½ tablespoon fresh lime juice
2 tablespoon pureed strawberries
Pinch of salt
 
Prep
 
Preheat the oven to 350 degrees F. Place cupcake liners in a 12-cupcake baking pan. Spray the liners with olive oil or non-stick cooking spray. 
 
In the bowl of an electric mixer, beat the avocado, eggs and sugar until blended, 60 to 90 seconds, scraping the bowl as needed. Add the strawberry and mango purees and mix just until all ingredients are combined. Add the vanilla. 
 
In a separate bowl, whisk together the flour, baking powder, and salt. Add the dry ingredients (a little at a time) to the wet ingredients, stirring gently, just until everything is combined.
 
Transfer the batter to the cupcake tins, filling each liner with an equal amount. 
 
Bake 15 to 17 minutes, or until a toothpick inserted in the center of the cupcakes comes out clean. Remove from the oven and let cool.
 
For the frosting, add the avocado and powdered sugar to the bowl of a mixer. Using the whisk attachment, mix on medium-high until the two are combined to create a very thick paste. 
 
With the mixer on low, add the milk, lime juice and strawberry puree. Continue to mix until all ingredients come together to form a spreadable frosting. Mix in the salt. 
 
Use a small cookie dough or ice cream scoop to top each cupcake with about 1 tablespoon of frosting. Serve right away. 
 
 
Thanks for reading! All images and content are the property of Fake Food Free unless otherwise stated. Please do not republish full recipes and images without written permission. What is okay? Feel free to Pin images, share links to my posts or share the photo in a round up post with the title of this recipe and a link back to the post. Confused about copyright and food blogs? Here is some helpful information on Recipe Attribution. If you want to use a photo or full recipe, just ask. I’m sure we can work something out.  

Maple-Bourbon Budino with Spiced Pecans from Bakeless Sweets

April 17, 2013
 

About a year ago I caught a post on The Kitchn called How Cookbooks Are Made:  A Peek Into a Cookbook Photo Shoot. Since reading that story, I’ve had my eye out for Faith Durand’s, Bakeless Sweets.

I received a copy a few days ago, and there is already a good chance that I will refrain from turning on the oven all summer so that I can try every recipe in this book.

It has reintroduced me to a world of desserts that were somehow lost in my past. We ate many scratch-made puddings growing up so I debated why bakeless desserts had failed to get my attention in adulthood. The reason soon dawned on me.

After the scratch-made puddings of my youth, somewhere along the line bakeless desserts became fake. As in, they meant boxed pudding, jellos, and oil-based whipped cream — things that no longer have a place in my kitchen. It turns out that when those things went, so did all my desire to make bakeless desserts.

And that is what makes this cookbook brilliant. There is not a box of pudding required among its pages. In fact, Faith offers her own recipe for making pudding mix at home to keep on hand, eliminating the need for even the busiest cook to turn to the boxes.

As delicious as the many pudding recipes sound, don’t think for a minute that they are all this book has to offer. Every creative combination of stove-top and refrigerator desserts you can think of (and many more you never imagined) are in this book.

As Faith pointed out in that post I read a year ago, there is no cookbook like this on my shelf. It is truly unique, and not to mention, eye-opening when it comes to dessert.

A few of the recipes I plan to try out this summer include — Salted Caramel Risotto, Goat Cheese Panna Cotta with Cranberry-Port Glaze and Papaya Filled with Coconut Cream and Mango.

The book is also filled with gorgeous photos by Stacy Newgent. To be honest, I never thought mousse and jellies could be so pretty. The spoon selection used in the photographs is enough to make you want to spend the day shopping at an antique store so you can make your finished bowlful as beautiful.

I flipped through the pages admiring the photos as I tried to decide what to make. It didn’t take long before something on page 62 gave me a few flashbacks to my Old Kentucky Home. After living there for 10 years, I welcomed the change that came with moving to California, but there are two times a year that I know I will always miss.

Spring and autumn — when the horses are running.

I’m not exactly a true racing fan, but no one can deny the spirit in the air as Derby nears each May. So when I saw a recipe for Maple-Bourbon Budino with Spiced Pecans I knew I needed to add it to my long distance Derby celebration. (Budino is an Italian dessert that is similar to pudding, in case you were wondering like I was.)

A few tips. Just go ahead and make two batches of the pecans because you’ll have a hard time keeping your hands out of them before you finish the pudding. Also, don’t be scared of pudding. I have to admit the whisking, tempering and boiling all get me a bit nervous because I’ve failed so many times in the past. But thanks to Faith’s step-by-step instructions, I finally had a true pudding success. No lumps to be found. And the flavor of this rich, sweet and salty budino can’t be beat. Thanks to this book I was quickly reminded that I LOVE pudding, too!

Maple-Bourbon Budino with Spiced Pecans

(Both recipes reprinted with permission from Abrams Books.)

Maple and bourbon were meant to go together, with maple’s sweet fragrance and bourbon’s vanilla smoothness. They pair especially well in this intensely rich and sweet budino, which mounds up on the spoon like creamy maple syrup. It’s best eaten warm. 

Makes 2 cups (480 ml) or eight servings.
Gluten-free.

1/4 cup (55 g) packed dark brown sugar
1/4 cup (60 ml) Grade B maple syrup
1 cup (240 ml) cream
2 tablespoons cornstarch
1/2 teaspoon kosher salt
3/4 cup (180 ml) whole milk
3 large egg yolks
1 teaspoon pure vanilla extract
2 tablespoons bourbon

Warm and sweeten the cream: Bring the sugar and maple syrup to a boil over medium heat in a 3-quart (2.8-L) saucepan. Turn the heat to low and simmer for 10 minutes, or until the mixture is reduced by about half. Whisk in the cream and heat until the surface begins to quiver. Turn off the heat.

Make a cornstarch and egg yolk slurry: Meanwhile, whisk the cornstarch and salt together in a medium bowl. Slowly whisk in the milk, making sure there are no lumps. Whisk in the egg yolks. It is important that this mixture be as smooth as you can make it.(To be really sure, reach into the bowl and gently rub out any lumps between your fingers.)

Temper the slurry: Pour 1 cup (240 ml) of the hot cream into the bowl with the slurry and whisk vigorously to combine. They should come together smoothly, with no lumps. If you see any, add a little more liquid and whisk them out. Pour the tempered slurry back into the pan slowly, counting to 10 as you do and whisking vigorously.

Thicken the pudding: Turn the heat back on to medium. Bring the mixture to a simmer, whisking constantly and vigorously, working all the angles of the pot and scraping the bottom. It will take 2 to 5 minutes for the custard to come to a boil, with large bubbles that slowly pop up to the surface. Boil, whisking constantly, for 2 minutes.Turn off the heat. Stir in the vanilla and bourbon.

Chill the pudding: Immediately pour the custard into a shallow container. Place plastic wrap or buttered wax paper directly on the surface to cover it, and refrigerate. This recipe is best served warm—almost immediately, or after 30 minutes in the refrigerator. Serve it with a spoonful of spiced maple pecans (recipe follows) scattered on top.

Spiced Maple Pecans

These lightly toasted spiced pecans are just piquant enough to balance the sweet richness of the Maple-Bourbon Budino. 

Makes 1 cup (240 ml).
Gluten-free.

1 cup (110 g) roughly chopped pecans
1/4 teaspoon cinnamon
1/8 teaspoon ground ginger
1/8 teaspoon chipotle powder
1 tablespoon (14 g) unsalted butter
2 tablespoons Grade B maple syrup
1/2 teaspoon kosher salt

Butter a baking sheet and have it ready. Heat a large skillet over medium-high heat and add the pecans. Cook for about 3 minutes, stirring frequently, until they smell nutty and toasted. Add the spices and cook for 10 seconds, stirring. Add the butter and maple syrup and stir until melted, then bring to a simmer. As soon as the liquid bubbles down into a thick glaze, remove the pan from the heat.

Stir in the salt. Turn out onto the baking sheet. Store in an airtight container for up to 1 week.

Disclosure:  This book was sent to me for review purposes. I was not required to write about it and received no compensation for doing so. Thoughts are my own, and I also love pudding.

Whole Wheat Banana Snack Cake with Chocolate Guinness Frosting Recipe

April 8, 2013

When presented with an open beer (minus the ¼ cup you used in a recipe), most people would drink it. It’s a logical solution and one I’ve implemented myself numerous times.  But when I made the Guinness Braised Kale with potatoes and poached egg for St. Patrick’s Day, I found myself debating whether to drink half  a beer or make a cake.

I chose cake.
 

This isn’t your super sweet, rich, decadent dessert cake, which is why I decided to add snack cake to the name. It’s filling with the fresh flavor of banana, and the frosting will curb any craving for chocolate. Maybe even a hankering for dark beer. If you don’t mind a splash of booze and hearty whole grains for breakfast or as a snack, then I suggest you forgo finishing off your next pint, too.


Whole Wheat Banana Snack Cake with Chocolate Guinness Frosting

Makes: 9 servings

Ingredients

¾ cup mascavo (muscovado) sugar
¼ cup olive oil*
2 eggs
1 overripe banana, mashed
1 tbsp Guinness beer
1 cup whole wheat flour
½ tsp baking soda
¼ tsp salt
 
Frosting
1 tbsp unsalted butter, softened
1 ½ cups confectioner’s (powdered) sugar
1 tbsp cocoa powder
2 tbsp Guinness beer
 
Prep

Preheat the oven to 350 degrees F and grease an 8×8 inch square pan.

Add the sugar, oil and egg to the bowl of a mixer fitted with the paddle attachment. Mix on medium for about 1 minute. Add in the banana and mix on medium to medium-high 1 minute more. Mix in the 1 tablespoon of Guinness.
 
In a medium bowl, whisk together the flour, baking soda and salt. With the mixer on low, gradually add the dry ingredients. Mix just until combined, scraping the sides of the bowl as needed.
 
Transfer the batter to the prepared pan and bake for 20 to 25 minutes, or until a toothpick inserted in the center comes out clean. Allow the cake to cool.
 
To prepare the frosting, add the butter and powdered sugar to the bowl of the mixer fitted with the whisk or paddle attachment. Beat together the butter and powder sugar on medium and then medium-high until combined, and almost smooth, about 1 minute. Add the cocoa and 1 tablespoon of the Guinness. Mix on medium-high until the frosting is smooth, about 90 seconds. Mix in the additional 1 tablespoon of Guinness, based on your desired consistency for the frosting. The full 2 tablespoons was perfect for me.
 
Frost the cooled cake, cut into 9 pieces and serve. 
 
*Be sure to use regular olive oil with this recipe because it has a more mild flavor. Virgin olive oils may add too much of an olive-like taste. 


Thanks for reading! All images and content are the property of Fake Food Free unless otherwise stated. Please do not republish full recipes and images without written permission. What is okay? Feel free to Pin images, share links to my posts or share the photo in a round up post with the title of this recipe and a link back to the post. Confused about copyright and food blogs? Here is some helpful information on Recipe Attribution. If you want to use a photo or full recipe, just ask. I’m sure we can work something out. 

Summery Cake with Lemongrass Syrup Recipe from Home Made Summer

March 18, 2013
Summery Cake with Lemongrass Syrup Recipe from Home Made Summer | Fake Food Free
 

My first encounter with Yvette van Boven’s creative recipes, inspiring ideas and whimsical sketches was with the cookbook, Home Made. Among a bookcase of cookbooks with bright white photos encouraging you to make cooking cheerful and smiley, that book was a welcomed relief.

It was filled with dark shadowed food photos and recipes that made me want to lock up in the kitchen and get cooking. Don’t get me wrong, I enjoy cheer, balloons and bright flowers as much as the next person, but that isn’t how I cook. I like the rustic, the homemade, the old fashioned, and often, the imperfection.

I’m not sure how to explain it. As a home cook, that book spoke to me.

I received Home Made Winter last year. It was like a wonderful dark, snowy night by the fire in the form of a cookbook. The author explains that the recipes in that book represented much of her childhood growing up with the comfort foods of Ireland. 


I knew Home Made Summer was right around the corner, and I could hardly wait. This book, Yvette explains, is about her current life in Amsterdam and Paris with summers spent in Provence. It’s as summery as one can get while still holding on to that rustic charm. Fresh ingredients hit by natural sunlight that are comforting and earthly like spreading your toes through soft blades of grass on a summer lawn.

Cantaloupe Soup with Goat Cheese and Basil Oil, Scallop Ceviche and Jalapeno & Apple Sauce for your summer grilled goodies were a few of the things that caught my attention. And the garden photos! I enjoy how some recipes are paired with shots of gorgeous green gardens as opposed to only a completed dish.

As the author explains early on, the recipes in this book are true to summer. They don’t take a lot of work to prepare (ideal for summer heat) and they incorporate fresh, seasonal ingredients. It’s all about simplicity. 

Summery Cake with Lemongrass Syrup Recipe from Home Made Summer | Fake Food Free

I would say simplicity is the tone in her other books too, but if you are looking for more complex recipes or techniques you may have never tried before – Home Made or Home Made Winter would be a good choice. If simple, fresh, summer dishes are what you are after, this is your book.

Or you can be like me and use all three. 


Now that we are in California, I have access to many more diverse ingredients. One of these is lemongrass. I love the stuff, but from where we lived in Kentucky, I had to travel to a specialty store about an hour and a half away to get it. Now I have a nearly unlimited supply at a nearby Farmers Market.  That’s the first of three reasons why I wanted to make a summery cake with lemongrass syrup

Summery Cake with Lemongrass Syrup Recipe from Home Made Summer | Fake Food Free

The seconds is that I’ve used lemongrass in savory dishes, but never in something sweet.  The third, I’m such a fan of simple desserts. I used to be a triple chocolate-nut-caramel-whipped-cream in one dessert kind of girl, but now I find those kinds of things too rich, and overwhelming. Now I enjoy one or two flavors in a dessert that you can stop and savor.

This cake has that covered. I absolutely love this recipe, and I can think of few better summery (or springy) desserts to have on an Easter table. Right next to your copy of Home Made Summer.

A Summery Cake with Lemongrass Syrup 

Reprinted with permission from Abrams Books
 
For the Cake
½ tsp baking powder
pinch of salt
1 ½ cups (175 g) self-rising flour
¾ cup (175 g) unsalted butter, at room temperature
½ cup plus 2 tbsp (125 g) superfine sugar
3 large eggs
grated zest of 1 lemon

For the Syrup
1 cup (200 g) sugar
3 stalks of fresh lemongrass, cut into chunks

Make the cake:  Preheat the oven to 350 degrees F (170 degrees C). Grease a 4-cup Bundt pan or other cake pan.

Sift the baking powder, salt, and flour together into a small bowl. In a large bowl, beat the butter with the sugar until it’s creamy and white. Add the eggs one by one, beating after each addition, then beat in the lemon zest and the flour in two or three parts until well combined. Pour the batter into the prepared cake pan and baked for 35 to 40 minutes, until a skewer inserted in the center comes out clean. Let the cake cool for 5 minutes, then invert i onto a plate to let it cool further.

While the cake is baking, make the syrup:  In a medium saucepan over medium-high heat, bring ¾ cup (200 ml) water, the sugar, and the lemongrass to a simmer. Reduce the heat to low and let the mixture steep for about 20 minutes. Strain the syrup into a pitcher and throw out the lemongrass.

Pour one third of the syrup on top of the cake just after you’ve removed it from the pan, let it soak in. Then take your time pouring the rest of the syrup over the cake, say a splash every time you walk by. Continue until all the syrup is absorbed. Store the cake at room temperature, cover with plastic wrap.

My Notes: I used 4 mini cake pans and they worked perfectly. They did bake a little less, about 30 minutes, so check them early. Also, this batter was very thick for me, but don’t worry. It bakes up beautifully.

Summery Cake with Lemongrass Syrup Recipe from Home Made Summer | Fake Food Free


Disclosure:  This book was sent to me for review purposes. I was not required to post about it and received no compensation for doing so.

Sweet Cinnamon Date and Roasted Parsnip Spread Recipe

March 10, 2013


A few years ago I attended a cooking show with the Voltaggio brothers back in Lexington. They did several interesting creations during that show, but one that has stuck in my mind since was a roasted parsnip and date spread for toast. 
Confession:  I don’t love dates or parsnips. I can handle dates in moderation and the less sweet variety. Parsnips are a little too earthy for me, but I can handle them roasted with other root vegetables. 
So why did this combination stay in my head for 2 years? You got me. I have no idea.
I think maybe it is because I’m always looking for something that is low in added sugar that can fulfill my crazy sweet tooth. 
At the Farmers Market on Friday, I happened to come across both parsnips and dates, and I was reminded of that combination once again. I bit the bullet and bought both to see if I would even like this intriguing creation. 
I’m thankful to California that I now have several varieties of dates to choose from. Back in Kentucky it was usually Medjool dates or the diced kind coated in sugar that are sold during the holidays. And I’m thankful to the vendor who had them all labeled – sweet, less sweet, more sweet, etc. I like it simple.
I picked up a variety that she had labeled, Caddy Candy. Although now I’m wondering if my memory serves me right because I can’t find that name associated with dates anywhere. But for what it’s worth, these are less sweet. 
So I roasted up the parsnips, just like they did in the show, and then blended them with dates in the food processor. I wanted a little more flavor so I added a little cinnamon, some vanilla and a little olive oil to help with consistency. 
This is such a great combination! Even for someone who doesn’t like dates and parsnips. It’s a naturally sweet spread perfect for sourdough toast. I can see it working with oatmeal, pancakes and waffles, too.

Sweet Cinnamon Date and Roasted Parsnip Spread

2 medium parsnips, peeled and cubed (about 1 to 1 ½ cups)
Pinch of sea salt
8 to 10 medium-sized whole, pitted dates
½ tsp vanilla
¼ tsp ground cinnamon
1 to 2 tsp extra virgin olive oil (optional)
Preheat the oven to 400 degrees F.
Spread the parsnip cubes in a single layer on a baking sheet. Spray or drizzle with just a little of the olive oil. Add just enough to lightly coat them and keep them from sticking. Sprinkle them with the pinch of salt. 
Roast for 20 – 25 minutes, or until they begin to brown and are tender all the way through. Remove from the oven and set aside to cool.
Transfer the parsnips to a small food processor. Add the dates. Pulse until a spread begins to form. Add the vanilla and cinnamon. Pulse until smooth (or as smooth as you can get it). Add 1 to 2 teaspoons of olive oil as you puree if you want a thinner, more spreadable consistency. Makes about ¾ cup. 

Avocado Pound Cake with Blood Orange Glaze Recipe

March 1, 2013
Avocado Pound Cake with Blood Orange Glaze | Fake Food Free


I started the New Year off with a sense of adventure. After a long break from blogging due to our move, I was ready to jump right into some baking experiments. 

I did. And I failed. 

For a few weeks our apartment was filled with dry, gritty donuts and collapsed cakes. So I claimed 2013 the year of cooking, not baking. 

But then I got the bug again. The kind of bug that sees an avocado sitting on the counter and wonders if I can use it in place of butter or oil in a recipe. Not that I don’t fully embrace butter. I was simply up for a challenge. 

The first challenge was getting the right consistency. After blending the avocado and mixing it with sugar, eggs and flour I seemed to be on the right track. It even looked pretty when I took it out of the oven.

Avocado Pound Cake with Blood Orange Glaze
The next challenge was getting it out of the pan. Even though the avocado has a good amount of fat, I was using a non-stick pan and I greased it, given my track record, I wasn’t hopeful. I’m pretty sure I cheered when it slid right out of the pan.

Avocado Pound Cake with Blood Orange Glaze | Fake Food Free
 
The final result? You can replace the butter or oil with avocado. At least with this recipe you can. I ended up with a dense, sweet pound cake, with a tiny hint of avocado flavor and a burst of citrus from the glaze. 
 

Avocado Pound Cake with Blood Orange Glaze

Makes: 6 to 8 servings

Ingredients

1 avocado, peeled and pitted, pureed
1 cup raw sugar (turbinado or Demerara)
¼ cup mascavo sugar (you might be able to substitute brown sugar)
2 large eggs
1 teaspoon pure vanilla extract
½ teaspoon baking powder
¼ teaspoon salt
1 cup unbleached all-purpose flour
 
Glaze
1 tablespoon blood orange juice
½ teaspoon orange zest
5 tablespoons confectioners’ sugar 
 
Prep
 
Preheat the oven to 350 degrees F. Grease a small loaf pan. I used a mini loaf pan, the size that comes with a 4 piece set. The cake expands so this was easily enough for 6 to 8 slices once it was baked. 
 
Add the pureed avocado, the raw sugar and the mascavo sugar to the bowl of a mixer. Beat on medium for about 45 seconds. Add the eggs and beat for about 30 seconds. Mix in the vanilla. 
 
Add the baking powder and salt. Slowly mix in the flour just until all ingredients are combined. 
 
Pour the batter into the prepared baking pan. Place the pan on a baking sheet. Bake for 40 to 45 minutes, or until a knife inserted in the center comes out clean.
 
This is a dense pound cake so make sure to use the knife test to ensure it is baked through. The top of the bread will darken quite a bit.
 
Place the loaf pan on a cooling rack to cool for about 10 minutes. Remove the cake from the pan and allow to cool completely.
 
In a small dish, stir together the glaze ingredients, adding the powdered sugar one tablespoon at a time. You might decide you like a thinner or thicker consistency, so add more or less sugar to your liking. 
 
Poor the glaze over the cooled pound cake and let set before slicing and serving. 

Avocado Pound Cake with Blood Orange Glaze | Fake Food Free
Thanks for reading! All images and content are the property of Fake Food Free unless otherwise stated. Please do not republish full recipes and images without written permission. What is okay? Feel free to Pin images, share links to my posts or share the photo in a round up post with the title of this recipe and a link back to the post. Confused about copyright and food blogs? Here is some helpful information on Recipe Attribution. If you want to use a photo or full recipe, just ask. I’m sure we can work something out.  
 

Double Chocolate Orange Cookies Recipe

February 8, 2013

These chocolate orange cookies bring together two of my very favorite ingredients!

Double Chocolate Orange Cookies | Fake Food Free 
Did you ever buy those chocolate oranges? They came in the shiny foil and when you whacked it on the counter top it broke into appropriately imprinted orange slices. 
 
I think they were introduced around Christmas or Easter one year and we went crazy for them. I don’t know if they are still available, but I owe them all the credit for introducing me to the flavor combination of chocolate and orange. 
 
I don’t want to be so bold as to say that it ranks up there with chocolate and peanut butter, but if I had to pick a fruit to go with my chocolate, orange just might be it. 
 
Valentine’s Day is coming up, and while I know it isn’t everyone’s favorite holiday, I am adamant about the fact that one should, at the very least, embrace a holiday that focuses so heavily on chocolate. Forget the love, the pink, the hearts if you must, but my goodness, eat some chocolate!
 
I’m here to help you out with this recipe. A lot of chocolate, a little orange, some whole grains and raw sugar. Nice and simple, but the perfect way to celebrate Valentine’s Day.
 
 
Double Chocolate Orange Cookies | Fake Food Free


Double Chocolate Orange Cookies Recipe

Makes: 18 cookies

Ingredients

½ cup unsalted butter, softened
¾ cup raw sugar
1 large egg
½ tsp vanilla
1 tsp fresh orange juice
Zest of 1 orange
½ tsp baking soda
¼ tsp salt
¼ cup unsweetened cocoa powder
¾ cup whole wheat flour
½ cup dark chocolate chips
 
Prep
 
Preheat the oven to 350 degrees F.
 
In the bowl of a mixer, cream together the butter and sugar, about 1 to 2 minutes. Scrape the sides of the bowl and add the egg. Mix until incorporated. Add the vanilla, orange juice and orange zest, mix about 30 seconds more. 
 
Add the baking soda, salt and cocoa powder. Mix until the cocoa powder is distributed throughout the dough. With the mixer on low, add the flour a ¼ cup at a time. Mix just until it is incorporated. Stir in the chocolate chips.
 
Use a small cookie scoop or tablespoon to transfer the dough to a standard baking sheet. Bake for 8 minutes. Allow to cool on the baking sheet 1 to 2 minutes and transfer to a cooling rack to cool completely. 
 
 
Thanks for reading! All images and content are the property of Fake Food Free unless otherwise stated. Please do not republish full recipes and images without written permission. What is okay? Feel free to Pin images, share links to my posts or share the photo in a round up post with the title of this recipe and a link back to the post. Confused about copyright and food blogs? Here is some helpful information on Recipe Attribution. If you want to use a photo or full recipe, just ask. I’m sure we can work something out.
 

Smoked Almond Matcha Tea Cookies Recipe

December 12, 2012
I love making these Smoked Almond Matcha Tea Cookies during the holidays. The almonds add a flavorful, smoky surprise that goes so well with the sweetness of the cookie, and the matcha gives them a festive green color. 
 
 
Smoked Almond Matcha Tea Cookies | Fake Food Free


If I yelled hello it would echo. Hear it? It’s a tiny echo from this deep dark hole of job transition and packing that has swallowed me up for the past few weeks. It’s an okay hole. I’ll be out of it soon. But right now it has taken me over. 

 I’ve never made a big move or transition right at Christmas time before. It’s exciting to imagine the coming New Year as a true new beginning, but I am really missing Christmas. Fortunately, we’ll spend some time with family before the official move so even if there are none at our house, I see lights, trees, snowmen and cookies in our future. 

 Ah, cookies. This year there won’t be many made by me, but before I packed the the baking sheets, I did manage to make just a few for a cookie exchange with a friend. 

 I had lots of smoked almonds left over from the Almond Goat Cheese Scoops, and even some matcha from these Matcha Tea Cookies with Gooseberry Filling, so I tried combining them for what turned out to be my new favorite cookie. They are much like a shortbread or sandie cookie, and the matcha adds a light green color making them even more festive. 

Smoked Almond Matcha Tea Cookies | Fake Food Free


 I always like to warn you when a recipe calls for refrigeration. I’m notorious for getting all excited to quickly make a cookie and realize later that I didn’t pay close enough attention to the fact that the dough needs to be refrigerated! So plan ahead with these, they will need to firm up for 3 to 4 hours in the fridge.  

Smoked Almond Matcha Tea Cookies Recipe 

Makes: About 2 dozen cookies

Ingredients

1 cup unsalted butter, softened 
⅓ cup Demerara or other raw sugar 
1 large egg 
1 tsp almond extract 
½ tsp Matcha tea powder 
¼ tsp fine ground sea salt 
2 ¼ cups unbleached all purpose flour 
½ cup smoked almonds, crushed 

Prep

 In the bowl of a mixer, beat the butter and sugar for 60 to 90 seconds. I usually add extra time when working with raw sugar to help it combine better with the butter. 

Add the egg and beat for about 30 seconds. Add the almond extract and tea powder and mix just until the powder is incorporated. 

Add the salt. Next add the flour a little at a time while mixing on low and scraping the sides of the bowl until a dough is formed. 

 Divide the nuts in half, and spread each portion out on a large piece of plastic wrap. Divide the cookie dough in half. Take one half and roll it into an even log shape. Adjust the size to how big you would like your cookies to be. Mine had about a 2 inch circumference. Roll it in the nuts to coat the outside, and then wrap it tightly with the plastic wrap. 

Repeat the process with the other half of dough. Refrigerate the dough until very firm, about 3 to 4 hours or leave it overnight. 

When ready to bake, preheat the oven to 375 degrees F. Slice the cookies about ¼ to ⅓ inch thick and place on an ungreased cookie sheet. Bake 7 to 8 minutes, or just until the edges begin to brown. Allow to cool about 1 to 2 minutes on the tray and then transfer to a cooking rack. Makes about 2 dozen. 

Smoked Almond Matcha Tea Cookies | Fake Food Free


 My plan was to have all kinds of holiday posts for you this month, but unfortunately it’s just not meant to be. Now I’m at the point where all my cooking and baking gear needs to make its way to boxes, so this will be my last recipe post for 2012. 

I have lots of travel eats to share as I’ve now been out to the East Bay 3 times this year and we are preparing for our second cross-country trip. If time allows, I’ll stop back in to at least share some good food. 

I’ll see you in 2013 with all kinds of new adventures! 
Merry Christmas and Happy New Year!


Thanks for reading! All images and content are the property of Fake Food Free unless otherwise stated. Please do not republish full recipes and images without written permission. What is okay? Feel free to Pin images, share links to my posts or share the photo in a round up post with the title of this recipe and a link back to the post. Confused about copyright and food blogs? Here is some helpful information on Recipe Attribution. If you want to use a photo or full recipe, just ask. I’m sure we can work something out.

20 Holiday Cookie Recipes

November 30, 2012
Even though I compiled this list in 2012, I return to it every year during the holiday season. It contains links to my favorite holiday cookie recipes which have all been featured here on Fake Food Free.
 
 
20 Holiday Cookie Recipes | Fake Food Free
 
Friday is a good day for news, right?
 
As in, big news.
 
As in, life is being flipped upside down, but in a very good way kind of news. 
 
As in, we’re moving from central Kentucky to the East Bay in California news!
 
Perfect because I was so ready to share that! And we are so excited!
 
From the food perspective, just in case you are unaware (although I doubt you are), the East Bay is a incredible food destination. Well, really the entire area. In addition to a past stop in San Francisco, I’ve visited twice so far in the moving process. In that short amount of time I’ve enjoyed Peruvian cuisine, vegan soul food, seafood, Montreal-style bagels, Hong Kong-style bakeries, craft beer, and of course, wine. 
 
Then there are the amazing Farmer’s Markets. The fact that I will have access to fresh figs, nuts, artichokes and avocados is surreal for me. Yes, you should expect some posts soon! 
 
And fortunately, there are lots of places to run. I think all the food access may have subconsciously played a role in my decision to register for the San Francisco Marathon in 2013! 
 
I should finally arrive in California on New Year’s Day so Christmas will be light around here, but I still plan to get in plenty of baking. I may not have a tree up, but I refuse to pack the mixing bowls and cookie sheets just yet. 
 
As for right now, I just got back from a California visit and you’ve probably noticed my week long blogging break has turned into almost two. I’ll be back in the kitchen this weekend, but I want to kick off the Christmas season with a cookie round up. 
 
If you are looking to add some cookies made with whole grain flours and minimally refined sugars to your baking list, look no further. Some traditional treats are mixed in, but many of these fit those criteria. 
 
I’ll be back next week with a review of what is turning out to be my favorite cookbook of 2012! Meanwhile, tell me what you are baking this year!
 
(Clicking on the name will take you to the recipe.)
 
Chocolate Covered Marzipan Cookies


Matcha Tea Cookies with Gooseberry Filling


Chocolate Almond Oatmeal Cookies


Jamaican Coffee and Spice Biscotti


Honey Cinnamon Oatmeal Raisin Cookies


Peanut Butter Chocolate Chip Cookies 


Lemon Rosemary Thumb Prints with Peach Jam


Ginger Rum Molasses Cookies


Chocolate Crinkle Cookies


Whole Wheat Double Chocolate Cranberry Cookies 


Russian Tea Cakes


Cherry Nut Cookies


Fiery Peanut Butter Cookies


Bourbon Chocolate Chip Pecan Cookies


Spicy Chocolate Peanut Butter Cookies with Curry Glaze


Crunchy Peanut Butter Date Balls


Whole Wheat Black Sesame Cookies


Chewy Chocolate-Tahini Puffed Grain Squares


Chocolate Snowballs


Pumpkin Peanut Butter Cookies


Thanks for reading! All images and content are the property of Fake Food Free unless otherwise stated. Please do not republish full recipes and images without written permission. What is okay? Feel free to Pin images, share links to my posts or share the photo in a round up post with the title of this recipe and a link back to the post. Confused about copyright and food blogs? Here is some helpful information on Recipe Attribution. If you want to use a photo or full recipe, just ask. I’m sure we can work something out.

Chewy Chocolate-Tahini Puffed-Grain Squares Recipe from Whole Grains for a New Generation

November 12, 2012

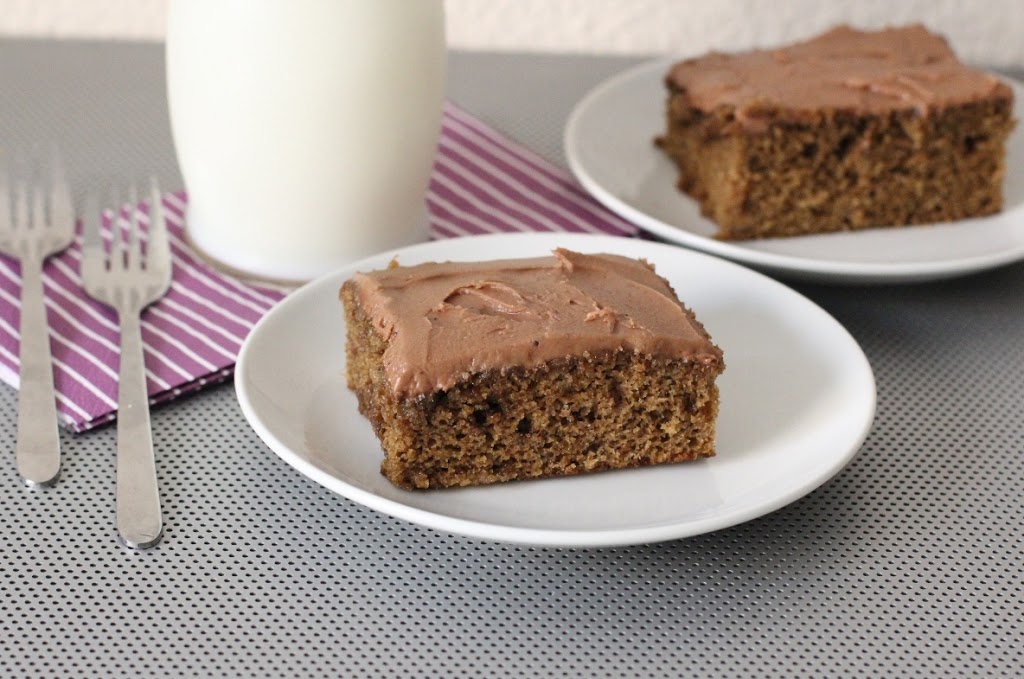
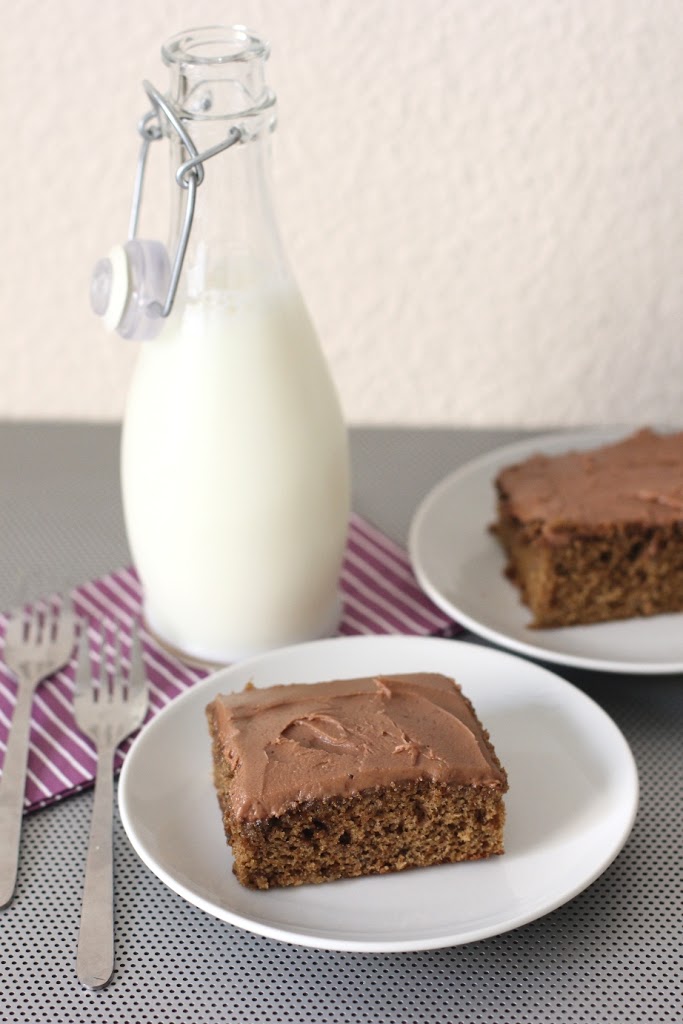
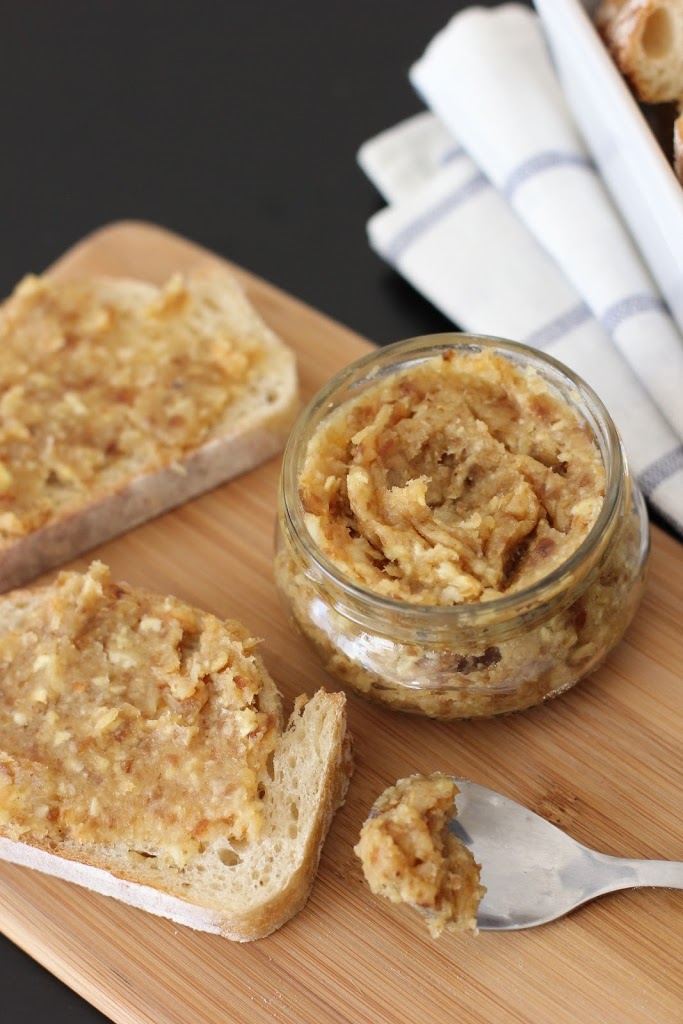
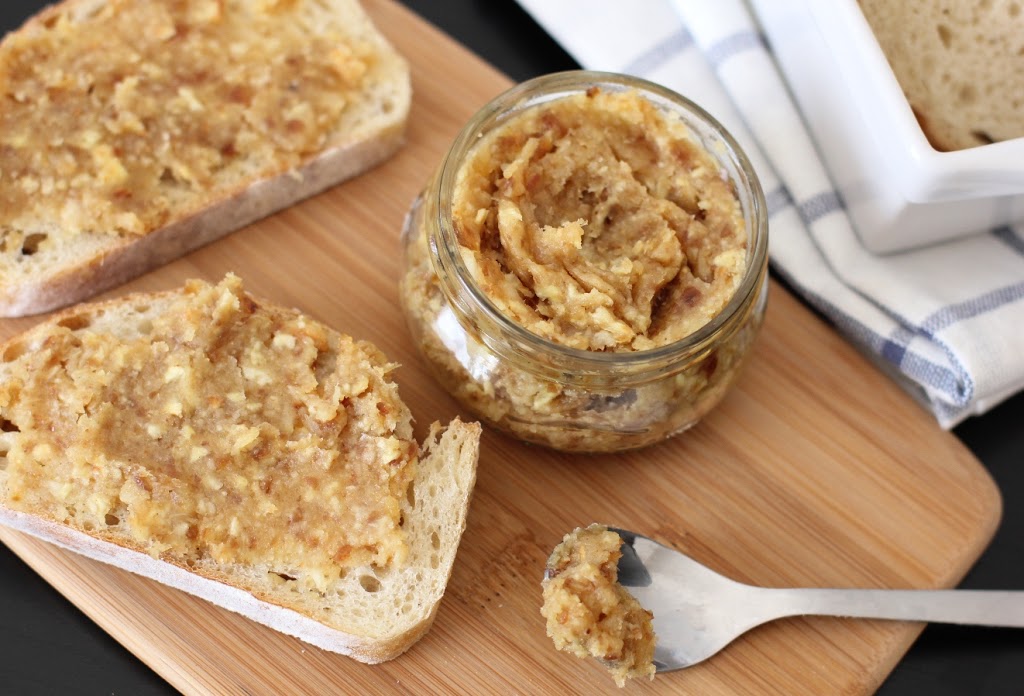
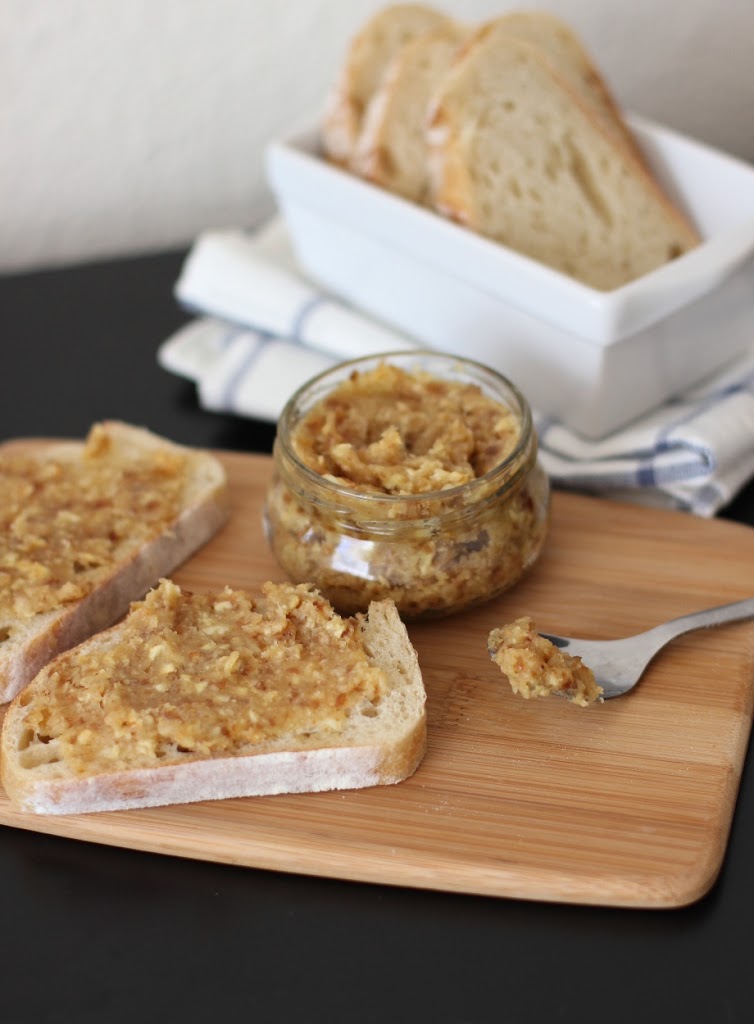
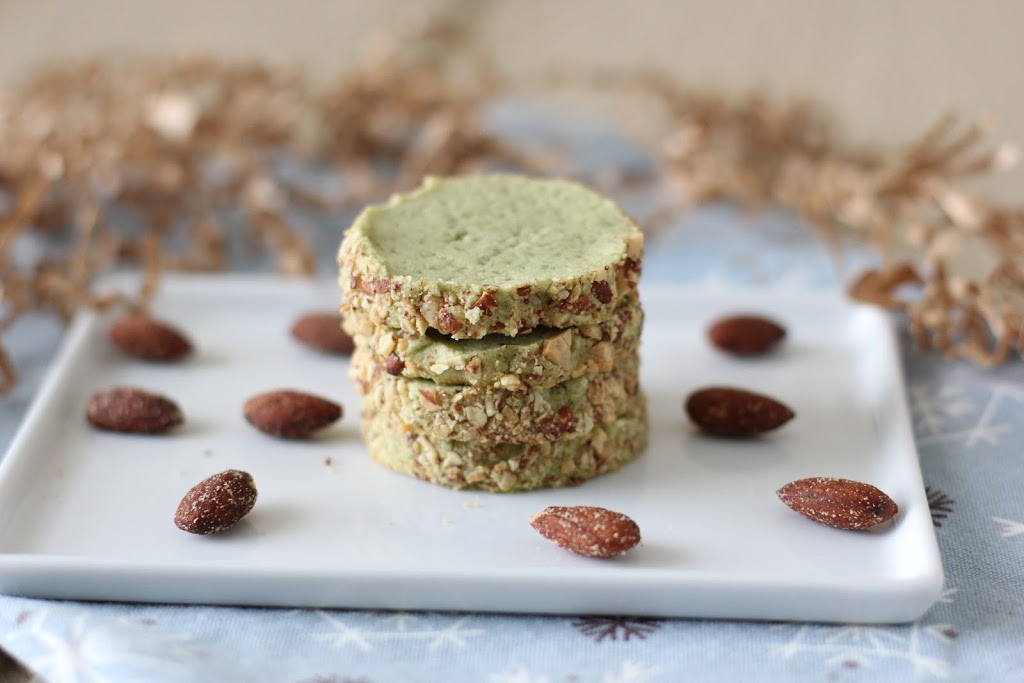
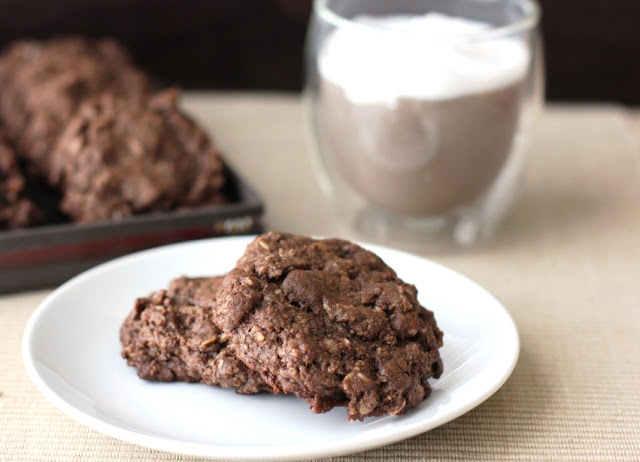
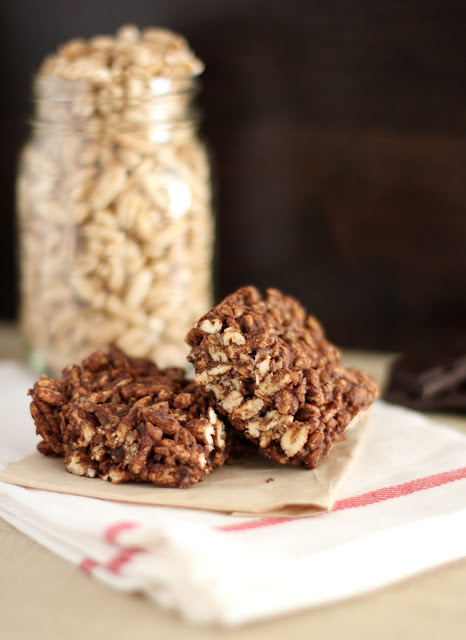
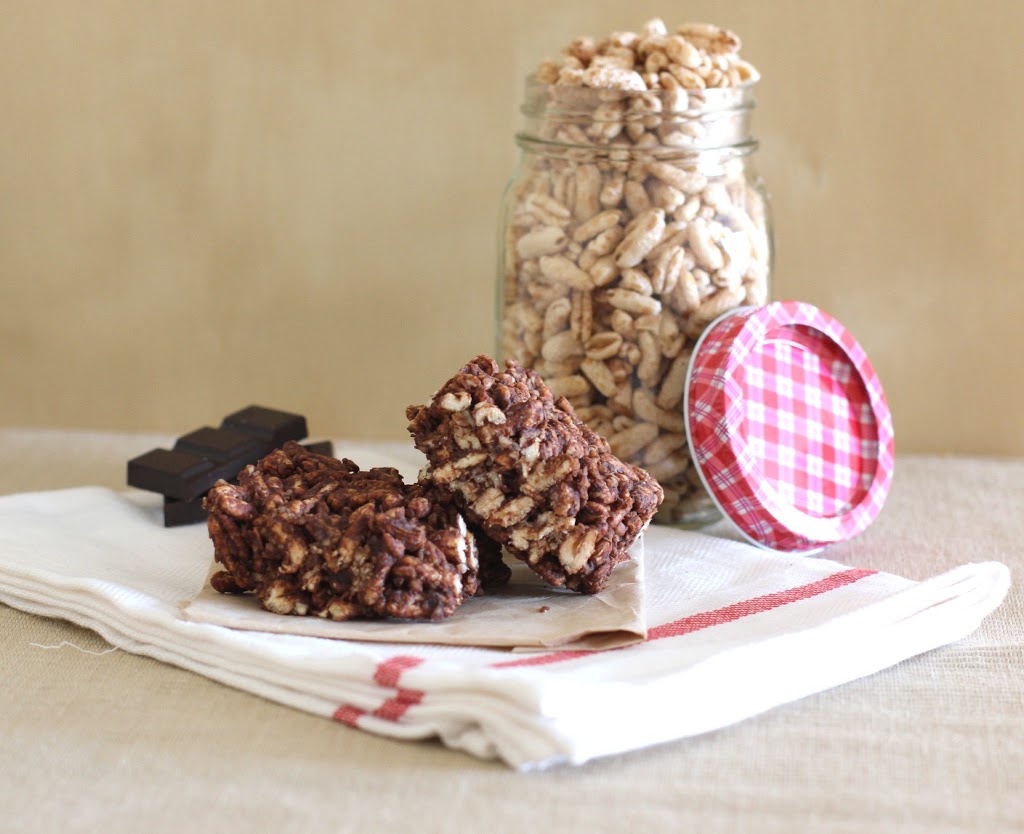
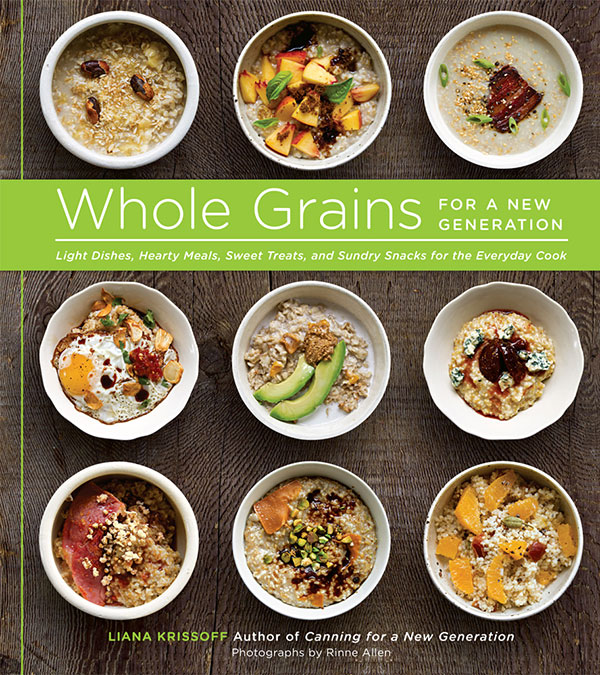
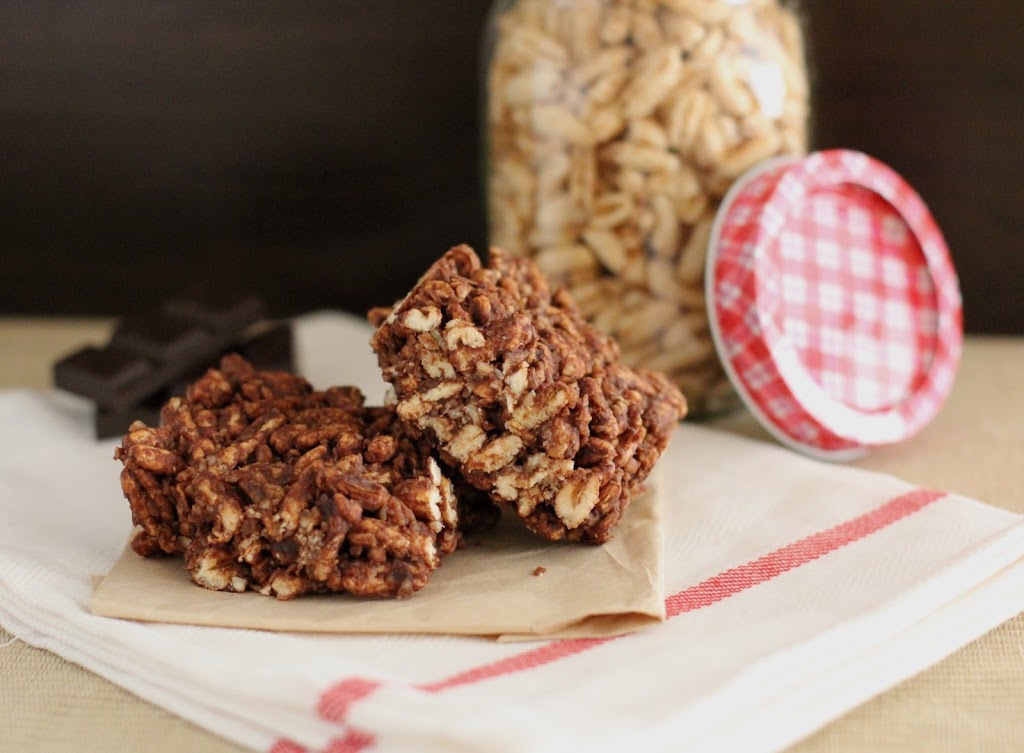
These puffed-grain squares are sweet with chocolate and slightly nutty with the flavor of tahini. A great snack from the cookbook Whole Grains for a New Generation by Liana Krissoff!

 Chewy Chocolate-Tahini Puffed-Grain Squares | Fake Food Free | A whole grain chocolate snack!  
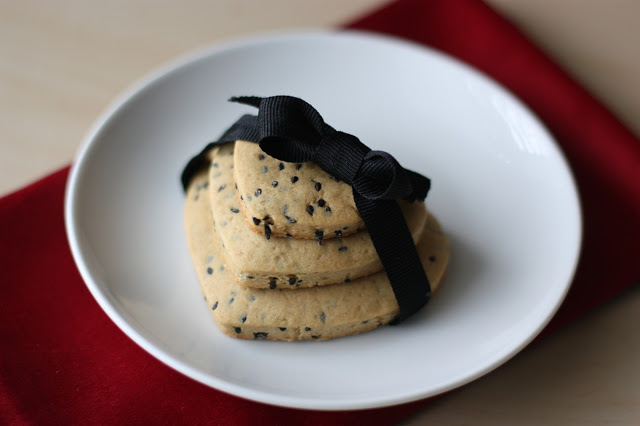
Cookbooks. I love everything about them – the valuable information, the creativity, delicious recipes, beautiful photos and stories about the hard work that went into producing them. 
 
There is nothing better than cookbooks that cover my favorite topics and Liana Krissoff has managed to write two that fall into that category – Canning for a New Generation, and now, Whole Grains for a New Generation. 
Whole Grains for a New Generation | Interview with author Liana Krissoff on Fake Food Free
 
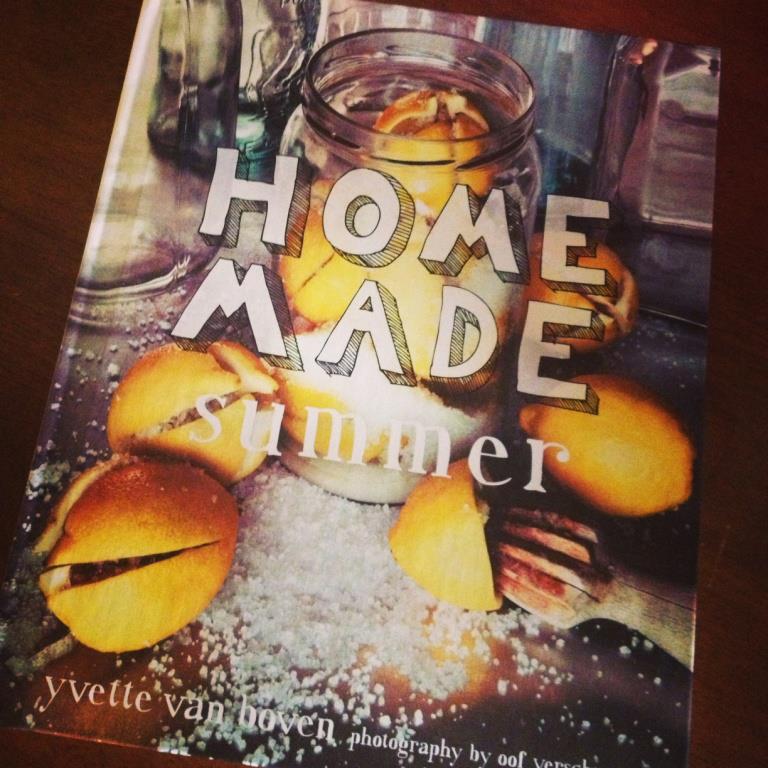
I received a copy of the latter just a few weeks ago, and as with most cookbooks I love, I read every recipe before I could put it down.  Liana covers whole grains with every bit of the creativity and thoroughness that she covered food preservation. My favorite part is the section on steel cut oatmeal options. Internationally inspired ideas include avocado and oranges, goat cheese and honey and blue cheese with soy sauce.
 
But don’t think for a minute that this book is all oatmeal. I consider myself pretty well versed in whole grains, but this book took them to a new level for me with recipes such as Curried Cauliflower and Sorghum, Millet Maki Rolls with Avocado Puree and Chickpea-Flour Crepes with Quinoa, Melted peppers and Goat Cheese. The book is filled with gluten-free, vegetarian and meat and fish dishes. 
 
I was excited to learn that Liana was open to email interviews, so I decided to ask her a few questions that came to mind as I browsed her work. Here are a few things she had to say. If you are as big of a cookbook and whole grains fan as I am, I think you will find them inspiring! And she also provides some great tips. See the note about prepping steel cut oats!
 
ME:  Working in public health I find it difficult to convince people to eat whole grains, let alone cook them. What are some tips you would give a person just beginning to cook or bake with whole versus refined grains? 
 
LIANA:  I think the key is to enjoy whole grains for what they are rather than expecting them to be something they’re not. I’ll be the first to admit that it’s not easy to become acclimated to most whole-wheat pasta or switch to multigrain baguettes after years of enjoying the traditional refined-wheat-flour versions. Pasta is delicious! Bread made with white flour can be truly amazing stuff! But instead of making those the basis of your meals every day, I’d suggest just skipping the pasta and white bread and making something different altogether: try a polenta tart with chard and Gruyère, for example, instead of pasta; serve your wine and cheese with a crisp seeded rye flatbread instead of white French bread.
 
I understand that in a lot of cases this does mean spending a bit more time in the kitchen, so I’ve really made an effort to simplify the recipes and pare down the processes in this book—a polenta tart isn’t the no-brainer that a big bowl of pasta with tomato sauce is, but it’s in the ballpark, totally doable.
 
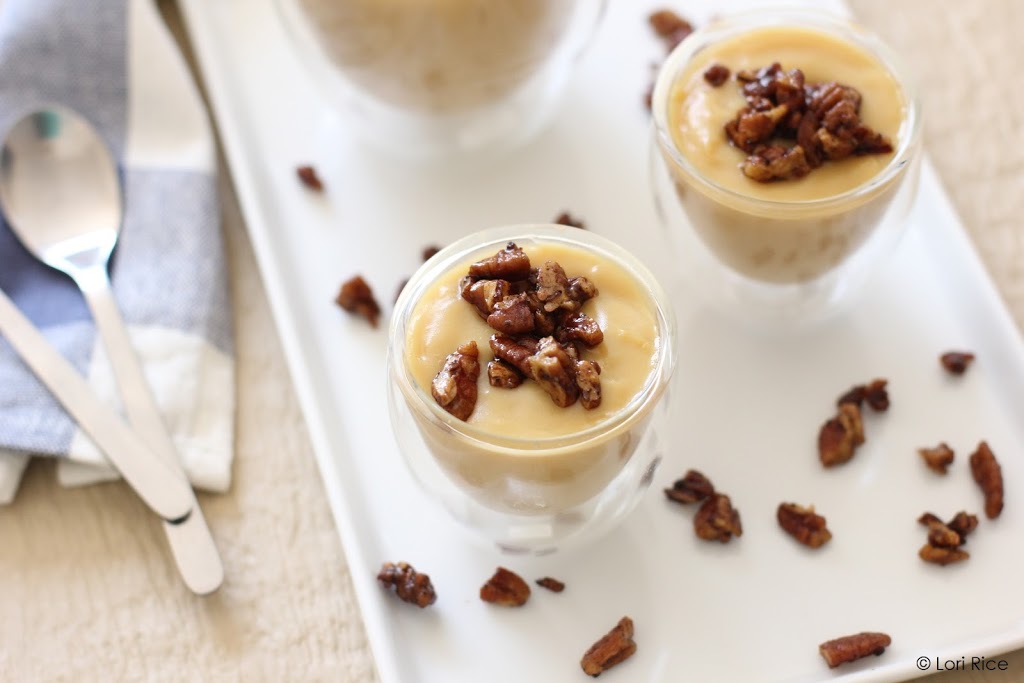
Another thing I’d recommend is starting with whole grains that are especially easy to cook and easy to love: quinoa, for example. Fifteen minutes on the stovetop, and it’s so incredibly versatile: it goes with just about anything—summer or winter vegetables, meat, fish, fruit, sweets—and can act as the grain or starch in just about any meal. It also makes a great quick dessert pudding.
 
Or just focus on one meal of the day and replace your dry sweetened prepared breakfast cereal with steel-cut oats: In the evening, bring the oats and water to a boil, remove from the heat, and let stand overnight; the next morning, just warm it up and it’s ready. Try savory toppings on your oatmeal if you’re the adventurous type. Instead of store-bought snack crackers or cookies in the afternoon, pop some popcorn on the stovetop and experiment with unusual toppings—there are tons of suggestions in the book.
 
ME:  Travel and food culture inspire my own blog so I love the international influences in your recipes. Where do you get your inspiration for these dishes?
 
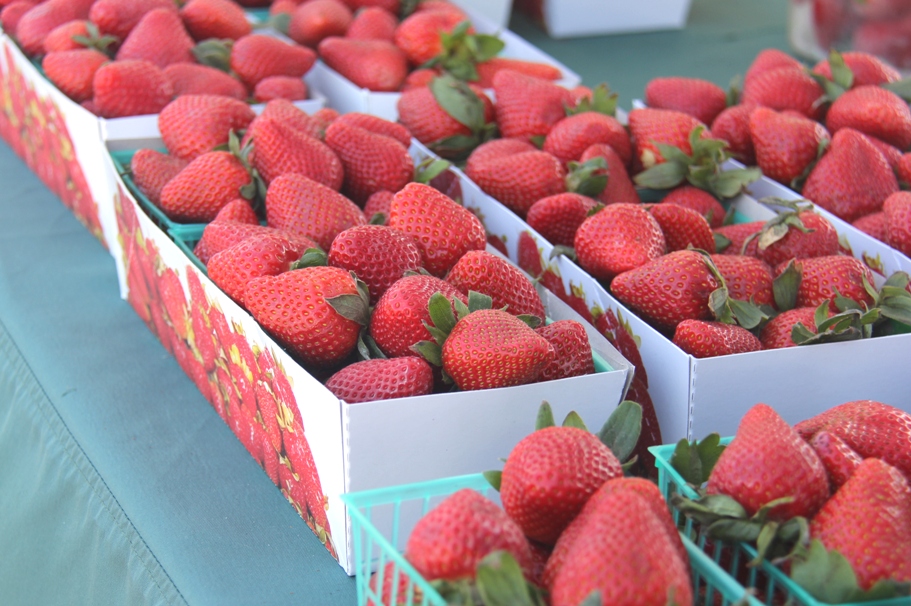
LIANA:  I’m glad to know that’s a selling point for cookbooks these days! A lot of my cooking is influenced simply by what I find in the stores and markets around me at any given time of year, or wherever I’m living at the time. I’m cheap, so I use whatever is most plentiful and readily available, and sometimes that means coming up with a dozen ways to use plums or whatever because they’re in season and the ones on sale happen to be really good.
 
I go to a lot of restaurants—not so many high-end places, but taco shops and pho restaurants, random Middle Eastern and African places in strip shopping centers, and German bakeries on Main Streets in the Midwest. Just becoming familiar with the wide variety of cooking techniques used around the world—by eating in restaurants (and maybe peeking into the kitchens), by reading books, by traveling—can open your mind to new ways of doing things. For example, the Indian technique of tempering, or frying whole spices in ghee or oil and adding the sizzling mixture to a dish at the end of cooking: It works so well to infuse the food with a bright but deep flavor, can’t this be applied to dishes that aren’t necessarily traditionally Indian? Would it work with a Texas-style chili? Can’t hurt to try it, right? 
 
My friends have been incredibly valuable as resources too: Their creativity and willingness to try anything are constantly inspiring. I love getting that email from a friend who’s just made the best vegetarian tom yum, or the best oatmeal cookie and has to share the recipe. My parents, too, of course, are always experimenting with new foods and have many times pointed me in a direction I wouldn’t have thought to go in otherwise. I often feel like I’m just taking in raw information, massaging it a little, interpreting it, and sending it back out.
 
ME:  If I’ve counted correctly, this is your fourth cookbook. What were your experiences with the process of writing a cookbook? Were there any major lessons learned from the first that made the ones to come easier to write and publish?
 
LIANA:  Yes, this is the fourth. The first two were work-for-hire jobs, which meant that the publisher needed books written about those particular subjects, and I was given the job of writing basically to certain specifications—although it still surprises me how much leeway I was given to come up with my own selection of recipes and to write what became quite personal books. I occasionally wonder how they let some of those headnotes fly!
 
The canning and whole grains books were more traditional arrangements, which just meant that after they were done I felt more like an “author” than a “writer.” I wish I could say that writing has gotten much easier for me, but each book has been hard in its own way. The first two because the schedule was crazy and I had to make so many slow cookers’ worth of food in a short period of time in a very small apartment. The canning book because I was essentially canning something nearly every day for almost a year. The whole grains book because I felt like I was learning about whole grains as I worked: a lot of those grains were new to me, and the experimentation phase was pretty intense. The book I’m working on now, a vegetarian cookbook, has been challenging simply because of the sheer scale of the project: How do I narrow my focus? 
 
To answer your question in a more fine-grained way, from book to book I have gotten better about methodology: my system for developing and testing recipes, and keeping track of what I’m doing and what I’ve done, has become more refined, so not as much energy is wasted on procedural issues. I don’t repeat my mistakes because I’ve misplaced a page of notes or forgotten how long I cooked something. And some idiosyncrasies I’ve just learned to deal with: I thought for this current book I’d try to write the headnotes for the recipes as I was writing the recipes themselves, so I wouldn’t be scrambling to write them at the end, but I’m realizing that this just doesn’t seem to work for me.
 
Writing clear recipes and writing fun and helpful headnotes are two different skills. One is the kind of thing I’d prefer to write standing up at the kitchen counter with my notes and timers around me, or at the very least at a desk; the other needs to be written cozied up in a soft chair with a glass of wine or cup of tea nearby, late at night with a deadline looming. So I guess I’ll be writing a couple hundred headnotes right before the manuscript is due, and I’ve come to accept that the book will probably be better and more interesting for it even if my hair is a few shades grayer at the end of the day.
 
ME:  Any tips for those out there who aspire to write their own cookbook?
 
LIANA:  People who know about publishing say that in a glutted cookbook market you need a platform, a built-in audience, a blog with a ton of traffic. And that’s probably true if what you want to write is not within a small, specialized niche. But I think that if you can find a niche and fill it very well—like Sandor Katz has done with his fermentation bibles, or Isa Chandra Moskowitz with her vegan cookbooks written in a certain clever style, or Samuel Thayer with his foraging books—you can be very successful. You just have to convince a publisher that people want to read a book about that topic even though there aren’t already a lot of books in the market segment yet.
 
Publishers tend to be pretty conservative, and want to go with what they know will sell, especially with cookbooks, which are very expensive to produce, but I would like to believe that when presented with solid market research they’ll take a chance on something different. I wrote a canning book because there weren’t very many out there yet; there wasn’t even a canning section on the bookstore shelves, and I didn’t know where bookstores would even place it, but I knew there was this latent desire for more canning books out there and was lucky to find an editor and publisher who were eager to take the plunge.
 
Think about what’s missing from your bookstore shelves. What do you want to read? That may be what you should write! I’d also suggest you read, read, read. Blogs are great, but read actual published cookbooks, too, so you know how to write a recipe clearly and make your language consistent. This is the editor in me talking, of course: Clarity! Consistency! But I’m convinced that if your mechanics are sound, your personal voice comes through more effectively and the whole pitch becomes more persuasive.
*********************************************************************
 
Such great answers to my questions.
 
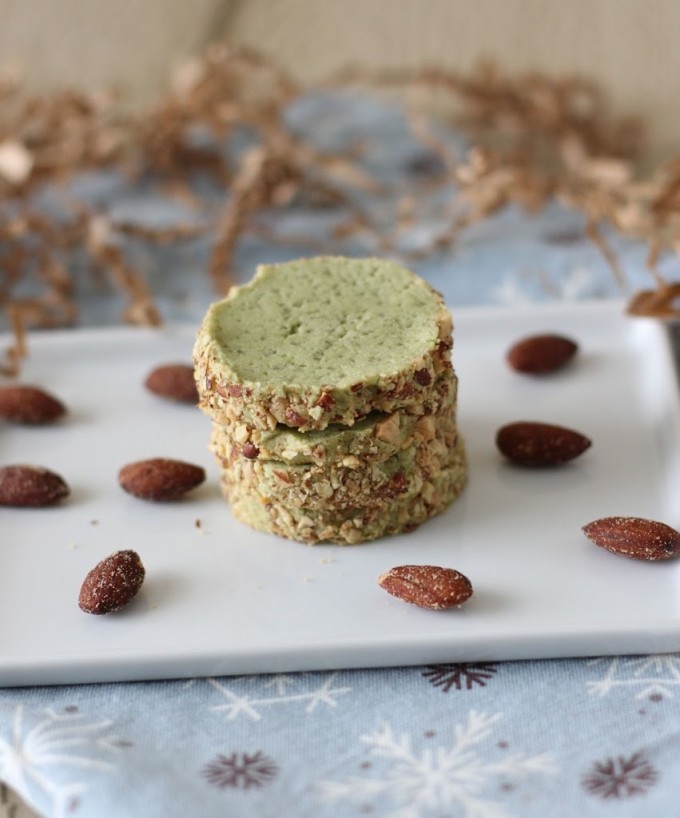
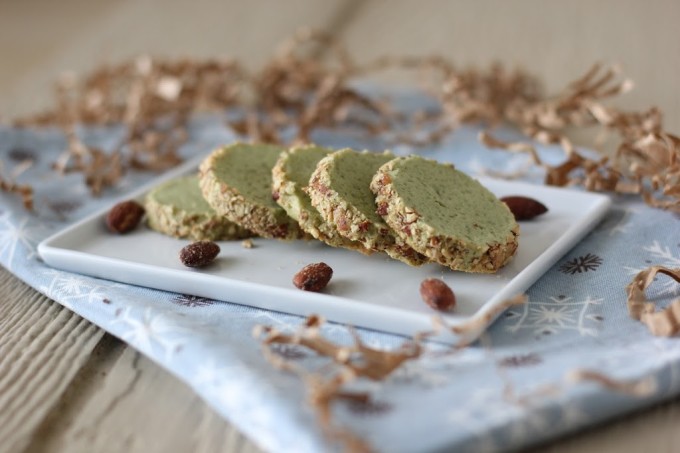
I’ve tried for a while to come up with a good krispie treat-like recreation using puffed kamut and rice without much luck. I was thrilled when I saw the Chewy Chocolate-Tahini Puffed-Grain Squares in this book, and I knew right away it was what I wanted to make.
 
Chewy Chocolate-Tahini Puffed-Grain Squares | Fake Food Free | A whole grain chocolate snack!
 
These are so quick and tasty. I kept mine stored in the fridge and cut them with a serrated knife after they got firm. I love these as a fast breakfast on a busy morning or as a post-run snack. 

Chewy Chocolate-Tahini Puffed-Grain Squares 

Reprinted with permission from Abrams Books. 
Makes 16 | vegetarian 
 
From the book: 
 
These chewy, dense squares were inspired by a recipe in Terry Walters’s brilliant book Clean Food. There’s very little in here that isn’t good for you, and yet my daughter—who is certainly no stranger to real sweets—absolutely loves them. Parents in particular should appreciate the value of a treat-snack you don’t really have to think twice about allowing.
 
These keep nicely for up to two weeks in the refrigerator. If you want to keep it gluten free, use puffed brown rice or millet or a combination of the two. You might also consider substituting sunflower seeds for the almonds (allergenic to many kids) if you plan to pack one of these into a kid’s school lunchbox or send them to school as a treat for the class.
 
Ingredients
 
 1 cup (110 g) whole almonds
 4 cups (60 g) unsweetened puffed Kamut, brown rice, spelt, or millet, or a combination
2 tablespoons shredded unsweetened coconut (optional)
1 tablespoon flax seeds, coarsely ground
3 tablespoons olive or vegetable oil
1/2 cup (120 ml) honey or maple syrup
2 ounces (55 g) bittersweet chocolate, chopped
2 tablespoons tahini
Pinch of salt
 
Prep
 
In a food processor or blender, pulse the almonds until finely ground. Dump into a large bowl and add the puffed grains, coconut, if using, and flax seeds.
 
In a small heavy saucepan, combine the oil, honey, chocolate, tahini, and salt. Cook over medium heat just until the chocolate is melted and the mixture is semi-uniform. Pour over the mixture in the bowl and stir with a rubber spatula until well coated. Dump the mixture into a 9-inch (23-cm) square baking pan or dish and press firmly with your palms or the spatula to an even layer. Use a bench knife or metal spatula to cut into 16 squares, then cover and put in the refrigerator until firm, about 15 minutes. Transfer to an airtight container and store in the refrigerator for up to 2 weeks.
 
 
Chewy Chocolate-Tahini Puffed-Grain Squares | Fake Food Free | A whole grain chocolate snack!

Disclosure:  This cookbook was sent to me free of charge for review purposes. I was not required to post about it and received no compensation for doing so. As always, thoughts and opinions are my own.


Thanks for reading! All images and content are the property of Fake Food Free unless otherwise stated. Please do not republish full recipes and images without written permission. What is okay? Feel free to Pin images, share links to my posts or share the photo in a round up post with the title of this recipe and a link back to the post. Confused about copyright and food blogs? Here is some helpful information on Recipe Attribution. If you want to use a photo or full recipe, just ask. I’m sure we can work something out.

Want to create beautiful food and product photos that you can't wait to share?!
Discover your style, control the light, and shoot using the tool you know how to use (yes, your phone included). Learn about free resources, Live Q&As with Lori, and online courses you can take from anywhere in the world!
We respect your privacy. Unsubscribe at any time.