Browsing Category

Book and Product Reviews

Salted Dark Chocolate Coconut Brownies

February 10, 2012
I love experimenting with coconut oil in my baking and it is especially delicious with brownies! This is a recipe I made a little while back using coconut oil sent to me by Kelapo.
 Salted Dark Chocolate Coconut Brownies | Fake Food Free | Rich chocolate brownies made with coconut oil.
 
 
You’ve heard me sing the praises of coconut oil before. I can be considered a diehard fan. In fact, just the other day I was thinking that it has been at least 2 years since I’ve had anything in our kitchen except olive oil, butter, and coconut oil for cooking. 
 
These are my big three – my real food ammunition for day to day cooking. 
 
Considering that virgin coconut oil makes up a third of the party, I was excited when Jen of Kelapo Coconut Oil asked if I’d like to give their product a try. Why yes, I would. One can never have too many options for good coconut oil, and I’ve learned that Kelapo is very good indeed. 
 
Kelapo’s coconut oil is extra virgin, cold-pressed, unrefined and fair trade organic. I also happen to be a sucker for elephants, one of which they have on their logo, but that is beside the point. 
 
 
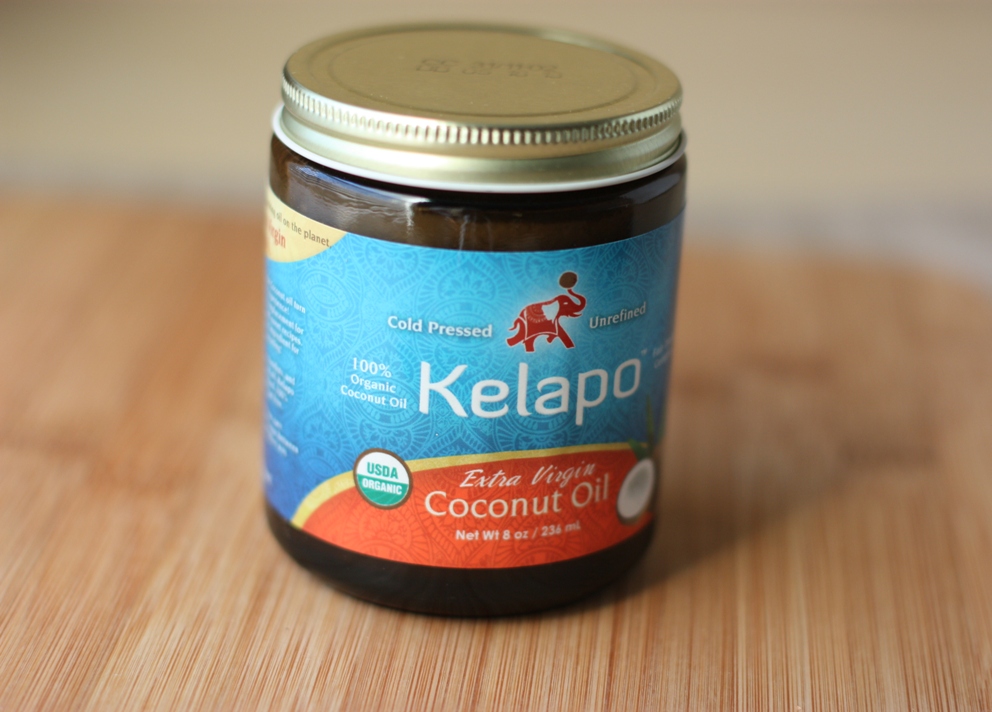
Kelapo had everything I would expect in a good coconut oil – a nice fresh flavor and a smooth consistency. From a health educators standpoint I really enjoyed the informational card that came with my jar because it explained simple ways you could start your day with the coconut oil. Most people don’t try healthy foods that are unfamiliar to them because they don’t know how to use them. 
 
Problem solved.
 
The tips included adding it to your oatmeal, or to your tea and coffee; or frying eggs in it and adding it to smoothies. I took a different route with the coconut oil and used it in my baking (as I’m sure you are familiar with if you read the blog regularly). 
 
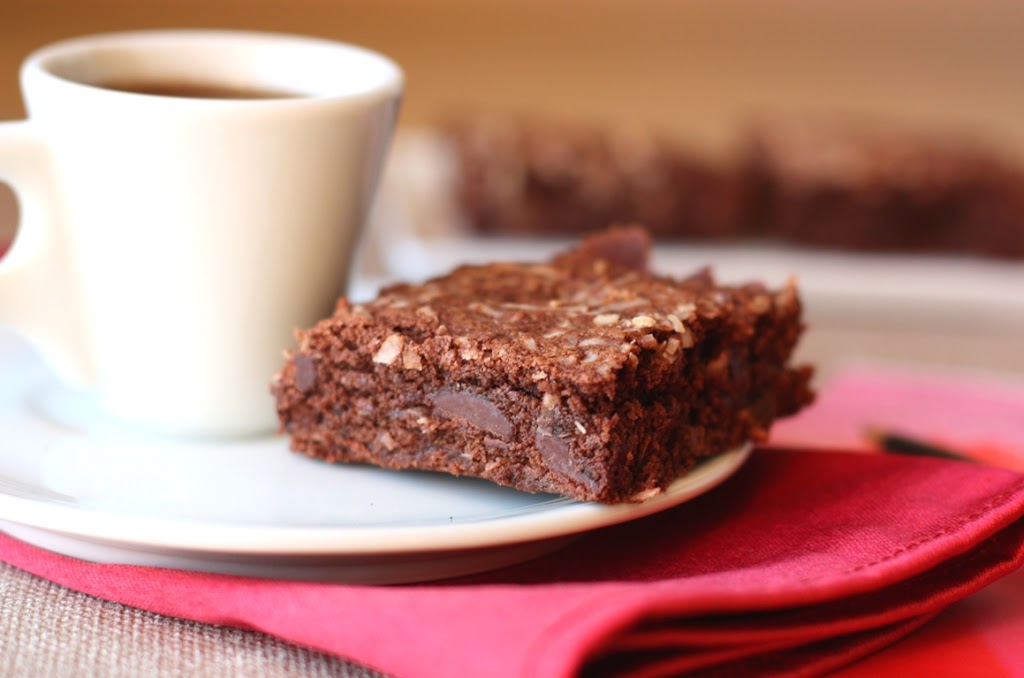
This time I went with brownies, and saying I went a different route isn’t to say I wouldn’t have these brownies for breakfast.
 
Salted Dark Chocolate Coconut Brownies
 
Makes: 9 brownies
 
Ingredients
½ cup whole wheat pastry flour
½ tsp baking powder
½ tsp Pink Himalayan sea salt (or sea salt of your choice)
¼ cup cocoa powder
½ cup extra virgin coconut oil
1 oz. unsweetened chocolate
2 eggs
1 cup raw sugar
1/3 cup dark chocolate chips
½ cup unsweetened, shredded coconut plus extra for topping
 
Prep
 
Preheat the oven to 350 degrees F and grease an 8 x 8 inch brownie pan with a little coconut oil.
 
In a bowl, whisk together the flour, baking powder, sea salt and cocoa powder. In a double boiler or in the microwave, melt  the unsweetened chocolate and the coconut oil together. Set aside to cool. 
 
In a medium mixing bowl combine the eggs and sugar. Continue to whisk until slightly frothy, about 1 minute. Ensure the coconut oil and chocolate are cool to touch and gently stir this into the eggs and sugar. Stir in the dry ingredients a little at time, just until all the ingredients are combined. 
 
Stir in the chocolate chips and the coconut. Pour the batter into the prepared pan, and sprinkle with extra coconut.  Bake 20 to 25 minutes or until the brownies are set in the center. Remove from the oven, place on a cooling rack. Slice and serve. 
 
 
Salted Dark Chocolate Coconut Brownies | Fake Food Free | Rich chocolate brownies made with coconut oil.


More coconut oil recipes:
 
Chocolate Chip Cookies
Strawberry Cinnamon Toast 
Coconut Lime Granola
Pumpkin Black Sesame Seed Muffins 

 Pin It

Disclosure:  Kelapo Coconut Oil was sent to me free of charge. I was not required to post about it and received no compensation for doing so. 

Thanks for reading! All images and content are the property of Fake Food Free unless otherwise stated. Please do not republish full recipes and images without written permission. What is okay? Feel free to Pin images, share links to my posts or share the photo in a round up post with the title of this recipe and a link back to the post. Confused about copyright and food blogs? Here is some helpful information on Recipe Attribution. If you want to use a photo or full recipe, just ask. I’m sure we can work something out.  


Green Tea Bubble Tea

December 29, 2011

My fascination with bubble tea began towards the end of my time as an undergraduate at Purdue. Tucked in the corner, among the shops on Chauncey Hill, a new shop opened. For a while we wondered what this little place was which other students – mostly Asian – were flocking to.

At this point in time, although I was up to my forehead in food and nutrition from an academic perspective, I have to admit I knew nothing of food culture. My husband – then fiancée – convinced me to give it a try and my knowledge of beverages hasn’t been the same since.

I loved the texture and consistency; the almond, coconut and fruit flavors. I loved everything down to the big straws and the chewy bubbles. Simply put, it’s unique; I can’t think of anything like it in the U.S. In fact, most people I know would be turned off by chewing their beverages.

Bubble tea has been difficult to find since then. We were exposed to many more bubble drinks when we traveled around Southeast Asia a few years ago, but I’ve been interested in making my own to compensate for the lack of access here.
So when I was flipping through the cookbook Cooking WithoutBorders by Anita Lo with Charlotte Druckman, the Green Tea Bubble Tea caught my eye. Not only was this my chance to make it, but this version just happens to be a cocktail. And what better time for a cocktail than while ringing in the New Year?


Regardless of whether or not you like bubble tea – or even cocktails – this cookbook deserves some exploring. The fusion Lo creates in her recipes is remarkable. Take, for example, the Barbecued Squid with Edamame and Boiled Peanuts, Chilled Grapefruit and Ginger Soup with Sweet Avocado Mousse or Turkey with Spicy Black Beans in Tofu Dumplings.

The cookbook includes all types of meats from pork to rabbit, but it is the seafood dishes that stand out to me. You’ll find several varieties of ceviche, soft shell crab and halibut. The cocktail section is small, but unexpected and original, from the Celery-Dill Martini to this bubble tea.

In the book, Lo describes the drink as an Asian White Russian. I couldn’t agree more, and White and Black Russians just happen to be some of my favorite cocktails. I searched for green tea powder here with no success. Therefore, I brewed strong green tea and made that into the green tea syrup.

This is a strong, but sweet drink ending with the chewy bubbles. If nothing else, the black bubbles in the bottom of your cocktail will serve as a conversation starter.

Happy New Year!

Green Tea Bubble Tea
From Cooking Without Borders by Anita Lo, reprinted with permission from Abrams Books

For the green-tea simple syrup:
1 cup sugar
¼ cup green-tea powder
Pinch of salt
1 cup boiling water

For each drink:
2 tablespoons black bubble-tea
bubbles, cooked, strained, and
rinsed according to package
instructions
Splash of amaretto
2 ounces vodka
1½ ounces green-tea simple syrup, or
to taste
2 ounces milk
Make the green-tea simple syrup: Whisk the sugar with the green-tea
powder and salt until no clumps remain. Slowly add the boiling water,
whisking constantly until dissolved. Strain if necessary to remove clumps.
Let cool.

Make the drink: Combine the cooked “bubbles” with the amaretto in a
rocks glass and fill with ice. Put the vodka, green-tea simple syrup, and
milk in a cocktail shaker with ice. Shake and strain into the rocks glass.
Serve with a wide straw.


Pin It

Jerk-style Country Ham and Pineapple Tamales

December 6, 2011

This is the fourth in my series of Cookbooks for Christmas. Be sure to check out The Fundamental Techniques of Classic Bread Baking, The Vegetarian Option and How to Cook Indian.

Before I moved to Kentucky, country ham was nothing more than the step-child of meat options on the Cracker Barrel breakfast menu. I had no idea why someone would select ham over bacon or sausage despite the fact that they all came from the same animal.
Then I moved to Kentucky. Suddenly country ham is everywhere. There are country ham biscuits as party appetizers and skillet-fried country ham for breakfast. It is a regular offering in the meat case at my local butcher, and my most recent job exposed me to a youth agriculture program where the kids made their own country hams to auction off at the local stock sale.
See, I told you. It’s everywhere.
My first encounter with country ham had me gasping for a drink of water. Salty. Very salty. Things haven’t changed much since that first impression, but I have found that I like country ham in things. Meaning, those things it is in helps balance the salty flavor.
A few weeks ago I got a copy of the cookbook Ham: An Obsessionwith the Hindquarter by Bruce Weinstein and Mark Scarbrough. I never knew there was so much one could do with ham. The book contains 100 unique recipes from the around the world.

Guess what is featured from my part of the world. Yep, country ham.
As I flipped through I saw recipes for Collards and Country Ham, Country Ham Butternut Squash and Chile Stew, and Country Carbonara. That doesn’t include all the things that don’t use country ham such as Steamed Ham Buns and Roasted Fresh Ham with Apple Wheatberry Salad.
If you’ve read a cookbook by Weinstein and Scarbrough before you know it’s as much about the text as it is about the recipes and photography. It is part comical novel, part recipe book. I was immediately sucked into the story about the taking of their pig from farm to market.  

So back to this country ham.

One thing that I wasn’t expecting (nor would most Kentuckians), was to see country ham Caribbean-style with a side of Mexican cuisine thrown in. The second I turned to page 151 I knew what I was making.

Jerk-style Country Ham and Pineapple Tamales.
Sounds pretty amazing, right? Not only was I excited about these flavors, but this was my very first time making tamales. As with post things I put off, I was left thinking – why in the world did I wait so long?
These tamales are simple to make. The construction takes a little time, but not so much that it’s overwhelming.
Now, let’s talk about these flavors. The spices, pineapple and rum are just what the country ham needs. The tamales are sweet with just a touch of saltiness. With all of the spices, the flavor explodes in your mouth with each bite. This recipe is such a creative representation of Kentucky meets Caribbean!

Jerk-style Country Ham and Pineapple Tamales
Reprinted with permission from Abrams Books

Makes 20 Tamales

Call this Bruce’s culinary free-for-all: a Caribbean filling made with American country ham and served as a Tex-Mex delicacy in corn husks. There’s not much more I can say, except they freeze well. Make them in advance, then wrap them individually in plastic and freeze for up to 3 months; thaw on the counter for 30 minutes before steaming as directed.

20 large, dry corn husks for tamales
6 ounces dried pineapple
10 ounces cooked country ham, rind removed and discarded, the meat cut into little cubes (a little less than 2⁄3 cup)
3 medium scallions, cut into 2-inch pieces
1/4 cup dark rum such as Myers’s
2 tablespoons minced peeled fresh ginger
2 tablespoons packed dark brown sugar
2 tablespoons red wine vinegar
2 teaspoons ground cumin
1 teaspoon ground coriander
1 teaspoon dried oregano
1 teaspoon dried thyme
1/2 teaspoon ground allspice
1/2 teaspoon ground cloves
1/2 teaspoon grated nutmeg
1/2 teaspoon cayenne
1/4 teaspoon garlic powder
4 cups instant masa harina
3 cups very hot water
2⁄3 cup peanut oil
1 teaspoon onion powder
1. Put the corn husks in a large bowl and cover with boiling water. Set them aside to soak until soft, about 30 minutes. If they all won’t stay submerged, place a little plate over them in the bowl to force them down into the hot water.
2. Meanwhile, put the dried pineapple in a medium bowl and cover with boiling water. Soak for 10 minutes, then drain in a colander set in the sink. Chop the pineapple into tiny bits.
3. Transfer those pineapple chunks to a food processor fitted with the chopping blade. Add the ham, scallions, rum, ginger, brown sugar, vinegar, 1 teaspoon cumin, the coriander, oregano, thyme, allspice, cloves, nutmeg, cayenne, and garlic powder. Pulse until well chopped and thoroughly blended but not pureed. This is the filling for the tamales, so you want some tooth in the thing—in other words, no baby food.
4. Mix the masa, hot water, oil, onion powder, and remaining 1 teaspoon ground cumin in a large bowl to make a wet dough.
5. Take a corn husk out of the hot water and spread it on your work surface so that its natural curl faces you. Spread a generous 1/4 cup of the masa dough into the corn husk, smoothing it out but also keeping it near the thicker bottom of the husk, like a little bed of dough for the filling. Spread the dough out to the sides a bit so that when you roll the husk closed the long way, that dough will encircle and even cover the filling.
6. Place about 11/2 tablespoons of the ham mixture in the center of the dough in the corn husk.
7. Fold the sides of the husk up and over the filling, thereby also bringing the masa dough up and around the filling inside. Make sure the sides overlap and fully close, holding the filling tightly inside. Fold the wider bottom up over the husk and do the same with the narrower top. Tie these in place with butchers’ twine so the tamale will stay closed.
8. Repeat steps 5 through 7 with the remaining husks.
9. Set up some kind of steaming contraption: either a large vegetable steamer in a large saucepan with about an inch of so of water in the bottom, or a couple of bamboo steamers placed over a wok with a similar amount of water in it. Bring the water to a boil over high heat.
10. Stand the tamales up in the vegetable steamer or lay them in the bamboo steamers. Cover, reduce the heat, and steam for 40 minutes, checking the water occasionally and adding more if necessary. In no event should the water rise and come in contact with the tamales. You want the water gently simmering in the pan or wok but not boiling vigorously. Once steamed, set the tamales aside for 5 minutes before serving, just so no one gets a steam burn from the incredibly hot filling inside. And don’t be a Gerald Ford. In the 1976 presidential race, he tried to eat a tamale still in the husk while campaigning in Texas. He lost the state. Unwrap the husk and fork out the tender filling inside.

Cookbooks for Christmas: Tandoori Chicken from How to Cook Indian

November 25, 2011

This is the third in my series of Cookbooks for Christmas with the purpose of sharing a few gift ideas for the foodie in your life. Be sure to check out the review and recipe from my other posts The Fundamental Techniques of Classic Bread Baking and The Vegetarian Option.


After a week of eating traditional US favorites at every meal, it doesn’t take long for me to start craving something a little more culturally diverse in flavor. With this in mind last year, I set a goal for myself at the beginning of 2011 to cook more ethnic foods, specifically Thai and Indian. I’m sad to say I’ve failed miserably. 
I’ve done some recreation and my own versions of Asian and Indian-inspired foods, but my real goal was to cook authentically. Maybe I bit off more than I could chew, but with only a few weeks left in the year, I’m not ready to give up just yet. 
So with a craving to put something different on my plate, I turned to my new cookbook – How to Cook Indian by Sanjeev Kapoor. This monster of a cooking resource has been my reading material of choice for the past few weeks. Like a mystery novel I can’t seem to stop turning the page to see what happens next – to the curry, the coconut milk, the ground lamb and the chicken. 
I find this cookbook ideal for anyone ready to add a little diversity to their kitchen whether beginner or advanced. There are over 500 recipes. Yes, 500. Everything from what I consider standard Indian foods (which simply means they can be found on the buffet at my favorite Indian place here in town) to things I have never heard of before. It’s been an adventure in culinary discovery for me. 
No food photography in this one, but those spaces are filled with even more recipes and instructions that are straight forward and easy to understand. The book begins with base spice mix recipes for things such as Chai Masala and moves on to everything from vegetarian dishes, to lamb, to chicken, to fish. 
For each recipe name the original is given followed by a description for those of us not well versed in cuisines or languages of India. There is Pyaaz Ki Tarkari (Onions with tamarind), Kolhapuri Sukka Lamb (Spicy coconut lamb) and Maa Chole Di Dal (North Indian Lentils) to name just a few. 
This weekend my husband brought home some fresh chickens so we decided to go with what I consider rather classic – Tandoori Chicken. I say we because while he doesn’t make an appearance on the food blog often, he helped with this dish as much as I did. 
This was my first time making Tandoori Chicken at home and I have to admit, it was pretty darn easy. As long as you take into consideration marinating times with your preparation I have a feeling you will think so too. This recipe calls for either Kashmiri red chili powder or paprika powder which is what gives the chicken that identifiable red color. Mine didn’t turn out as red as varieties I’ve had before, but I think that is because I did use paprika instead of the chili powder.
The flavor of the chicken is outstanding. With all the spices and marinating flavor is fully infused into the meat. Delicious. And with 499+ recipes to go, there is a lot more where that came from!
Tandoori Chicken
Chicken marinated in spicy yogurt and baked
 Reprinted with permission from Abrams Books
This darling of the Indian palate, traditionally cooked in a clay oven called a tandoor, is one of my per­sonal favorites. Leaving the bone in ensures that the final dish will be succulent and juicy.
Serves 4.
1 (1¾-pound/800-gram) whole bone-in chicken
1 teaspoon Kashmiri red chile powder or paprika powder
1 tablespoon freshly squeezed lemon juice
1 teaspoon table salt
For the marinade:
1 cup (250 grams) plain yogurt, drained until thick
2 tablespoons fresh ginger paste
2 tablespoons fresh garlic paste
1 teaspoon Kashmiri chile powder or paprika powder
½ teaspoon table salt
2 tablespoons freshly squeezed lemon juice
½ teaspoon garam masala
2 tablespoons filtered mustard oil
To cook and serve:
2 medium red onions
Melted butter
½ teaspoon chaat masala
2 lemons, cut into wedges
1. Cut the chicken into 4 pieces: 2 leg quarters and 2 breast halves. Make incisions in the flesh with a sharp knife. Put the chicken in a deep bowl. 
2. In a small bowl, stir together the chile powder, lemon juice, and salt, and rub it onto the chicken pieces. Cover the bowl with plastic wrap and put in the refrigerator for 30 minutes to marinate. 
3. Make the marinade: Put the yogurt in a bowl, add the ginger paste, garlic paste, chile powder, salt, lemon juice, garam masala, and mustard oil, and stir. 
4. Add the marinade to the chicken pieces and toss so that all the pieces are well covered with it. Cover the bowl again and put it in the refrigerator for 3 to 4 hours to marinate. 
5. Cut the onions into round slices and then separate the rings. Put in a bowl of iced water and soak for 30 minutes. Drain well and set aside in the refrigerator until needed. This will keep the onions crisp. 
6. Preheat the oven to 400°F/200°C. Put the chicken pieces onto metal or presoaked wooden skewers, arrange in a single layer on a rimmed baking sheet, and cook for 10 to 12 minutes or until almost cooked through. Baste with butter and cook for 8 minutes more. 
7. Sprinkle with chaat masala and serve hot with the onion rings and lemon wedges. 
Disclosure: A review copy of this cookbook was sent to me free of charge. I was not required to post about it and received no compensation for doing so. 

Smoky Chili Non Carne from The Kentucky Fresh Cookbook

November 17, 2011

This morning, still groggy, I opened the door to let the dogs out.

Whoa! When did winter get here?

After several weeks of warm autumn temperatures, I do believe we are finally headed into the next season. I don’t mind it at all, but it’s going to take me a while to adapt. Maybe this will help.

If it wasn’t time for chili before, well it certainly is now! And not just any chili, but Smoky Chili Non Carne.

I had the opportunity to review The Kentucky Fresh Cookbook by Maggie Green and loved every minute of it. Maggie’s book is a wonderful, seasonal cooking resource divided by month. The chili can be found in November along with other warming, comforting foods perfect for the season.

You can head over to Cooks & Books & Recipes to read more about it and get the recipe.

The Vegetarian Option: Cookbooks for Christmas

November 10, 2011

This is the second in my series of Cookbooks for Christmas with the purpose of sharing a few gift ideas for the foodie in your life. Be sure to check out the review and recipe for my first post The Fundamental Techniques of Classic Bread Baking.

I’d estimate that about 75% of our meals each week are vegetarian which means I often find myself in a rut. Just the other night I was standing in the kitchen idea-less with a few winter vegetables in front of me and a couple options for grains to bulk them up.

Then just as I thought I would be swallowed in a boring, repetitive sea of vegetable stir-fry and rice, along comes this cookbook – The Vegetarian Option by Simon Hopkins accompanied by gorgeous photography by Jason Lowe.

This cookbook is perfect for the person who almost has the basics mastered and is ready to incorporate some more challenging and internationally-inspired combinations. The chapters are divided by vegetables such as Cauliflower & Broccoli, Cabbage & Chard, Spinach & Sorrel and Beets & Turnips.

The reader is greeted in each chapter with a bit about how to handle the vegetable in the kitchen and then turns the page to be awed by the final results. Most of recipes are filling enough for main courses or they can be used as side dishes. Fair warning if using them as a side dish, though. They might steal the show all together.

Just to give you a few examples of what you’ll find between the covers, for the adventurous there is New-crop Garlic Saffron & Tomato Quiche, Asian Fried Turnip Paste or Spinach Mousse with Parmesan Cream. If you are looking for some basics you will also find it full of simple, yet creative salads, stock recipes and condiments.

Personally, my eyes lit up when I saw the recipe for Asian Scallion, Radish & Cucumber Salad with Cashews & Vermicelli . You will rarely hear me use the word dazzled, but my goodness, I was dazzled by this recipe.

As I mixed together the ingredients for the nutty, spicy dressing and poured it over my bowl of mixed vegetables I wondered how it was going to come together. One bite and I was sold – crunchy, nutty, refreshing with just a touch of spiciness from the radishes and ginger.

Just a note before you get started. The ginger syrup used in the dressing needs to be made the night before. Also, I found that while it won’t have the same full flavor, if you are short on time and ingredients tahini can work as a substitute for the homemade sesame paste.

Asian Scallion, Radish & Cucumber Salad with Cashews & Vermicelli

Serves 4
Before you start, you will need on hand both ginger syrup and sesame paste. Also, feel free to add more of one ingredient or another, and to adjust the sweet-sharp balance of the dressing.

1/4 pound dried thread vermicelli (or glass noodles)
2 heaping tablespoons unsalted cashew nuts
salt
a little sunflower oil
6 radishes, trimmed
6 scallions, trimmed
1 cucumber, 7 inches long
generous handful each of cilantro and mint leaves
1 or 2 large red chilis, sliced

for the dressing

1 tablespoon ginger syrup (see below)
1 tablespoon sesame paste (see below)
juice of 2 limes
1 tablespoon Asian fish sauce or light soy sauce
1 tablespoon sesame oil

to garnish

2 teaspoons toasted sesame seeds

Snap the vermicelli into shorter lengths, one-third of the original, folded skein.

Soak in cold water for about 30 minutes, or until well softened. Drain and return to the bowl. Now cover with boiling water, and fork and lift the noodles around for a few minutes until they have become silky, soft, and tender (eat one). Drain, rinse in cold water, and set aside.

In a small skillet, gently toast the cashews with a little salt in a little oil until golden all over. Cool, and then crush each cashew lightly with the back of a knife. Reserve.

Cut the radishes into quarters or rounds, the scallions into diagonal shreds, and the cucumber into thick matchsticks. Tip the prepared vegetables into a large bowl and add the vermicelli. Tear the cilantro and mint leaves into smaller pieces and add to the salad with the chili. Mix together with your hands to distribute everything evenly.

Now whisk the dressing ingredients together in a small bowl. Add to the salad and mix together once more with two forks, lifting and dropping the salad so that all is evenly dressed. Pile onto a shallow serving dish and sprinkle the crushed cashews and sesame seeds over. Best eaten pleasantly chilled, with warm sake or ice-cold beer.

Ginger Syrup

2 cups (scant) granulated sugar
11/2 cups water
finely pared zest of 1 lemon (use a potato peeler)
11/2 cups peeled and coarsely grated fresh ginger

Dissolve the sugar in the water in a pan over medium heat, then bring to a boil and cook for 2 minutes. Immediately add the lemon zest and ginger and stir together. Bring back to a boil for a few seconds and then pour into a bowl. Cover and leave to infuse overnight.

The following day, add 2 tablespoons water and warm through until liquid and pourable. Strain through a sieve and press on the solids with the back of a ladle to extract all the ginger and lemon flavors. Pour the syrup into a screw-top jar and store in the refrigerator until needed, where it will keep for several weeks.

Sesame Paste

Makes about 1 ¾ cups
You need a powerful, small food processor to make this paste. For the best flavor, I feel it is important to use Asian brands of chili and sesame oils.

2/3 cup sesame seeds
3 tablespoons finely grated ginger (juice saved!)
1 large garlic clove, peeled
2 tablespoons light soy sauce
4 tablespoons mirin (Japanese cooking wine)
1 to 2 tablespoons chili oil
1/3 to 1/2 cup sesame oil, plus a little extra to serve
2 tablespoons lemon juice
1/2 cup warm water
1 to 2 tablespoons sugar, to taste

Lightly toast the sesame seeds in a dry pan over medium heat until fragrant, and
cool slightly. Tip into a small food processor and add all the other ingredients.

Grind and pulse until you have a paste that is fully emulsified and super-smooth.

Disclosure & Credit: This cookbook was sent to me free of charge. I was not required to write about it and received no compensation for doing so. All recipe reprinted with permission from Abrams Books.

**************************************************************************************

Today is the last day to sign up for the 2nd Annual International Blogger Cookie Exchange! Come join us!

2nd Annual International Holiday Cookie Exchange

November 3, 2011

The International Blogger Holiday Cookie Exchange is back for 2011!

Last year Adrienne of Gastroanthropology and I created this event as a way to have a cookie exchange across international borders. Since it’s not always feasible to ship cookies, we trade recipes instead.

Adrienne has a lot going on this year that has taken her away from food blogging for a bit (including a new baby – congratulations!), so one of my favorite blogging buddies has stepped up to partner with us this year, Andrea of Food Embrace!

Without further delay, here’s how it works:

As a part of this recipe exchange you’ll be doing three things – sending a recipe to another blogger, making the recipe another blogger has sent to you, then posting about the recipe you made.
The recipe should be something you’d find on a holiday cookie plate, so anything from rugelach to alfajores to fudge squares to gingerbread men qualifies!

To participate email me at Lori (at) fakefoodfree (dot) com or Andrea (at) foodembrace (dot) com (or leave a comment with your email address below).

So here are the important dates:

Let us know you want to participate by next Thursday, November 10th.
(We will email you soon after with whom you should send your recipe to and who you will be receiving one from.)
Send your recipe to the blogger randomly selected for you by Sunday, November 20th.

Make, photograph and post about the recipe you received from a fellow blogger by Sunday, December 11th.

The round up will be featured here at Fake Food Free and Food Embrace the week of December 12th.

We hope you will join us!

Cookbooks for Christmas: The Fundamental Techniques of Classic Bread Baking

November 1, 2011

If you aren’t quite ready for the holiday season, don’t stop reading. I’m not either. I do, however, have several great cookbooks to review for you that just might get you thinking about gifts for your foodie friends even if that foodie friend is yourself. So I’m beginning a series that will extend through December – Cookbooks for Christmas. If holiday celebrations aren’t a tradition in your house, these books can certainly work for any occasion. As I keep telling my husband, it’s impossible to have too many cookbooks!

When I learned that The Fundamental Techniques of Classic Bread Baking from The French Culinary Institute was available I jumped at the chance to get a copy. Why? Because I need it. Not want it, but desperately NEED it.

Bread and I go way back, but as I’ve mentioned before I can never seem to master exquisite skill at home.

I worked in a bakery for several years. In addition, to customer service and sales, I was the go-to nutrition and ingredient person. Every time a question was asked such as, “How many calories, carbs or protein are in this type?” or “What are the grains in this one?” It would be followed by my coworkers turning to me and saying, “Lori?”

I could rattle off grams and kilocalories followed by an extensive list of grains. Not sure why this type of information sticks with me, but it has a lot to do with why I studied nutrition. Everyone has their thing, and for me, food and nutrition just clicks.

When it came to the actual bread, I was on the oven side of things. Someone else prepared the sponge and dough, while I worked on the kneading team and eventually became a baker.

So…I can definitely shape your loaf and tell you when your bread is done baking.

What I struggle with is measuring your ingredients and making your bread rise correctly.

See, I needed this book.

I haven’t been exposed too much in the way of professional culinary training, speaking specifically about the training provided in this cookbook. This book is science – the flour, the yeast, the sugar. The role of all ingredients required for baking the perfect loaf of bread are explained.

The truth is it might overwhelm someone new to baking. That being said, it also contains essential information that someone new to (or familiar with) baking needs to know. So, I say, take a chance and help educate.

In addition to the abundant information about baking terminology, tools, shapes, cuts and techniques are the recipes. Sigh. The recipes.

French, German and Italian recipes. The real deal with gorgeous photos to accompany many.

Some I was familiar with such as Challah, Rye, Stollen and Panettone . Others were new discoveries like La Mouna, Pane Siciliano Semolina and Landbrot mit Sauerkraut. The last section even covers some gluten-free varieties.

I decided to select one that was fairly straight forward and simple to start with – Pain de Mie Complet.

The process itself could not have been easier. It can be made in a weekend afternoon with little else than letting it rise the appropriate amount of time.

And back to that rising thing.

The result? I really like the flavor of this bread. We’ve been using it for grilled sandwiches and toast this week. I’ll be making it again, along with several other recipes from this book.

However, my result was far from perfect. I needed a bit more puff to my loaf, but otherwise we ended up with a delicious bread. And of course, now I have an excuse to make it again.

Pain de Mie Complet

Reprinted with permission from Abrams Books

Makes 2 loaves
Estimated time to complete: 5½ hours
Improved mix
Desired dough temperature (DDT): 75°F (25°C)

Ingredients

Bread flour    276 grams / 9¾ ounces (Baker’s Percentage 50%)
Fine whole wheat flour    276 grams / 9¾ ounces (50%)
Water    359 grams / 122⁄3 ounces (65%)
Powdered milk    22 grams / ¾ ounce (4.06%)
Unsalted butter    28 grams / 1 ounce (5%)
Cool heavy cream    17 grams / 2⁄3 ounce (3%)
Salt    14 grams / ½ ounce (2.5%)
Fresh yeast    8 grams / 1⁄8 ounce (1.56%)

Total    1000 grams / 2 pounds 31⁄3 ounces (181.12%)
Oil for greasing bowl
Flour for dusting
Butter for greasing pans
1 large egg for egg wash

Equipment

Scale
Digital thermometer
Standing electric mixer fitted with the hook
Large bowl or container
Bowl scraper
Plastic film
Two 9-inch loaf pans
Small bowl
Whisk
Pastry brush
Wire racks

Prepare the mise en place, taking care that the cream is about 60°F (15°C).

Combine the bread and fine whole wheat flours with the water, powdered milk, butter, heavy cream, salt, and yeast in the bowl of a standing electric mixer fitted with the hook. Mix on low speed for about 4 minutes, or until blended. Increase the mixer speed to medium and mix for about 8 minutes, or until the dough is smooth and almost shiny. Check the gluten development by pulling a window. Lightly oil a large bowl or container.

Scrape the dough into the prepared bowl. Cover the bowl with plastic film and set aside to ferment for 1 hour.

Lightly flour a clean, flat work surface.

Uncover the dough and divide it into two 500-gram / 18-ounce rounds on the floured surface. Cover with plastic film and bench rest for 15 minutes.

Lightly butter two 9-inch loaf pans.

Uncover the dough and, if necessary, lightly flour the work surface. Gently press on the dough to degas and carefully shape each round into a bâtard. Place each bâtard into a prepared loaf pan, seam side down. Cover with plastic film and proof for 90 minutes.

About an hour before you are ready to bake the loaves, preheat the oven to 350°F (177°C).

To make the egg wash, combine the egg with 14 grams / 1 tablespoon water in a small bowl, whisking to blend.
Uncover the dough and, using a pastry brush, lightly coat the top of each loaf with the egg wash.

Transfer the loaves to the preheated oven. Bake for 35 minutes, or until the crust is golden brown and shiny and the sides are firm to the touch.

Remove from the oven. Then, turn the loaves from the pans and transfer to wire racks to cool.

Disclosure: A review copy of this cookbook was sent to me free of charge. I was not required to post about it and received no compensation for doing so.

Woven Shrimp for Number 33

October 20, 2011

I turned 33 last week. And I emphasize the word week because the celebrations lasted roughly 7 days. Around here we believe that celebrating just one day simply isn’t enough.

In honor of the big day, there was one specific meal I wanted. Nothing else would do.

That meal was Woven Shrimp from Azur Restaurant and Patio in Lexington, KY.

If you find yourself in Lexington you should find yourself a seat at Azur, but don’t look for it downtown. Azur is actually located in a strip mall on the southwest side of the city. But don’t let the description of the location fool you. This modern establishment which serves lots of local products such as Kentucky beef and Kentucky seafood from our up and coming aquaculture farms, also boasts an inviting patio area.

So back to that Woven Shrimp. Actually let’s go back to the first course because those were equally exciting.

We opted for a Saturday lunch and settled in on the patio with jackets and the space heaters going (it was just too beautiful not to sit outside) and ordered a Kentucky Ale.

Next up for me, well, us, were Truffle Fries. These are one of life’s simple pleasures. No French Frie tastes the same after you’ve had one graced by the presence of truffle oil.

My husband ordered his favorite, Lobster Crepes. Crepes with a creamy lobster-based filling set on top of guava sauce and garnished with microgreens. Sweet, salty, rich – this is the crepe of all crepes.

We enjoyed our starters to their fullest extent and some a bit longer. We had to keep fries on the table and nibbled throughout our meal. You don’t just give Truffle Fries back to the waitress. You finish them even if you are full. I mean, it’s truffle oil!

Now on to the main course which for my husband was actually a starter. He was sold on the Fried Calamari which came topped with sautéed peppers, onions and Napa cabbage. This was a bowl of perfection. The calamari was light and tender. It almost melted in your mouth.

Now for this woven shrimp. To get you thinking in the right direction, consider coconut shrimp with three times the flavor and ten times the creativity.

Woven shrimp is jumbo shrimp covered with shredded filo and fried until crispy. Good, but it gets even better. It is set on top of risotto. Creamy coconut risotto with edamame and corn. Then it’s topped with a chili sauce.

It’s brilliant, classic and a bit breathtaking all at the same time. Hands down my favorite dish at a restaurant.

So remember, Azur, Lexington, Woven Shrimp.

Birthdays aren’t complete without dessert. My mom is a fabulous cake decorator and has owned a shop for years, so growing up I was never without a beautiful birthday cake. Now that I’m all grown up, I usually still get one, but it’s when we are able to get together near my birthday, not always on it.

So I usually have a substitute the day of and this year my husband went to Twisted Sifter, a nearby bakery whom I also mentioned in my post about Danville, Kentucky. On a side note, I might have mentioned rather strongly that I wanted a cake from there.

Inside this beautiful cake was the seasonal flavor, pumpkin pecan with a cream cheese filling covered in buttercream frosting. We kept saying we would freeze part of it, but then we made an excuse everyday as to why we needed another piece. Needless to say, we’ll just have to order another when we get a craving because none made it past my birthday week!

Thirty-two was a big year for me. We got a new pug, I published my first book, I ran my 2nd half marathon and we visited a few new places. All of that has me more than ready to face 33 and excited to find out what’s in store!

Native American Cooking Hidatsa Stuffed Sugar Pumpkin

September 18, 2011
Hidatsa Stuffed Sugar Pumpkin Recipe | Fake Food Free

Other than a fondness for fry bread, I must admit that I know little to nothing about Native American cuisine or cooking styles.

However, autumn is the time of year when what little I do know about this cuisine does come to mind. In autumn we tend to think of those orange and brown tones to our foods and earthy flavors much of which encompasses the heart of Native American cooking.
A few days ago I was notified of the anniversary release of two cookbooks, one of which was Spirit of the Harvest: North American Indian Cooking by Beverly Cox and Martin JacobsThe book, a James Beard and IACP award winner, is overflowing with authentic Native American recipes from tribes throughout North America including the Cherokee, Navajo and Sioux.

Once I began reading, I knew my knowledge of this cuisine was about to change.

My favorite part of the book, aside from the wonderful recipes, is page 10. This page opens up into a map of the US. On this map are icons which represent foods traditionally used in different areas such as blue corn, buffalo, hazelnuts, deer, persimmons and sweet potatoes. While now it may be more evident in types of barbeque, the diversity of foods prepared across the US was as apparent then as it is today.

Similarly the recipes are separated into different regions and tribes throughout the book. Some of the recipes you’ll find include Iroquois Leaf Bread, Hopi Venison Stew, Honey-Ginger Baked Beets and Papago Cactus Salad.

Hidatsa Stuffed Sugar Pumpkin | Fall Recipes

 I wanted to go with something unique that I’d never tried before which, to be honest, wasn’t difficult. Almost every recipe in the book was new to me.

I settled on the impressive, yet surprisingly simple, Hidatsa Stuffed Sugar Pumpkin from the Great Plains region. Aside from scraping out a bit of pumpkin, nothing about this recipe is difficult, nor are the ingredients hard to come by. Yet, it is delicious and upon seeing it, no one will doubt your skills in the kitchen again.

The sage, the pumpkin, the hearty meat – all of it is perfect for autumn. Considering the presentation, I wouldn’t hesitate to also set it on the holiday table.

Hidatsa Stuffed Sugar Pumpkin | Pumpkin Recipe


Hidatsa Stuffed Sugar Pumpkin
Reprinted with permission from Abrams Books

1, 4 to 5 pound sugar pumpkin
2 tsp salt
½ tsp dry mustard
1 to 2 tbsp vegetable oil or rendered fat
1 pound ground venison, buffalo or beef
1 medium onion or 4 green onions, chopped
1 cup wild rice, cooked
3 eggs, beaten
1 tsp crushed dried sage
¼ tsp pepper

Preheat oven to 350 degrees F. Cut the top from pumpkin and remove seeds and strings. Prick cavity with a fork and rub with 1 teaspoon of salt and the mustard.
Heat oil in a large skillet. Add meat and onion and sauté over medium-high heat until browned. Off the heat, and stir in wild rice, eggs, remaining salt, sage, and pepper. Stuff pumpkin with this mixture.

 Hallowed Pumpkin for Hidatsa Stuffed Sugar Pumpkin Recipe

Place ½ inch of water in the bottom of a shallow baking pan. Put the pumpkin in the pan and bake for 1 ½ hour, or until tender. Add more water to the pan as necessary to avoid sticking. Cut pumpkin into wedges, giving each person both pumpkin and stuffing. (Or you can scoop out the stuffing with a bit of pumpkin which is what I did.) Serves 6.


As I mentioned, there were two books re-released so I don’t want to pass on sharing the second with you. That’s because it happens to be the ideal gift book for any creative food lover. The Secrets of Pistoulet by Jana Kolpen tells the story of a French farmhouse and was first published in 1996. When I started flipping through it, I thought – this would make the cutest gift. Then I read a bit more about it, The recipes are designed as little pull-out cards and written in paragraph form with very flexible directions. There’s Potage of Vision, Potage of Heart and Potage of Strength. It’s like a recipe book and an inspirational note all in one.


The Secrets of Pistoulet by Jana Kolpen  

The Secrets of Pistoulet by Jana Kolpen
Disclosure: A review copy of these cookbooks was sent to me free of charge. I was under no obligation to blog about them and received no compensation for doing so.

Want to create beautiful food and product photos that you can't wait to share?!
Discover your style, control the light, and shoot using the tool you know how to use (yes, your phone included). Learn about free resources, Live Q&As with Lori, and online courses you can take from anywhere in the world!
We respect your privacy. Unsubscribe at any time.