Browsing Category

Book and Product Reviews

Roasted Eggplant and Black Lentil Soup Recipe

September 16, 2012

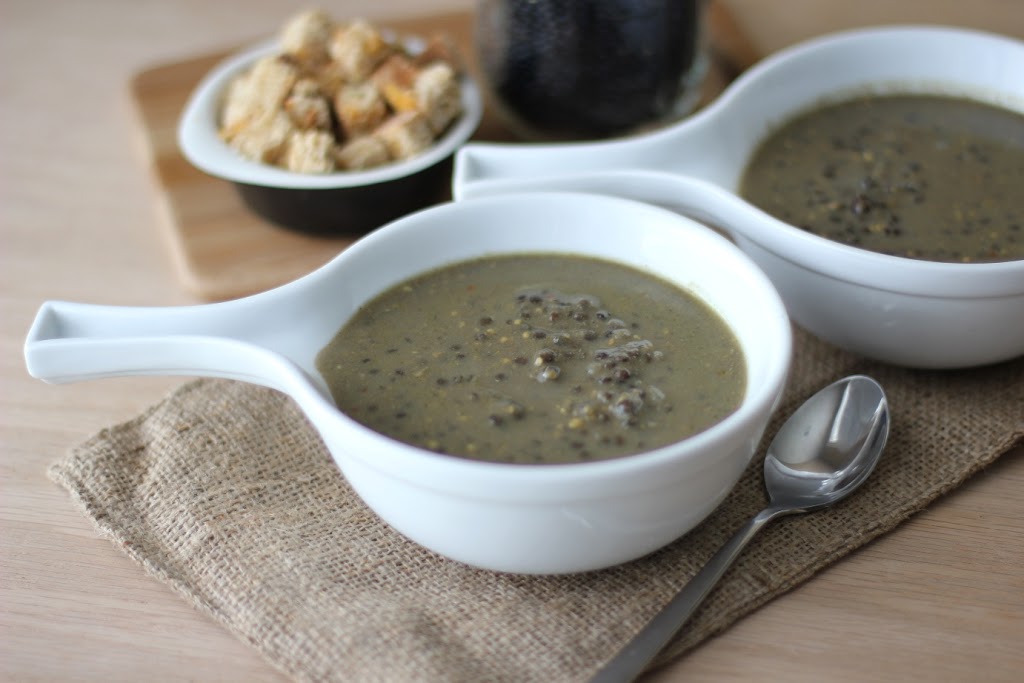
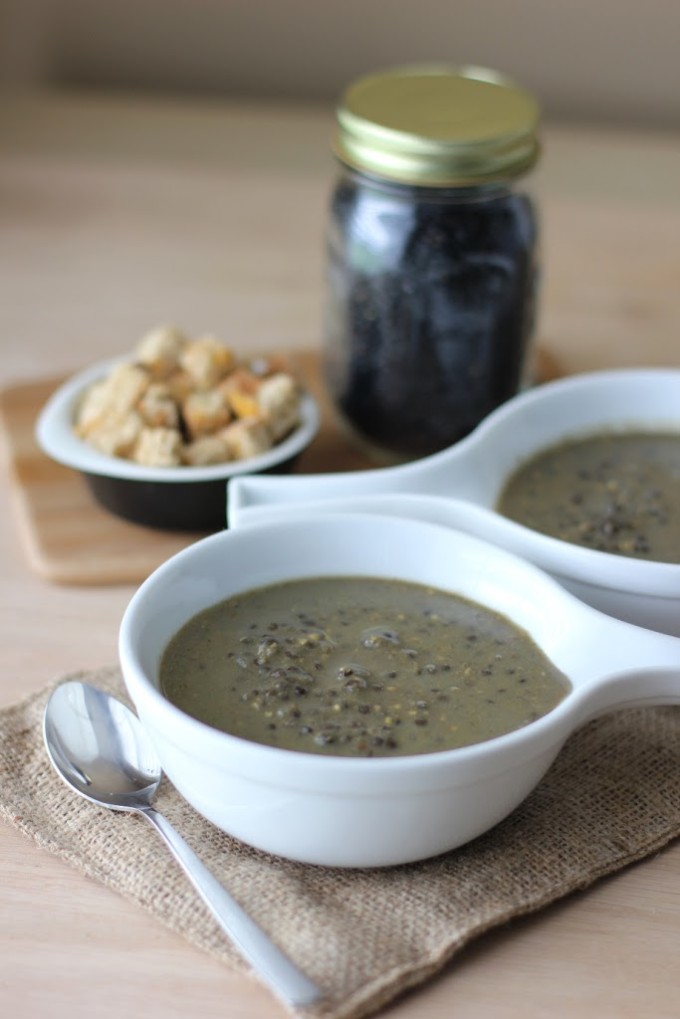
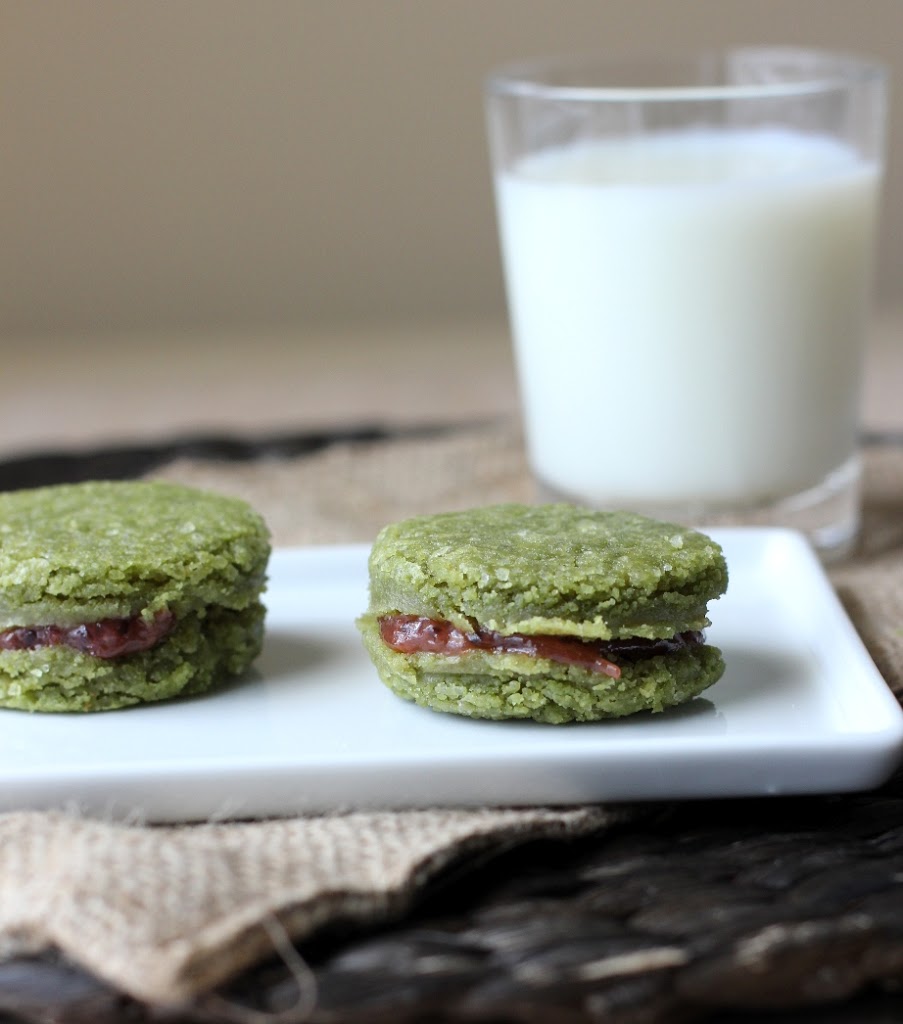
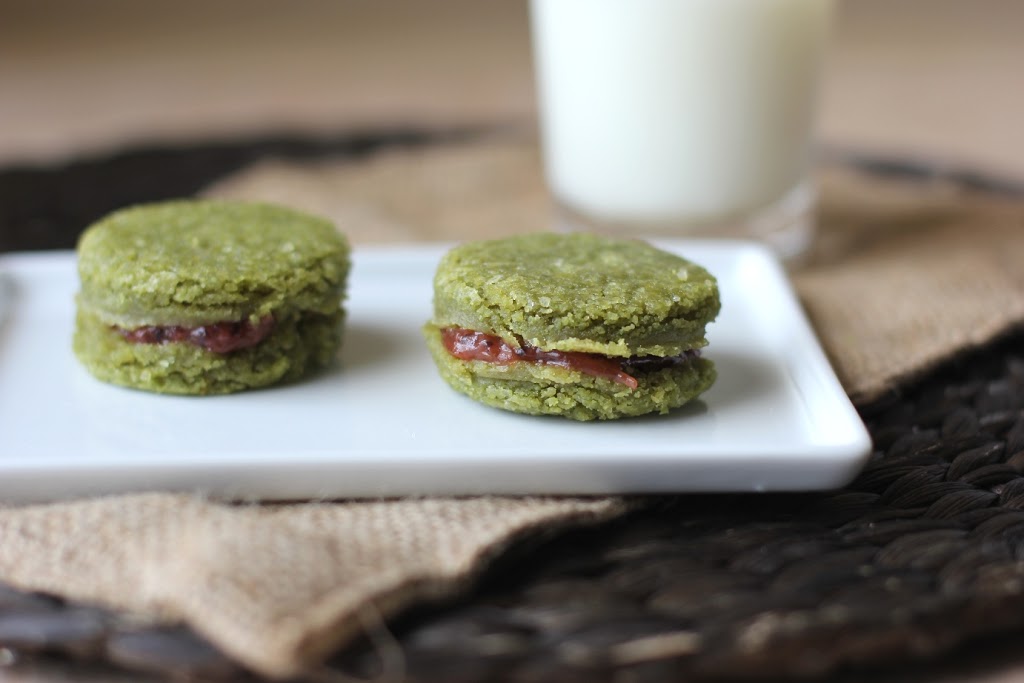
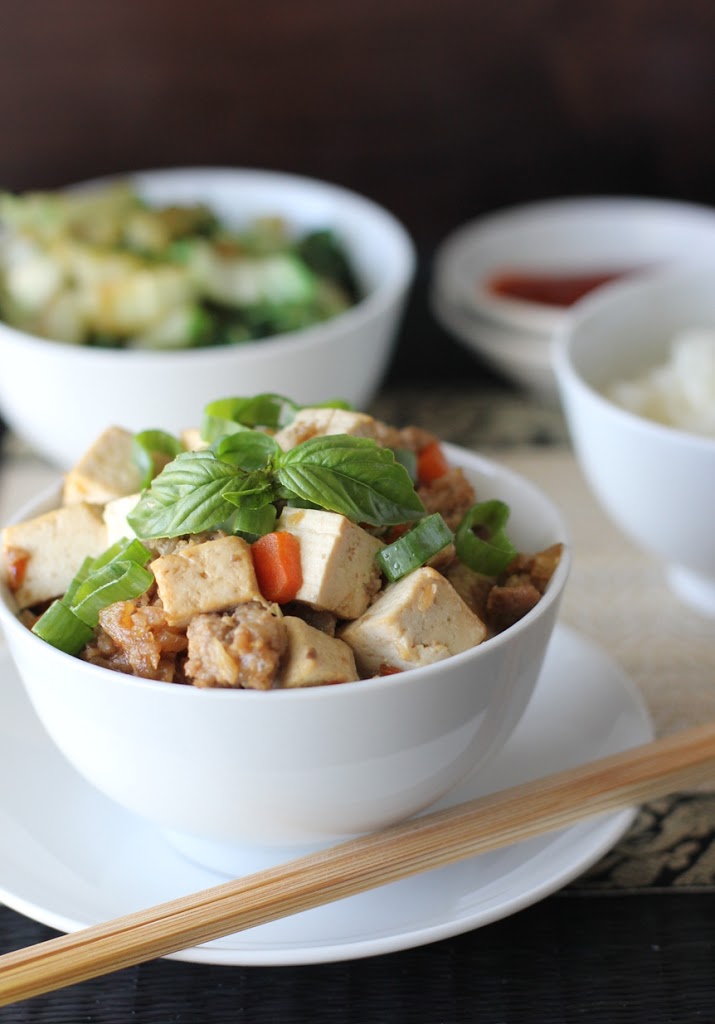
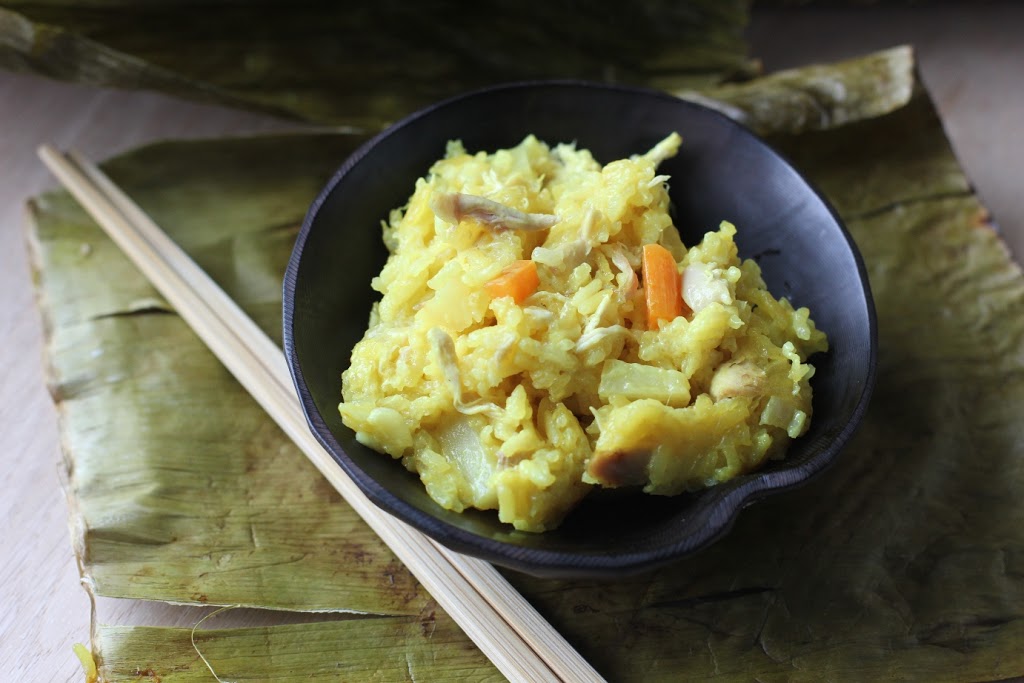
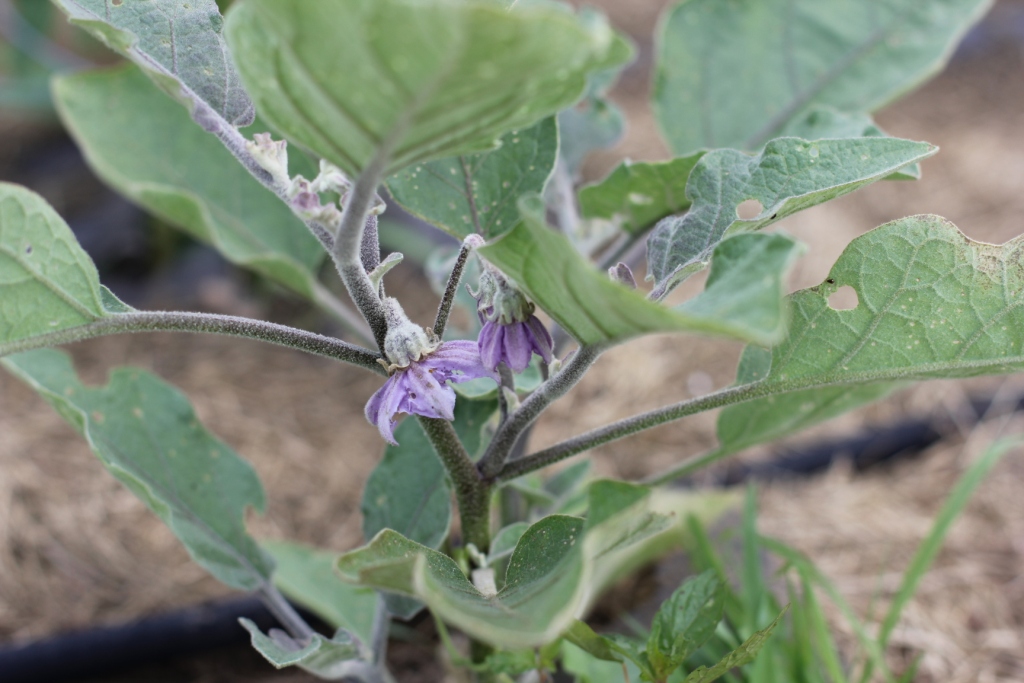
This eggplant and black lentil soup recipe is one I came up with after a Kentucky Food Bloggers event at Whole Foods. I’ve used black lentils a lot more since then, but this recipe still remains a favorite for cool summer days and for transitioning into autumn. It’s thickened with eggplant puree and flavored with tahini and garam masala. 

Roasted Eggplant and Black Lentil Soup Recipe | Fake Food Free
 
It’s hard to believe that it has been almost a year since our Kentucky Food Blogger group got together. We attempted all spring and summer, but busy schedules wouldn’t allow us to find a date that would work for more than a couple people.
 
That changed this past Friday night with the help of Whole Foods Market in Lexington. We were invited out to attend a special edition of their Flights After 5 event. Flights After 5 is a Friday night get-together where 5 beer tastings are matched with 5 appetizers at stations throughout the store. Last Friday Kentucky beers were featured including two of my favorite breweries West Sixth and Lore Brewing.


Several area bloggers joined the staff at Whole Foods as they told us a bit about the work that they do, and about the mission of the store. I will admit that I’m not a 100% Whole Foods shopper, but I do appreciate the products I buy there – grains from the bulk bins, my puffed kamut, and Ataulfo mangos, when they are in season.
 
I really like that on their website you can find Unacceptable Ingredients for Food and their Meat Animal Welfare Standards. That makes shopping easy. Through my work in agriculture, I’ve come across many local meat producers and fruit and vegetable farmers who supply Whole Foods. The combination of local support and global projects makes me a fan. We also learned that they price match with surrounding competitors, which explains why I’ve always felt that many things at Whole Foods aren’t any more expensive than they are at other area supermarkets.
 
Along with a little education, good beer and snacks, and great company, we received every food bloggers favorite thing – a goodie bag! They kept our cooking in mind and filled it with several ingredients, perfect for putting together a few new recipes. I was happy to see black lentils in my bag. I’ve used their brand before, and I was excited to create something new with them.
 
 
Baba ganoush was one of the appetizer offerings that night so I had eggplant on my mind. Lucky me, we just happen to still have eggplant from the garden.
 
I had no idea what direction I would go with the soup, but the more I tasted it, the more I felt it needed some Indian influences, which ended up making it a lot like daal. (And I’m definitely not complaining.) Tahini and garam masala came to the rescue, and I added some crushed red pepper for heat. It turned out to be a great way to celebrate the start of comfort soup season!
 
Roasted Eggplant and Black Lentil Soup Recipe | Fake Food Free


Roasted Eggplant and Black Lentil Soup Recipe  
Makes: 4 to 6 servings
Write a review
Print
Ingredients
  1. 6 small eggplants (you need about 1 cup roasted pulp)
  2. 1 1/2 tablespoons extra virgin olive oil
  3. 1 small onion, chopped
  4. 2 cloves garlic, minced
  5. 4-6 cups vegetable stock
  6. 2 tablespoons tahini
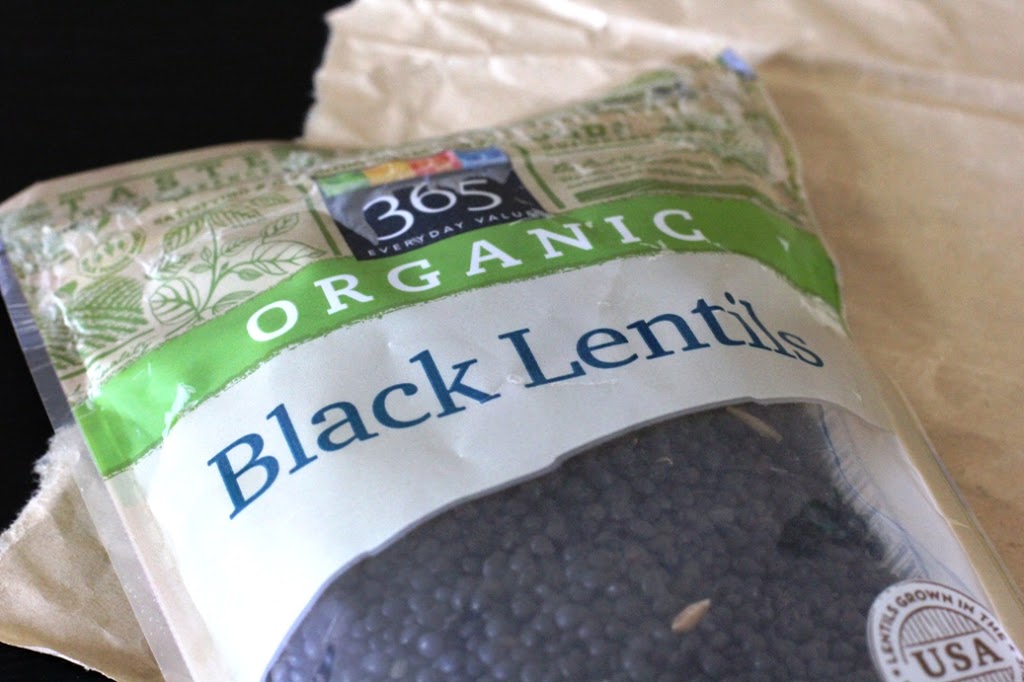
  7. 1 cup black lentils
  8. 1 teaspoon salt
  9. 1 teaspoon garam masala powder
  10. ¼ teaspoon ground black pepper
  11. ¼ teaspoon crushed red pepper
Instructions
  1. Preheat the oven to 400 degrees F.
  2. If your eggplant is round, de-stem and cut each in half. Longer Japanese style can be roasted whole. Lightly coat the eggplants with 1/2 tablespoons of the olive oil and spread in an even layer, cut side down, on a baking sheet. Bake for 20 minutes, or until pulp is very soft. Remove from the oven and allow to cool.
  3. In a soup pot, heat the 1 tablespoon of olive oil over medium-high and add the onion and garlic. Cook over medium to medium-high until the onions begin to soften, about 3 minutes. Add 4 cups of the stock. (Reserve the remaining 2 cups to add later, if you want a thinner soup.) Simmer for about 3 minutes.
  4. Scoop out the cooled eggplant pulp and transfer it to the soup pot. Use an immersion blender to blend the eggplant, onions and garlic with the stock until smooth.
  5. Add the tahini, and bring the soup to a low boil. Stir in the lentils. Reduce heat and simmer for 20 minutes or until the lentils are tender. Add the salt, garam masala, black pepper and crushed red pepper. Add more or less of each to taste. Simmer for another minute or two and serve.
Fake Food Free https://www.fakefoodfree.com/


—————————————————————————-

Voting for the Country Living Blue Ribbon Blogger Awards ends September 17, 2012! Fake Food Free is a finalist! If you enjoy my blog, I’d truly appreciate your vote for Reader’s Choice. You can vote here, no sign in or registration required.

Disclosure:  Some products in this recipe were given to me free of charge from Whole Foods Market. I was not required to post about them and received no compensation for doing so. Thoughts here are my own. 


Thanks for reading! All images and content are the property of Fake Food Free unless otherwise stated. Please do not republish full recipes and images without written permission. What is okay? Feel free to Pin images, share links to my posts or share the photo in a round up post with the title of this recipe and a link back to the post. Confused about copyright and food blogs? Here is some helpful information on Recipe Attribution. If you want to use a photo or full recipe, just ask. I’m sure we can work something out.  

Kentucky Road Trip: The Bluebird in Stanford, KY

July 24, 2012


When we moved to rural Kentucky many of our friends thought we were crazy. Why would we move ourselves 40 minutes outside of the city; 40 minutes away from convenience and access?
 
Lexington is wonderful, but we’d spent our time there. And after moving back from Brazil, honestly, I had changed. I didn’t care so much about things like going to Target once a week, or having easy access to take out.
 
Fortunately, looking back there is no way I would change our decision. Of course, there is our garden, and the silence of the weekend morning, but more importantly we have explored a side of Kentucky that we never would have otherwise.
 
 And we have found some amazing things along the way.


Our most recent exploration? The Bluebird in Stanford, KY.
 
A small cafe serving gourmet food made with local ingredients such as pastured eggs and meats? A cozy, modern breakfast and lunch spot on a quaint small-town main street that uses the modern technology of an iPhone to take your order and an iPad to check out?
 
Yes, and yes.


I was blown away by the Bluebird. I don’t mean to say the food I have enjoyed in smaller towns isn’t tasty, but I wasn’t expecting such an outstanding experience from quality of the food, to creativity of the menu, to friendliness of the staff.
 
It’s less than an hour drive from where we live, and we set out for breakfast a few weekends ago after our Saturday morning run. I had checked out the menu online so I already knew what I was getting – the Breakfast Fries.


Brilliant, right? I mean, home fries are breakfast food, why not take the potato in the form of a French fry and cover it with all kinds of breakfast goodies. And they did just that with bacon, green peppers, onions, tomatoes, scallions, eggs and smoked Gouda sauce. It tasted every bit as good as it sounds. 


We split that, and my husband ordered a biscuit with gravy. It’s standard around here, although this version was anything but, with a light, fluffy homemade biscuit and savory sausage gravy. 


Thanks to the Bluebird I also discovered a new (to me) small batch, hand-roasted coffee in Kentucky – Baxter’s Coffee in Somerset, KY. You know I’m a bit of a coffee snob, and I am always surprised how delicious a locally roasted coffee can be. We enjoyed it so much my husband picked up a bag on his most recent visit. (Yes, he’s already been back!)


If you find yourself traveling through the Bluegrass state, put the small town of Stanford and the Bluebird on your agenda. It surpassed our former favorites even among the delicious foods in Lexington. My thanks to Chef Bill Hawkins for bringing wonderful locally sourced food to unexpected places.  


Bluebird
202 W. Main Street
Stanford, KY. 40484
Mon-Sat 7am-4pm
Facebook
 

Matcha Tea Cookies with Gooseberry Filling

July 10, 2012

These matcha tea cookies with gooseberry are filled with a tangy spread made of the fruit! The sandwich cookies combine two unexpected flavors that are delicious together!

Matcha Tea Cookies with Gooseberry Filling Recipe | Fake Food Free

The first time I had green tea in sweets was during our trip to Hong Kong a few years ago. We loved the fast-paced, cafeteria-like bakeries we found on almost every corner. During one quick stop, I picked up a green tea cake with red bean filling, and loved it.

Matcha Cake filled with Red Bean from Chinese Bakeries in Hong Kong. The inspiration for match tea cookies with gooseberry filling. | Fake Food Free


If you do a search for matcha green tea there is no shortage of sweets and bakery creations on food blogs. I’m actually a bit late to the party, but for good reason. I had a difficult time finding the powder around here. I tried to find it when I made the Green Tea Bubble Tea last year without success.

Now I know why.

Since my first experience with green tea baked goods was in Hong Kong, I was associating it with the wrong culture (shame on me). When Matcha Factory contacted me to offer a sample, I learned a thing or two, most importantly that matcha green tea is of Japanese origin.

I’d wanted to bake with it for a while so I gladly took them up on the offer. Matcha tea is ground, shade grown, steamed tea leaves. It’s full of antioxidants, and like most other Asian ingredients, it boasts a variety of health benefits. If that isn’t enough, it also turns everything it contacts into a beautiful shade of green. I definitely need more of this in my kitchen.

When it came to bake goods, just about every idea I had for the matcha tea had been done before, and done well. I first set out with the idea of a tea cake. I wanted to use some of this year’s gooseberries sent from my parents.

I posted about gooseberries last year. If you are unfamiliar it is a small round fruit with an internal texture of a blueberry, but a skin more like a grape. They are tart, and great for a something a little different in baked goods.

My cakes are more like a rich, sweet, chewy cookie, and I’m not complaining. The tart gooseberry filling turned out to be perfect for them. 

Matcha Tea Cookies with Gooseberry Filling Recipe on Fake Food Free


Cookies or cakes, I’m sold on adding matcha tea to baked goods. I loved some of the recipes I found on the company’s website such as the Matcha Butter and Matcha Salt. Next up I’m going to use it in a morning shake or maybe a latte.

Matcha Tea Cookies with Gooseberry Filling

Makes: 8 sandwich cookies

What you’ll need for the cookies:
1 1/3 cups Demerara sugar
¾ cup (1 ½ sticks) unsalted butter, melted
1 large egg
½ teaspoon almond extract
1 1/3 cup unbleached all-purpose flour
½ teaspoon baking powder
¼ teaspoon salt
1 teaspoon matcha green tea powder

How to make the cookies:

Preheat the oven to 350 degrees F, and lightly grease a 9 x 13 in baking dish.

In a mixing bowl, whisk together the sugar and melted butter, until combined. Next, whisk in the egg until incorporated and add the almond extract. In a separate bowl, whisk together the flour, baking powder, salt and matcha tea.

Add the dry ingredients to the wet ingredients, and stir until all is combined. You will end up with a thick batter, kind of like a very soft sugar cookie dough.

Matcha tea cookies


Press the batter/dough into the baking dish, and smooth it so that it is evenly spread to the corners.

Bake for 18 – 20 minutes, until the edges begin to brown and the center is set. Remove from the oven and cool completely. 


Gooseberry Filling

What you’ll need for the filling:

1 ½ cups gooseberries, defrosted if frozen
2 tablespoons Demerara sugar
¼ cup water

How to make the filling:

Combine all ingredients in a medium sauce pan and bring to a boil. Once the berries have burst and it begins to thicken, remove from the heat. Allow to cool for about 5 minutes.

Transfer to a small food processor, or you can use an immersion blender in the pan. Blend until smooth and no skins can be found.

Transfer back to the sauce pan and continue to cook over medium to medium-high heat until the filling becomes thick and spreadable. Set aside to cool completely.

Use a round cookie cutter to cut the cooled matcha tea cookies, or cut into squares. You will get about 16 (8 cookies) with a 1 ½ inch cutter. You will get more if you choose to make squares.

To assemble, spread a small amount of the filling on one cookie, and top with another just before serving.

Matcha tea cookies filled with gooseberries recipe | Fake Food Free


Thanks for reading! All images and content are the property of Fake Food Free and Lori Rice unless otherwise stated. Please do not republish full recipes and images without written permission. What is okay? Feel free to Pin images, share links to my posts or share the photo in a round up post with the title of this recipe and a link back to the post. Confused about copyright and food blogs? Here is some helpful information on Recipe Attribution. If you want to use a photo or full recipe, just ask. I’m sure we can work something out.


Disclosure: A free Matcha Tea sample was sent to me by the Matcha Factory. I was not required to post about it and received no compensation for doing so. All thoughts and opinions are my own.

Bean Curd and Prawn Stew from Building a Perfect Meal

June 14, 2012
 
 
Bean Curd and Prawn Stew Recipe | Fake Food Free
 
I love when a cookbook has a creative concept, so when I was given the opportunity to review Building a Perfect Meal by Michelle Tchea I knew it was going to be a fun adventure. I might add that when the creative concept is combined with Asian cuisine, well, it doesn’t get much better. 


The cookbook cover reads:
 
“The concept of this cookbook is simple:  start with a basic recipe and then elevate it into something spectacular…”
 
The book starts with a helpful explanation of ingredients including things such as red beans, taro, daikon and luffa. After the knowledge building, the fun begins! Each page has two recipes – the basic recipe to master and then the more complex recipe which incorporates the basic. 
 
For example, Boiled Eggs followed by beautiful Marbled Tea Eggs; Sesame String Bean Salad and then Peanut Summer Noodles; for dessert, Gloriously Sweet Red Beans followed up by Sweet Red Beans and Panna Cotta.
 
There aren’t many cookbooks ideal for both the seasoned cook and the beginner, but this one definitely meets that goal. The best part is that the recipes are straight forward with few ingredients, so if you like quick cooking, this book is for you. 
 
There are many recipes I can’t wait to try, but for my review I went straight to the Bean Curd and Prawn Stew. I was drawn to this recipe both by the flavors and by the beautiful photo (one of many that grace the pages through the entire book).
 
 
Bean Curd and Prawn Stew from Building a Perfect Meal by Michelle Tchea
 
The basic recipe for this dish is Stir-fried Minced Pork. A few more ingredients and the stew is born. This is one of those dishes that surprise you with flavor. Using only sugar and soy sauce for seasoning allows the taste of the other ingredients to shine through.
 

Bean Curd and Prawn Stew 

Reprinted with permission from Michelle Tchea

Serves 2-4
 
Cooking oil for shallow-frying
Onion 1 small, peeled and finely chopped
Prawns (shrimps) 4, peeled and roughly chopped
Minced pork 150 g (5 1/3 oz)
White wine or water (optional) 1 – 2 Tbsp
Diced carrots 45 g (1 ½ oz)
Firm bean curd 100 g (3 ½ oz), cut into small cubes
Dark soy sauce 1 Tbsp
Sugar ½ tsp
Hot water (optional) 1 – 2 Tbsp
Corn flour (cornstarch) 1 tsp, mixed with 2 tsp cold water
Spring onions (scallions) to garnish, finely chopped
 
Heat oil in a wok and lightly sauté onions until fragrant. Add prawns and cook until pink, about 1 minute.
 
Add pork, breaking up any large pieces. Add in a splash of wine or water if the mixture is drying up.
 
Add carrots and continue to cook over medium heat for another 2 minutes or until the meat is just cooked but still moist. 
 
Add bean curd, soy sauce and sugar and cook for another 2 minutes or until heated through. Add a splash of hot water if the mixture is looking dry.
 
Add corn flour mixture and simmer for further 1 minute before removing from heat. Garnish with spring onions and serve hot with rice.
 
Bean Curd and Prawn Stew Recipe


Disclosure: This cookbook was sent to me by Michelle Tchea for review purposes. I was not required to post about it and received no compensation for doing so. Thoughts and opinions here are my own.

Bringhe – Memories of Philippine Kitchens

June 4, 2012

I regularly revisit the goal to challenge myself in the kitchen by experimenting with cuisines from different areas of the world. I don’t always accomplish this goal, but over the past several months I’ve been happy with the variety around here. Foods from South Africa, West Africa, Ireland, Thailand, the Caribbean, and Italy have all found their way into posts.
I owe a lot of this to cookbooks. My most recent endeavor? A closer look at Filipino cuisine.
Other than the Filipino barbecue recipe learned from my husband’s college friend, I have no experience with the cuisine. I’ve not stepped foot in a Filipino restaurant (only because I’ve yet to have the opportunity), and while we entertained the idea of making Manila a stop on our Southeast Asia trip in 2009, it wasn’t meant to be on that adventure. 
So needless to say, I had a lot to learn. After reading this cookbook, I have been thoroughly educated.
Memories of Philippine Kitchens: Stories and Recipes from Far and Near by Amy Besa and Romy Dorotan is a history book of traditional dishes. I received a revised and updated copy for review just a few weeks ago. The beautiful photos take you there – to the market stalls, to the rustic kitchens – you can almost feel the ingredients your hands and smell them cooking. The recipes make you wonder how you can bring such time-honored practices into your own kitchen; a challenge I welcome.
While taking a journey through geographic regions of the Philippines by way of food, the book introduces the reader to unfamiliar regions, and foods that seem different, but familiar at the same time. Dishes such as the classic Chicken Adobo, sweet Bibingka, and Lumpia. These names only mention the type of food or style of cooking. The recipes and variations seem endless.
I stopped turning the pages at the province of Pampanga – The Rice Heartland of Luzon. This led me to the Arayat Kitchen where I found Bringhe. The book describes this dish as Filipino paella. I took a quick look at the ingredients, and set out to find some banana leaves which I finally located last week.
I feared steaming a dish in leaves in a wok on my very U.S. American stove would be a difficult task, but this recipe was a breeze. The results were a dinner of nutty sticky rice in coconut milk complete with vegetables and pastured chicken. 
A one-pot meal at its finest.
There are very few times you find a book with so much of a culture within its pages. This book has a prominent place on my food history and culture bookshelf. 
I’m off in search of my next food culture challenge, and considering how many more recipes I want to try in this book, I have a feeling it will be Filipino once again. 
Bringhe
Reprinted with permission from Abrams Books 

Bringhe is a Filipino version of paella, made with glutinous rice and steamed in banana leaves.
Serves 4 to 6
One 3 1/2-pound chicken
1 large onion, quartered
Banana leaf sections, for lining the wok
2 tablespoons canola oil
3 garlic cloves, sliced
1 medium onion, diced
1 red bell pepper, diced
1 large carrot, diced
1 large russet potato, peeled and diced
One 1-inch piece fresh turmeric, peeled and grated
(or 1 teaspoon ground turmeric)
2 cups glutinous rice, soaked overnight in water
to cover, drained well
About 2 cups coconut milk
4 tablespoons fish sauce, or to taste
Place the chicken and quartered onion in a large saucepan and add water to cover. Bring to a boil over high heat, then reduce the heat and simmer, uncovered, until the chicken is tender, about 40 minutes. Remove the chicken, strain, and reserve the broth. Set the chicken aside to cool, then remove the meat from the bones and shred it. Set aside.
Wipe the banana leaves with damp paper towels to clean them. Run them through a flame on both sides to soften them a bit. Grease a large wok (or 2 small woks) and line it with a double layer of banana leaves.
In a large sauté pan over medium heat, warm the oil. Add the garlic, diced onion, and bell pepper and sauté until the onion is translucent, about 5 minutes. Add the carrots and potatoes and cook until softened, about 5 minutes. Add the turmeric and stir for 1 minute, until aromatic.
Add the rice and cook, stirring, until thoroughly coated with the oil, about 5 minutes. Add 1 1/2 cups of the coconut milk, 1 1/2 cups of the reserved chicken stock, and the fish sauce. Bring to a simmer and cook, stirring frequently, until all the liquid is absorbed. 
Add another 1/2 cup coconut milk and 1/2 cup stock and continue to stir until the liquid is absorbed. This should take about 20 minutes—the rice should be tender but al dente. If the rice isn’t cooked through, add more coconut milk and stock. Continue to cook, stirring, until the liquid is absorbed and the rice is cooked through. Add the shredded chicken and cook until warmed through, about 3 minutes.
Fill the prepared wok (or woks) with the rice mixture, smooth the top to create an even layer, cover with the lid or foil, and place over medium heat. Cook without stirring for 20 minutes, or until a golden brown crust that holds the dish together is formed at the bottom of the dish. If the crust hasn’t formed, raise the heat to medium-high and cook for another 5 to 10 minutes to form the crust. Invert onto a large serving plate, remove the banana leaves, and serve.
Disclosure: A copy of this cookbook was sent to me for review purposes. I was not required to write about it, and received no compensation for doing so. Opinions expressed here are my own.

Gardens, Markets and Pure Beef

June 3, 2012


Happy June! 
 
 I was not a fan of summer until I started gardening and exploring Farmer’s Markets. Now summer rates as high on my list as autumn, at least until we get to the hot and humid Augusts we often experience in Kentucky. Until then I will be enjoying all the things of the season.
 
I thought I’d use this post to spread some of the beauty of June through garden and market photos, and to reveal the winner of the Pure Beef cookbook!
 
 
Our garden is coming along nicely except for the extra bugs that are around due to the mild winter. The Roma tomatoes are just now beginning to turn pink on their way to red. The blue potatoes are blooming, and although I’m sad that the strawberries are done, we have picked a few blueberries, and raspberries aren’t far behind!
 
Roma on its way to red!


Eggplant blooms
Blue potato blooms
 
 
Blackberries-to-be


Raspberries
Guard Pug – every garden should have one.


I stopped by our small (but sufficient) Farmer’s Market this weekend for onions and tomatoes. Some of our farmer’s here grow tomatoes in high tunnels so there are already some heirlooms ripe and ready.


All of this produce will go perfectly with some Pure Beef.  By random draw, the winner of the cookbook is LouAnn at Oyster Food and Culture! Congratulations!
 
I’ve been reading LouAnn’s blog for a few years now, and had the opportunity to meet up with her for lunch a few years back when I was visiting California. Do stop by and check out her blog. It is full of so much information on food and culture. I learn something new with each post!
 
Thank you for your comments! I hope you’ll consider getting your own copy of Pure Beef. I’ve been enjoying it so much.

Pure Beef: Tamarind Beef Satay

May 24, 2012

I first made this delicious beef satay recipe back in 2012. Every summer it continues to be a great go-to meal or snack when we fire up the grill for some outdoor cooking. 

Grilled Tamarind Beef Satay Recipe | Fake Food Free


The email subject read, “As far from fake beef as one can get.”

That was enough to spark my curiosity.

Before I opened it I wasn’t aware of the cookbook that awaited me, of the story that would later have me nodding my head, or the fact that it would be so educational that my husband would hijack it for a day and read the first 70 pages.

Pure Beef Cookbook

The title says a lot, but it does not say it all. I’ve found this cookbook to serve as a novel as I have read through Lynne Curry’s story. Lynne is a former vegetarian who now finds herself in Oregon’s Wallowa Valley enjoying what I can only imagine is one of the most beautiful places on earth with some of the best food.

I live in central Kentucky and it’s pretty beautiful here, too. As I write this I just happen to have a chorus of cows singing from the farm behind our house, but I’ve been to Oregon and I love it. This can be considered – how I related to this book #1.

Number 2, is the story of how a vegetarian came to enjoy the flavor of grassfed beef, culturally, nutritionally, and ethically. To paraphrase roughly, the moment was during her international travels in Guatemala when she was graciously offered grassfed beef as a gesture of hospitality.

Tamarind Beef Satay recipe from the Cookbook Pure Beef


While I have never been a vegetarian, I fully believe that culture and respect for the people of that culture should override what we will and will not eat. I’ve tried many things, and maybe one day I will be put in a position where I just can’t stomach it, but as of now this is my view. It was a view that I felt I shared with the author as I read, making this book even more meaningful.

I was never all that crazy about beef until I enjoyed the local grassfed beef of the Bluegrass. This opportunity occurred only about 2 years ago when we returned to the States. Now it is the only beef I will buy. There are many reasons for this, and I will let you read through these when you get your copy of Pure Beef. Considering my background, nutrition is one reason.

As I moved past the why of the book, I got to the how. How to cut beef, how to buy it, how to cook it. I still have a lot more to read, but this is as much a resource for my library as a cookbook.

Then you get to the recipes. There truly is a recipe for every cut, and an endless amount of tips on how to cook it all. Coffee Bean-Chile Rubbed Sirloin Roast, Boneless Oxtail and Buckwehat Crepe Purses, and Baked Argentinian Empanadas to name a few.

There are side dishes and condiments galore as well, with and without beef, such as Roasted Corn Salsa, Butternut Squash Bread Pudding, and Lemony Chard Bundles. There are also variations on recipes such as the gluten-free meat loaf.

There were too many great recipes to choose from, so I had to use a bit of a spin-the-bottle approach to select one. I landed on Tamarind Beef Satay.

Tamarind Beef Satay


We picked up a tri tip from our local grassfed beef source, Marksbury Farm Market. It worked beautifully and all the credit has to go to my husband. One tip he picked up from the book was to freeze the meat for about 20 minutes before slicing it thinly for the beef satay. He sliced, I mixed the marinade.

This recipe is simple and the beef satay cooked up on the grill quickly. The sweet and tart flavors of the tamarind, honey and fish sauce go so well together. Next time I’ll probably add just a little more chile sauce because we are spicy food fans. We served up the satay with grilled corn and a green salad. Easy and delicious!

Tamarind Beef Satay

Recipe reprinted with permission from Pure Beef © 2012 by Lynne Curry, Running
Press, a member of the Perseus Book Group.

From the book:

Tamarind is an intoxicating sour and sweet fruit from Indonesia where satay is the go-to snack on a stick. It is incredible with beef, so I created a tamarind marinade that lacquers thin beef strips to grill or broil. Satay makes a wonderful appetizer; to fill it out for a main dish, I accompany it with another Indonesian favorite, a fruit salad called Rujak, which has as many renditions as pasta salad does in this country. My version is a beautiful chopped salad of cucumbers, jicama, pineapple, and mango that’s crunchy, juicy, sweet, and tart. Served along with Sticky Rice or steamed rice, it turns satay into a tantalizing meal, just the thing to wake up your taste buds in the middle of winter.

Makes 4 servings as a main dish; 8 as an appetizer

3 tablespoons tamarind paste*
3 tablespoons honey
1 tablespoon fish sauce

1/2 teaspoon chile sauce, such as sambal oelek
1/8 teaspoon salt
1/2 cup unsalted dry roasted peanuts
1 to 1 1/2 pounds top sirloin steak, sliced into 1/4-inch thick strips

Mix the tamarind paste, honey, fish sauce, chile sauce, and salt in a medium-sized bowl. Pound the peanuts in a mortar and pestle or in a heavy-duty plastic bag with a rolling pin to the texture of fine breadcrumbs and stir into the tamarind sauce. Put the beef strips in the bowl, toss to coat, and marinate for about 15 minutes at room temperature.

Preheat a charcoal or gas grill for high heat (425°F to 475°F), scraping the grate clean and oiling it lightly, or preheat the broiler. Thread the slices onto wooden or metal skewers, stitching the beef on and then stretching it along the skewer so that it looks like a miniature banner. Thread any short strips onto the same skewer.

Grill or broil the skewers for 1 to 2 minutes per side and serve the satay warm or at room temperature.

*Note: Tamarind is available from Asian grocery markets in several different forms. Tamarind paste is the easiest form that can be used straight from the jar. If your tamarind is labeled concentrate, use only 1 tablespoon and mix it with 2 tablespoons water. If you have a block of tamarind, chop about 1/2 cup of it, use a fork to mash it with 6 tablespoons of boiling water, and let it soften for about 5 minutes. Use a fine-meshed strainer to extract 3 tablespoons of pulp, pressing on the mixture firmly with a spoon.


Disclosure: A copy of this cookbook was sent to me for review purposes. I was not required to post about it and received no compensation for doing so.

Borekitas: Hazan Family Favorites

May 21, 2012

When I received my copy of the Hazan Family Favoritescookbook I will admit I had to do some research. There is no doubt that this speaks to my lack of knowledge of Italian cuisine.  It made me think about how it is possible to feel affection for a cuisine without really knowing it at all.


There is no question that I love homemade pasta and marinara sauces, or that I believe they are 100% worth the time and effort it takes to make them. I enjoy bean soups and simple meat cutlets, and the other elegant offerings that come from an Italian kitchen.

What I think I have often overlooked is the simplicity. 

In case you have some more to learn about Italian cooking like I did, the book was written by Guiliano Hazan. He is the son of Marcella Hazan whose cookbooks are credited with introducing the United States to traditions and techniques of Italian cooking. 

The book is a collection of recipes rescued from a fifty-six year-old notebook. As you flip through it and see the pictures you can feel the history and importance of its pages.

What you also see when you read the recipes is simplicity. Most of the recipes use only a handful of fresh ingredients to create a stunning end product. It’s impressive, educating, hunger-inducing, and it makes you think – okay, I’m ready to begin mastering the art of Italian cooking. 

Or if you are like me, it may also make you think – okay, let’s book the trip to Italy!


Amid the Fettuccine with Orange, Fried Parmesan Cheese-Battered Lamb Chops, and the Peach-and-Strawberry Semifreddo, the Borekitas caught my attention. What’s not to love about spinach, feta and ricotta stuffed into a bite-size pastry? Absolutely nothing. These are delicious. 


Borekitas
From Hazan Family Recipes, reprinted with permission from Abram Books 
 
Time from start to finish: 1 hour and 15 minutes
Makes about 20 borekitas 

From the cookbook:
My parents and I went to my grandparents’ almost every Friday for Shabbat dinner. I can still
taste and smell the wonderful little pies my Nonna Giulia made, which she called borekitas.
She made them either with a dough shell or a phyllo shell. The fillings were spinach or cheese.
In attempting to replicate them, I used Claudia Roden’s The Book of Jewish Food as a guide.
Both the cheese and spinach fillings below are just like what I remember, and the dough shell,
my favorite of the two, is just as good as the one Nonna Giulia used to make.


FOR the dough
4 tablespoons butter
1 1/2 cups all-purpose flour
1/4 cup vegetable oil
1/4 teaspoon salt

FOR the spinach filling (I made the spinach)
1/2 teaspoon salt
8 ounces fresh spinach, washed
1 ounce feta cheese
2 tablespoons whole-milk ricotta cheese


Cut the butter into small pieces and allow to come to room temperature.

Put all the ingredients in a food processor with 1/4 cup water and run it until a smooth, homogeneous dough forms. If it crumbles when pinched, mix in a little more water, 1 tablespoon at a time, until the dough is soft and smooth when pinched.

Wrap the dough in plastic and let it rest for about 20 minutes before using.

Spinach filling
In a pot large enough to cook the spinach, put about 2 inches of water, and place over high heat. When the water is boiling, add the salt and spinach. Cook until tender, 2 to 3 minutes, then drain.

Once the spinach is cool enough to handle, squeeze the excess water out and coarsely
chop. Place the spinach in a bowl. Crumble the feta and add it along with the ricotta. Mix thoroughly.


Assembling the borekitas
Preheat the oven to 350°F on the bake setting.

Take about a walnut-size ball of dough, place it on a counter, and press it with your fingers into a disk 2 inches in diameter. Put about 1 tablespoon of either cheese or spinach filling on the disk. Fold the disk over the filling to form a half-moon shape, making sure to pinch the open sides together to seal them, and place on a baking sheet, either oiled or lined with a nonstick baking mat.

When all the borekitas are assembled, bake until golden brown, about 20 minutes. Serve warm.


Disclosure: A copy of this cookbook was sent to me for review purposes. I was not required to post about it and received no compensation for doing so. 

Coconut Milk Flap Jacks: CakeLove in the Morning

April 18, 2012

I appreciate a big breakfast. 
I didn’t realize exactly how much until a few months into our time living abroad. I knew that not every country celebrated the morning meal the way we do in the U.S., or in countries such as Ireland or the U.K.  But I was taken aback by the confused looks I got when describing pancakes, omelets, bacon, biscuits, and grits to our new friends. 
Brazil is a bread or pastry and coffee culture when it comes to breakfast. In many ways, I guess we are around here too, except for the weekends. Oh the weekends! Or rather, the weekend breakfast!
So when I get a cookbook that highlights this meal you can imagine my excitement. This time it was CakeLove in the Morning by Warren Brown.
Cake? In the morning? I’m in!
I’ll admit when I first looked through this cookbook, I thought it might be best for a beginner in the kitchen. With recipes such asApple-Cranberry Oatmeal and Zucchini Bread, it provides excellent instruction for the basics.
But then I took a closer look. 
I’ve reviewed one of Warren Brown’s cookbooks before and I used to watch his show on the Food Network. While I remembered that he is a lawyer turned baker, it had escaped me that he has a degree in public health and practiced health care law. 
My point? Upon my closer look at the book, his background in health is evident. 
His recipes have a delightful combination of healthy, whole ingredients from buckwheat flour to yams, and I was even introduced to a new oil that I have yet to explore, rice bran oil. This book would be perfect for health-minded beginners, but it has plenty to keep those of us who cook a bit more interested as well.
Aside from baked goods such as White Chocolate Waffles and Chocolate Chip Bacon Pancakes, there are several savory breakfast recipes, and condiments to go with it all – Dairy-free Butternut Squash Frittata, Breakfast Lasagna (I know! Isn’t that a great idea?), Jalapeno Honey Butter. And you can’t forget cake in the title; there are a few of those too. 
I went with a traditional favorite that had an interesting twist – Coconut Milk Flap Jacks. This whole grain recipe uses whole wheat and buckwheat flours, oats, honey and, of course, coconut milk. 
I am no expert pancake maker, and these turned out beautifully. They were light and fluffy despite the hearty grains. I agree with the recipe description that the pancakes bring the flavor of the Caribbean. That’s why I added a little mango on the side!
This one is perfect for Mother’s Day brunch, and you can serve them with the cookbook on the side because it would make a great gift.

Coconut Milk Flap Jacks

From Cake Love in the Morning by Warren Brown, reprinted with permission for Abrams Books
Serves: 4
1 cup (about 6 ounces) banana, mashed
1 cup coconut milk (or milk)
1 egg
2 tablespoons fresh lemon juice
2 teaspoons honey
1 teaspoon vanilla extract
1 cup whole-wheat flour
¼ cup whole rolled oats
2 tablespoons buckwheat flour
1 tablespoon superfine sugar
1 ½ teaspoons baking powder
½ teaspoon baking soda
¼ teaspoon salt
1 tablespoon butter or vegetable oil
Cinnamon and Allspice to sprinkle
Preheat the oven to 275 degrees F to keep the finished pancakes warm.
Combine the banana in a medium bowl with the coconut milk, egg, lemon juice, honey, and vanilla extract. Set aside for 5 minutes.
In a large bowl, whisk to combine the whole-wheat flour, oats, buckwheat flour, sugar, baking powder, baking soda, and salt.
Gently fold the liquid ingredients into the flour mixture, but don’t fully combine. Let the batter rest for 10 minutes to soften the oats.
Meanwhile, heat a large skillet or griddle over medium heat. When the surface is hot, add the butter or vegetable oil and spread it out.
Using a ¼-cup measure, drop 4 to 6 pancakes into the pan. Flip when bubbles appear, after about 3 to 4 minutes. 
Cook for another minute, then remove the pancakes to a heat-resistant plate in the warmed oven.
Sprinkle with a dusting of cinnamon and allspice and serve with warmed maple syrup. 

Disclosure:  A review copy of this book was sent to me by Abrams Books. I was not required to post about it and received no compensation for doing so. I only review books and products that I enjoy enough to have in my own kitchen.  

Pie It Forward: Chocolate Fleur de Sel Caramel Tart

March 20, 2012

I vaguely remember writing about reducing added sugar a few posts ago.

Then this arrived in my mailbox.

Pie It Forward by Gesine Bullock-Prado is the perfect reason to put your sugar sacrifice on hold, at least for one dessert.
Before opening the cover of this book I should warn you that if your perception of pie is two pieces of buttery crust filled with fruit or cream prepare to broaden your horizons. Among the classic apple and berry, cookie-crusted tarts and puff pastries proudly claim their pie identity.
I am a work in progress when it comes to baking so I have no doubt that the first few chapters of this cookbook are meant for me. The dos, don’ts, and most importantly, the whys of pie making are well explained. It’s the why that I need. The “we do this so it doesn’t do that” is the kind of logic I need to better myself in any culinary undertaking, and this book has it.
It also has beautiful food photos by Tina Rupp, and recipes such as Chocolate Stout Pudding Pie, Yuzu-Ginger Rice Pudding Meringue Pie, and Gooseberry Fool Tartlets. And for all of you out there who have somehow escaped the burden of a sweet tooth, there is a section devoted to savory pies as well.

For better or worse, I was drawn to the Chocolate Fleur de Sel Caramel Tart. I say worse because it took me two tries to get a presentable dessert. First, the sides of the tart fell, second I burned the caramel.

In my defense I did rock the truffles. Oh, did I mention there are chocolate truffles on the top? Yes, just when you think caramel in a chocolate crust couldn’t get any better, along comes a truffle.

I’m still a work in progress, but I did close this adventure with a delicious, albeit slightly modified version, of this brilliant tart. The main differences you’ll see between mine and the gorgeous photo in the book is a darker caramel (I came a mere fraction of a degree from a second burning), and I had an 11-inch tart pan instead of the 8-inch the recipe calls for. Don’t be discouraged if your access to tart pans is as limited as mine, you can still make this dessert, as well as several other tasty recipes, in this book.
I probably don’t need to tell you that the combination of a chocolate cookie crust with a hint of coffee tastes amazing with a caramel filling. Or that the added bonus of a truffle on top will fulfill any chocolate craving to come your way.
Anyone attending a potluck or party with me in 2012 should most definitely expect pie. I’ve only got one recipe down, and there are so many more to go!

Chocolate Fleur de Sel Caramel Tart
From Pie It Forward by Gesine Bullock-Prado. Reprinted with permission from Abram Books

This is a sophisticated candy bar wrapped up in tart’s clothing. It features caramel that leaves ropy tendrils behind after you’ve taken a bite. And while you can use a fork, I have to tell you it’s so much easier to pick up your slice to convey it to your mandibles.

MAKES 1
(8-inch/20-cm) tart

For the crust

Chocolate Cookie Tart Crust (recipe below)  1/2 batch

Soft Caramel Filling (recipe below) 1 batch

For the truffles

heavy cream ¾ cup; 177 ml
unsalted butter 2 tablespoons; 28 g
salt pinch
corn syrup (optional) 1 tablespoon; 15 ml
bittersweet chocolate, finely chopped 8 ounces; 225 g
cocoa powder 1/4 cup; 20 g

For the assembly

large-grain fleur de sel (sea salt) 1/2 teaspoon; 2.5 g

Procedure for the crust

1. Preheat the oven to 350 degrees F (175 degrees C). Line an 8-inch (20-cm) tart pan with
the dough. Dock and freeze it for 20 minutes. Line the crust with parchment, fill it with pie weights, and bake it for 15 minutes. Remove the pie weights and parchment and bake the crust for 15 minutes more, or until
the bottom is golden brown and baked through. Allow it to cool.

2. Prepare the caramel filling as instructed on page 36 and pour it into the cooled crust. Refrigerate until firm, about 2 hours.

Procedure for the truffles

1. In a small, heavy saucepan, simmer together the cream, butter, salt, and corn syrup, if using, making sure the butter melts completely. Take the pan from the heat and add the chocolate. Allow it to sit for a few minutes undisturbed, then whisk the mixture until the glaze emulsifies and all the chocolate melts. Cover and refrigerate until set, about 1 hour.

2. Using a melon scoop, a teaspoon-sized cookie scoop, or a teaspoon, form small rounds of ganache and roll them into balls with your hands. Roll the truffles in cocoa powder to coat them evenly.

Assembly

1. Place the truffles around the perimeter of the tart, sprinkle fleur de sel over all, and serve at room temperature.

Chocolate Cookie Tart Crust

This is a scrumptious and elegant chocolate tart dough. The key is using the right cocoa powder. You can’t go with your grocery-store variety of anemic cocoa. No, sir. I’ll know if you use it, too. You must use a high-quality, very dark cocoa: Cacao Barry or Valrhona are excellent choices. For this one, I use Cacao Barry Extra Brute. You’ll thank me later.

Makes enough dough for 2 (8-inch/20-cm) tarts,
8 (4-inch/10-cm) tarts, or 16 mini tarts

eggs 2
sweetened condensed milk  2 tablespoons; 30 ml
brewed coffee, cooled   2 tablespoons; 30 ml
all-purpose flour, cold 1 1/2 cups; 185 g
cocoa powder 1/2 cup; 40 g
sugar 3/4 cup; 150 g
instant espresso powder 1 tablespoon; 3 g
salt 1 teaspoon; 6 g
unsalted butter, cut into small pieces and chilled ¾ cup; 180 g

1. In a small bowl, whisk together the eggs, condensed milk, and coffee.

2. In the bowl of a food processor fitted with the blade attachment, pulse together the flour, cocoa, sugar,
espresso powder (if using), and salt.

3. Add the butter and pulse until the mixture resembles course cornmeal. While pulsing, add the liquid ingredients, and continue until the dough just holds together when you press it with your fingers.

4. Turn the dough out onto a large piece of plastic wrap. Form it into a flat disk, cover it completely with the plastic wrap, and refrigerate it for at least 30 minutes.

Soft Caramel Filling

Makes approximately 2 cups (480 ml)

sugar 1 cup; 200 g
corn syrup 1/4 cup; 60 ml
salt 1 teaspoon; 6 g
unsalted butter 2 tablespoons; 28 g

heavy cream ⅓ cup; 75 ml
vanilla bean paste 1 teaspoon; 5 ml

1. In a large, heavy saucepan, combine the sugar, ⅓ cup (75 ml) water, the corn syrup, and salt and cook, stirring, over medium-low heat until the sugar has melted.

2. Brush down the sides of the pan with a damp pastry brush to eradicate any errant sugar crystals.

3. Stop stirring, increase the heat to medium-high, and clip on a candy thermometer. Heat the sugar syrup to
245 degrees F (120 degrees C).

4. Once the syrup has reached temperature, take the pan off the heat and carefully add the butter and cream. The mixture will bubble vigorously at first. Stand back and let the hot sugar do its molten dance. When the syrup has calmed, stir until the butter has completely melted. Add the vanilla and stir again. Pour the caramel immediately into your pastry vessel (or other vessel) of choice and allow it to cool and set completely, 1 to 2 hours.

Pie It Forward day was 3/14, but you can still download Gesine’s Wild Blueberry Pie recipe and watch the video to get a few inside tips!

Want to create beautiful food and product photos that you can't wait to share?!
Discover your style, control the light, and shoot using the tool you know how to use (yes, your phone included). Learn about free resources, Live Q&As with Lori, and online courses you can take from anywhere in the world!
We respect your privacy. Unsubscribe at any time.