Browsing Category

Appetizers and Snacks

Homemade Garden Chili Slow Cooker Recipe

September 19, 2012


Chili is one of those foods that I get burned out on by December, but every time the next September rolls around, I’m ready for it all over again. My cravings for it this year started this past week, and they are just about spot on, considering we are moving towards the end of the month.

As you can probably tell from my posts, it has been a great garden year. We are still bringing in more tomatoes than I know what to do with, and I have plenty of frozen veggies from harvests earlier in the summer. With the weather turning cooler here, chili seemed like the ideal way to use them up.
My goal was to use a lot of fresh tomatoes, so this recipe does take some prep work. For me, this is just the kind of thing I enjoy doing on a quiet Sunday. Once it’s all in the slow cooker, it’s low maintenance from there on out. 
Feel free to substitute different kinds of vegetables. I’ve been shredding and freezing zucchini all summer, and we also had some sweet corn tucked away in the freezer. Both ended up being a great addition to this chili.

Homemade Garden Chili Slow Cooker Recipe

6 – 8 lbs of tomatoes (you’ll need about 6 cups of sauce)
5 cloves garlic
1 small onion, chopped
2 cups black beans, soaked overnight
2 cups shredded zucchini, thawed if frozen
1 cup sweet corn, thawed if frozen
1 cup water
2 tbsp chili powder
1 tsp chipotle chili powder
1 tsp cumin
2 tsp salt
½ tsp ground black pepper
2 scotch bonnet peppers (or your favorite hot pepper)
Preheat the oven to 400 degrees F. Cut de-stem and core tomatoes if necessary, and cut in half. (I used a mix of San Marzano, Beefsteak and heirlooms.) Arrange cut side down on a baking sheet with the garlic and drizzle with a little olive oil. In batches, roast for 20 minutes. Set aside to cool.
Add the onion and black beans to your slow cooker. Remove the skins from the tomatoes and place the pulp and the garlic cloves in a blender. Blend in batches until a smooth sauce results. Pour the sauce into the slow cooker. Set to high.
Add the zucchini and corn. Add the water. Stir in the chili powders, cumin, salt and black pepper.  Take the scotch bonnet peppers and de-stem them. Cut a small slit in the side of each. Place the whole pepper in the soup. Put on the lid and cook on high for about 4 1/2 hours, or until the beans are tender.
Before serving, remove the two peppers and discard. Serve with your favorite toppings. Makes about 6 servings.

Honey-Pecan Tomato Tarts with Blue Cheese Recipe

July 12, 2012
This recipe for tomato tarts is one of my favorite tomato recipes of all time. I first made them back in 2012 and I’ve been recreating them since. They are well worth firing up the oven in the summer!
 
Honey-Pecan Tomato Tarts with Blue Cheese Recipe | Fake Food Free
 

The tomatoes are finally on in the garden! We’ve had a few setbacks with sun scorching in the extreme heat, but there has been a steady stream on the kitchen counter for about a week now.

The SunSugar cherry tomato plant is doing well this year. As much as I love these little orange gems, I’ve hit my limit for eating them fresh (at least for a couple days). We needed a little variety.

Over the 4th of July, my aunt sent some Georgia pecans home with us. After my husband got them all cracked open, I had 3 cups of fresh pecans that were screaming to be used.

I love the combination of blue cheese, nuts and honey so that inspired mini-tarts using the cherry tomatoes.

Tomato Tarts Recipe with Honey, Pecans and Blue Cheese | Fake Food Free


The blue cheese was the perfect topper to balance out the sweetness from the nuts, tomatoes and honey. If you don’t like blue cheese, feta, or even parmesan, would work well, too.

Honey-Pecan Tomato Tarts with Blue Cheese

Makes:  6 tarts

What you’ll need:

1 tablespoon extra virgin olive oil
1/3 cup minced onion
2 cloves garlic, minced
1 pint cherry tomatoes
1/3 cup pecans, chopped
1 teaspoon honey
1/2 teaspoon salt
1  9-inch pie crust
3 – 4 oz. blue cheese, crumbled

How to make it:

Preheat the oven to 375 degrees F.

Heat the olive oil in a skillet over medium-high heat. Add the onions and garlic. Cook for 1-2 minutes. Add the cherry tomatoes. Reduce heat to medium and cook, stirring often, about 7 minutes. The tomatoes will begin to burst and the onions will caramelize. Gently smash the tomatoes as they begin to burst.

Stir in the pecans and cook about 1 more minute. Stir in the honey, and the salt. Allow to cool while you prepare the crust.

Roll the pie crust to about 9 inches, and cut into 6 – 3 1/2 to 4 inch circles. I used an x-large muffin pan for the tarts. Place each circle of dough into the muffin tin. Press gently to fill the bottom and to come up about 1 inch on the side. Prick the dough with a fork. (You will likely have a little dough left over.)

Spoon the tomato mixture into each of the muffin tins, filling the crust. Next, divide the blue cheese and sprinkle each tart with an equal amount.

Bake for 20 minutes, until the cheese is melted and begins to bubble, and the edges are browned. Remove from the oven and allow to cool for about 5 minutes before removing from the pan.

Tomato Tarts Recipe with crunchy honey pecans and tangy blue cheese! | Fake Food Free


Thanks for reading! All images and content are the property of Fake Food Free and Lori Rice unless otherwise stated. Please do not republish full recipes and images without written permission. What is okay? Feel free to Pin images, share links to my posts or share the photo in a round up post with the title of this recipe and a link back to the post. Confused about copyright and food blogs? Here is some helpful information on Recipe Attribution. If you want to use a photo or full recipe, just ask. I’m sure we can work something out.

Salad with Grilled Zucchini and Blackberry Balsamic Dressing Recipe

July 7, 2012

Salad with Grilled Zucchini and Blackberry Balsamic Dressing Recipe | Fake Food Free


If you’ve spent any time at all near a summer squash plant, you know how it goes. One minute you see a tiny little zucchini growing; a day later you have a squash as big as your arm.

Those huge zucchinis always went into bread at our house so I made some zucchini muffins last week. Unfortunately, that only used up ½ of the monster.  Instead of more baked goods, I decided to take the rest to the grill for zucchini steaks.

With summer zucchini always comes blackberries so a blackberry dressing sounded perfect. This dressing drizzled on a salad with a couple zucchini steaks and few extras made a great summer meal.

Blackberry Balsamic Dressing Recipe for Salad with Grilled Zucchini | Fake Food Free


Salad with Grilled Zucchini and Blackberry Balsamic Dressing

Makes:  4 servings

What you’ll need:

Zucchini Steaks
8 – 1 ½ inch thick slices zucchini
2 teaspoons olive oil
1 teaspoons balsamic vinegar
Salt and pepper to taste

Blackberry Balsamic Dressing
½ cup blackberries, defrosted if frozen
5 fresh rosemary leaves
2 tablespoons balsamic vinegar
½ cup extra virgin olive oil
1 teaspoons sugar
¼ teaspoons salt
1/8 teaspoons black pepper

Salad
8 cups greens (I used romaine, cabbage and spinach)
4 oz. blue cheese, crumbled
4 tablespoons sunflower seeds

How to make it:

Place the zucchini slices in a shallow dish and drizzle with the olive oil and balsamic vinegar, and sprinkle with salt and pepper. Coat each piece and set aside to marinade while you prepare the dressing and salad.
In a small food processor, combine all of the dressing ingredients and pulse until it is smooth. If using fresh berries you may need to add 1-2 tablespoons of water. Makes about ½ cup of dressing. Set aside.
Prepare four plates with 2 cups of greens, 1 ounce of blue cheese and 1 tablespoon of sunflower seeds. Set aside.

Preheat the grill or a grill pan on the stove. Place the zucchini slices on the grill and cook on medium-high for 3 to 4 minutes on each side.

Place two zucchini steaks on each salad and drizzle with dressing.

Salad with Grilled Zucchini. A great vegetarian summer meal! | Fake Food Free


Thanks for reading! All images and content are the property of Fake Food Free and Lori Rice unless otherwise stated. Please do not republish full recipes and images without written permission. What is okay? Feel free to Pin images, share links to my posts or share the photo in a round up post with the title of this recipe and a link back to the post. Confused about copyright and food blogs? Here is some helpful information on Recipe Attribution. If you want to use a photo or full recipe, just ask. I’m sure we can work something out.


BLT Spinach Salad with Fresh Garlic Dill Dressing

May 31, 2012
BLT Spinach Salad with Fresh Garlic Dill Dressing | Fake Food Free

As much as I love a tasty whole grain, I am aware when I have a few too many grains in my diet. Once spring race training comes to an end, it’s time to slow down on the bread and oatmeal, and replace them with more fruits and veggies. I have to say the timing couldn’t be better as the garden starts to come around.

I love BLTs and this salad is a great option when you’d rather skip the sandwich part. It’s also a good way to use up some of the fresh herbs from the herb garden!

 
BLT Spinach Salad with Fresh Garlic Dill Dressing | Fake Food Free
 
 
BLT Spinach Salad with Fresh Garlic Dill Dressing
 
Makes: 2 servings
 
Ingredients
2 medium tomatoes
1 cup fresh spinach, finely chopped
1 cup lettuce (any variety), finely chopped
5 sweet basil leaves, chopped
4 pieces bacon, cooked crisp and chopped (preferably local, pastured)
 
Dressing:
2 tbsp plain Greek yogurt
1 tbsp water (optional, to thin yogurt if necessary)
1 clove garlic, chopped
1 tbsp chopped fresh dill
1 tbsp chopped fresh chives
Pinch of salt and black pepper
 
Prep
 
Cut the tops off the tomatoes and gently scrape out some of the inside of the tomato with a spoon to create a bowl for the salad. Set aside.
 
In a medium bowl, combine the spinach, lettuce, basil and bacon.
 
In a small food processor, combine the yogurt, water, garlic, herbs, salt and pepper. Process until garlic is finely chopped. Pour dressing over the salad and toss to coat.
 
Place half of the salad into each tomato. Serve immediately. 
BLT Spinach Salad with Fresh Garlic Dill Dressing | Fake Food Free

Tomorrow is the last day to enter to win a copy of the Pure Beef by Lynne Curry! (Giveaway Closed)

Thanks for reading! All images and content are the property of Fake Food Free and Lori Rice unless otherwise stated. Please do not republish full recipes or images without written permission. What is okay? Feel free to Pin images, share links to my posts or share the photo in a round up post with the title of this recipe and a link back to the post. Confused about copyright and food blogs? Here is some helpful information on Recipe Attribution. If you want to use a photo or full recipe, just ask. I’m sure we can work something out.

Pure Beef: Tamarind Beef Satay

May 24, 2012

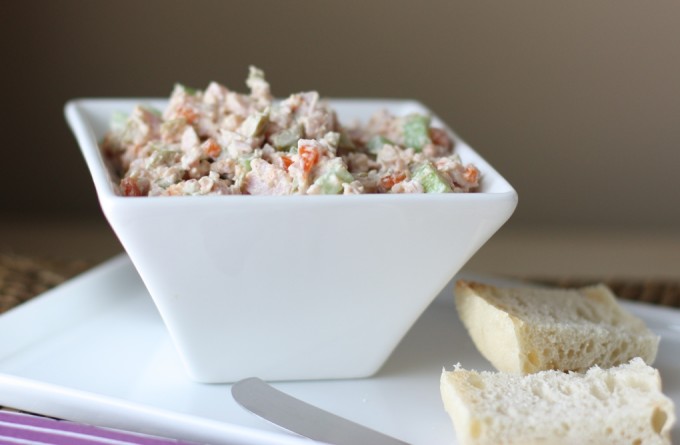
I first made this delicious beef satay recipe back in 2012. Every summer it continues to be a great go-to meal or snack when we fire up the grill for some outdoor cooking. 

Grilled Tamarind Beef Satay Recipe | Fake Food Free


The email subject read, “As far from fake beef as one can get.”

That was enough to spark my curiosity.

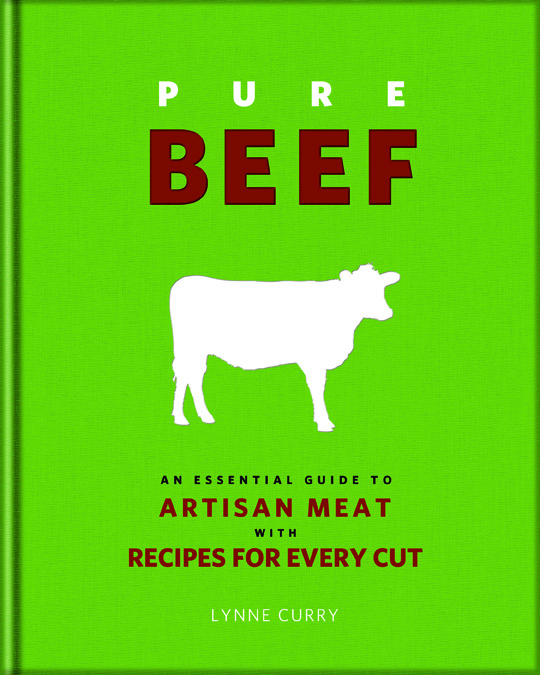
Before I opened it I wasn’t aware of the cookbook that awaited me, of the story that would later have me nodding my head, or the fact that it would be so educational that my husband would hijack it for a day and read the first 70 pages.

Pure Beef Cookbook

The title says a lot, but it does not say it all. I’ve found this cookbook to serve as a novel as I have read through Lynne Curry’s story. Lynne is a former vegetarian who now finds herself in Oregon’s Wallowa Valley enjoying what I can only imagine is one of the most beautiful places on earth with some of the best food.

I live in central Kentucky and it’s pretty beautiful here, too. As I write this I just happen to have a chorus of cows singing from the farm behind our house, but I’ve been to Oregon and I love it. This can be considered – how I related to this book #1.

Number 2, is the story of how a vegetarian came to enjoy the flavor of grassfed beef, culturally, nutritionally, and ethically. To paraphrase roughly, the moment was during her international travels in Guatemala when she was graciously offered grassfed beef as a gesture of hospitality.

Tamarind Beef Satay recipe from the Cookbook Pure Beef


While I have never been a vegetarian, I fully believe that culture and respect for the people of that culture should override what we will and will not eat. I’ve tried many things, and maybe one day I will be put in a position where I just can’t stomach it, but as of now this is my view. It was a view that I felt I shared with the author as I read, making this book even more meaningful.

I was never all that crazy about beef until I enjoyed the local grassfed beef of the Bluegrass. This opportunity occurred only about 2 years ago when we returned to the States. Now it is the only beef I will buy. There are many reasons for this, and I will let you read through these when you get your copy of Pure Beef. Considering my background, nutrition is one reason.

As I moved past the why of the book, I got to the how. How to cut beef, how to buy it, how to cook it. I still have a lot more to read, but this is as much a resource for my library as a cookbook.

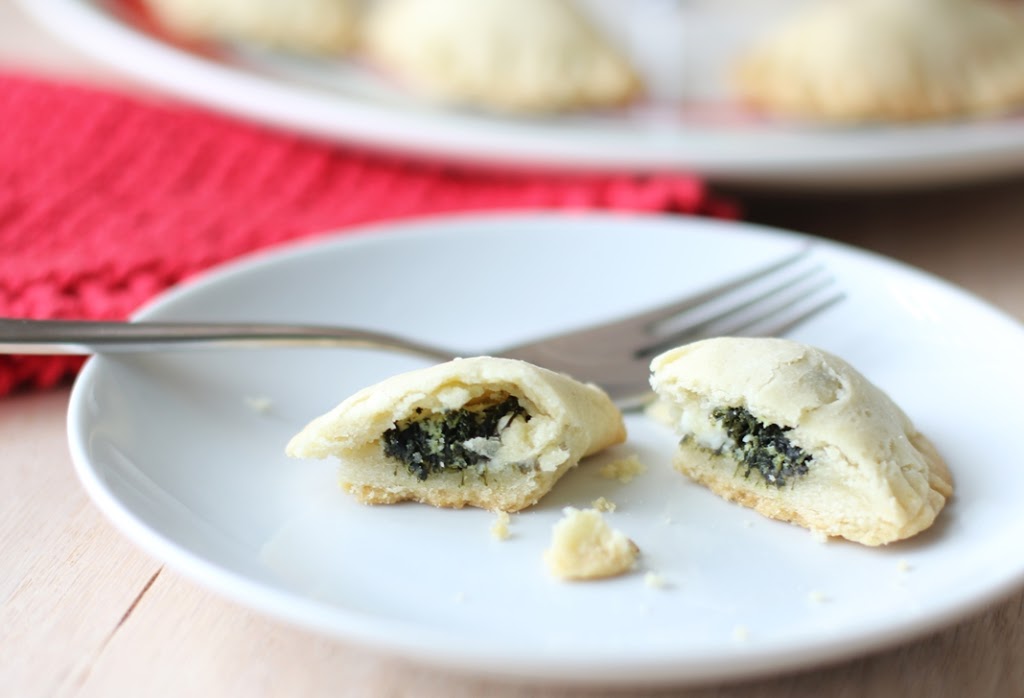
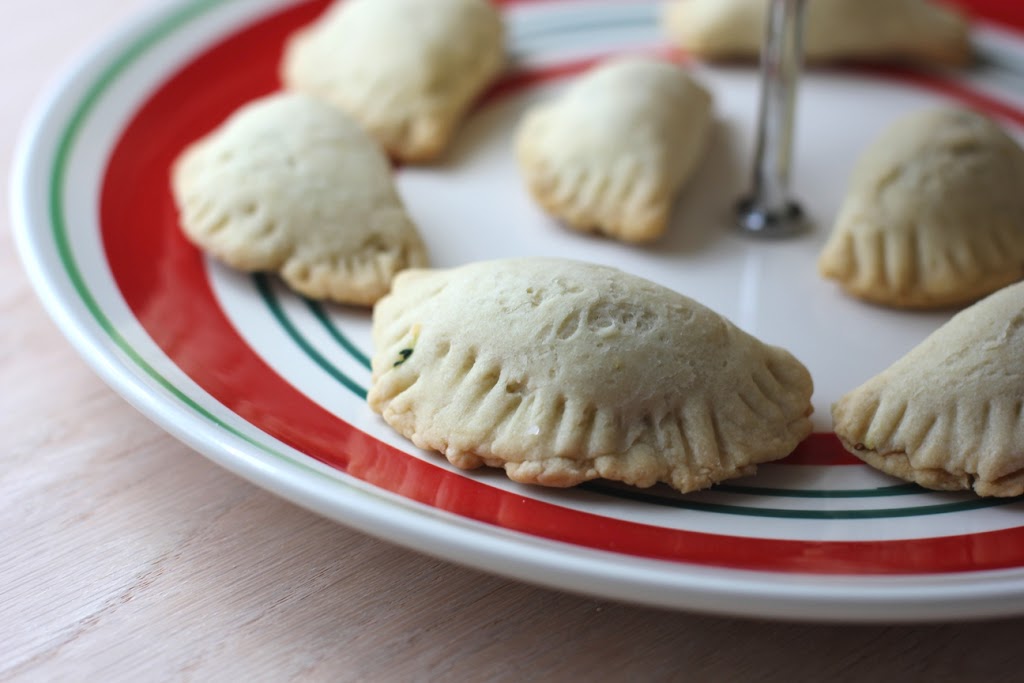
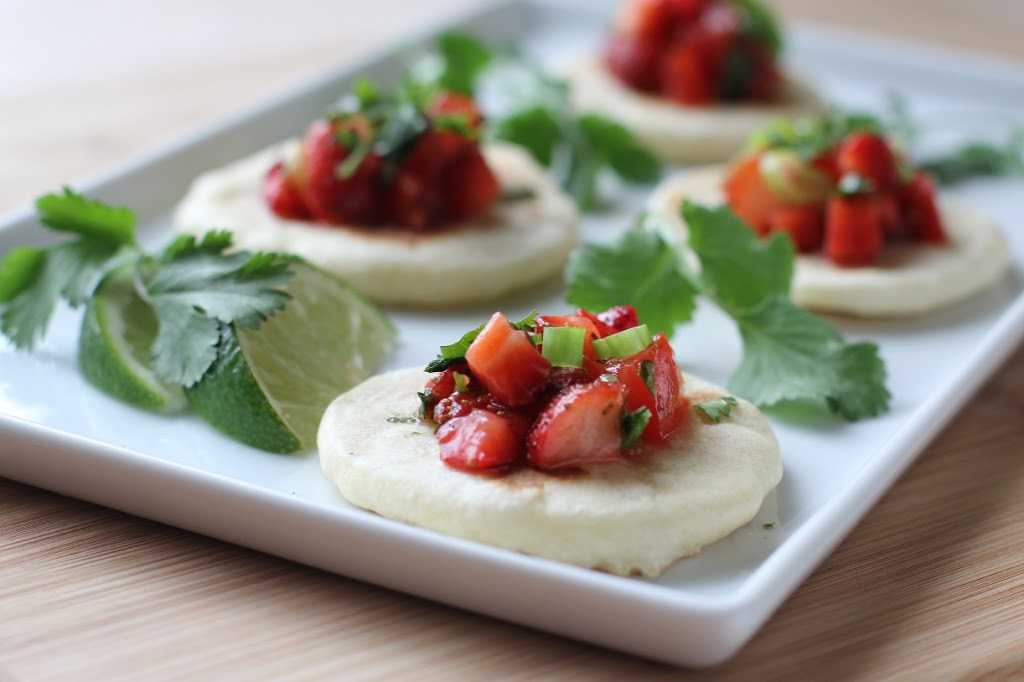
Then you get to the recipes. There truly is a recipe for every cut, and an endless amount of tips on how to cook it all. Coffee Bean-Chile Rubbed Sirloin Roast, Boneless Oxtail and Buckwehat Crepe Purses, and Baked Argentinian Empanadas to name a few.

There are side dishes and condiments galore as well, with and without beef, such as Roasted Corn Salsa, Butternut Squash Bread Pudding, and Lemony Chard Bundles. There are also variations on recipes such as the gluten-free meat loaf.

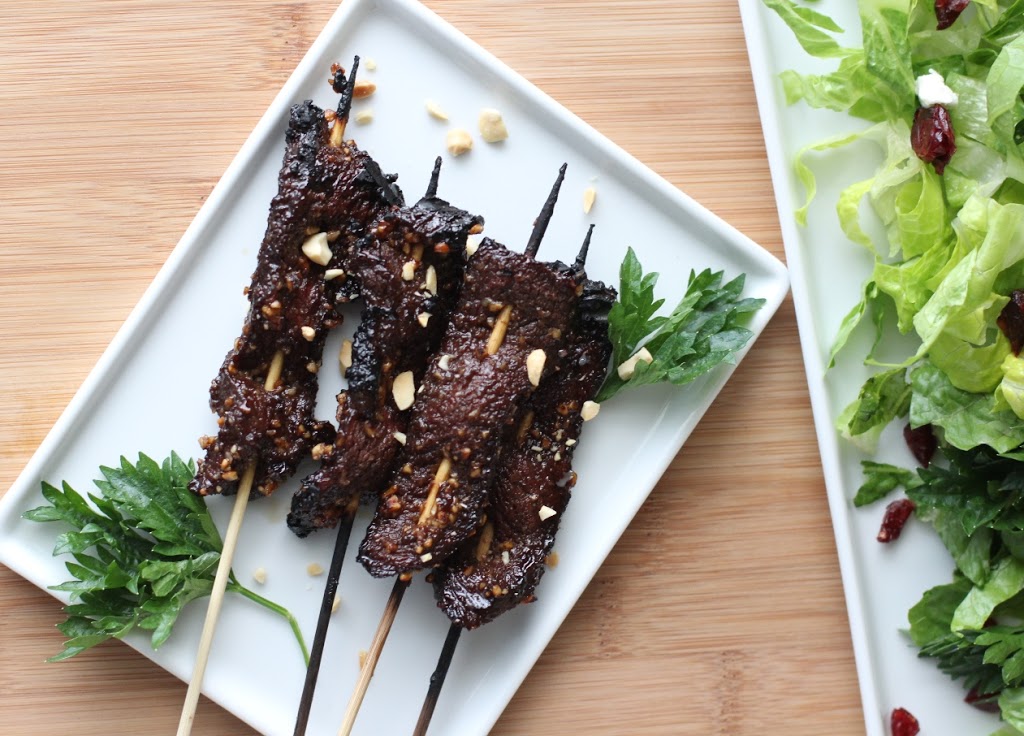
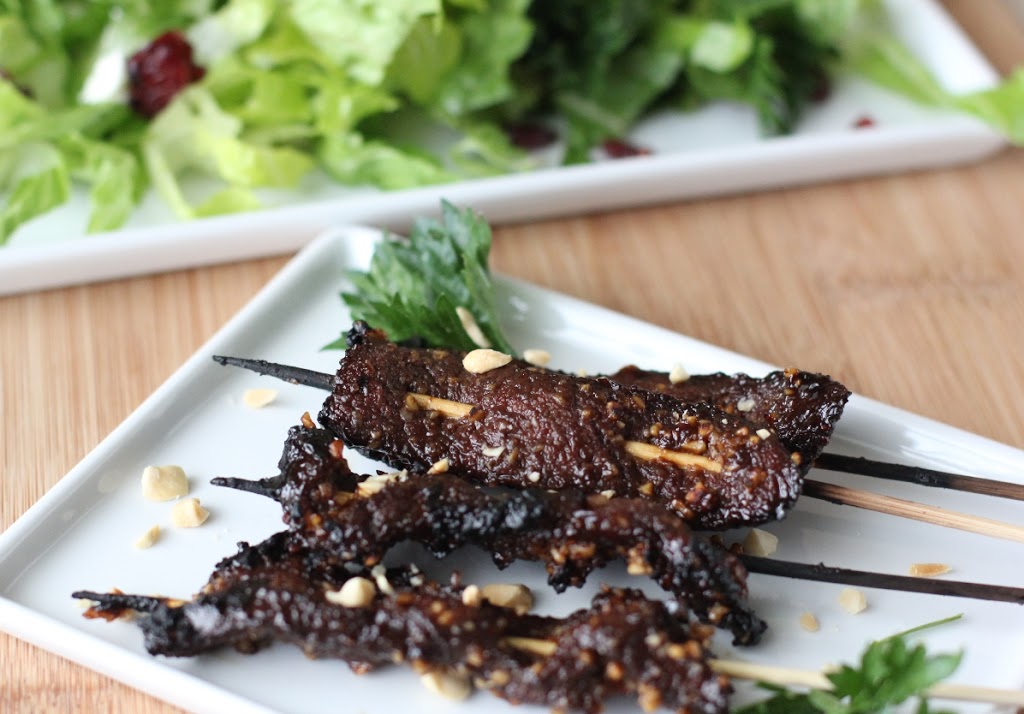
There were too many great recipes to choose from, so I had to use a bit of a spin-the-bottle approach to select one. I landed on Tamarind Beef Satay.

Tamarind Beef Satay


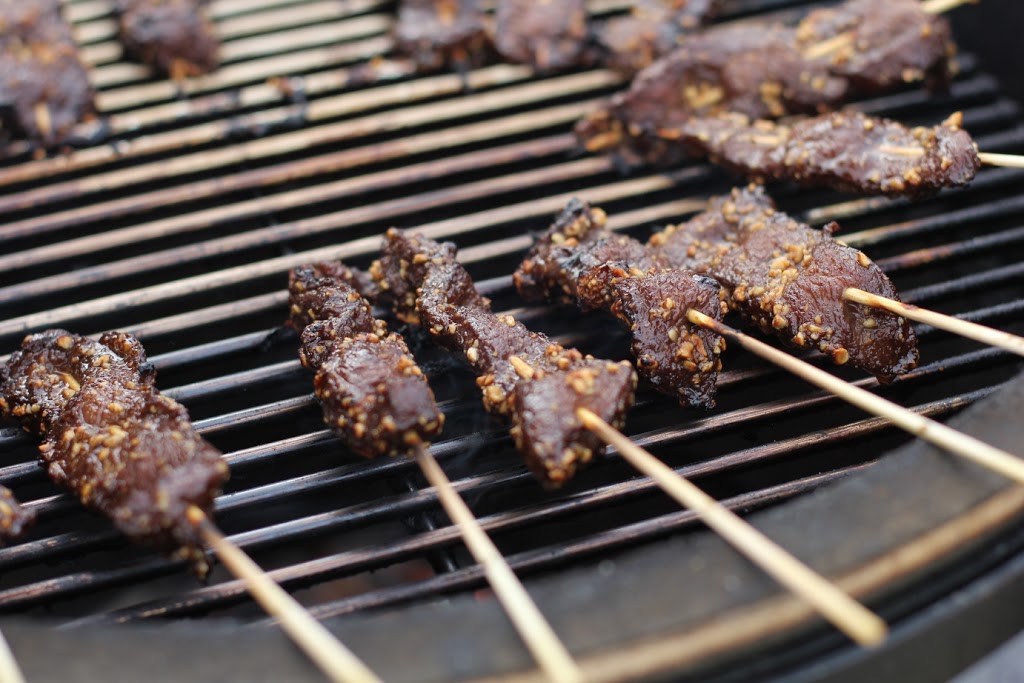
We picked up a tri tip from our local grassfed beef source, Marksbury Farm Market. It worked beautifully and all the credit has to go to my husband. One tip he picked up from the book was to freeze the meat for about 20 minutes before slicing it thinly for the beef satay. He sliced, I mixed the marinade.

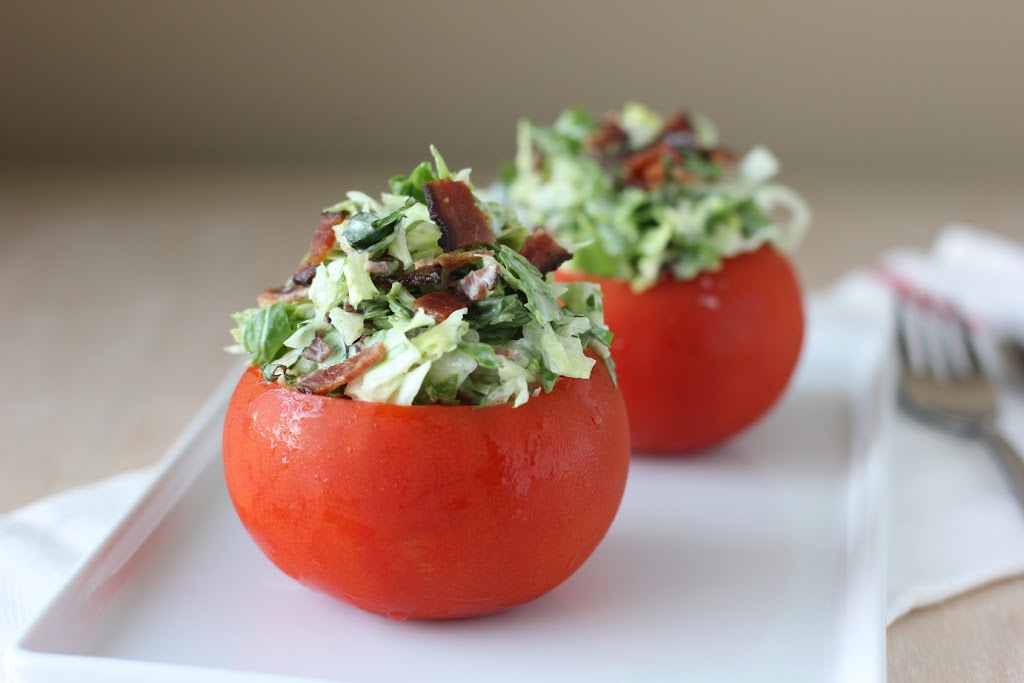
This recipe is simple and the beef satay cooked up on the grill quickly. The sweet and tart flavors of the tamarind, honey and fish sauce go so well together. Next time I’ll probably add just a little more chile sauce because we are spicy food fans. We served up the satay with grilled corn and a green salad. Easy and delicious!

Tamarind Beef Satay

Recipe reprinted with permission from Pure Beef © 2012 by Lynne Curry, Running
Press, a member of the Perseus Book Group.

From the book:

Tamarind is an intoxicating sour and sweet fruit from Indonesia where satay is the go-to snack on a stick. It is incredible with beef, so I created a tamarind marinade that lacquers thin beef strips to grill or broil. Satay makes a wonderful appetizer; to fill it out for a main dish, I accompany it with another Indonesian favorite, a fruit salad called Rujak, which has as many renditions as pasta salad does in this country. My version is a beautiful chopped salad of cucumbers, jicama, pineapple, and mango that’s crunchy, juicy, sweet, and tart. Served along with Sticky Rice or steamed rice, it turns satay into a tantalizing meal, just the thing to wake up your taste buds in the middle of winter.

Makes 4 servings as a main dish; 8 as an appetizer

3 tablespoons tamarind paste*
3 tablespoons honey
1 tablespoon fish sauce

1/2 teaspoon chile sauce, such as sambal oelek
1/8 teaspoon salt
1/2 cup unsalted dry roasted peanuts
1 to 1 1/2 pounds top sirloin steak, sliced into 1/4-inch thick strips

Mix the tamarind paste, honey, fish sauce, chile sauce, and salt in a medium-sized bowl. Pound the peanuts in a mortar and pestle or in a heavy-duty plastic bag with a rolling pin to the texture of fine breadcrumbs and stir into the tamarind sauce. Put the beef strips in the bowl, toss to coat, and marinate for about 15 minutes at room temperature.

Preheat a charcoal or gas grill for high heat (425°F to 475°F), scraping the grate clean and oiling it lightly, or preheat the broiler. Thread the slices onto wooden or metal skewers, stitching the beef on and then stretching it along the skewer so that it looks like a miniature banner. Thread any short strips onto the same skewer.

Grill or broil the skewers for 1 to 2 minutes per side and serve the satay warm or at room temperature.

*Note: Tamarind is available from Asian grocery markets in several different forms. Tamarind paste is the easiest form that can be used straight from the jar. If your tamarind is labeled concentrate, use only 1 tablespoon and mix it with 2 tablespoons water. If you have a block of tamarind, chop about 1/2 cup of it, use a fork to mash it with 6 tablespoons of boiling water, and let it soften for about 5 minutes. Use a fine-meshed strainer to extract 3 tablespoons of pulp, pressing on the mixture firmly with a spoon.


Disclosure: A copy of this cookbook was sent to me for review purposes. I was not required to post about it and received no compensation for doing so.

Borekitas: Hazan Family Favorites

May 21, 2012

When I received my copy of the Hazan Family Favoritescookbook I will admit I had to do some research. There is no doubt that this speaks to my lack of knowledge of Italian cuisine.  It made me think about how it is possible to feel affection for a cuisine without really knowing it at all.


There is no question that I love homemade pasta and marinara sauces, or that I believe they are 100% worth the time and effort it takes to make them. I enjoy bean soups and simple meat cutlets, and the other elegant offerings that come from an Italian kitchen.

What I think I have often overlooked is the simplicity. 

In case you have some more to learn about Italian cooking like I did, the book was written by Guiliano Hazan. He is the son of Marcella Hazan whose cookbooks are credited with introducing the United States to traditions and techniques of Italian cooking. 

The book is a collection of recipes rescued from a fifty-six year-old notebook. As you flip through it and see the pictures you can feel the history and importance of its pages.

What you also see when you read the recipes is simplicity. Most of the recipes use only a handful of fresh ingredients to create a stunning end product. It’s impressive, educating, hunger-inducing, and it makes you think – okay, I’m ready to begin mastering the art of Italian cooking. 

Or if you are like me, it may also make you think – okay, let’s book the trip to Italy!


Amid the Fettuccine with Orange, Fried Parmesan Cheese-Battered Lamb Chops, and the Peach-and-Strawberry Semifreddo, the Borekitas caught my attention. What’s not to love about spinach, feta and ricotta stuffed into a bite-size pastry? Absolutely nothing. These are delicious. 


Borekitas
From Hazan Family Recipes, reprinted with permission from Abram Books 
 
Time from start to finish: 1 hour and 15 minutes
Makes about 20 borekitas 

From the cookbook:
My parents and I went to my grandparents’ almost every Friday for Shabbat dinner. I can still
taste and smell the wonderful little pies my Nonna Giulia made, which she called borekitas.
She made them either with a dough shell or a phyllo shell. The fillings were spinach or cheese.
In attempting to replicate them, I used Claudia Roden’s The Book of Jewish Food as a guide.
Both the cheese and spinach fillings below are just like what I remember, and the dough shell,
my favorite of the two, is just as good as the one Nonna Giulia used to make.


FOR the dough
4 tablespoons butter
1 1/2 cups all-purpose flour
1/4 cup vegetable oil
1/4 teaspoon salt

FOR the spinach filling (I made the spinach)
1/2 teaspoon salt
8 ounces fresh spinach, washed
1 ounce feta cheese
2 tablespoons whole-milk ricotta cheese


Cut the butter into small pieces and allow to come to room temperature.

Put all the ingredients in a food processor with 1/4 cup water and run it until a smooth, homogeneous dough forms. If it crumbles when pinched, mix in a little more water, 1 tablespoon at a time, until the dough is soft and smooth when pinched.

Wrap the dough in plastic and let it rest for about 20 minutes before using.

Spinach filling
In a pot large enough to cook the spinach, put about 2 inches of water, and place over high heat. When the water is boiling, add the salt and spinach. Cook until tender, 2 to 3 minutes, then drain.

Once the spinach is cool enough to handle, squeeze the excess water out and coarsely
chop. Place the spinach in a bowl. Crumble the feta and add it along with the ricotta. Mix thoroughly.


Assembling the borekitas
Preheat the oven to 350°F on the bake setting.

Take about a walnut-size ball of dough, place it on a counter, and press it with your fingers into a disk 2 inches in diameter. Put about 1 tablespoon of either cheese or spinach filling on the disk. Fold the disk over the filling to form a half-moon shape, making sure to pinch the open sides together to seal them, and place on a baking sheet, either oiled or lined with a nonstick baking mat.

When all the borekitas are assembled, bake until golden brown, about 20 minutes. Serve warm.


Disclosure: A copy of this cookbook was sent to me for review purposes. I was not required to post about it and received no compensation for doing so. 

Strawberry-Lime Salsa with Homemade Flour Tortillas

May 7, 2012

Strawberry-Lime Salsa with Homemade Flour Tortillas | Fake Food Free

It’s strawberry season! For the second year in a row we’ve been blessed with plants that keep on giving. For the past two weeks we’ve been getting one or more boxes of berries like this almost everyday.

Kentucky Garden Strawberries and a Strawberry-Lime Salsa Recipe | Fake Food Free
 
While I may get overwhelmed with herbs and peppers throughout the summer, that never happens with strawberries. Any that aren’t going in my mouth are going in the freezer!
 
It’s difficult to eat them any way but straight out of the box, but I’ve managed to create a few things that aren’t berries in a bowl or berries in oatmeal. One is this salsa.
 
Strawberry-Lime Salsa with Homemade Flour Tortillas | Fake Food Free
 
I’ve always liked a little fruit in my salsa, but I was introduced to strawberry salsa last year through a recipe program with the Kentucky Proud local food project we have here and Cooperative Extension.
 
I wasn’t sure how I’d like strawberries and tomatoes together, but one bite and I was sold. It’s so good.
 
This is my take on strawberry salsa. I decided to serve it up with some mini flour tortillas. I have been hooked on these tortillas from the Homesick Texan. I’ve made corn tortillas, but I just made these flour tortillas for the first time a couple weeks ago and I’ve made them two more times since! This time I made them much smaller to create an appetizer-sized serving plate for the salsa.
 
Strawberry-Lime Salsa with Flour Tortillas
 
Makes: 24 bite-size snacks
 
Ingredients
 
4 Roma tomatoes, de-seeded and chopped
1 cup diced strawberries
3 green onions, whites and greens sliced
¼ cup fresh cilantro, chopped
Juice and zest of one lime
½ to 1 teaspoon fine ground sea salt
Plain Greek yogurt or sour cream for serving (optional)
 
Prep
 
Combine the tomatoes, strawberries and onions in a bowl. Add the cilantro, lime juice and lime zest. Stir to combine all ingredients. Stir in the salt to taste. Refrigerate for at least 30 minutes before serving.
 
You can find the flour tortilla recipe at the Homesick Texan. When you are ready to cut the dough, cut it into 24 small pieces and follow the instructions provided there. Be sure to roll it very thin. It will puff up during cooking.
 
To serve, top each tortilla with a tablespoon of salsa. Garnish each with a ½ teaspoon of yogurt or sour cream, if using. Serve right away.

Strawberry-Lime Salsa with Homemade Flour Tortillas | Fake Food Free


Thanks for reading! All images and content are the property of Fake Food Free unless otherwise stated. Please do not republish full recipes and images without written permission. What is okay? Feel free to Pin images, share links to my posts or share the photo in a round up post with the title of this recipe and a link back to the post. Confused about copyright and food blogs? Here is some helpful information on Recipe Attribution. If you want to use a photo or full recipe, just ask. I’m sure we can work something out.  

Smoky Ham Salad with Olives

April 15, 2012


Smoky Ham Salad with Olives | Fake Food Free
 
 
I think I need to plan a picnic. I can’t stop thinking about picnic foods.
 
This is surprising because I’m not much of a picnic person. All that mayo sitting out for hours in 80 degree weather is enough to turn a person off. But for some reason I’m ready to set my food safety phobias aside for the sake of nice weather and a meal outside.
 
One food from my picnic memory book is ham salad. We always had it growing up, and I really liked the way my mom would make it. She ground up the ham so it was more of a spread than other versions I’ve seen. 
 
Despite being a fan, I have never made ham salad myself. But with some ham leftover from Easter I thought it was a good time to try and put my stamp on it. 
 
I decided to use what I now call my classic combo for former mayo-only based salads – plain Greek yogurt, a little mayo and spicy brown or Dijon mustard. I’ve had success with coleslaw, potato salad and chicken salad, and I actually like it a lot more than the all mayo versions. 
 
I’d suggest using full fat Greek yogurt. I hear over and over again that people don’t like Greek yogurt, and for the life of me I haven’t been able to figure out why. Then I bought some fat free Greek yogurt by one of the popular brands. (The ones famous for their flavored, diet yogurt who decided to do Greek because it’s cool.)
 
I now know why people say they don’t like Greek yogurt. I’m not exaggerating when I say it was one of the worst things I have tasted. I threw it out.
 
So try a full fat version (Greek Gods and Fage are my favorites). I promise it will change your life, at least as far as yogurt is concerned. And because it is yogurt the way it was meant to be, you’ll need much less of it to fill you up, and for flavor and fat in your recipes. 
 
Smoky Ham Salad with Olives | Fake Food Free
 
 
Back to the ham salad. I keep a small amount of mayo in the recipe because it cuts the sour flavor of the yogurt just enough so that it’s not overpowering. I also added some olives, and finished it off with just a bit of smoked hot paprika.
 
Crackers or a crusty baguette make the best form of transport. And be careful, it might put you in the mood for a picnic. That’s fine by me. I could use the company!
 
Smoky Ham Salad with Olives | Fake Food Free


Smoky Ham Salad with Olives

Makes: About 3 cups

Ingredients 

2 ½ cups cooked ham, finely chopped
1 large rib celery, chopped
¼ cup green olives, diced
½ tbsp grated onion
¼ cup plain Greek yogurt
1 tbsp mayonnaise
1 tsp spicy brown mustard
¼ tsp black pepper
¼ tsp smoked hot paprika
 
Prep
 
In a bowl, combine the ham, celery, olives and onion. Set aside.
 
In a separate bowl stir together the yogurt, mayo, brown mustard, pepper and paprika. Pour the yogurt mixture over the ham. Stir to mix all ingredients. Refrigerate at least 30 minutes before serving. 
 
hamsalad3
 
Thanks for reading! All images and content are the property of Fake Food Free unless otherwise stated. Please do not republish full recipes or images without written permission. What is okay? Feel free to Pin images, share links to my posts or share the photo in a round up post with the title of this recipe and a link back to the post. Confused about copyright and food blogs? Here is some helpful information on Recipe Attribution. If you want to use a photo or full recipe, just ask. I’m sure we can work something out.

Mixed Vegetable and Peanut Spring Rolls

February 28, 2012

These can best be described as kitchen sink spring rolls. I had a drawer of veggies in the fridge teetering on the edge of ripe, and “I’m gonna rot on ya.” Vegetable soup is often a good solution for this, but I wasn’t in the mood. Instead I thought I’d keep with this Asian trend I have going and experiment once again with spring rolls.
These can be served room temp or cold, after having them for lunch today, I vote cold. There is a bit of Sriracha in the veggies, but always add more for good measure.
Mixed Vegetable and Peanut Spring Rolls
1 tsp extra virgin coconut oil
3 leaves kale, de-stemmed, chopped fine
½ cup broccoli florets, chopped fine
¾ cup napa cabbage, shredded
2 medium carrots, cut into matchsticks (or as close as you can get)
3 green onions, sliced
2 tbsp vegetable stock
1 tbsp natural peanut butter (unsweetened, unsalted)
½ tsp sesame oil
1 tbsp Sriracha chili sauce
2 tbsp dry roasted, unsalted peanuts, chopped
2 tbsp fresh cilantro, chopped
Soy sauce to taste
8 rice paper wraps
Heat a large wok or skillet over medium-high. Add the coconut oil and heat through until melted. Add the kale, broccoli, cabbage, and carrots. Cook for 2-3 minutes. Add the green onions and the vegetable stock. The stock will evaporate quickly. Add the peanut butter.
The peanut butter will take some work to melt and incorporate into the veggies. Continue to stir. Add the sesame oil and Sriracha. Once the peanut butter has coated all the veggies, stir in the peanuts, cilantro, and soy sauce. Cook about 30 seconds and remove from heat.
Wet one rice paper wrap with hot water. Lay it over a plate, add 1/8 of the mixture towards one end and roll like you would a sandwich wrap or burrito. Continue this step for all of the wraps. Serve room temperature or cold. Makes 8 spring rolls.
Pin It

Bloggers Get Together – 5B: Believers in Better Beer, Bites and Blogging

February 17, 2012

There are few things I find more professionally and socially rewarding than food blogging. If I ever tire of cooking, food photography, or food culture, I will still post just to afford myself the opportunity to attend blogger conferences.
I have met people from around the world that I would never have encountered otherwise. These people are creative, smart, and inspiring. We are also one positive group of folks! But what can you expect from food. Good, quality food has a way of lifting one’s spirits.
Hoperatives, a Cincinnati beer blogging group, took a chance on an opportunity to bring a few of us happy bloggers together for the 5B: Believers in Better Beer, Bites and Blogging Conference.And if there is anything happier than food bloggers, well, it’s likely beer bloggers. 
Last Saturday about 40 of us spent the day learning, engaging and sharing. Mindy, Jonathan and I each traveled up on our own schedules from the Bluegrass, and we were outsiders to this group. As a result, I learned a significant amount about the Cincinnati brewery scene, along with some tips in social media and blog design that I can apply to my own work.
I might also mention that when you are obtaining such good information, it doesn’t hurt to sit down and pop open a Schlafly beer at 10:30 am. Beer blogging conferences just might be a little better than food blogging conferences.
I’ll admit that I may have been as excited about lunch as the conference itself. Our coordinators arranged for Cafe de Wheels to park outside the convention center for us. I currently live in a food truck desert, so I couldn’t stop thinking about this all day. I even braved the cold temperatures to place and pick up my order which turned out to be one of the best burgers I have had in a long time. Food trucks have sit-down restaurant burgers beat every time. 

This conference provided plenty of perks including admission to the Cincy Winter Beerfest on Friday and Saturday with a connoisseur ticket on Saturday.  In this case connoisseur means delicious appetizers paired with craft beers.
Here are a few of my favorites. You’ll have to forgive my failure to state the direct source for some of the foods. I was banking on finding some sort of list of food vendors online and haven’t been able to do so. I took only limited notes at the event so if you were there, please feel free to fill me in!
My favorite savory food were these tasty Slow Sliders – a combination of all things local. Not only that, but you could tell how fresh the ingredients were with each bit – a really outstanding sandwich if you like bratwurst, and I do.

Next was the house-made braunschweiger (a liverwurst)  from Virgil’s Café paired with Crispin Maple flavored cider. I got the impression that few people were willing to try this. They were missing out! While I can’t eat a ton of braunschweiger, I grew up with it and thoroughly enjoy it on occasion. And that cider? The maple really cut that standard cider flavor making this one even better than others I’ve tasted. 
I promise every beer I drank was not of the fruity variety, but this Framboesa (raspberry) was one of my favorites. I like it when my fruity beers really do taste like the fruit they are named for, and this one did without a doubt.
And then came the grand finale. Actually, for me it was the appetizer because to ensure I got one, I went there first. Bacon S’mores! Homemade marshmallows studded with pieces of bacon, torched to perfection, sandwiched between two Snickerdoodles with chocolate. I decided to only eat one cookie to pace myself, but whoa – they were as amazing as they sound.

Next some of us headed down to the actual beerfest. Over 300 craft beers were available. Absolutely impressive, but I have to admit, I’m not sure how gung-ho I would be to drive up and attend the beerfest itself. I was in good company so I had a great time, but it was absolutely packed. Your ticket provided a tasting glass and 25 tasting tickets which is A LOT of beer.
The lines for the well known breweries, Rogue, Bell’s, and Blue Moon along with the well known local breweries such as Kentucky Ale, wrapped all the way around the building. It would have been at least a 30-45 minute wait for a 5-8oz beer. We started finding the smaller breweries with shorter lines to try out so we’d actually get a drink. This turned out to be a better plan for trying something new anyway. 
Let me try to prove my point regarding how packed it was. When have you ever seen a Men’s bathroom line this long?!
 
The one beer I set out to try was Kentucky Ale’s Kentucky Coffee Stout made with Alltech’s Café Citadelle from the Sustainable Haitiproject, and I succeeded. I like coffee. I like beer. It only gets better when you put them together. I especially liked how smooth this one was and the coffee flavor was strong which equals good in my book. 
It was great to see all the craft beers, but lines wear me out. As a perk for attending the conference, though, it was well worth it and a nice finish to a fun day.
Want to create beautiful food and product photos that you can't wait to share?!
Discover your style, control the light, and shoot using the tool you know how to use (yes, your phone included). Learn about free resources, Live Q&As with Lori, and online courses you can take from anywhere in the world!
We respect your privacy. Unsubscribe at any time.