Browsing Category

Vegetarian

Salad with Grilled Zucchini and Blackberry Balsamic Dressing Recipe

July 7, 2012

Salad with Grilled Zucchini and Blackberry Balsamic Dressing Recipe | Fake Food Free


If you’ve spent any time at all near a summer squash plant, you know how it goes. One minute you see a tiny little zucchini growing; a day later you have a squash as big as your arm.

Those huge zucchinis always went into bread at our house so I made some zucchini muffins last week. Unfortunately, that only used up ½ of the monster.  Instead of more baked goods, I decided to take the rest to the grill for zucchini steaks.

With summer zucchini always comes blackberries so a blackberry dressing sounded perfect. This dressing drizzled on a salad with a couple zucchini steaks and few extras made a great summer meal.

Blackberry Balsamic Dressing Recipe for Salad with Grilled Zucchini | Fake Food Free


Salad with Grilled Zucchini and Blackberry Balsamic Dressing

Makes:  4 servings

What you’ll need:

Zucchini Steaks
8 – 1 ½ inch thick slices zucchini
2 teaspoons olive oil
1 teaspoons balsamic vinegar
Salt and pepper to taste

Blackberry Balsamic Dressing
½ cup blackberries, defrosted if frozen
5 fresh rosemary leaves
2 tablespoons balsamic vinegar
½ cup extra virgin olive oil
1 teaspoons sugar
¼ teaspoons salt
1/8 teaspoons black pepper

Salad
8 cups greens (I used romaine, cabbage and spinach)
4 oz. blue cheese, crumbled
4 tablespoons sunflower seeds

How to make it:

Place the zucchini slices in a shallow dish and drizzle with the olive oil and balsamic vinegar, and sprinkle with salt and pepper. Coat each piece and set aside to marinade while you prepare the dressing and salad.
In a small food processor, combine all of the dressing ingredients and pulse until it is smooth. If using fresh berries you may need to add 1-2 tablespoons of water. Makes about ½ cup of dressing. Set aside.
Prepare four plates with 2 cups of greens, 1 ounce of blue cheese and 1 tablespoon of sunflower seeds. Set aside.

Preheat the grill or a grill pan on the stove. Place the zucchini slices on the grill and cook on medium-high for 3 to 4 minutes on each side.

Place two zucchini steaks on each salad and drizzle with dressing.

Salad with Grilled Zucchini. A great vegetarian summer meal! | Fake Food Free


Thanks for reading! All images and content are the property of Fake Food Free and Lori Rice unless otherwise stated. Please do not republish full recipes and images without written permission. What is okay? Feel free to Pin images, share links to my posts or share the photo in a round up post with the title of this recipe and a link back to the post. Confused about copyright and food blogs? Here is some helpful information on Recipe Attribution. If you want to use a photo or full recipe, just ask. I’m sure we can work something out.


Thai Fish Cake Stuffed Portabella Mushrooms

April 26, 2012

Thai Fish Cake Stuffed Portabella Mushrooms Recipe | Fake Food Free

I buy portabella mushrooms only on occasion, but I think I may be stuck in a rut with how to serve them. When I bought this round I had the thought – why don’t I stuff them with some sort of fish?

Oh wait, I already did that. 

But this is different. This time around I couldn’t stop thinking about Thai fish cakes. So I went with cod instead of salmon, grabbed the lemongrass and a Bird’s eye chili out of the freezer, and reached to the back of the pantry for the panko and fish sauce. This one is a keeper, and I’m sold that portabellas are good for so much more than burgers!
Thai Fish Cake Stuffed Portabella Mushrooms Recipe | Fake Food Free


Thai Fish Cake Stuffed Portabella Mushrooms

Makes 2 servings

Extra virgin olive oil
2 portabella mushroom caps, cleaned
2 tbsp fresh chives, chopped
2 inch piece lemongrass, minced
1 Thai Bird’s eye chili, minced
2 cloves garlic, minced
1 tsp freshly grated ginger
¼ tsp salt
¼ tsp ground coriander 
1 tsp fish sauce
1 large egg
3 oz. fillets cod, cooked, cooled and flaked
½ to ¾ cup panko bread crumbs

Preheat the oven to 400 degrees F. Coat the mushrooms in a thin layer of olive oil, and grease a shallow baking dish. Set aside.

In a mixing bowl, combine the chives, lemongrass, chili, garlic, ginger, salt, coriander and fish sauce. Add the egg and beat the ingredients with a fork until the egg is blended with the herbs and spices. Add the fish breaking it into small pieces.

Stir in ½ cup of the bread crumbs. How much you need will depend on the moisture in your fish. I used a frozen fish that I baked so it held in a lot of water. You want the fish cake to form and hold a patty shape. Add more bread crumbs until you reach this stage. I added all ¾ cup.

Divide the fish cakes and press the stuffing into the mushroom caps, mounding it as you flatten and press it. Bake for 25 to 30 minutes or until the fish cake is browned and the mushroom tender.


Thanks for reading! All images and content are the property of Fake Food Free unless otherwise stated. Please do not republish recipes and images without written permission. Feel free to Pin images and share links to my posts, but please do not copy and paste recipes or photos and share them on other sites. Confused about copyright and food blogs? Here is some helpful information on Recipe Attribution.

Black Lentil Salad with Roasted Asparagus

March 30, 2012

This simple black lentil salad uses spring asparagus with sweet onions to create a delicious side dish for a seasonal meal.

 
Black Lentil Salad with Roasted Asparagus Recipe | Fake Food Free
 

So far we’ve been harvesting single servings of asparagus from the garden. My husband got the first serving, and I got the second. He’s a much bigger asparagus fan than me so I thought that was only fair.

It’s coming up slowly, but I’m not going to complain because it’s a bit early for asparagus anyway. I’ll take the slow arrival as a trade off for having it so early. It must have known how desperate I was to get the garden going this year. Despite the warm winter, I still felt like I’d been cooped up inside for way too long.

This week I did manage to collect enough asparagus to make a salad, and this got me thinking about some black lentils in the pantry. It goes without saying; we are still in clean out mode. It’s amazing how much you can stuff into a small pantry when you are as obsessed with grains and legumes as I am.

The tang of the balsamic vinegar in the dressing for this salad adds a good balance to the asparagus that has turned sweet from roasting. I rounded up all the asparagus I could, but if you have more, add it. It only makes this salad better.


Black Lentil Salad with Roasted Asparagus Recipe
Black Lentil Salad with Roasted Asparagus
Serves 2-3 for a main, or 4 for a side
Write a review
Print
Ingredients
  1. ¼ cup white onion, finely diced
  2. 1 cup dried black lentils
  3. ¼ cup chopped fresh chives
  4. ½ to 1 pound asparagus, roasted or grilled
  5. 3 tablespoons balsamic vinegar
  6. 1 tablespoon extra virgin olive oil
  7. 1 teaspon mascavo sugar
  8. Salt and pepper to taste
Instructions
  1. Place the onion in a bowl of ice water and allow it to sit while you prepare the rest of the salad. This will draw some heat out of the onions. If your onions are already sweet, you can skip this step.
  2. In a medium sauce pan, add the lentils and 4 cups of water. Bring to a boil, reduce heat and simmer partially covered for 20-25 minutes. You want the lentils to be slightly firm for a salad. Drain and rinse with cold water until cooled. Pour into a medium bowl.
  3. Drain the onion. Add the chives and onion to the lentils. Chop the asparagus into ½ inch pieces and add to the lentils.
  4. In a small bowl, whisk together the vinegar, olive oil, and sugar. Add salt and pepper to taste. Pour the dressing over the lentils and toss to coat. Add more salt or pepper, if desired.
Notes
  1. To roast the asparagus, spread in a single layer on a baking sheet. Bake at 400 degrees F for about 15 minutes, or until dark green, but still crisp.
Fake Food Free https://www.fakefoodfree.com/
 

Black Lentil Salad with Roasted Asparagus Recipe
 

Soon I’ll be looking for ideas to use up all our asparagus. What’s your favorite way to prepare it?

Thanks for reading! All images and content are the property of Fake Food Free unless otherwise stated. Please do not republish full recipes and images without written permission. What is okay? Feel free to Pin images, share links to my posts or share the photo in a round up post with the title of this recipe and a link back to the post. Confused about copyright and food blogs? Here is some helpful information on Recipe Attribution. If you want to use a photo or full recipe, just ask. I’m sure we can work something out.

Vegetable Orzo Salad

March 12, 2012

Winter-warming comfort foods have left my mind completely. In their place, I see visions of grills, picnics, sandwiches, salads, and green gardens. It’s like the spring switch has been flipped and there is no going back. 
Spring veggies haven’t emerged in the garden, but I had to make something that would indicate to my brain and stomach that it is just a matter of time. I don’t make pasta salad often, but every now and then it makes one delicious lunch, especially when you load it with as many vegetables as possible. 
I love orzo in pasta salads because it feels like a lighter choice. Those small pieces don’t sit as heavy as macaroni or rigatoni. Any variety of vegetables can be added to this salad. I’m planning for some asparagus in a few weeks that will make a nice addition. 
If you like your pasta salads with a little more dressing, you can double the dressing recipe. Only a small amount is used, but this is a mayo based dressing. If you aren’t into mayo, I have a feeling plain Greek yogurt would work too.
Vegetable Orzo Salad
3 cups orzo, cooked and cooled
1 cup broccoli florets, chopped
1 cup cauliflower florets, chopped
1/8 cup onion, finely chopped
15 black olives, halved
15 green olives, halved
2 generous tbsp mayo
1 tbsp red wine vinegar
1 ½ tsp mascavo sugar (or white)
Salt and pepper to taste
Place the orzo and veggies in a large bowl. In a small bowl, whisk together the mayo, red wine vinegar, sugar, salt, and pepper.
Pour the dressing over the salad and toss to coat. Best served cold. Makes 6 servings.
Pin It

Mixed Vegetable and Peanut Spring Rolls

February 28, 2012

These can best be described as kitchen sink spring rolls. I had a drawer of veggies in the fridge teetering on the edge of ripe, and “I’m gonna rot on ya.” Vegetable soup is often a good solution for this, but I wasn’t in the mood. Instead I thought I’d keep with this Asian trend I have going and experiment once again with spring rolls.
These can be served room temp or cold, after having them for lunch today, I vote cold. There is a bit of Sriracha in the veggies, but always add more for good measure.
Mixed Vegetable and Peanut Spring Rolls
1 tsp extra virgin coconut oil
3 leaves kale, de-stemmed, chopped fine
½ cup broccoli florets, chopped fine
¾ cup napa cabbage, shredded
2 medium carrots, cut into matchsticks (or as close as you can get)
3 green onions, sliced
2 tbsp vegetable stock
1 tbsp natural peanut butter (unsweetened, unsalted)
½ tsp sesame oil
1 tbsp Sriracha chili sauce
2 tbsp dry roasted, unsalted peanuts, chopped
2 tbsp fresh cilantro, chopped
Soy sauce to taste
8 rice paper wraps
Heat a large wok or skillet over medium-high. Add the coconut oil and heat through until melted. Add the kale, broccoli, cabbage, and carrots. Cook for 2-3 minutes. Add the green onions and the vegetable stock. The stock will evaporate quickly. Add the peanut butter.
The peanut butter will take some work to melt and incorporate into the veggies. Continue to stir. Add the sesame oil and Sriracha. Once the peanut butter has coated all the veggies, stir in the peanuts, cilantro, and soy sauce. Cook about 30 seconds and remove from heat.
Wet one rice paper wrap with hot water. Lay it over a plate, add 1/8 of the mixture towards one end and roll like you would a sandwich wrap or burrito. Continue this step for all of the wraps. Serve room temperature or cold. Makes 8 spring rolls.
Pin It

Soba Noodles and Mushrooms in a Ginger Garlic Broth

February 23, 2012
Soba Noodles and Mushrooms in a Ginger Garlic Broth Recipe | Fake Food Free


The book – Why the Chinese Don’t Count Calories by Lorraine Clissold – has been on my reading list for a long time. After a commitment to actually make it through that list in 2012, I finally got myself a copy a few weeks ago.

I’m halfway through and things are already changing in my kitchen.

Soba Noodle Recipe


I didn’t know what to expect from the title alone. I knew it was a book about Chinese food culture. I adore anything to do with food culture, and at the moment, Asia. I’ll post more details when I’ve finished the book, but every aspect of it so far has my senses on alert.

Not only is it well written, but within it is detailed information about Chinese principles and how they apply to food. Not only are there plenty of suggestions for Chinese cooking, but Clissold does a wonderful job of explaining how the reader can apply these principles when Chinese cuisine isn’t on the menu.

After reading page after page about noodle dishes, simple broths, and the yin and yang, I decided to make up a simple dish for our dinner last night. I tend to load my food with herbs and spices, but remembering the principles conveyed in the book I made a broth using a homemade vegetable stock I’d frozen earlier this year.

I added only garlic, green onions, ginger, mushrooms, and salt to season it, and crumbled in a bit of chili flakes. Mine came from a cayenne pepper I had dried from last year’s garden. I served this warm over soba noodles, and with some steamed baby bok choy.

Yes, I could get used to eating like this, but the eating it has never been the issue. I just never seem to get out of my comfort zone and cook it. Simplicity in food is so appealing.

Soba Noodles and Mushrooms in a Ginger Garlic Broth

Makes:  4 servings

What you’ll need:
8 cups vegetable broth
8 cloves garlic, minced
¼ inch piece fresh ginger, grated
8 oz. mushrooms, sliced thick
5 green onions, greens and whites sliced
1 teaspoon sea salt, or to taste
¼ teaspoon dried chili flakes
4-6 baby bok choy, steamed until tender
10-12 oz pack soba noodles, cooked and drained

How to make it:

In a soup pot, heat the broth to a low boil and then reduce heat to simmer. Add the garlic and ginger. Simmer for about 5 minutes. Next add the mushrooms, and simmer just until barely cooked, about 3 minutes more. Add the onions, salt and chili flakes. Allow to simmer while you prepare the serving bowls.

Divide the noodles into four deep bowls. Place one or more baby bok choy in each bowl. When ready to serve, ladle the hot broth over the noodles, about 2 cups per bowl. 

Delicious Soba Noodles and Mushrooms in a Ginger Garlic Broth Recipe | Fake Food Free

Som Tam (Green Papaya Salad)

February 15, 2012

It all changed the night we ordered green papaya salad in Bangkok during our trip to Thailand a few years ago. Up until this dinner I had learned that when you ordered foods spicy they were served to you – tourist spicy. This means that there was barely a chili to be found in the dish. Disappointing, because while I knew I didn’t necessarily want Thai-spicy, I still like spicy food. 
That night in Bangkok my husband and I both ordered Som Tam, and I asked for it spicy. The waitress replied, “You want it spicy?” I think I remember saying – a little spicy – but looking back I’m pretty sure she didn’t hear me. 
After delivering our order I watched the waitress walk away and sit down at another table with others. Then I looked over at the bar and realized all the staff was watching us. 
Once we tasted the green papaya salad we knew why. They wanted to see our reaction. It was by far the hottest thing I have eaten. In our cooking class earlier that week, we had added about three Thai chilies to our Som Tam. I’d say there were no fewer than 10-12 in this version. 
I tried coaching my husband, telling him – You can’t stop. You have to keep eating it so you don’t feel the burn! A few bites later for me, and about a half a bite for him, we admitted defeat. When the waitress returned to the table to clear our plates, she gave a smirk and said, “It was too spicy?”
We knew then that there was a bit of a joke being played on us. We’re good sports though; glad we could give them a show. 
Fortunately this experience didn’t ruin my preference for Som Tam. It remains one of my favorite meals. I’ve always wished I could make it at home, but green papayas are non-existent around here.
Well, almost non-existent. 
I made it up to Jungle Jim’s International Market in Cincinnati this past weekend, and just about squealed out loud when I saw green papaya in the produce section. 
This is a modified version of Som Tam. To be honest, I forgot exactly what was in it and failed to pick up some long beans at the market. I also refuse to by supermarket tomatoes this time of year. So this version is without the beans, tomatoes and dried shrimp, but the flavor of the sauce with the garlic, lime and fish sauce was perfect. Even without these ingredients it still tasted just like what we had in Thailand.
This dish can be made with shredded carrot too, but it’s worth the wait if you can find a green papaya. And in those pictures, the chopsticks are just for show. This is a dish most often eaten with your hands accompanied by sticky rice. 
I still remember our cooking instructor telling us that foreigners always took too much rice and salad in their fingers when eating. “Just take a little bit,” she said. 
Som Tam (Green Papaya Salad)
4 cloves garlic, chopped
1 – 2 Thai birds eye chilies, sliced
1 green papaya, peeled and shredded
Juice of 2 limes
2 tbsp fish sauce
1 tsp mascavo sugar (palm sugar is used in Thailand)
¼ cup dry roasted peanuts, chopped
If you have a mortar and pestle, use it. But you can still make this if you don’t. A bowl and a heavy kitchen tool such as a meat tenderizer worked for me. 
Start by mashing the garlic and chilies together. Continue to work them until they are completely smashed and start to form a bit of a paste. Stir in the green papaya. Begin to smash it gently with the garlic and peppers to bruise it slightly.
Next add the lime juice, fish sauce, and sugar. Stir until the sugar is dissolved. Stir in the peanuts, reserving a few to sprinkle on top. Serve with steamed sticky rice. Makes 3-4 servings. 
Here are some other recipes for Som Tam around the web. 
Bon Appetit 
NY Times
Thai Table
She Simmers

Pin It

Barbecue Kale and Onion Pizza

January 31, 2012
I remain a kale fan even a few years after writing this post. The leafy green does beg for creativity and this barbecue kale and onion pizza is the perfect solution.  The kale is braised in beer before being baked over a whole wheat cornmeal crust with barbecue sauce and two kinds of cheese. 

Barbecue Kale and Onion Pizza | Fake Food Free 
We eat so much kale that using the green in creative ways has become the ultimate challenge for me. I buy loads of it and then think – hmmm, what can I put kale in today. Soups, salads, smoothies, omelets? I haven’t taken on dessert yet, but it could be coming. One cannot underestimate kale’s versatility.
 
The super bowl won’t be a big deal for us this year. Well, except for the food. I’ll sit down and watch the game (or just the commercials), if it means I get to make game food. So my latest challenge was to get kale on the super bowl snack table.
 
I think I may have succeeded.
 
What, no kale? How about if it is cooked in beer and put on a pizza with barbecue sauce? Yes, I can see you may be coming around a bit to the idea. 
 
Kale gives this pizza a hearty twist that really eliminates the need for heavy meats. It’s a great way to switch things up from bbq chicken pizza or standard pepperoni. 
 
Barbecue Kale and Onion Pizza | Fake Food Free
 
Barbecue Kale and Onion Pizza on a Whole Wheat Cornmeal Crust

Makes: 4 to 6 servings

Ingredients
1 Whole Wheat Cornmeal Crust, rolled to about 16 inches, or divide into 2 to 4 smaller pizzas (recipe below)
1 tablespoon extra virgin olive oil
1 small onion, sliced
2 cloves garlic, minced
4 cups fresh kale leaves, chopped
¼ cup beer (ale works well)
½ teaspoon salt
¼ teaspoon ground black pepper
Pinch of smoked sweet paprika
¾ to 1 cup barbecue sauce (I use a local sauce, Kentucky Smokin’ Grill)
4 oz. sharp cheddar cheese, shredded
4 oz. whole milk mozzarella, thinly sliced
Crushed red pepper

Prep

Preheat the oven to 425 degrees F.

Heat the oil in a large skillet over medium-high. Add the onion and garlic. Cook, stirring often, for about 3 minutes. Add the kale and turn to coat in the oil. Carefully add the beer. Simmer the kale 3 to 5 minutes, until it begins to wilt. Add the salt, pepper and smoked paprika.

Place the crust on a baking sheet or pizza pan that has been greased with olive oil and sprinkled with cornmeal. Spread the barbecue sauce over the crust. Sprinkle ½ of the cheddar cheese over the sauce. Divide the kale evenly over the crust. Place the mozzarella cheese over the kale and top with the rest of the cheddar cheese. Sprinkle with crushed red pepper, if desired.

Bake for 15 to 20 minutes, or until the cheese begins to bubble and brown. Remove from the oven and allow to cool 2-3 minutes before slicing. Serves about 4-6.


Whole Wheat Cornmeal Crust
Adapted from Spelt Pizza Dough by Food Embrace

Ingredients
1 cup warm water (about 110 degrees F)
1 tablespoon active dry yeast
1 tablespoon mascavo sugar (or brown sugar)
1 cup yellow cornmeal
2 cups white whole wheat flour
1 tablespoon extra virgin olive oil
Additional water: 3 to 5 tablespoons 
Extra olive oil
 
Prep

Dissolve the yeast in the warm water and stir in the sugar. Set aside and allow the yeast to bloom, about 5 minutes.

In the bowl of an electric mixer with a dough attachment, combine the cornmeal, flour and olive oil. Turn the mixer on low, and slowly add the yeast. Add the additional water, 1 tablespoon at a time until the dough comes together and is smooth, but not sticky.
 
Once a dough ball is formed, remove it from the bowl and gently knead it on the counter top to form a smooth ball. Place the dough ball back into the bowl and coat it lightly with olive oil.. Allow to rise in a warm place for 1 hour before pressing and rolling into the pizza crust.


Barbecue Kale and Onion Pizza | Fake Food FreePin It

Thanks for reading! All images and content are the property of Fake Food Free unless otherwise stated. Please do not republish full recipes and images without written permission. What is okay? Feel free to Pin images, share links to my posts or share the photo in a round up post with the title of this recipe and a link back to the post. Confused about copyright and food blogs? Here is some helpful information on Recipe Attribution. If you want to use a photo or full recipe, just ask. I’m sure we can work something out.

Cranberry Orange Quinoa Stuffing with Pecans in an Acorn Squash

November 11, 2011

The first smells of Thanksgiving drifted through our kitchen this week. I’m talking about that aroma of celery, onion and sage cooking on the stove; the very core of the standard stuffing.

From that point, stuffing can go just about any direction. This time mine headed straight towards cranberry, orange and quinoa and then took a right turn and hopped directly into an acorn squash.

I used the unseasoned croutons I made from leftover Pain de Mie Complet and instead of using all bread as I would with my usual stuffing; I substituted some of it with cooked quinoa. Pecans added a little crunch and I loaded mine with cranberries. You can adjust most of the ingredients to your liking and perhaps add some diced apple or apricots, use walnuts or change the flavors with a sprinkle of cinnamon.

I was a little unsure of what the result would be, but was pleasantly surprised. This could easily make the Thanksgiving table both for flavor and appearance, but we used it as a main course and training for the big day.

Cranberry Orange Quinoa Stuffing with Pecans in an Acorn Squash

1 small acorn squash
2 tbsp butter or olive oil
½ lg onion, diced
2 ribs celery, sliced
2 cloves garlic, minced
Zest and juice of one orange
1 ¼ tsp poultry seasoning
¼ tsp dry mustard
¼ tsp celery salt
½ tsp salt
¼ tsp black pepper
1 cup unseasoned croutons
½ cup cooked quinoa
1 – 1 ½ cups chicken or vegetable stock
1/3 cup chopped pecans
½ cup dried cranberries

Preheat the oven to 400 degrees F. Prep the squash by splitting it in half. Remove the seeds. Gently pierce the flesh with a fork. Drizzle and coat with olive oil. Place in a greased baking dish and sprinkle with a bit of salt. Set aside.

In a large skillet, melt the butter or heat the oil over medium-high heat. Add the onion and celery and cook for about 3-4 minutes. Add the garlic and cook an additional 2 minutes. Next, stir in the orange zest, poultry seasoning, dry mustard, celery salt, salt and pepper. Cook 1 minute.

Turn off the heat and add the croutons and quinoa. Stir in the orange juice and then add the stock one ½ cup at a time. The amount of stock you need will depend on the type of bread pieces you use. Mine were chopped fine so I used about 1 cup. You want the stuffing to absorb all the liquid, but be moist enough so that you can firmly stuff it into the squash. It should be able to hold its shape when pressed together.

Once the stock is added, stir in the pecans and cranberries. Evenly divide the stuffing and use a spoon to transfer and gently stuff the mixture into each half of the acorn squash.

Bake for 30-35 minutes or until the squash is tender when pierced with a fork. Serves 2 as a main course and 4 as a side dish.

Need some more ideas for ways to stuff your acorn squash? Check out A Healthy Passion and Find Your Balance Health.

The Vegetarian Option: Cookbooks for Christmas

November 10, 2011

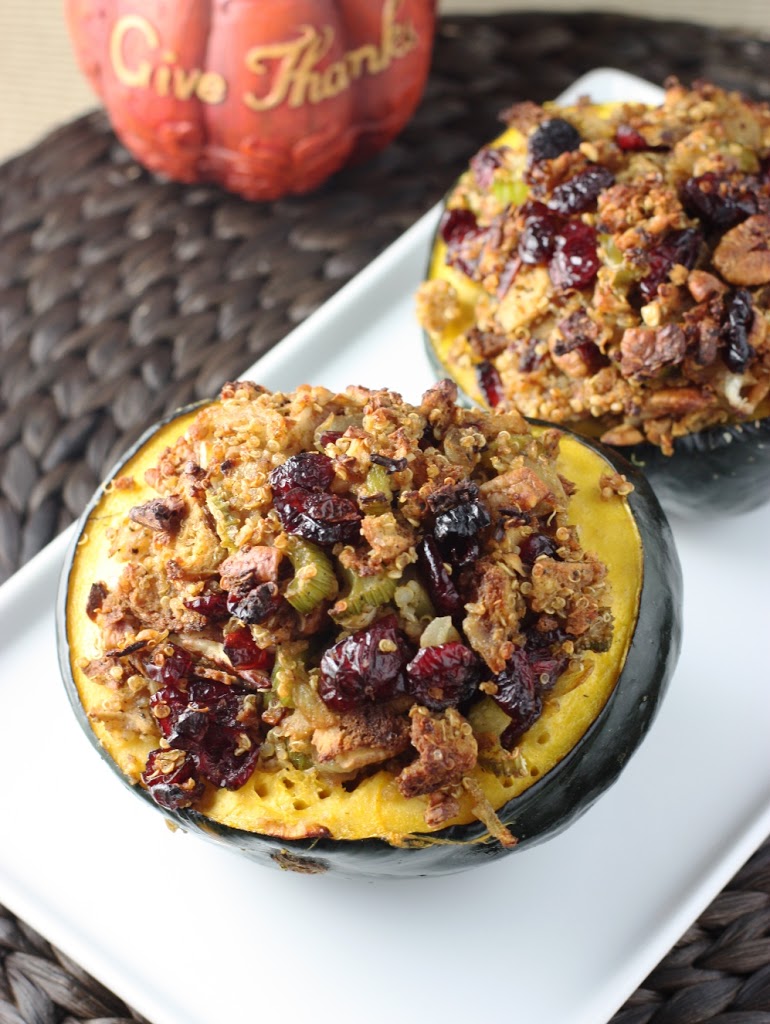
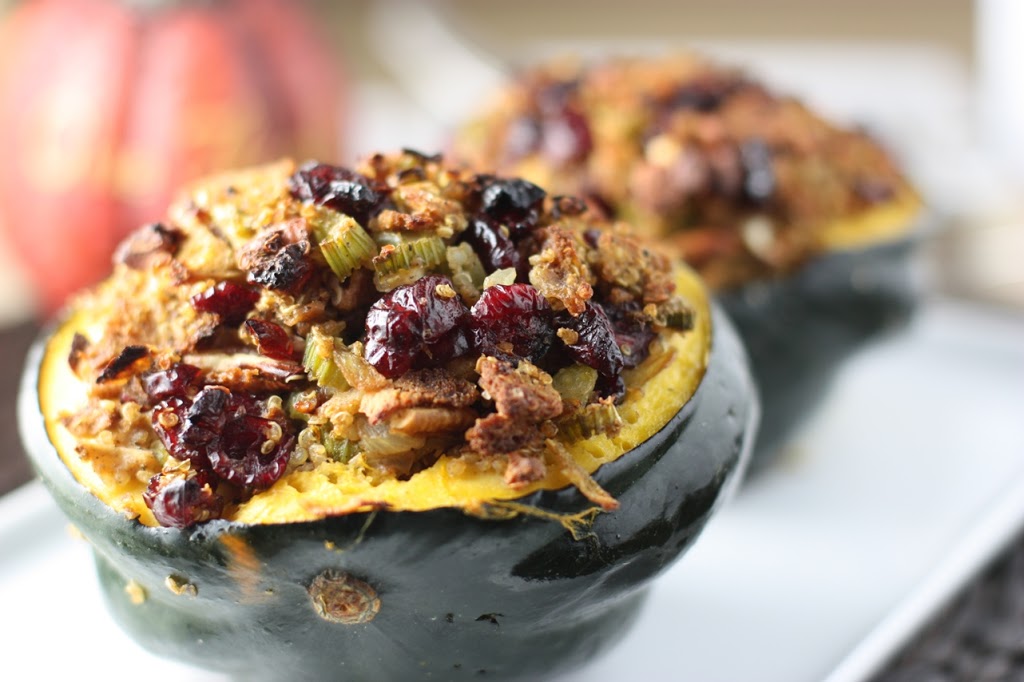
This is the second in my series of Cookbooks for Christmas with the purpose of sharing a few gift ideas for the foodie in your life. Be sure to check out the review and recipe for my first post The Fundamental Techniques of Classic Bread Baking.

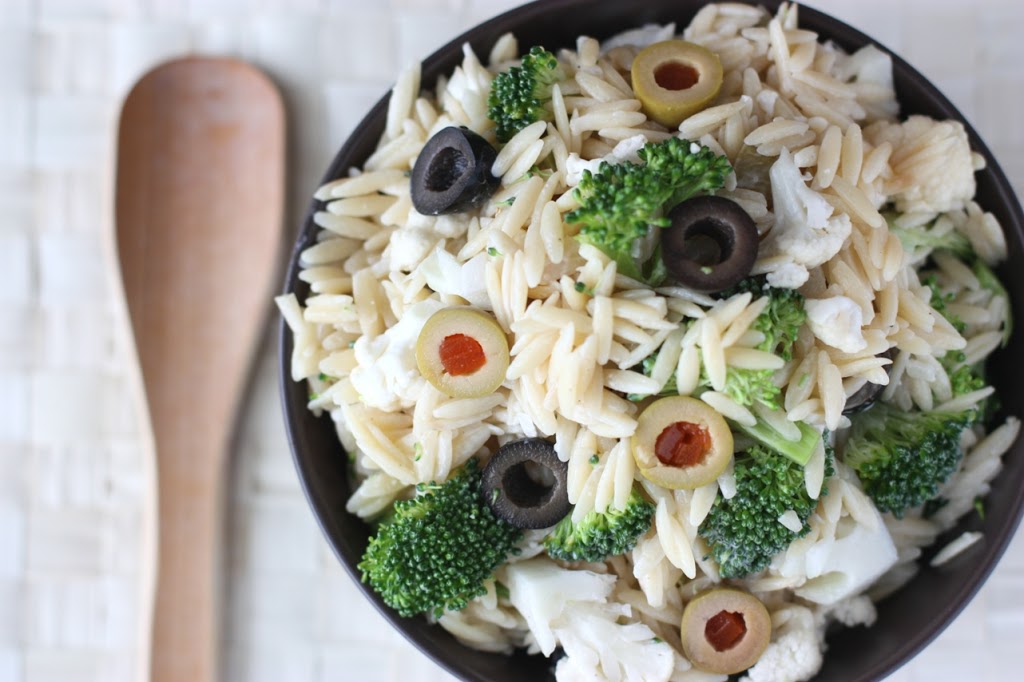
I’d estimate that about 75% of our meals each week are vegetarian which means I often find myself in a rut. Just the other night I was standing in the kitchen idea-less with a few winter vegetables in front of me and a couple options for grains to bulk them up.

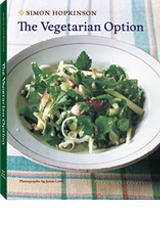
Then just as I thought I would be swallowed in a boring, repetitive sea of vegetable stir-fry and rice, along comes this cookbook – The Vegetarian Option by Simon Hopkins accompanied by gorgeous photography by Jason Lowe.

This cookbook is perfect for the person who almost has the basics mastered and is ready to incorporate some more challenging and internationally-inspired combinations. The chapters are divided by vegetables such as Cauliflower & Broccoli, Cabbage & Chard, Spinach & Sorrel and Beets & Turnips.

The reader is greeted in each chapter with a bit about how to handle the vegetable in the kitchen and then turns the page to be awed by the final results. Most of recipes are filling enough for main courses or they can be used as side dishes. Fair warning if using them as a side dish, though. They might steal the show all together.

Just to give you a few examples of what you’ll find between the covers, for the adventurous there is New-crop Garlic Saffron & Tomato Quiche, Asian Fried Turnip Paste or Spinach Mousse with Parmesan Cream. If you are looking for some basics you will also find it full of simple, yet creative salads, stock recipes and condiments.

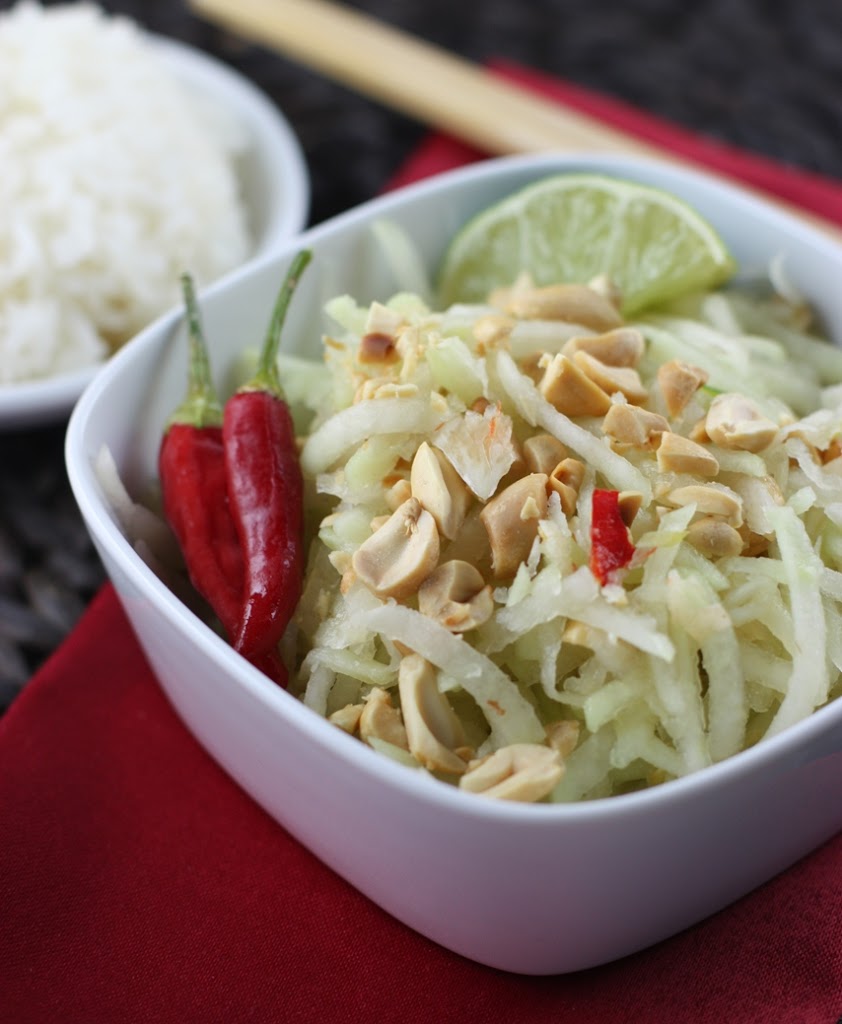
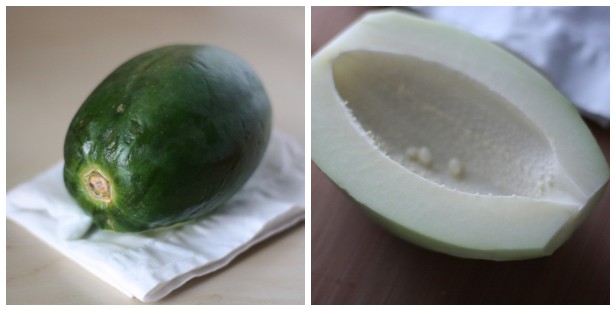
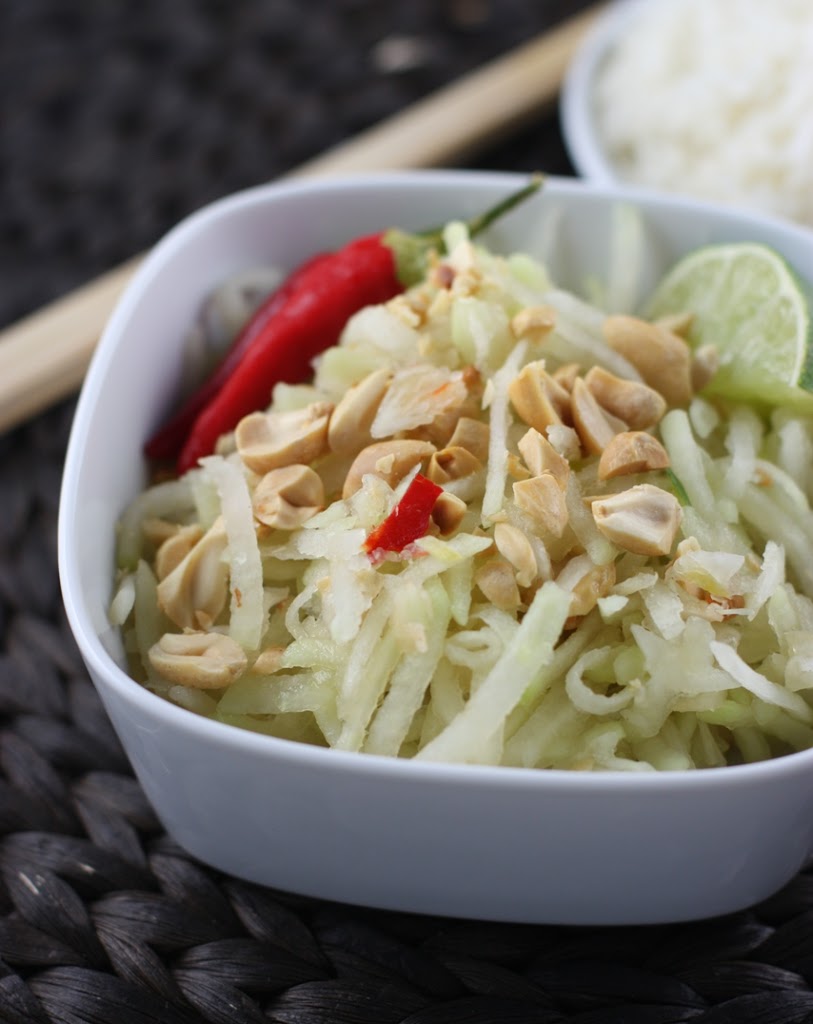
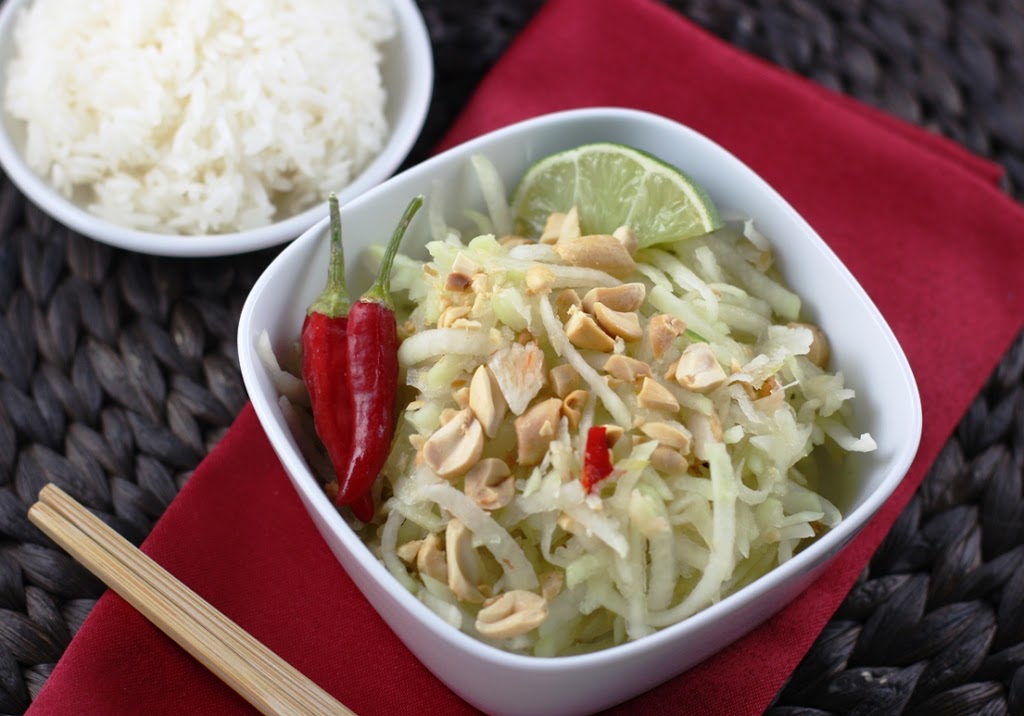
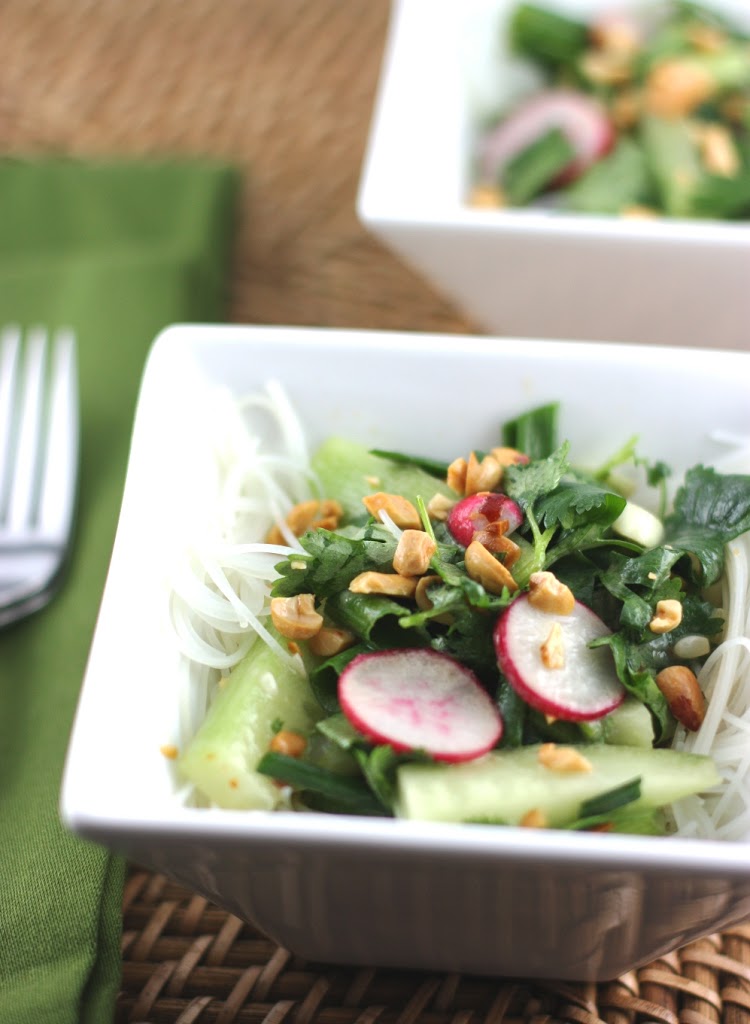
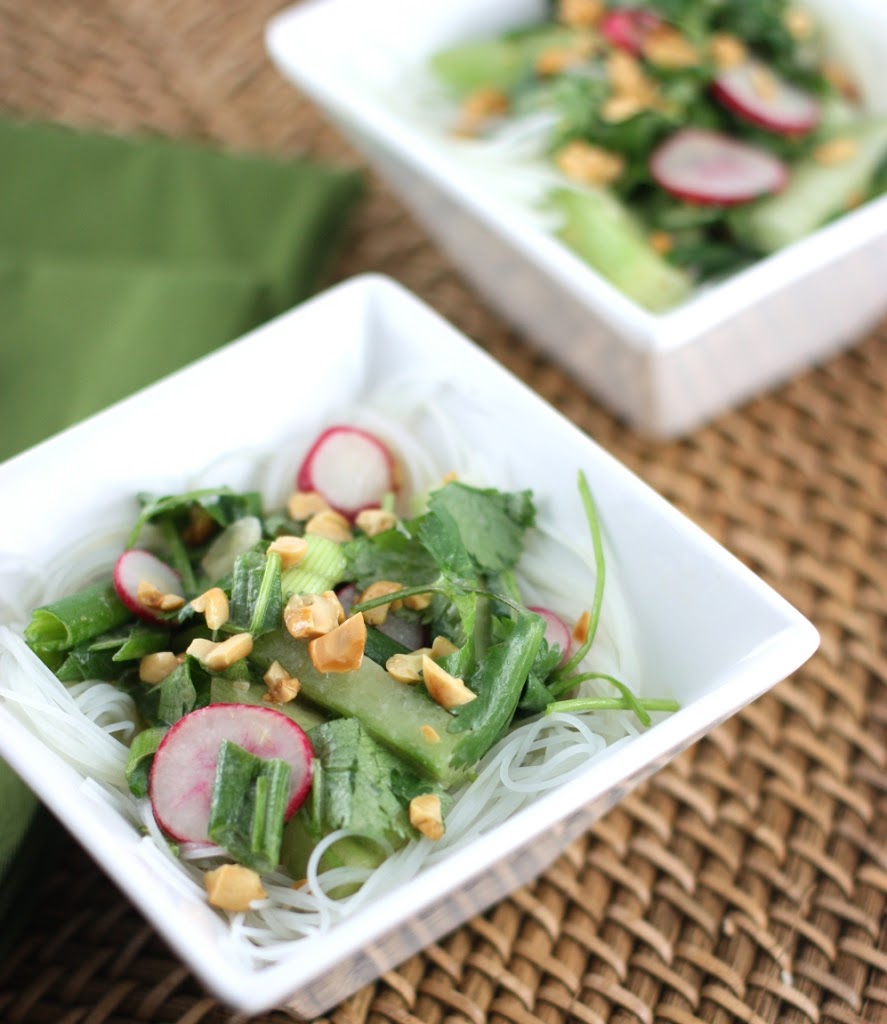
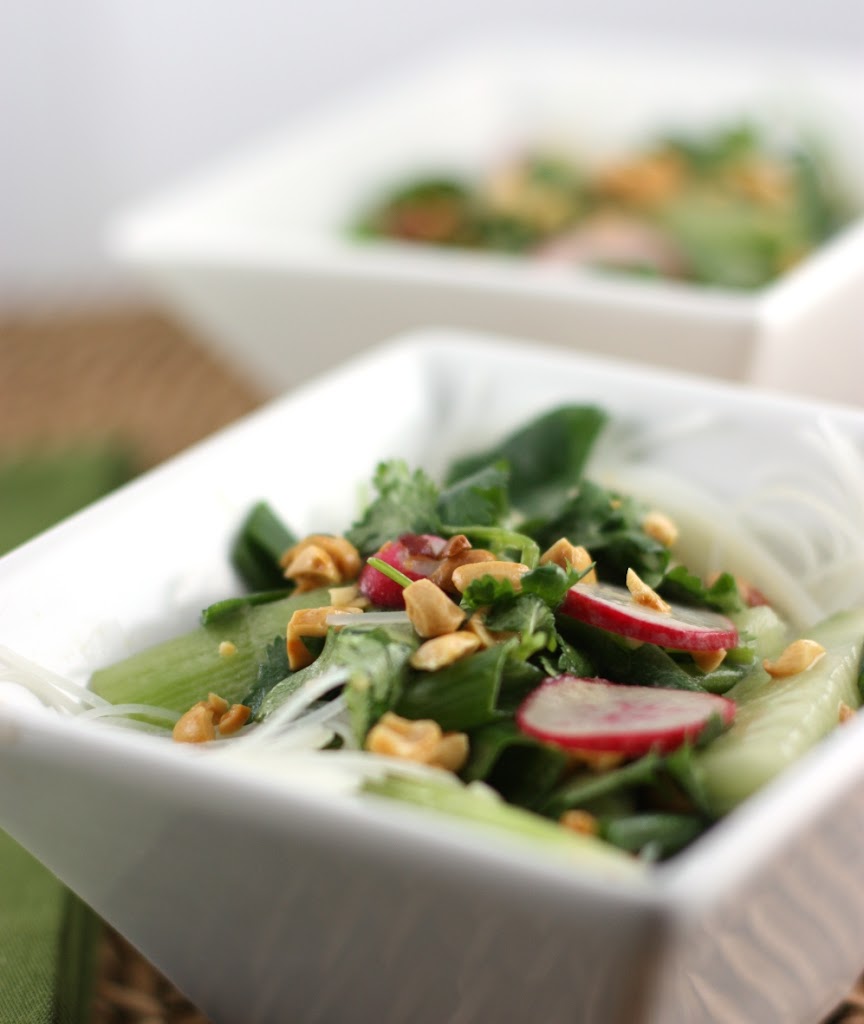
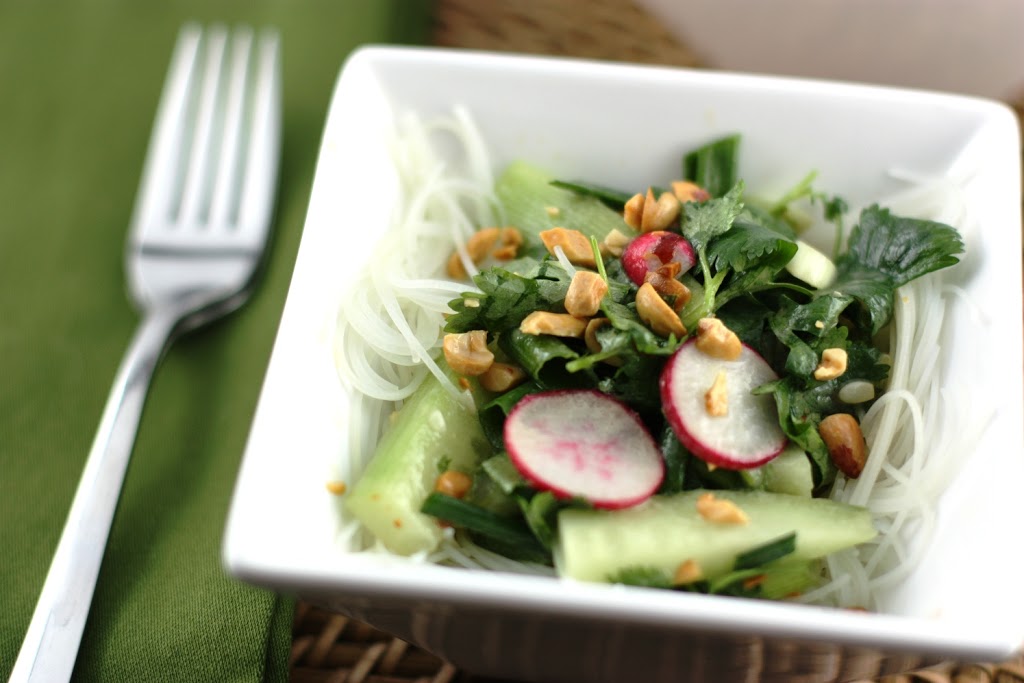
Personally, my eyes lit up when I saw the recipe for Asian Scallion, Radish & Cucumber Salad with Cashews & Vermicelli . You will rarely hear me use the word dazzled, but my goodness, I was dazzled by this recipe.

As I mixed together the ingredients for the nutty, spicy dressing and poured it over my bowl of mixed vegetables I wondered how it was going to come together. One bite and I was sold – crunchy, nutty, refreshing with just a touch of spiciness from the radishes and ginger.

Just a note before you get started. The ginger syrup used in the dressing needs to be made the night before. Also, I found that while it won’t have the same full flavor, if you are short on time and ingredients tahini can work as a substitute for the homemade sesame paste.

Asian Scallion, Radish & Cucumber Salad with Cashews & Vermicelli

Serves 4
Before you start, you will need on hand both ginger syrup and sesame paste. Also, feel free to add more of one ingredient or another, and to adjust the sweet-sharp balance of the dressing.

1/4 pound dried thread vermicelli (or glass noodles)
2 heaping tablespoons unsalted cashew nuts
salt
a little sunflower oil
6 radishes, trimmed
6 scallions, trimmed
1 cucumber, 7 inches long
generous handful each of cilantro and mint leaves
1 or 2 large red chilis, sliced

for the dressing

1 tablespoon ginger syrup (see below)
1 tablespoon sesame paste (see below)
juice of 2 limes
1 tablespoon Asian fish sauce or light soy sauce
1 tablespoon sesame oil

to garnish

2 teaspoons toasted sesame seeds

Snap the vermicelli into shorter lengths, one-third of the original, folded skein.

Soak in cold water for about 30 minutes, or until well softened. Drain and return to the bowl. Now cover with boiling water, and fork and lift the noodles around for a few minutes until they have become silky, soft, and tender (eat one). Drain, rinse in cold water, and set aside.

In a small skillet, gently toast the cashews with a little salt in a little oil until golden all over. Cool, and then crush each cashew lightly with the back of a knife. Reserve.

Cut the radishes into quarters or rounds, the scallions into diagonal shreds, and the cucumber into thick matchsticks. Tip the prepared vegetables into a large bowl and add the vermicelli. Tear the cilantro and mint leaves into smaller pieces and add to the salad with the chili. Mix together with your hands to distribute everything evenly.

Now whisk the dressing ingredients together in a small bowl. Add to the salad and mix together once more with two forks, lifting and dropping the salad so that all is evenly dressed. Pile onto a shallow serving dish and sprinkle the crushed cashews and sesame seeds over. Best eaten pleasantly chilled, with warm sake or ice-cold beer.

Ginger Syrup

2 cups (scant) granulated sugar
11/2 cups water
finely pared zest of 1 lemon (use a potato peeler)
11/2 cups peeled and coarsely grated fresh ginger

Dissolve the sugar in the water in a pan over medium heat, then bring to a boil and cook for 2 minutes. Immediately add the lemon zest and ginger and stir together. Bring back to a boil for a few seconds and then pour into a bowl. Cover and leave to infuse overnight.

The following day, add 2 tablespoons water and warm through until liquid and pourable. Strain through a sieve and press on the solids with the back of a ladle to extract all the ginger and lemon flavors. Pour the syrup into a screw-top jar and store in the refrigerator until needed, where it will keep for several weeks.

Sesame Paste

Makes about 1 ¾ cups
You need a powerful, small food processor to make this paste. For the best flavor, I feel it is important to use Asian brands of chili and sesame oils.

2/3 cup sesame seeds
3 tablespoons finely grated ginger (juice saved!)
1 large garlic clove, peeled
2 tablespoons light soy sauce
4 tablespoons mirin (Japanese cooking wine)
1 to 2 tablespoons chili oil
1/3 to 1/2 cup sesame oil, plus a little extra to serve
2 tablespoons lemon juice
1/2 cup warm water
1 to 2 tablespoons sugar, to taste

Lightly toast the sesame seeds in a dry pan over medium heat until fragrant, and
cool slightly. Tip into a small food processor and add all the other ingredients.

Grind and pulse until you have a paste that is fully emulsified and super-smooth.

Disclosure & Credit: This cookbook was sent to me free of charge. I was not required to write about it and received no compensation for doing so. All recipe reprinted with permission from Abrams Books.

**************************************************************************************

Today is the last day to sign up for the 2nd Annual International Blogger Cookie Exchange! Come join us!

Want to create beautiful food and product photos that you can't wait to share?!
Discover your style, control the light, and shoot using the tool you know how to use (yes, your phone included). Learn about free resources, Live Q&As with Lori, and online courses you can take from anywhere in the world!
We respect your privacy. Unsubscribe at any time.