Browsing Category

Vegetarian

Beecher’s Flagship Cheddar with Avocado, Lime, and Shell Pasta from Melt: The Art of Macaroni and Cheese

October 23, 2013
Cheddar with Avocado, Lime, and Shell Pasta Recipe from Melt: The Art of Macaroni and Cheese on Fake Food Free


I’ve only had the book for a week, but every person I’ve told about it or shown it to has had the same response. It’s something like, “Oh, wow,” accompanied by a deep, long sigh. You know, the kind of sigh that is reserved for thoughts of, and longing for, comfort food.

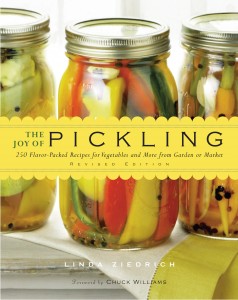
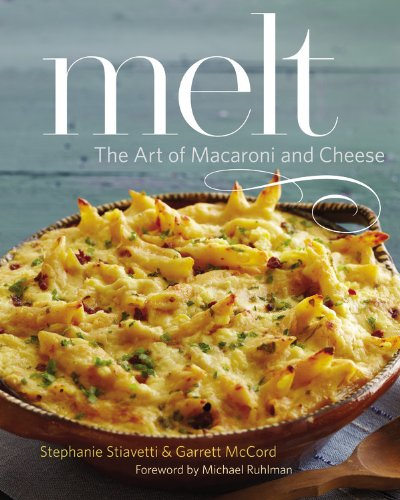
The book is Melt: The Art of Macaroni and Cheese by Stephanie Stiavetti & Garrett McCord, and it deserves every comfort food sigh and oh-wow that it prompts.


I mean, it’s mac and cheese. It’s the heart of the definition of comfort food. Even though most of us grew up with the fake stuff in a box or that made with cheese food, we still have a place in our hearts for the real deal.

If you don’t know what the real deal is, let me explain. 

The real deal is a perfect combination of creamy and pleasantly gooey cheese with well-cooked pasta. It can be straight from the stovetop or out of the oven. Take your pick. It also goes beyond cow’s milk cheddar and Monterey jack to include blue cheese, goat and sheep’s milk cheeses.

The real deal is summed up and well defined by Melt.

Stephanie and Garrett have managed to recreate macaroni and cheese while maintaining its roots and deep traditions. I fell for it within the first few pages as they explain how so many amazing cheeses are reserved for the cheese plate or the wooden serving block, positioned next to a few grapes or figs and a glass or two of good wine. One of their goals with this book is to introduce ways to use these amazing cheeses in your cooking.

I found that goal to be a huge relief. I love cheese. I’ve taken cheese making courses and written an article on making it at home, but I still find cheese overwhelming. This is especially true considering all the cheeses I now have access to here in California, many of which are recommended in this book.

I found myself thinking – you mean it’s okay if I actually cook with these cheeses instead of reserving them for a platter of fruit and crackers?

Yes. It is. And this book will show you some the best recipes and methods for doing just that.

Melt is full of cheese education. But don’t be discouraged if you haven’t heard of the cheeses mentioned in the recipes. Each has a helpful list of alternative cheeses you can use. There are also wine and additional food pairings to help you enjoy your new cheese find even more.

Before you begin to think that this book is only pasta coated in delicious cheese and baked into a comfort-food casserole, let me share the titles of some recipes with you. There are plenty of flavorful twists on casseroles and stovetop versions, but there are also refreshing pasta salads such as Drunken Goat with Edamame, Fennel, and Rotini and side dishes like Point Reyes Original Blue with Pecans, Figs, and Shell Pasta (which will make it on our Thanksgiving table this year). There is even a dessert section with recipes like Fromage Blanc, Chevre, Peach, and Ghost Pepper Cannelloni.

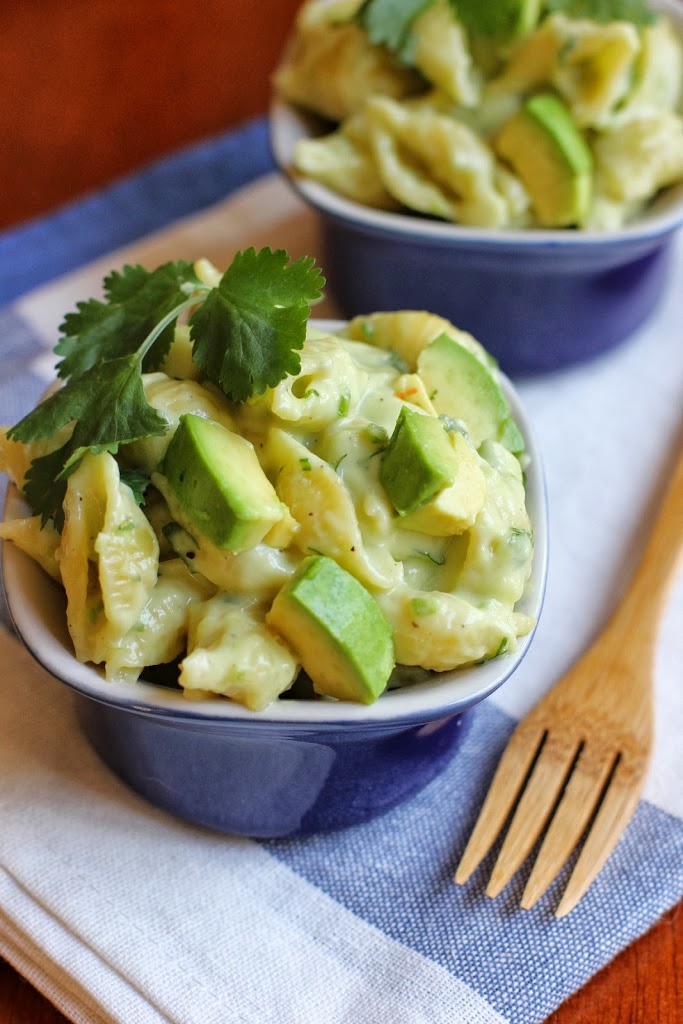
Despite all those wonderful options, the Beecher’s Flagship Cheddar with Avocado, Lime, and Shell Pasta caught my attention for two reasons. First, I just got back from Seattle where I walked by the Beecher’s Handmade Cheese Shop. I reluctantly passed up their mac and cheese because I was on the mission for another food find. (Yes, I regret that decision.) Second, because I am crazy about avocados and I was completely intrigued with the idea of mixing them into a bowl of macaroni and cheese.


Recipe for Mac and Cheese with Cheddar, Avocado and Lime! | Fake Food Free


One taste of this dish and I was ready to grab my fork and eat it straight from the pan. It’s creamy, tangy, sweet and salty all at the same time with the prominent qualities of traditional, southern-style macaroni and cheese.

Make it. Then consider it a good indicator of what is to come when you get yourself a copy of the book. You may not have realized you needed a cookbook devoted to macaroni and cheese, but trust me, you do.


From the book:
If you ever have the opportunity to wander through the Pike Place Market, the heart of the food scene in Seattle, you’ll likely come across the Beecher’s Handmade Cheese shop. Inside, you can sample their wares and watch the cheesemaking process unfold before your eyes. The proprietors serve what they call the World’s Best mac and cheese; with its jaunty kick of spice and smooth sauce, it’s definitely a contender for the title.

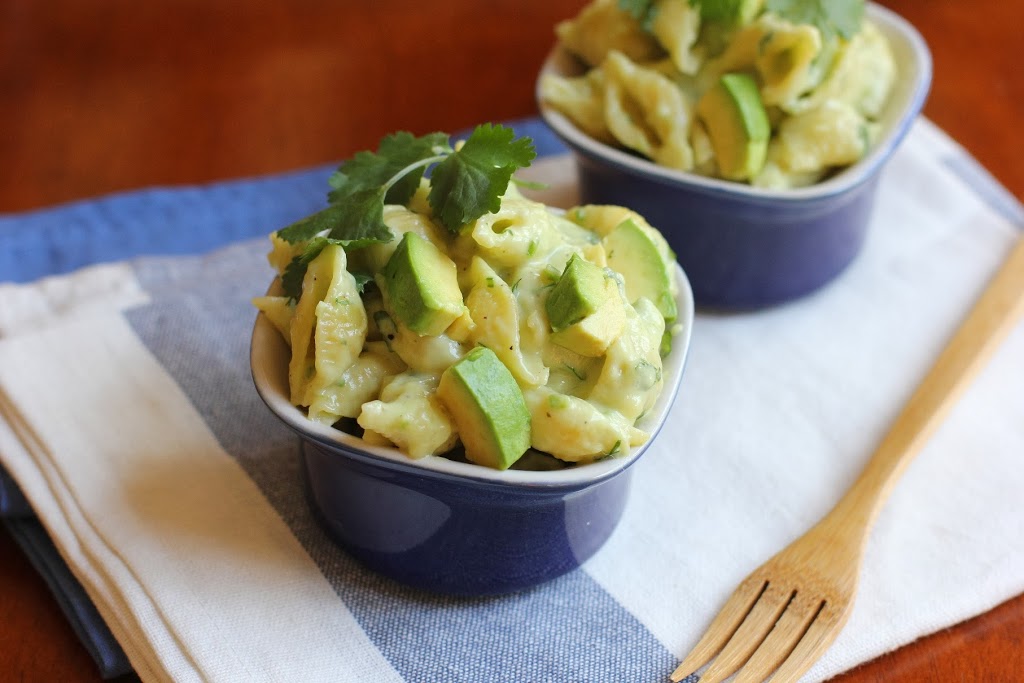
We love to use Beecher’s Flagship—a fierce, creamy paragon of Cheddar if ever there was one—in this avocado macaroni and cheese. The svelte texture of avocado melds so well with this sharp, tangy Cheddar. Smooth and buttery with a slight citrus tang, this jade-colored mac is a casual way to enjoy mac and cheese.

Beecher’s Flagship Cheddar with Avocado, Lime, and Shell Pasta

©2013 Stephanie Stiavetti and Garrett McCord. Reprinted with permission from Little, Brown and Company.

Serves 4 to 6

1 jalapeño pepper
Zest of 1 lime
Juice of 1 lime
2 green onions, green parts only, chopped
2 cloves garlic, chopped
3 ripe avocados, pits and skin removed, divided
10 ounces conchiglie or other medium shell pasta
1½ cups milk
2 tablespoons butter
3 tablespoons flour
1 teaspoon sea salt
½ teaspoon freshly ground black pepper
10 ounces Beecher’s Flagship
Cheddar, shredded
¼ cup chopped cilantro
Lime wedges for garnish

1. Remove the stem from the jalapeño and cut the jalapeño half. Remove the ribs and seeds—or keep them, depending on how much heat you like. Toss the jalapeño into the bowl of a food processor with the lime zest and lime juice. Add green onions, garlic, and flesh of 2 of the avocados. Blitz together into a very smooth paste.

2. Cook the pasta in a large pot of salted boiling water until al dente. Drain through a colander and set aside.

3. To prepare the mornay sauce, heat the milk in a small saucepan over medium heat. As soon as the milk starts to steam and tiny bubbles form around the edges of the pan, turn off the heat. Place the butter in a medium saucepan and melt over medium flame. Add the flour and stir with a flat-edge wooden paddle just until the roux begins to take on a light brown color, scraping the bottom to prevent burning, about 3 minutes. Slowly add the milk and stir constantly until the sauce thickens enough to evenly coat the back of a spoon—a finger drawn along the back of the spoon should leave a clear swath. Remove from heat and stir in salt and pepper. Add cheese to sauce, stirring until completely melted. Add the avocado-onion paste and whisk together until uniform and creamy. The key word here, if you haven’t guessed, is smooth. Season with more salt and pepper to taste.

4. Add the pasta and cilantro to the sauce and stir together. Dice the last avocado and toss together with the mac and cheese. Serve immediately with a splash of lime juice.

Alternative cheeses: Jasper Hill Cabot Clothbound Cheddar, Fiscalini Bandage Wrapped, Cheddar, Shelburne Reserve

Wine pairings: Pinot Grigio, Verdelho, Godello

Additional pairings for the cheese, outside of this recipe:
corn, cooked black beans, persimmons, most chili peppers, winter squashes such pumpkin or butternut


Disclosure: This book was sent to me for review purposes. I was not required to write about it and received no compensation for doing so. Thoughts are my own and this is a really great book.

Baking with Coconut Sugar: Spiced Coconut Sugar Cookies Recipe

October 3, 2013

 These cookies were one of my first baking experiments with coconut sugar! It’s now a staple in my pantry. 

Baking with Coconut Sugar: Spiced Coconut Sugar Cookies Recipe | Fake Food Free

 We finally gave in and went for it.

We got our first Costco membership.

While a household of two has little need for 40 rolls of toilet paper at one time, we were tempted by the travel deals we’d heard about from friends. Not to mention, if you can go at a time when it isn’t swamped, it’s kind of fun just to look around.

I was somewhat surprised to find several foods that will likely make my future shopping lists – avocado oil, unsweetened dried cherries, quinoa in bulk. Ours even carries California craft beer bombers.

Considering the size of everything, I figured I should pace myself. One bulk item at a time. So I had my eye on something specific our past few visits.

Coconut sugar.

I’ve purchased a little in small amounts, but I decided that some baking experiments were in order. So I picked up the size of bag that one can only find at a warehouse club.

I’ve used mascavo sugar ever since we lived in Brazil, but I find it harder to come by here. The coconut sugar is similar in texture and flavor so it is turning out to be a good substitute.

First up, cookies. It’s finally fall and I can barely contain my excitement for the season! I thought this spiced whole wheat cookie would be a great way to celebrate the season.

The dough needs to be refrigerated for one hour so be sure to plan ahead with this one. These cookies bake up crispy around the edges and chewy on the inside. They do spread just a little so instead of cutouts that need an exact shape I’d just go for circles or squares.

Spiced Coconut Sugar Cookies
Makes: 24, 2 inch cookies
Write a review
Print
Ingredients
  1. ½ cup unsalted butter, softened
  2. ½ cup coconut sugar
  3. 1 tablespoon molasses
  4. ¼ teaspoon salt
  5. ¼ teaspoon ground cinnamon
  6. 1/8 teaspoon ground nutmeg
  7. 1/8 teaspoon ground ginger
  8. 1/8 teaspoon ground clove
  9. Pinch of ground black pepper
  10. 1 cup white whole wheat flour
Instructions
  1. In the bowl of a mixer fitted with the paddle attachment, combine the butter and sugar. Cream on medium-high for 45 to 60 seconds, scraping the sides of the bowl as needed.
  2. Add the molasses and mix for 30 more seconds.
  3. Add the salt, cinnamon, nutmeg, ginger, clove and black pepper. Turn the mixer to low and slowly add the flour. Mix just until the ingredients are incorporated, scraping the bowl as needed.
  4. Transfer the cookie dough to a sheet of plastic wrap. Form into a ball, wrap and refrigerate for 1 hour.
  5. Preheat the oven to 350 degrees F.
  6. Roll the dough out on a floured surface or between two sheets of parchment paper to about ¼ inch thickness. Cut into your desired shapes.
  7. Bake on an ungreased baking sheet for 8 minutes. Until the cookies are firm and the edges slightly browned. Cool 5 to 7 minutes before removing them from the baking sheet.
Fake Food Free https://www.fakefoodfree.com/

I should probably mention that if you do a search on coconut sugar, you will find all kinds of opinions on both production and health benefits.  Personally, I like coconut sugar simply because it is a minimally refined, natural sugar that retains some of its mineral content (a sugar we found often throughout Southeast Asia). I’m not into the miracle marketing claims. If you eat natural foods, health tends to fall into place. And regarding the sustainability and farming issues, well, there are many sides to every story.


Thanks for reading! All images and content are the property of Fake Food Free unless otherwise stated. Please do not republish full recipes and images without written permission. What is okay? Feel free to Pin images, share links to my posts or share the photo in a round up post with the title of this recipe and a link back to the post. Confused about copyright and food blogs? Here is some helpful information on Recipe Attribution. If you want to use a photo or full recipe, just ask. I’m sure we can work something out.   

Slow Cooker Mushroom and White Bean Soup with Red Wine Recipe

September 4, 2013

Red wine adds rich flavor to this hearty mushroom and white bean soup. It’s easy to throw together in the slow cooker making it perfect for a busy day when you need a warm and filling meal.

Slow Cooker Mushroom and White Bean Soup with Red Wine | Fake Food Free

About one year ago, I made my first road trip across the country – Lexington, Kansas City, Cheyenne, Salt Lake City, Reno, and finally Oakland. I dropped off my husband to start his new job and I went back to Kentucky to wrap things up before making the move final.

So while I haven’t been in California a full year, he has. This month marks when things really began to change. I’ve probably mentioned before that we love change. This past year of change has been rewarding, challenging, and exciting.

And of all the things I could have made to mark this anniversary, I picked soup?

Well, we just got back from a very low key, and enjoyable trip to Las Vegas over Labor Day weekend. We could really use a break from heavy food. It is also now September and my favorite season of the year (regardless of where I live) is almost here – fall!

To justify things more, I love that I can now get mushrooms at the Farmers Market! I like all kinds of mushrooms, but I always default to the white button. I find that I can do so much with them – stuff them, put them in soups, add them to tacos. Don’t let anyone fool you into thinking they don’t have benefits either. As I put in my book, even white buttons have plenty of immune boosting power.


Slow Cooker Mushroom and White Bean Soup with Red Wine | Fake Food Free


I bought a bag that fortunately decided to hang on until I got back from traveling. I had to make the decision to use them now or never. When I spotted the half bottle of red wine on the counter the meal began to come together.

So grab the slow cooker! It may not be crisp and cool yet, but fall is coming! Feel free to start off the celebrations with this rich and hearty soup.

 
Slow Cooker Mushroom and White Bean Soup with Red Wine Recipe
Serves 4
Red wine adds flavor to this hearty mushroom and white bean soup. It's easy to throw together in the slow cooker making it perfect for a busy day when you need a warm and filling meal.
Write a review
Print
Ingredients
  1. 1 pound white button mushrooms, halved or sliced
  2. ½ medium yellow onion, sliced
  3. 3 cloves garlic, minced
  4. 1 quart chicken, beef or vegetable stock
  5. 1 cup red wine
  6. 1 ½ to 2 teaspoons fine sea salt
  7. ½ teaspoon ground black pepper
  8. 1 sprig rosemary
  9. 1 ½ cups (or 15-ounce can) cooked white kidney beans, rinsed and drained
Instructions
  1. Place the mushrooms, onions, garlic stock, wine ,and 1 cup of water in the bowl of the slow cooker. Add ½ teaspoon of salt and ¼ teaspoon of black pepper. Place the rosemary sprig in the bowl and stir.
  2. Cook on high for about 3 ½ hours, until the mushrooms are almost tender. Remove the rosemary and add the beans. Add an additional 1 to 2 teaspoons of salt and ¼ teaspoon of black pepper to taste. Let cook on high for 20 to 30 more minutes, and serve.
Fake Food Free https://www.fakefoodfree.com/
 
Slow Cooker Mushroom and White Bean Soup with Red Wine | Fake Food Free
 
Thanks for reading! All images and content are the property of Fake Food Free unless otherwise stated. Please do not republish full recipes and images without written permission. What is okay? Feel free to Pin images, share links to my posts or share the photo in a round-up post with the title of this recipe and a link back to the post. Confused about copyright and food blogs? Here is some helpful information on Recipe Attribution. If you want to use a photo or full recipe, just ask. I’m sure we can work something out.

Smoky Boiled Peanuts Recipe

August 27, 2013

One thing I wasn’t expecting to find at the markets here were fresh peanuts. I know that there are a few areas on this side of the U.S. where they are grown, but I was definitely closer to the peanut growing states of Virginia and Georgia when we lived in Kentucky.

Yet, I can’t remember ever coming across a fresh peanut. But then again, I wasn’t looking for them either.

When I saw the light blond shells piled up on the tables at the market, I knew right away that they were peanuts. It took me longer to figure out that they were fresh. (Often called, green peanuts.)

Never one to resist the urge to buy a new ingredient, I bagged up a few handfuls still speckled with the dirt and brought them home. Honestly, I had no idea what else to do except boil them.

After researching several recipes, I made my first batch which was a huge fail. According to a few recommendations, I soaked them in water first, drained them and then boiled them. They were much too wet and soggy for my taste.

So when I picked up another bagful last week, I skipped the extra soaking step. I covered the 1 pound of peanuts in about 5 cups of water. I added salt, garlic powder and smoked hot paprika and let them boil.

Full disclosure. I forgot about them.

I had intended to boil them for 2 hours, but I returned to the stove about 2 hours and 45 minutes later to find almost no water left in the pan. Oops.

I pulled the pan off the burner and gave them a stir to distribute some of the seasonings that had collected at the bottom. Then, I tried one. They were delicious! They really reminded me more of the pinhão (pine nut) we used to find in Brazil, like a firm bean with a nutty flavor.

So there you have it. I accidentally discovered exactly how I like my boiled peanuts. Sometimes kitchen mistakes lead to grand results. And it’s even better if those mistakes and results come without setting off the fire alarm.

Smoky Boiled Peanuts

About 1 pound of fresh, green peanuts
5 to 6 cups of water
¼ cup finely ground sea salt
¼ tsp garlic powder
¼ tsp smoked hot paprika

Add the peanuts to a large saucepan and add enough water to cover the nuts. Stir in the sea salt, garlic powder and paprika. Bring the peanuts to a boil over high heat, partially cover the pan with a lid. Reduce the heat to medium to maintain a low boil, just above a simmer.

Let cook for 2 ½ to 3 hours, until almost all of the water has evaporated. There should still be at least a half inch in the bottom of the pan.  Stir to distribute the salt. Let cool before shelling and eating. Store in an airtight container in the refrigerator for up to 2 days. 

Japanese Pickled Ginger Recipe from The Joy of Pickling

August 19, 2013

   Japanese Pickled Ginger Recipe from The Joy of Pickling | Fake Food Free

Two of my favorite condiments are served beside sushi. First, it’s that pleasantly spicy wasabi. Second is the pickled ginger. I could eat that ginger on just about anything. It has crossed my mind that I could probably make it at home, but I have never searched for a good recipe. Fortunately, now I don’t have to because this time around a good recipe found me. 

All summer I have been browsing the pages of one amazing cookbook. It contains recipes for pickled everything! Or at least it seems like just about everything. The Joy of Pickling: 250 Flavor-Packed Recipes for Vegetables and More from Garden or Market by Linda Ziedrich

Pickled-Ginger-Cookbook
 
While you will find a huge variety of cucumber pickles, this cookbook goes well beyond the standard dill. Figs. You can pickle figs?! And peaches? There is even pickled pig’s ear should you choose to go there. There is also page after page of interesting condiments and sauces like Hot Orange Ketchup and Rhubarb Chutney
 
There were so many tempting recipes to try in this book, but I knew I finally had to give Japanese Pickled Ginger a try. The best part about many pickling recipes is that they are so easy to make. Top a few fruits or veggies with a liquid, seal and rest. A few days later you have a crisp, tangy snack or condiment. 
 
That is definitely the case with this ginger. Peeling and slicing takes a little time, but I had this recipe done in less than 30 minutes. Now that I have the ginger down, it may be time to start practicing the sushi. 
 
Japanese Pickled Ginger Recipe from The Joy of Pickling | Fake Food Free
 
This book has been out for a while now and I’m so glad that it finally caught my attention. I can tell it will become a well-used resource book for me every year. If you are spending late summer and early fall wondering what to do with all your garden produce, the chances are good that you can pickle it. This cookbook will show you how. 
 
Japanese Pickled Ginger Recipe from The Joy of Pickling | Fake Food Free
Japanese Pickled Ginger
©Linda Ziedrich 2009. Reprinted with permission from The Harvard Common Press.
 
Makes: About 1 Pint
 
From the book:
Use fresh young ginger for this pickle. Available in Asian markets, young ginger is pale, almost white with very thin skin and pink stem stubs. A mandolin may be useful for slicing the root. Your pickled ginger may turn out faintly pink, but it won’t have the hot pink color you’ll see in commercial versions of this pickle, that color comes from food dye. A traditional accompaniment to sushi, pickled ginger refreshes the palate and cleanses the mouth of fishy tastes
.
Ingredients
1 quart water
½ pound fresh ginger, sliced paper thin
1 teaspoon plus a sprinkle of pickling salt
1 cup rice vinegar
3 tablespoons sugar
1 teaspoon light (usukuchi) Japanese soy sauce
 
Directions
Bring the water to a boil in a saucepan and add the ginger. Bring the water back to a boil and then drain the ginger well in a colander. Let the ginger cool.
 
Put the ginger into a bowl and sprinkle the ginger lightly with salt.
 
In a saucepan, bring to a boil the vinegar, the sugar, the 1 teaspoon salt, and the soy sauce, stirring to dissolve the sugar and salt. Pour the hot liquid over the ginger, mix well.
 
Store the ginger in a tightly covered container in the refrigerator. It will be ready to use in a day or two and will keep for several months, at least. 
 

Disclosure: This cookbook was sent to me for review purposes by The Harvard Common Press. I was not required to post about it and I received no compensation for doing so. 

A Day at the San Francisco Cooking School

August 14, 2013

From a distance it doesn’t look like a cooking school. It could easily be mistaken for a boutique, or better yet, an art gallery. But once the glare of the windows clears and you open the door, if you have even the slightest interest in cooking, your heart skips a beat. It’s then that you realize that this is an art gallery, a hands-on gallery for the art of cooking.

Beautifully set, modern tables were the first thing I encountered. A clear sign that lunch would be delicious. Then the colorful Dutch ovens and well-organized white dishes that line each shelf caught my attention. I marveled over the ovens and ranges for a bit, and then I found my work station.


This was my first time visiting the San Francisco Cooking School. The 10 or 12 of us there were the lucky ones who responded quickly enough to an email inviting us to attend a Knife Skills workshop for food media.

We received a condensed version of the class with instruction on the various knife cuts while we prepped the ingredients for Minestrone Soup with Pesto. David taught us about batonnet and julienne while Jodi filled us in on the details of the school and the classes they offer.

What a diverse line up of classes. In addition to Knife Skills, you can take courses in Cooking Fundamentals, Soba Making, French Macarons, Recipe Testing and Development along with their Cook the Book series which features recipes from cookbooks focused on a variety of ethnic cuisines. If you want to take your cooking beyond your own kitchen, they also offer full-time and part-time culinary and pastry arts certificate programs.

As we chopped up the ingredients that we later took home to make our own minestrone soup, David finished up the class by making a rustic pesto. Jodi served up the soup they made earlier which would serve as our lunch along with crusty bread, a delicious salad with seasonal stone fruits, and wine.

I’ll admit, I’m not the biggest minestrone fan, but the pesto on this soup made all the difference. After more enjoyable conversation about the school with David and Jodi, we ended our meal with some of the best cookies I’ve had the pleasure of eating – almond, chocolate, candied ginger, and rosemary and cornmeal. These cookies had me scouring the website to find a course that would teach me how to make them.

Jodi granted me permission to reprint the soup recipe for you. It is the perfect summer-to-autumn transition meal. It is warm and comforting for the cooler days ahead, and it uses up late summer and autumn vegetables. 

Enjoy the soup, and when in San Francisco, check out the San Francisco Cooking School. I assure you there are few more inspiring or enjoyable places to cook.

Minestrone with Pesto

Reprinted with permission from Jodi at the San Francisco Cooking School

Soup:
3 tbsp extra-virgin olive oil
1 ½ cups diced onion
2 medium carrots, cut in ½-inch dice
2 medium leeks, white and light green parts only, finely sliced
2 stalks celery, cut in ½-inch pieces
Coarse salt and fresh pepper to taste
2 potatoes, peeled and cut in ½-inch dice
6 cups hot chicken or vegetable stock
1 (14 ounce) can chopped tomatoes
1 ½ cups Savoy cabbage, thinly sliced
1 ½ cups zucchini, cut in ½-inch dice
1 (14 ounce) can cannellini beans, drained and rinsed

Pesto:
2 cups gently packed basil leaves
1 medium garlic clove, chopped
¼ cup toasted pine nuts
½ cup extra-virgin olive oil
½ cup freshly grated Parmesan

In a large stock pot, heat the olive oil over medium heat. Stir in the onions, carrots, leeks and celery with a pinch each of salt and pepper. Cook until the vegetables are lightly browned and begin to soften, 5-6 minutes. Add the potatoes and cook, stirring occasionally, 2-3 minutes more.

Stir in the chicken broth, tomatoes and a pinch each of salt and pepper and cook until all the vegetables are tender, about 1 hour. Add the cabbage, zucchini and beans. Cook until cabbage and zucchini are just tender with a bit of a bite, about 6 minutes more.

While the soup is cooking, make the pesto. Using your knife, finely chop the basil, garlic, and pine nuts together. Place in a small bowl and add the oil until the mixture is shiny and moist. Stir in the cheese and season to taste with salt and pepper.

Serve the soup with a drizzle of the fresh pesto over the top. Serves 6.

Disclosure:  My visit to the San Francisco Cooking School was part of a free food media event. I was not required to post about my visit and received no compensation for doing so.

13 Best Tomato Recipes

August 1, 2013

I did it again.

Every year when the end of May rolls around, I forget. Unlike other bloggers who spend weeks building up to the big day, planning giveaways and making special recipes, it passes me by, and few weeks later I think – oops, I forgot again.

I’m talking about my food blogging anniversary. Fake Food Free has been alive and well for over 5 years. It’s overwhelming to think where this blog has taken me since I began typing my first words in our apartment in Southern Brazil.

Things have evolved through my travel, adventures in food culture and gardening. My photos are a bit better than those dark point-and-shoot images I started with, and I’d like to think my recipe writing has improved as well. I’ve met amazing people, and now I’m at a place where health, food and recipe writing, and taking food photos are my work. As you’ll hear me say often – Life is good.

And it all started with this blog.

While things have changed a bit here, and I don’t get to post as much as I used to, this is certainly not a farewell post. It’s a big Cheers, Prost and Saúde to another 5 and beyond!

What better way to celebrate than with tomatoes! Well, okay, a cocktail might be better, but right now we’re in the heart of summer and all I can think about are beautiful heirlooms, sweet cherries and plump Romas.

After 5 years of blogging, I’ve created and adapted my fair share of recipes using my favorite part of this season.

Here are 13 that you must make before the 2013 tomato season passes us by! (Click on the name and it will take you to the post with the recipe.)

Roasted Garlic, Tomato and Black Bean Soup

Grilled Marinara Pasta

Honey Peach and Tomato Black Rice Salad

Hearty Tomato, Kale and Mushroom Sauce

Roasted Tomato, Black Bean and Arugula Salad

Smoky Tomato Jam

Beer Cheese Tomato Soup

Honey-Pecan Tomato Tarts with Blue Cheese

BLT Spinach Salad with Fresh Garlic Dill Dressing

Heirloom Tomatoes and Cantaloupe

Stuffed Poblano Peppers with Tomato Chile Sauce

Poblano Cilantro Salsa

Sweet and Simple Tomato Pepper Salad

Warm Corn and Purple Cabbage Slaw with Coconut Dressing Recipe

July 11, 2013


I was without virgin coconut oil for almost 5 months. How I did it, I have no idea.


Over the past few years it has become my go-to oil – for cooking, baking, to spread on toast. I finished up my last jar before the move in December, thinking I’d get more when I settled into the place. It’s hard to believe it has taken this long. I’m so glad to have it back in the kitchen, and I’m also happy to be able to offer you some for your kitchen too.


Tropical Traditions remains my favorite brand and I’ve done a few giveaways of their products on the blog before. I use their Gold Label Virgin Coconut Oil in my cooking, and aside from the past 5 months, you can always find the 32 ounce jar in my cabinet. Actually, it is even nicer to have around now that we’ve moved to the Bay Area. With the temperatures being more stable and the climate more mild, it always seems to be at the perfect consistency.


Gold Label Virgin Coconut Oil - 32 oz.
I love that this oil comes in small batches, handmade from family producers. If you haven’t checked them out, they have a lot of great products. I’m also a huge fan of their Coconut Peanut Butter. I’ve used coconut oil in many recipes on the blog and I’ve written about the science that convinces me to include it in my diet.


This time I decided to use it in something other than baked goods. In fact, I went a bit crazy with coconut. I love what we always called fried corn in my family, which was basically corn cut off the cob and skillet cooked in butter with onions and bell peppers. I took that idea and added some purple cabbage to make a slaw, and then doused it with some delicious coconut flavor.


Since coconut oil is solid at room temperature, I kept this salad warm. The crazy-with-the-coconut comes in with the dressing. I used coconut oil, coconut vinegar and coconut sugar.


This makes six servings, but I’m not going to lie. I’m pretty sure I ate three for dinner the night I made it. I absolutely love the flavors. I make a lot of recipes I enjoy, but many just don’t make the cut to be repeats in my kitchen. This one will be coming around again, and soon!


Warm Corn and Purple Cabbage Slaw with Coconut Dressing

1 tsp virgin coconut oil
½ medium onion, thinly sliced
3 ears of corn, kernels cut off the cob
½ medium red bell pepper, thinly sliced
1 small head purple cabbage, thinly sliced
3 tbsp coconut vinegar
1 tbsp virgin coconut oil, melted
1 tbsp coconut sugar
¾ tsp salt


Heat the teaspoon of olive oil in a large skillet or wok over medium-high. Add the onion and cook for 30 seconds. Add the corn and cook for 2 to 3 minutes, until the moisture evaporates and corn just barely begins to brown.


Add the red pepper and cabbage and toss to heat the cabbage through. Cook about 30 seconds. You want the cabbage to wilt a bit, but not color the rest of the dish. Remove from the heat.


In a small dish, whisk together the coconut vinegar, 1 tablespoon of coconut oil, coconut sugar and salt. Pour the dressing over the warm vegetables and toss to coat.
Serve warm. Makes about 6 servings.


************************************************
GIVEAWAY CLOSED

So I thought it was about time I give away some coconut oil to you again. And if you haven’t tried it, you are in for a treat! After 5 years of blogging, I’m not much for the bells and whistles of like me here or follow me there. I’m more interested in hearing from you. There are only two requirements to enter.

  • Second, leave a comment here telling me your subscribed AND tell me in your comment what your most memorable experience is with coconut or coconut oil. 
Was it during a trip abroad, or a favorite family recipe? I’ll start. My best memory with coconut is when we traveled to Ubud, Bali and enjoyed a walking tour of a local village. Our guide asked a farmer to climb an amazingly tall palm and cut us a coconut. They then showed us how to cut a spout from the skin and drink it from the coconut. Incredible experience.
I’ll only include valid answers with the required info in the random draw. Leave your comment by Wednesday, July 24th, 11:59 pm PST.
If you’d like to learn more about Tropical Traditions here are some helpful links so you can stay connected.
Tropical Traditions on – Facebook, Twitter, Google+, Pinterest (all appropriate links)
More from Tropical Traditions:
 Win 1 quart of Gold Label Virgin Coconut Oil!
Tropical Traditions is America’s source for coconut oil. Their Gold Label Virgin Coconut Oil is hand crafted in small batches by family producers, and it is the highest quality coconut oil they offer. You can read more about how virgin coconut oil is different from other coconut oils on their website: What is Virgin Coconut Oil?
You can also watch the video they produced about Gold Label Virgin Coconut Oil:
Tropical Traditions also carries other varieties of affordable high quality coconut oil. Visit their website to check on current sales, to learn about the many uses of coconut oil, and to read about all the advantages of buying coconut oil online. Since the FDA does not want us to discuss the health benefits of coconut oil on a page where it is being sold or given away, here is the best website to read about the health benefits of coconut oil.

***************************************

And the winner is:

Meagan of Meagan’s First Kitchen (and you can see what has been keeping her away from the kitchen the past few months at Because Forgetting is Easy). Congrats Megan! Send me your address and I will pass it along to the folks at Tropical Traditions. Your Gold Label Virgin Coconut Oil will arrive soon! 

Kentucky Bourbon-Vanilla Soaked Cherries Recipe

June 26, 2013
Kentucky Bourbon-Vanilla Soaked Cherries | Fake Food Free | The perfect ice cream topping or cocktail garnish!

Last week at the Farmers Market, I saw this sign.

That sad face sums up my feelings pretty well. I have enjoyed my first cherry season in California so much. I think it’s because I wasn’t expecting to have such a selection. It completely took me by surprise.

Aside from a few cherry trees here and there in Kentucky, I’ve always associated cherries with Michigan. My past experience includes picking out a few in the grocery store and barely getting enough from a tree to make a mini cherry pie. This year, I had all the cherries I wanted. I took full advantage, too. I can’t begin to estimate how many pounds I carried home throughout the season.

But alas, it is coming to an end. I know there will be other fruits to take their place, but I will miss them all the same.

Every time I carried home by big bag of joy I said I was going to make bourbon cherries. It was now or never. Well, maybe now or next season, but the pressure motivated me to get on it.

Kentucky Bourbon-Vanilla Soaked Cherries | Fake Food Free | The perfect ice cream topping or cocktail garnish!

I came across these Vanilla-Bourbon Cherries at Sweetsonian a little while back. (Aren’t her pictures gorgeous?) I wanted those same flavors so I adjusted it and then got some exact measures for the ingredients. I know I’ll want to make them again and I’m horrible at remembering what I did from recipe to recipe so I’m hoping this will help me recreate them next year.

Dark red Bing cherries make pretty soaked cherries, but as always, I was steered by the sale. These yellow-red Rainier cherries were priced to sell so my cherries look a little lighter in their bourbon bath.

I’ve had them in the fridge a little over a week and they are delicious. I’ve dropped a few in our cocktails and I hope to use them on a dessert if I can stop eating them straight from the jar.

Kentucky Bourbon-Vanilla Soaked Cherries

Inspired by Vanilla-Bourbon Cherries by Sweetsonian

Ingredients

1 pint cherries, pitted
4 tbsp sugar
3 tbsp water
1 tsp pure vanilla extract
1/3 to ½ cup Kentucky bourbon

Prep

Tightly pack the cherries into a clean pint jar leaving about ½ inch headspace.

In a small sauce pan, heat the sugar and water on medium-high. Bring it just up to a simmer and cook until the sugar dissolves and it thickens a little, about 2 to 3 minutes. Remove from the heat and stir in the vanilla.

Pour the sugar syrup over the cherries. Pour the bourbon into the jar. How much you need will depend on how tightly your cherries are packed in. Ensure that all the cherries are covered, leaving about a ½ inch headspace.

Seal the jar. Give it a shake to mix the sugar syrup and bourbon.

Store in the refrigerator for at least 3 days before eating to allow the flavors to soak into the cherries. Then they should keep in the fridge for about a month.


Thanks for reading! All images and content are the property of Fake Food Free unless otherwise stated. Please do not republish full recipes and images without written permission. What is okay? Feel free to Pin images, share links to my posts or share the photo in a round up post with the title of this recipe and a link back to the post. Confused about copyright and food blogs? Here is some helpful information on Recipe Attribution. If you want to use a photo or full recipe, just ask. I’m sure we can work something out.  

Vegetarian Bell Pepper Adobo (Adobong Sili) Recipe from The Adobo Road Cookbook

June 4, 2013
  

Over the years, one of my favorite things about having this blog has become reviewing cookbooks. There are a lot of great cookbooks out there. To be honest, I have never reviewed any that were bad. But what makes a cookbook excellent to me, what makes it stand out among all the others, is when I can sense the passion for the food as I read the pages.

Lately I’ve had the opportunity to review several, but what I don’t always get to do is interact with the authors. Since our move to the Bay Area, one thing I am loving is that I can meet some of these cookbook authors at cookbook signings in the city.

That was the case with The Adobo Road Cookbook: A Filipino Food Journey-From Food Blog, to Food Truck, and Beyond by Marvin Gapultos (also the author of Burnt Lumpia). I received a review copy of the book and I was invited to the book signing at Omnivore Books. Having the chance to read it before the signing, I could not wait to learn more about the passion behind this book.

Yes, this book falls in the excellent category for me. The stories behind each recipe make you want to start creating, and continue to savor, family food memories of your own.

We haven’t been to the Philippines yet, but I’m continually intrigued by this cuisine. The tangy adobos and tasty lumpias, I’ve been wanting to try more dishes and The Adobo Road stepped right in with plenty of opportunities to do so. The best part is that the the recipes have a unique quality of being authentic without overwhelming the cook.

I enjoyed myself so much at the signing. Marvin described more about how the book came to be, and about the work that went into translating family cooking and memorized steps into a measured and written recipe that he could share with readers.

I knew what I was going to make prior to the signing, but I was even more encouraged when someone in the group asked what a person new to Filipino food should cook for the first time. His answer? An adobo. When I told Marvin that I hoped to make his Vegetarian Adobo for the blog, he told me more about his grandfather’s dish and how he hasn’t found the exact pepper used, but that this was incredibly close.

I’ve never made adobo before and the Vegetarian Bell Pepper Adobo (Adobong Sili) stood out for me due to it’s flavor and simplicity. In fact, I thought that it might be too simple or not as exciting as I hoped.

I underestimated its potential. I loved this dish! I wanted it to be as authentic as possible so I ordered the coconut vinegar online. I really think the slightly sweet flavor of this made the adobo. I’m so glad I decided to get it. Especially because it means there are more adobo dishes in my future.

If you’ve considered trying to make Filipino foods in your kitchen, definitely start with this book. The best way to describe it is easy authentic with plenty of passion to get you inspired!

Vegetarian Bell Pepper Adobo  Adobong Sili

Copyright © 2013 Marvin Gapultos. Reprinted with permission from Marvin Gapultos and Tuttle Publishing.

Serves 4–6

Prep Time: 15 minutes

Cooking Time: 30 minutes

2 tablespoons oil
1 red onion, thinly sliced
5–6 cloves garlic, smashed with the side of a knife and peeled
4 bell peppers of differing colors (green, red, yellow, orange), deseeded and cut into thin strips
¼ cup (65 ml) Filipino coconut vinegar, or distilled white vinegar
¼ cup (65 ml) soy sauce
¼ cup (65 ml) water
1 tablespoon brown sugar
1 teaspoon freshly ground black pepper
1 bay leaf

Heat the oil in a large sauté pan over moderately high heat. Add the onion and garlic and sauté until the onion is soft and translucent, 3–5 minutes. Toss in the bell peppers and sauté until they just begin to soften, 3–5 minutes.

Pour in the vinegar, soy sauce and water, stirring to scrape up any browned bits from the bottom of the pan. Stir in the brown sugar and black pepper, and add the bay leaf. Increase the heat to high and bring the liquid to a boil.

Reduce the heat to low, and simmer uncovered for 20 minutes, or until the bell peppers become tender but not mushy. Discard the bay leaf and serve the adobo with steamed white rice.

From the book:

Adobo: What’s in a name?
Despite foreign influence on Filipino cuisine, Filipino adobo is indigenous and unique to the Philippines, existing before colonial rule. In the Philippines, “adobo” refers to a technique, rather than a singular dish. In the Spanish context, adobo generally refers to a marinade used to flavor meats, whereas Mexican adobo refers to any number of spices. In all likelihood, Spanish colonists simply applied their term to what the Filipinos were already cooking and eating because it was similar in appearance to Spanish adobo, though not prepared the same way.

Disclosure:  This book was sent to me for review purposes. I was not required to post about it and received no compensation for doing so.

Want to create beautiful food and product photos that you can't wait to share?!
Discover your style, control the light, and shoot using the tool you know how to use (yes, your phone included). Learn about free resources, Live Q&As with Lori, and online courses you can take from anywhere in the world!
We respect your privacy. Unsubscribe at any time.