Browsing Category

Soup and Sandwiches

A Day at the San Francisco Cooking School

August 14, 2013

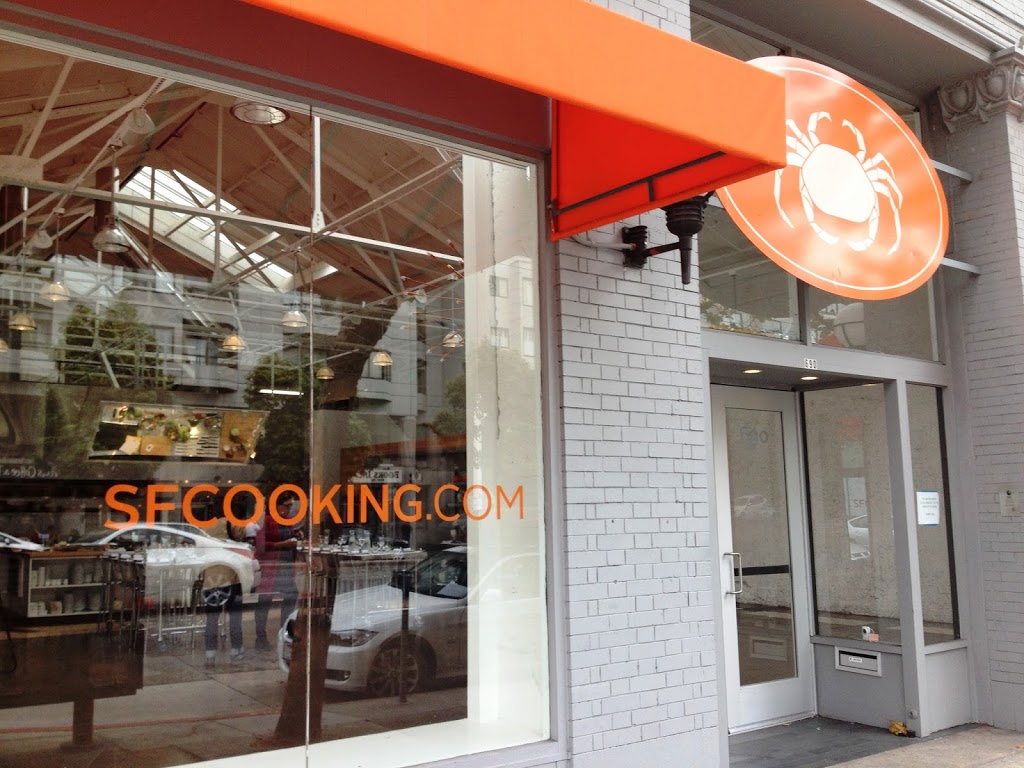
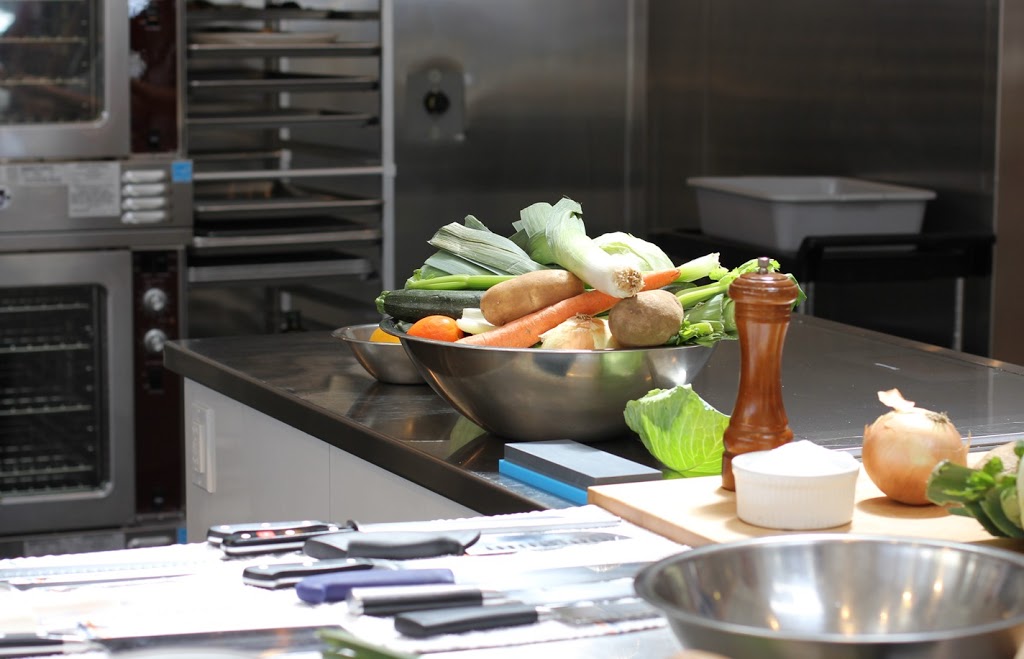
From a distance it doesn’t look like a cooking school. It could easily be mistaken for a boutique, or better yet, an art gallery. But once the glare of the windows clears and you open the door, if you have even the slightest interest in cooking, your heart skips a beat. It’s then that you realize that this is an art gallery, a hands-on gallery for the art of cooking.

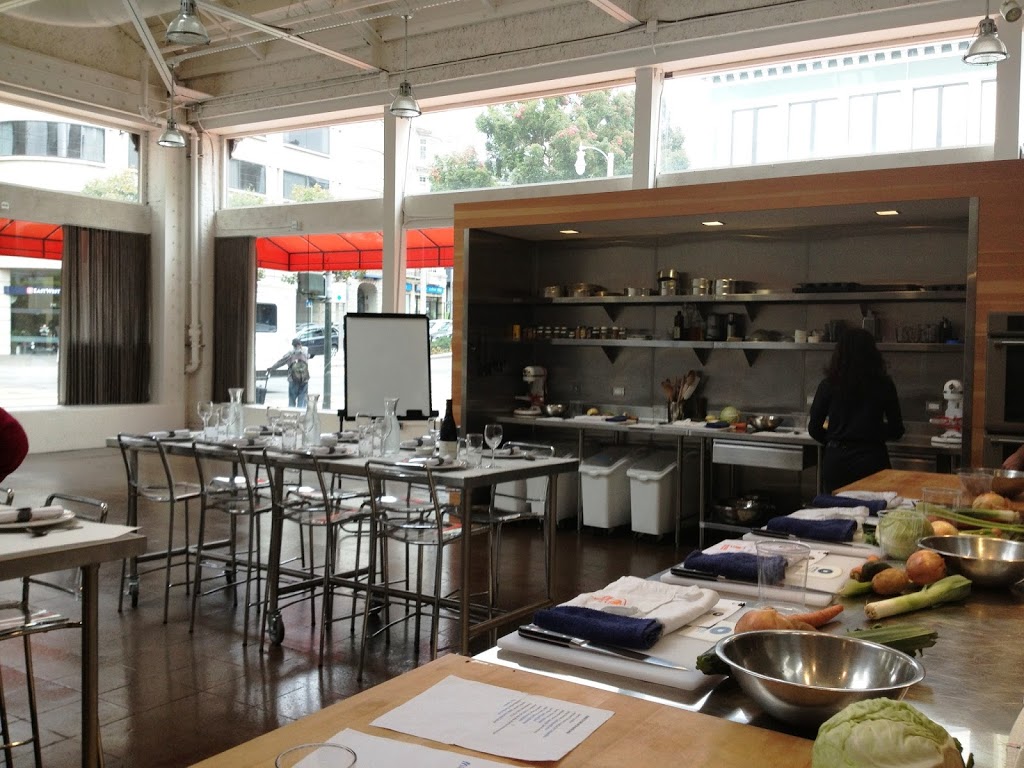
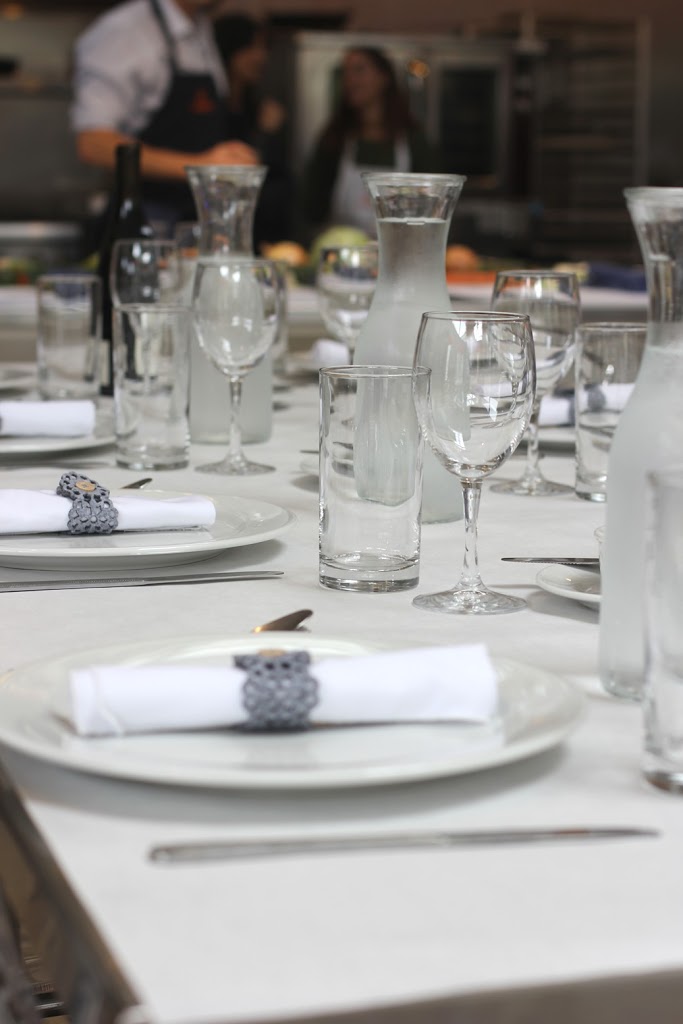
Beautifully set, modern tables were the first thing I encountered. A clear sign that lunch would be delicious. Then the colorful Dutch ovens and well-organized white dishes that line each shelf caught my attention. I marveled over the ovens and ranges for a bit, and then I found my work station.


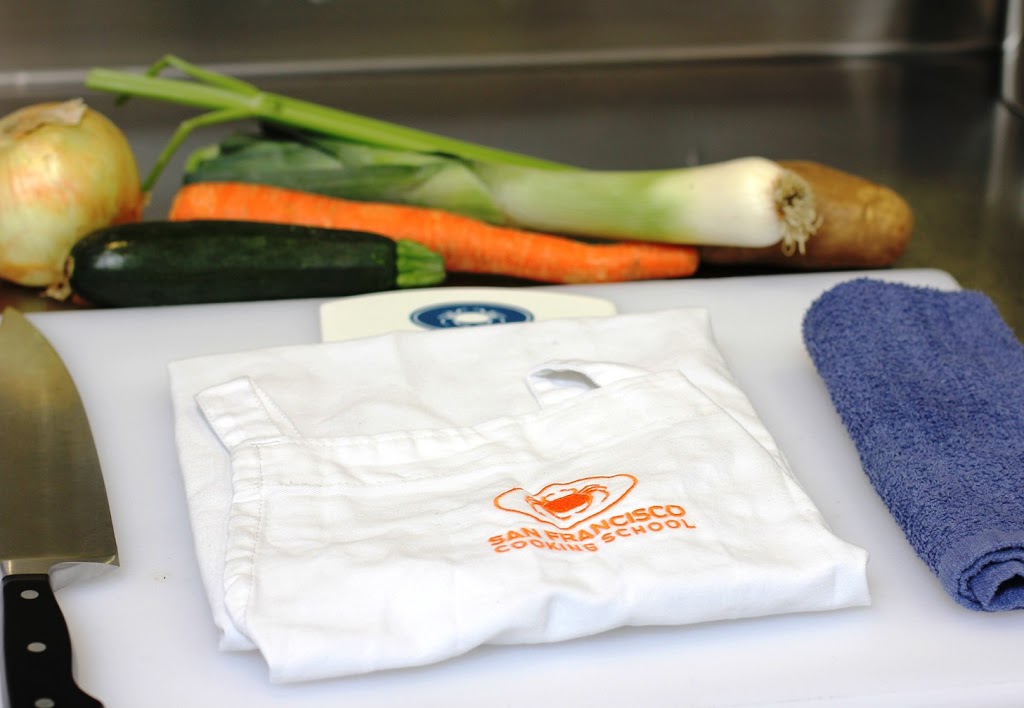
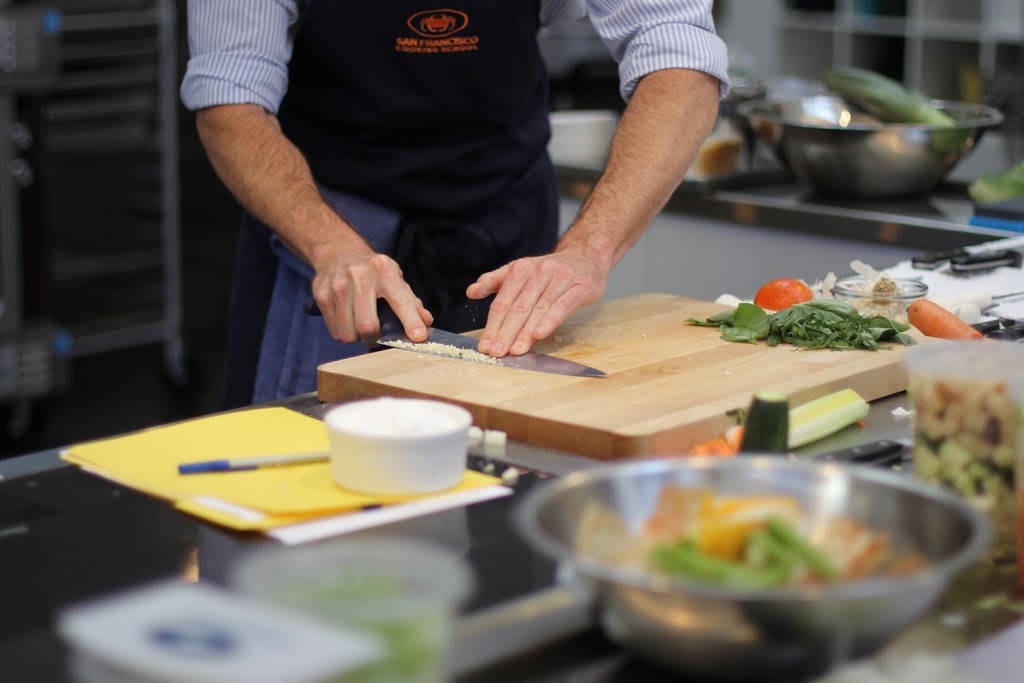
This was my first time visiting the San Francisco Cooking School. The 10 or 12 of us there were the lucky ones who responded quickly enough to an email inviting us to attend a Knife Skills workshop for food media.

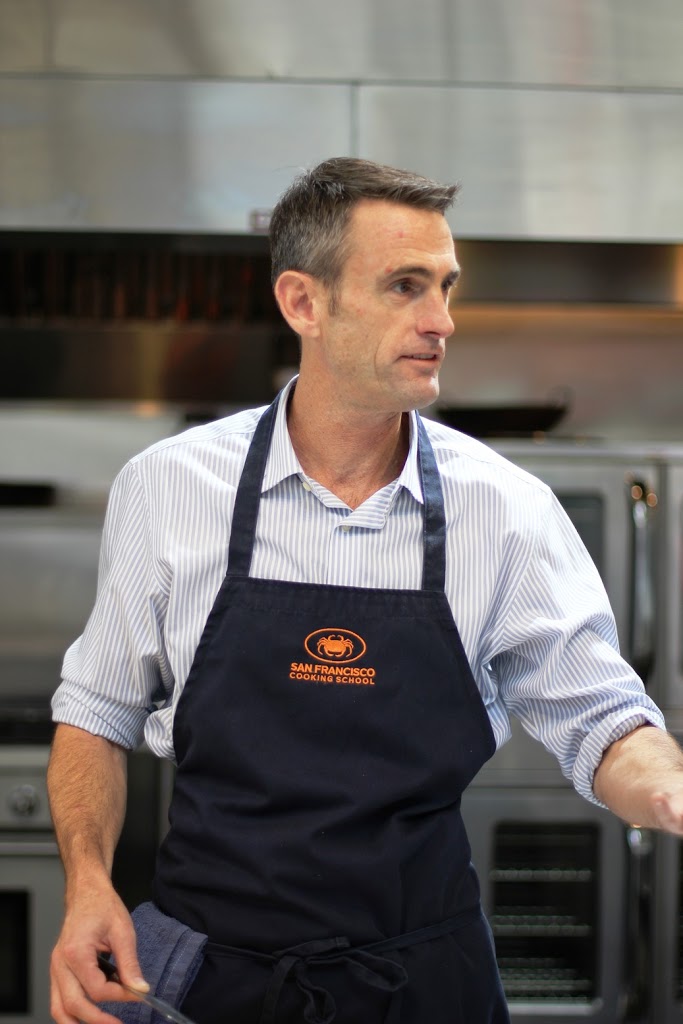
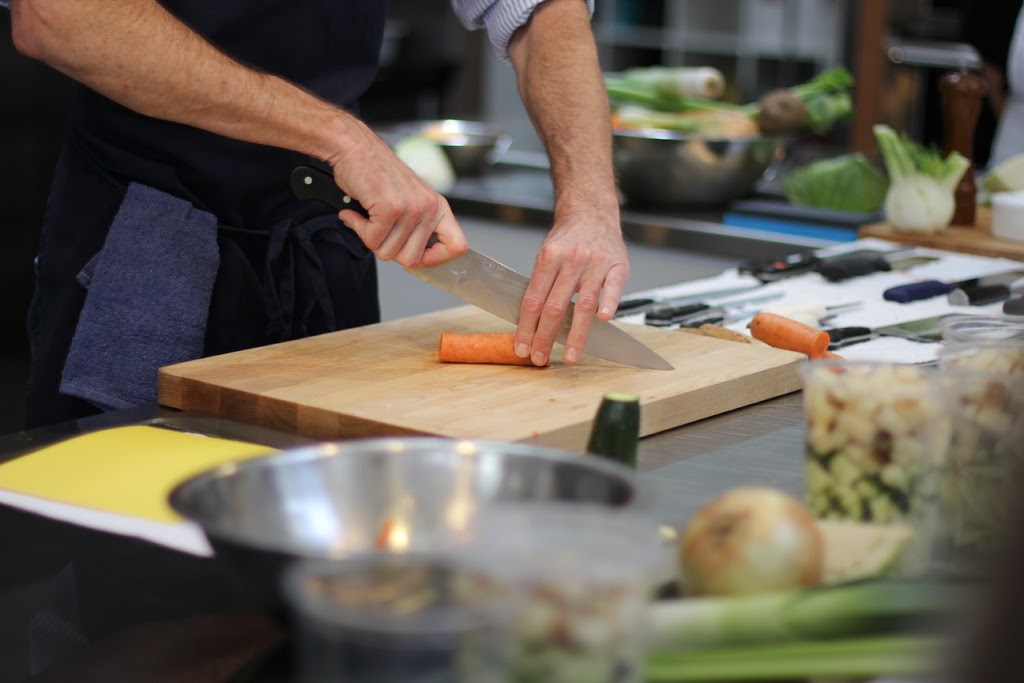
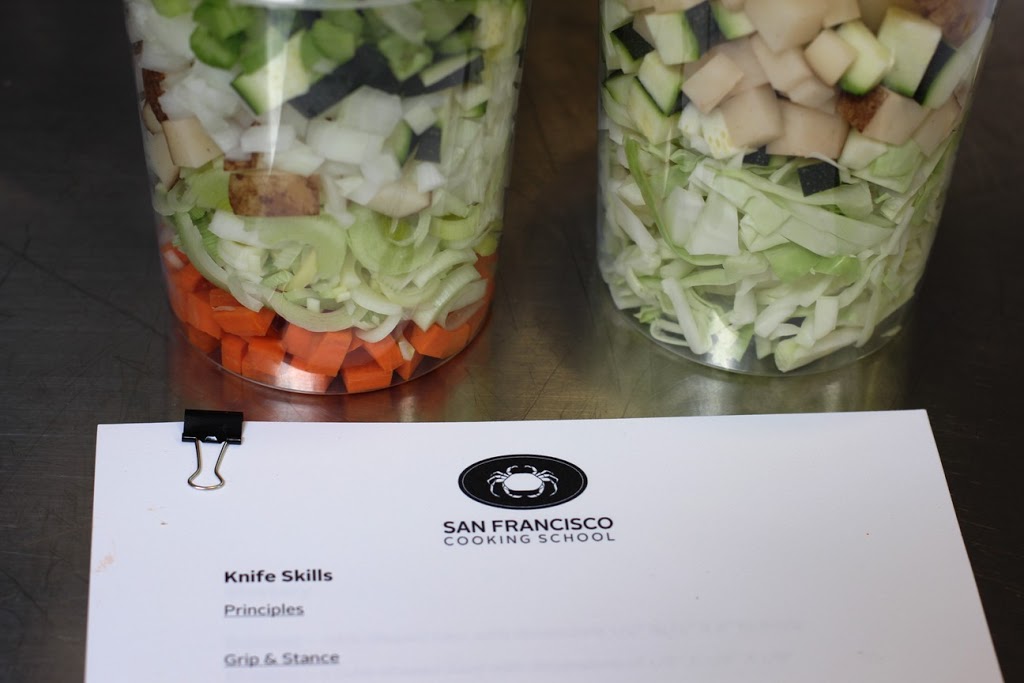
We received a condensed version of the class with instruction on the various knife cuts while we prepped the ingredients for Minestrone Soup with Pesto. David taught us about batonnet and julienne while Jodi filled us in on the details of the school and the classes they offer.

What a diverse line up of classes. In addition to Knife Skills, you can take courses in Cooking Fundamentals, Soba Making, French Macarons, Recipe Testing and Development along with their Cook the Book series which features recipes from cookbooks focused on a variety of ethnic cuisines. If you want to take your cooking beyond your own kitchen, they also offer full-time and part-time culinary and pastry arts certificate programs.

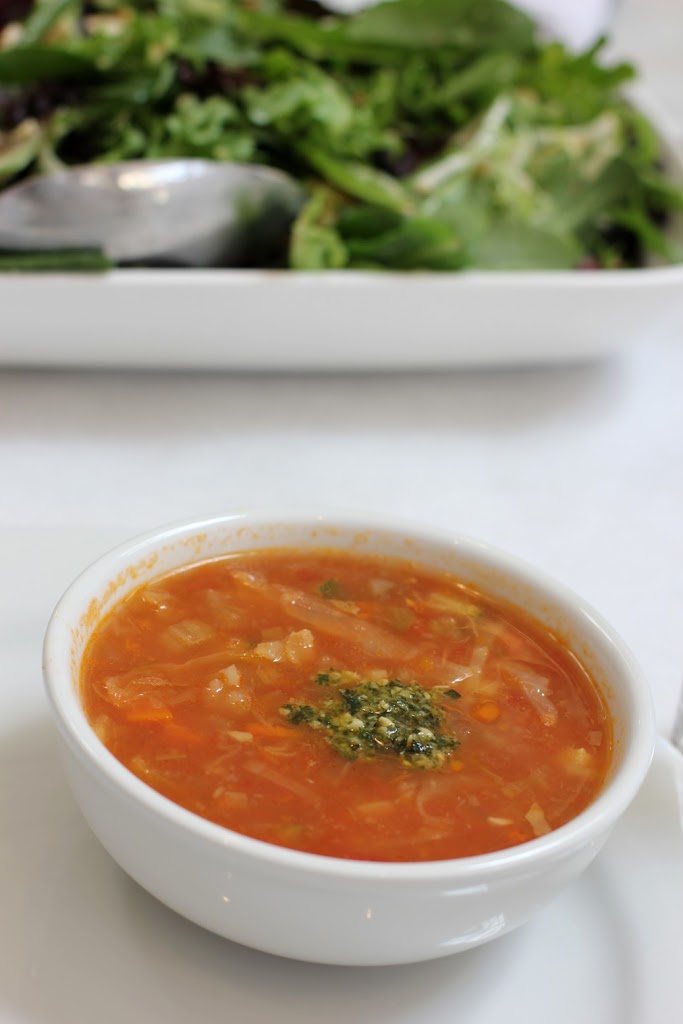
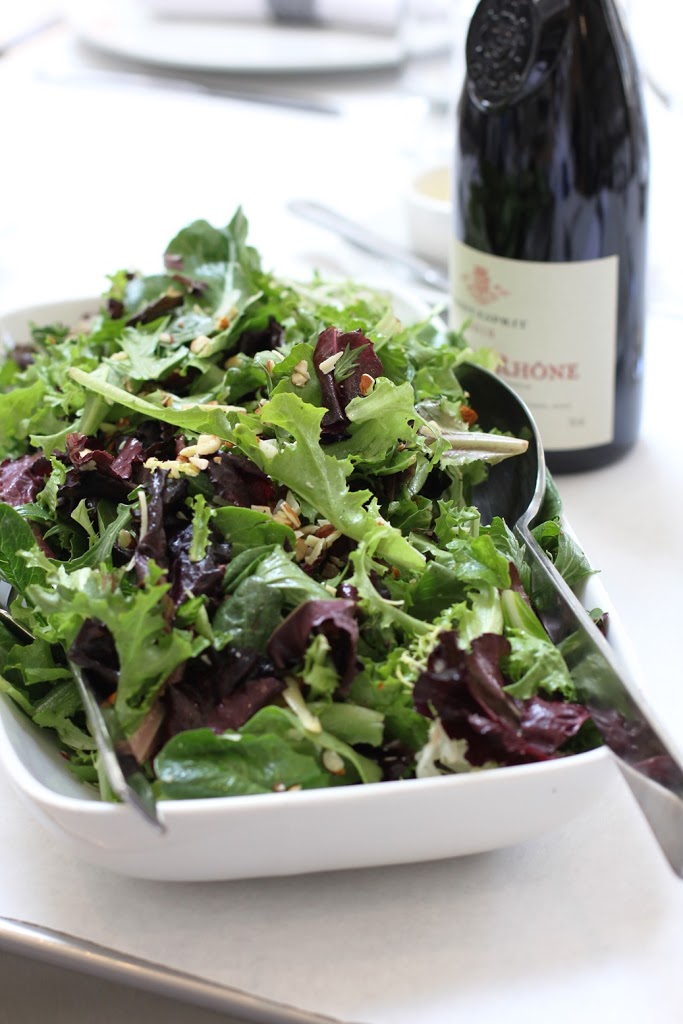
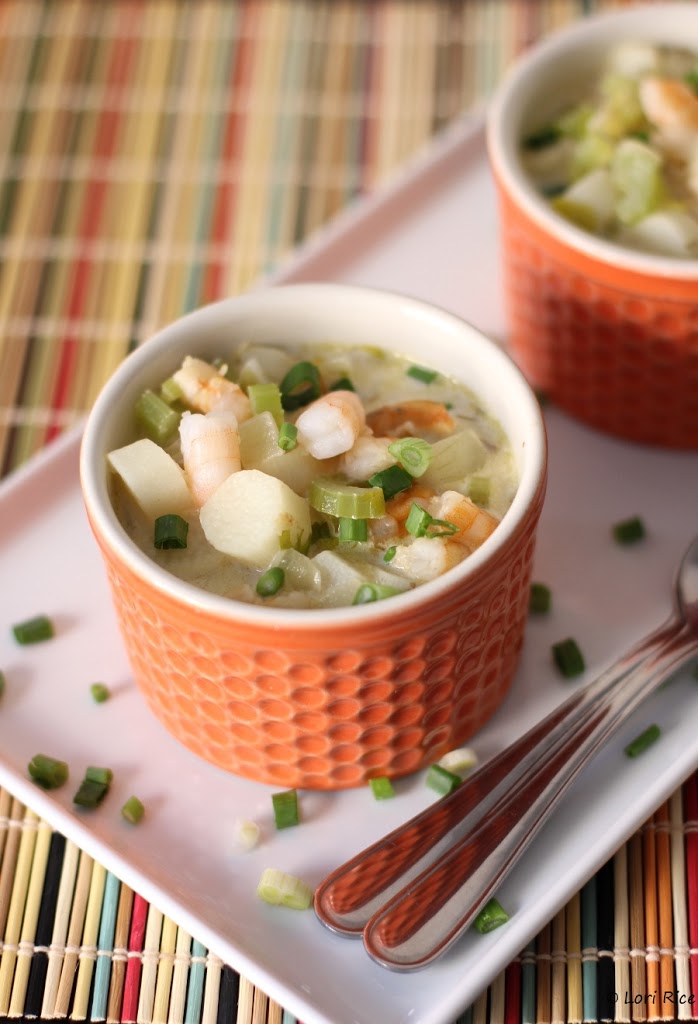
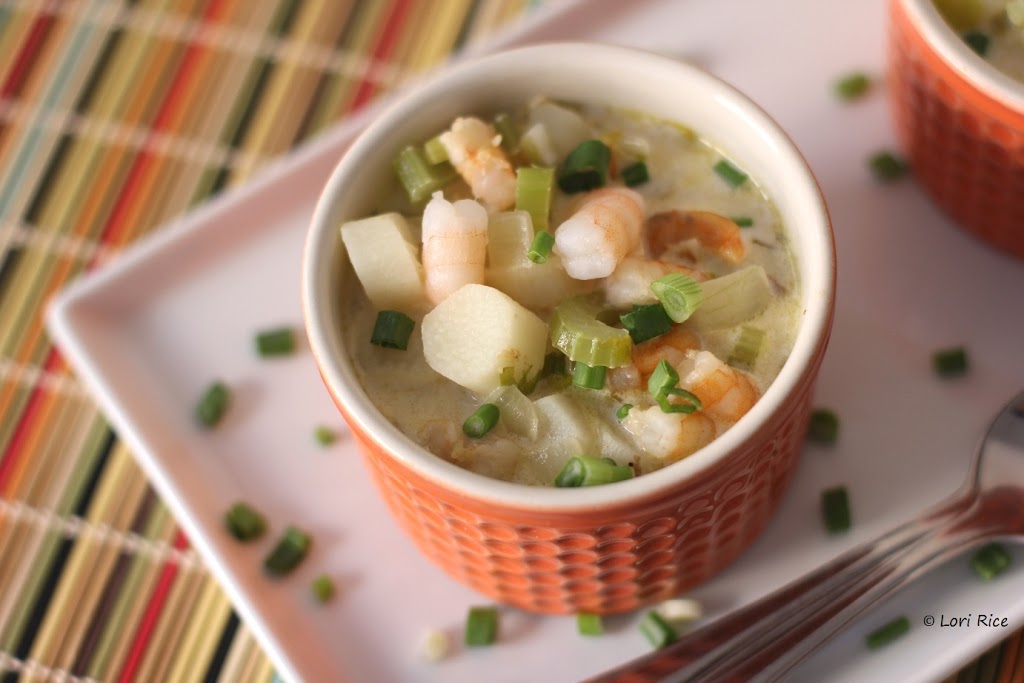
As we chopped up the ingredients that we later took home to make our own minestrone soup, David finished up the class by making a rustic pesto. Jodi served up the soup they made earlier which would serve as our lunch along with crusty bread, a delicious salad with seasonal stone fruits, and wine.

I’ll admit, I’m not the biggest minestrone fan, but the pesto on this soup made all the difference. After more enjoyable conversation about the school with David and Jodi, we ended our meal with some of the best cookies I’ve had the pleasure of eating – almond, chocolate, candied ginger, and rosemary and cornmeal. These cookies had me scouring the website to find a course that would teach me how to make them.

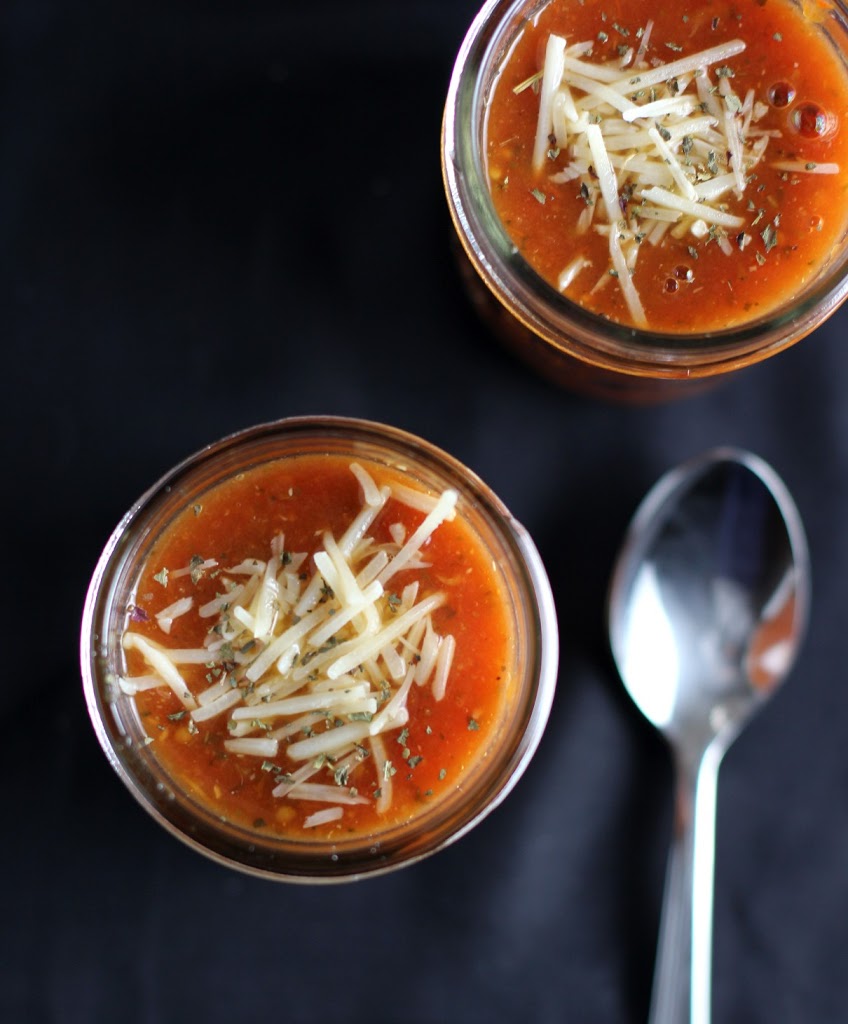
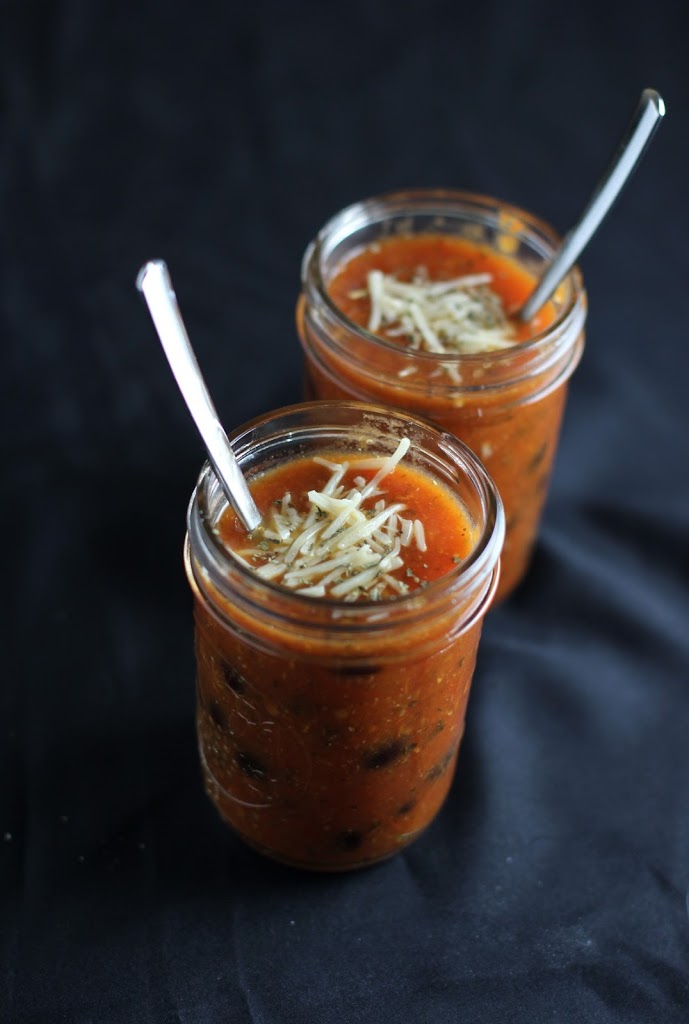
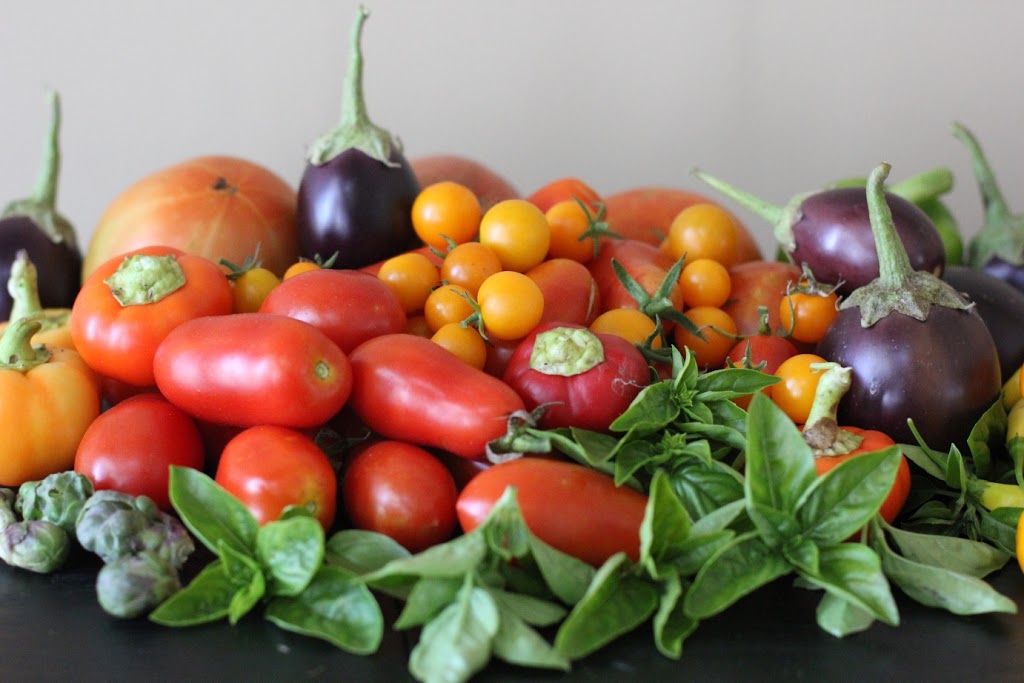
Jodi granted me permission to reprint the soup recipe for you. It is the perfect summer-to-autumn transition meal. It is warm and comforting for the cooler days ahead, and it uses up late summer and autumn vegetables. 

Enjoy the soup, and when in San Francisco, check out the San Francisco Cooking School. I assure you there are few more inspiring or enjoyable places to cook.

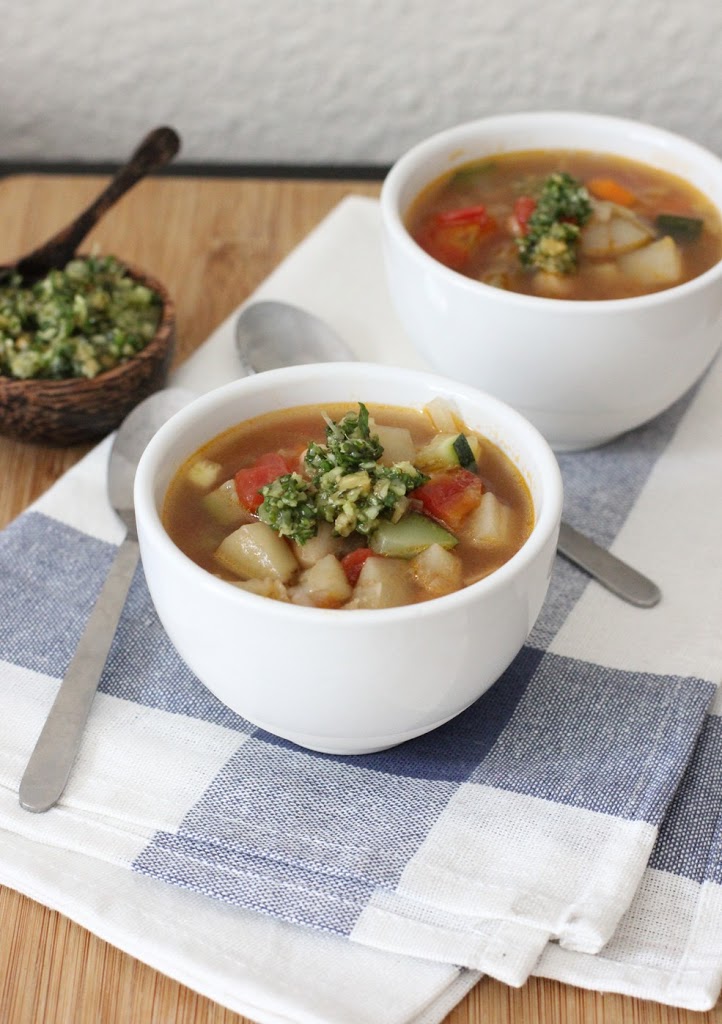
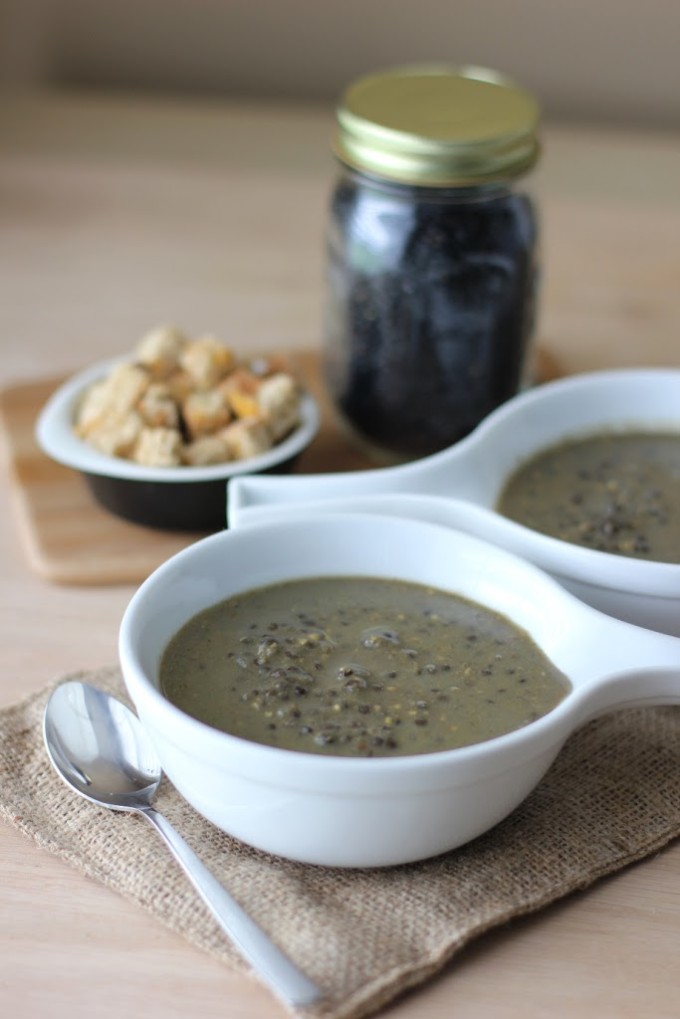
Minestrone with Pesto

Reprinted with permission from Jodi at the San Francisco Cooking School

Soup:
3 tbsp extra-virgin olive oil
1 ½ cups diced onion
2 medium carrots, cut in ½-inch dice
2 medium leeks, white and light green parts only, finely sliced
2 stalks celery, cut in ½-inch pieces
Coarse salt and fresh pepper to taste
2 potatoes, peeled and cut in ½-inch dice
6 cups hot chicken or vegetable stock
1 (14 ounce) can chopped tomatoes
1 ½ cups Savoy cabbage, thinly sliced
1 ½ cups zucchini, cut in ½-inch dice
1 (14 ounce) can cannellini beans, drained and rinsed

Pesto:
2 cups gently packed basil leaves
1 medium garlic clove, chopped
¼ cup toasted pine nuts
½ cup extra-virgin olive oil
½ cup freshly grated Parmesan

In a large stock pot, heat the olive oil over medium heat. Stir in the onions, carrots, leeks and celery with a pinch each of salt and pepper. Cook until the vegetables are lightly browned and begin to soften, 5-6 minutes. Add the potatoes and cook, stirring occasionally, 2-3 minutes more.

Stir in the chicken broth, tomatoes and a pinch each of salt and pepper and cook until all the vegetables are tender, about 1 hour. Add the cabbage, zucchini and beans. Cook until cabbage and zucchini are just tender with a bit of a bite, about 6 minutes more.

While the soup is cooking, make the pesto. Using your knife, finely chop the basil, garlic, and pine nuts together. Place in a small bowl and add the oil until the mixture is shiny and moist. Stir in the cheese and season to taste with salt and pepper.

Serve the soup with a drizzle of the fresh pesto over the top. Serves 6.

Disclosure:  My visit to the San Francisco Cooking School was part of a free food media event. I was not required to post about my visit and received no compensation for doing so.

13 Best Tomato Recipes

August 1, 2013

I did it again.

Every year when the end of May rolls around, I forget. Unlike other bloggers who spend weeks building up to the big day, planning giveaways and making special recipes, it passes me by, and few weeks later I think – oops, I forgot again.

I’m talking about my food blogging anniversary. Fake Food Free has been alive and well for over 5 years. It’s overwhelming to think where this blog has taken me since I began typing my first words in our apartment in Southern Brazil.

Things have evolved through my travel, adventures in food culture and gardening. My photos are a bit better than those dark point-and-shoot images I started with, and I’d like to think my recipe writing has improved as well. I’ve met amazing people, and now I’m at a place where health, food and recipe writing, and taking food photos are my work. As you’ll hear me say often – Life is good.

And it all started with this blog.

While things have changed a bit here, and I don’t get to post as much as I used to, this is certainly not a farewell post. It’s a big Cheers, Prost and Saúde to another 5 and beyond!

What better way to celebrate than with tomatoes! Well, okay, a cocktail might be better, but right now we’re in the heart of summer and all I can think about are beautiful heirlooms, sweet cherries and plump Romas.

After 5 years of blogging, I’ve created and adapted my fair share of recipes using my favorite part of this season.

Here are 13 that you must make before the 2013 tomato season passes us by! (Click on the name and it will take you to the post with the recipe.)

Roasted Garlic, Tomato and Black Bean Soup

Grilled Marinara Pasta

Honey Peach and Tomato Black Rice Salad

Hearty Tomato, Kale and Mushroom Sauce

Roasted Tomato, Black Bean and Arugula Salad

Smoky Tomato Jam

Beer Cheese Tomato Soup

Honey-Pecan Tomato Tarts with Blue Cheese

BLT Spinach Salad with Fresh Garlic Dill Dressing

Heirloom Tomatoes and Cantaloupe

Stuffed Poblano Peppers with Tomato Chile Sauce

Poblano Cilantro Salsa

Sweet and Simple Tomato Pepper Salad

Cookie Monster Ice Cream Sandwiches from I Scream Sandwich by Jennie Schacht

May 22, 2013
Cookie Monster Ice Cream Sandwiches from I Scream Sandwich by Jennie Schacht on fakefoodfree.com

There is a local ice cream shop in my hometown that has the best ice cream sandwiches. Chocolate chip cookies with chocolate chip ice cream. The cookies are thick and they turn chewy once frozen. They also have just enough of a salty flavor to offset the sweetness of the ice cream, making the whole treat incredibly tasty.

I’ve not made many ice cream sandwiches myself so it’s never occurred to me to try and recreate that version I loved growing up. Then I received a copy of I Scream Sandwich by Jennie Schacht. Those ice cream sandwiches from back home came to mind, but I wanted to try something that sounded different. Maybe the Vietnamese Breakfast with coffee flavored ice cream or the Got Your Goat with goat’s milk ice cream.

This book is full of ice cream sandwiches that will spark your curiosity. You’ll be pulling out the ice cream maker and calling dibs on bringing dessert to all your summer picnics. Creamy ice creams, rich gelatos and fruity sorbets are surrounded by more than just cookies.  Croissants, cakes, bars and buns are just a few of the creative exteriors to the sweet sandwiches in this book.

After my husband voiced his craving for something more classic, I decided to make the Cookie Monster. Let’s just say that after reading the recipe I realized that this sandwich was classic only in flavor. I wanted something a little different and, wow, did I get it.

Why? Well, this sandwich isn’t surrounded by a cookie, but by cookie dough! Frozen (yet soft) cookie dough around homemade chocolate chip ice cream. It’s a brilliant idea.

And you know what is even better? Despite the fact that it’s cookie dough and not a baked cookie, it tastes almost exactly like that ice cream sandwich I grew up with!

Just a few tips if you are not a regular ice cream sandwich maker (like I wasn’t). Plan, plan, plan ahead. You will need to plan for freezing time, greased parchment paper and cold bowls. Read through the recipe and read it again. It’s really not that much work when all is said and done, but you’ll want to know what to expect before you get into it. Also, some of the methods for assembly are explained in the first few pages of the book so give them a browse before you start the recipe.

Cookie Monster Ice Cream Sandwiches from I Scream Sandwich by Jennie Schacht on fakefoodfree.com

Finally, don’t expect to have much will power around these things. I thought a batch would last us a while, but these have to be the most vocal desserts I have ever made. I could hear them calling me from the freezer all day long.

Cookie Monster Chocolate Chip Ice Cream on Cookie Dough

Copyright © 2013 Jennie Schacht, reprinted with permission from Abrams Books

Chocolate Chip Ice Cream (GF)

2 cups (480 ml) whole milk
¹⁄3 cup (67 g) granulated sugar
2 tablespoons golden syrup, inverted sugar syrup or light agave nectar
2 tablespoons tapioca starch
¼ teaspoon kosher salt
1 cup (240 ml) heavy cream
½ teaspoon pure vanilla extract
½ cup (100 g) bittersweet (60 to 70 percent) chocolate, chopped or chips
1 tablespoon neutral vegetable oil or coconut oil

Whisk ½ cup (120 ml) of the milk with the sugar, syrup, tapioca, and salt in a medium saucepan until no lumps remain. Stir in the remaining 1½ cups (360 ml) milk and the cream. Heat the mixture over medium-high heat, stirring with a heatproof spatula, until it begins to steam and slightly bubble at the edges. Adjust to a simmer and cook, stirring constantly, until the mixture thickens to the consistency of a cream sauce, about 3 minutes longer; do not fully boil.

Transfer the mixture to a metal bowl set over a larger bowl of ice and water. Stir occasionally until the mixture is cool, taking care not to slosh water into the bowl. Stir in the vanilla, then cover and refrigerate until very cold, at least 2 hours. Transfer the bowl to the freezer for the last half hour before spinning it.

Freeze the mixture in an ice cream maker according to the manufacturer’s directions. While the mixture spins, melt the chocolate and oil in the microwave or in a small saucepan until you can stir it smooth. Let cool to room temperature, keeping it fluid. With the machine running, drizzle in the cooled melted chocolate during the last minute of spinning. (Alternatively, drizzle the chocolate over the ice cream as you transfer it to the container, folding it in with a spatula or ice cream paddle to break it up as you go.) Transfer the ice cream to a chilled container, cover, and freeze until firm but still spreadable, at least 4 hours.

Cookie Dough

½ cup (1 stick / 113 g) unsalted butter
¹⁄3 cup packed (67 g) light brown sugar
¼ cup (50 g) granulated sugar
2 tablespoons milk, whole or 2%
½ teaspoon pure vanilla extract
½ teaspoon kosher salt
1¼ cup (165 g) all-purpose flour
1 cup (200 g) mini chocolate chips
Neutral vegetable oil, for the waxed or parchment paper

Melt the butter with the brown and granulated sugar in a small saucepan, stirring to dissolve the sugar. Transfer to a bowl and stir in the milk, vanilla, and salt until well blended. Stir in the flour until completely smooth. Let cool completely, then stir in the chips. (If the chips begin to melt, stop stirring—the swirls will be pretty.)

Line an 8-inch (20-cm) freezer-safe baking pan with two pieces of lightly oiled waxed paper or parchment paper so the papers extend well beyond the edges of the pan on all four sides as a sling for easy removal. Scatter half of the dough into the pan and use your fingers to pack it into an even layer. Top with lightly oiled waxed or parchment paper, oiled side down.

Place another lightly oiled waxed or parchment paper in the pan, leaving 2 inches (5 cm) of paper extending at each end. Scatter and press the remaining dough into an even layer. Top with lightly oiled waxed paper or parchment, oiled side down. Freeze the dough layers until firm, at least 1 hour.

SANDWICH!

Use the flaps to lift out the top cookie dough layer. Peel the paper from one side and loosely replace it. Flip the layer over and do the same to the other side. Repeat with the second cookie dough layer. Place both layers back in the freezer.

Form sandwiches using Method #4* on page 19, starting with step 3, using the bottom two pieces of parchment extended on all sides to line the pan in place of the plastic wrap. Freeze hard before cutting the sandwiches into 4 strips in each direction to form 16 bars. To make 64 bite-size treats, cut each bar into quarters.

*Place one slab of cookie dough top-side down in the pan and spread softened ice cream over it in an even layer. Top with the second slab, top-side up, pressing firmly to evenly distribute the ice cream. Wrap tightly in plastic wrap and freeze until very firm, at least 6 hours or overnight, for easiest cutting.

Cookie Monster Ice Cream Sandwiches from I Scream Sandwich by Jennie Schacht on fakefoodfree.com

I should probably mention that I happily have many cookbooks to review this summer. Don’t worry, I haven’t stopped creating my own recipes. They will be interspersed regularly. But I have a passion for cookbooks and enjoy the opportunity to support the art by sharing ideas for new books for your library. I hope you enjoy them as much as I do.

Disclosure: I received a copy of this book for review purposes. I was not required to post about it and received no compensation for doing so. Thoughts here are my own.


Thanks for reading! All images and content are the property of Fake Food Free unless otherwise stated. Please do not republish full recipes and images without written permission. What is okay? Feel free to Pin images, share links to my posts or share the photo in a round up post with the title of this recipe and a link back to the post. Confused about copyright and food blogs? Here is some helpful information on Recipe Attribution. If you want to use a photo or full recipe, just ask. I’m sure we can work something out.  

Ginger Coconut Soup with Wai San and Shrimp Recipe

March 26, 2013

Wai San is a potato-like root vegetable that I discovered at an Oakland Farmers market several years ago. It turned out to be delicious addition to this ginger coconut soup!

I watched the mass of shoppers hover around the table for at least 10 minutes before I mustered up enough courage to elbow my way in and take a look. I was surprised to see a knobby, speckled, skinny root vegetable staring back at me. I had no idea what it was and given all the hustle around me, I doubted I’d get an answer even if I asked.


I walked away, but it didn’t take long for my curiosity to get the better of me. Finally, on my last lap through the Farmers Market there was a lighter crowd swarming the vendor. I stepped up, analyzed the unfamiliar root, and I caught his eye. I asked what it was. He responded twice with the proper name, and I’m sure my face revealed that not only could I not hear over the people, but that I also couldn’t understand him.

His next response was, “Chinese potato. You cook it like potato in a soup.

Sold. I grabbed up a handful and he nodded in acknowledgement that I only needed a few for soup.


After a bit of research, I think I finally found the name for this new-to-me vegetable. I say – I think – because it wasn’t easy to come by. I have found a couple of blogs which identify it as Wai San.

It’s long and thin, and almost looks like it has dots. Check.

When it’s peeled, its starch is sticky and a little glue-like. Check.

It boils up like a potato, yet it has a blander flavor. Check.

If you happen to know it by another name, please let me know in the comments. I’d love to learn more about it.

This being my first attempt at cooking with Wai San I didn’t want to get too adventurous. I stuck to the recommendation for soup, and I wasn’t let down.

Cut into small pieces, it takes less time to cook than potato. It has a similar texture, but it’s less starchy. It’s almost like a cross between a carrot and a potato, but with little flavor. That is, until you mix it with the ginger, coconut milk, and shrimp in this soup. Then it becomes all kinds of delicious.

 
Ginger Coconut Soup with Wai San and Shrimp Recipe
Serves 4
Wai San, a potato-like root veggie, makes a delicious addition to this soup. If you can't find it in your area, any type of potato can be substituted. Adjust the cooking time to cook until the potato you use is tender.
Write a review
Print
Ingredients
  1. 1 tablespoon extra virgin olive oil
  2. 1 small yellow onion, diced
  3. 4 cloves garlic, minced
  4. 2 stalks celery, sliced
  5. ½-inch piece of ginger, peeled and grated
  6. 1 ½ cups peeled and chopped Wai San
  7. 1 (13.5 ounce) can coconut milk
  8. 3 cups seafood stock
  9. ½ pound cooked shrimp, chopped
  10. ½ teaspoon sea salt
  11. ¼ teaspoon ground black pepper
  12. 2-3 green onions, sliced for garnish
Instructions
  1. Heat the olive oil over medium-high in a large soup pot. Add the onion, garlic and celery. Cook, stirring often, for 2 to 3 minutes, or until the vegetables begin to soften. Add the ginger. Add the Wai San and cook 1 more minute.
  2. Pour in the coconut milk and seafood stock. Bring to a low boil and then reduce the heat to a simmer. Allow the soup to simmer about 5 minutes or just until the Wai San is tender.
  3. Add the shrimp, salt, and pepper. Cook just until the shrimp are heated through, about 1 minute. Top each bowl of soup with green onions and serve warm.
Fake Food Free https://www.fakefoodfree.com/


Roasted Garlic, Tomato and Black Bean Soup Recipe

November 7, 2012

In this soup recipe, plain tomato is made more flavorful with roasted garlic, and more filling with hearty black beans.

Roasted Garlic, Tomato and Black Bean Soup Recipe | Fake Food Free


Keeping an eye on healthy eating usually leads to one thing in my kitchen – soup. 

I have loads of frozen tomatoes waiting to be used, but chili wasn’t sounding right. I needed something more exciting than the basic tomato soup, too.

I’ve come to realize that a head of creamy, sweet roasted garlic makes just about everything better. This soup is no exception. Along with the garlic, I added some black beans for texture and protein.

Roasted Garlic, Tomato and Black Bean Soup Recipe | Fake Food Free

This soup is sweet, rich and hearty all at the same time. I used about a gallon bag full of mixed frozen tomatoes from the garden. Skin on, whole tomatoes. It all gets blended by the immersion blender so leaving everything intact isn’t a problem for me. You can use whatever you have on hand – frozen, fresh, canned, whole, puree – it will all ultimately result in a tasty soup!

Roasted Garlic, Tomato and Black Bean Soup Recipe
Serves 4
Plain tomato soup is made more flavorful with roasted garlic, and more filling with hearty black beans!
Write a review
Print
Ingredients
  1. 1 head garlic
  2. 2 teaspoon olive oil
  3. 8 cups frozen whole tomatoes, thawed
  4. 2 tablespoon dried basil
  5. 1/4 teaspoon crushed red pepper
  6. 1 1/2 teaspoon salt
  7. 1 teaspoon mascavo or raw sugar
  8. 1 1/2 cups cooked black beans, rinsed and drained
  9. Shredded parmesan cheese for serving
Instructions
  1. Preheat the oven to 400 degrees F. Tear off about a 4-x-4-inch square of aluminum foil. Cut off the top third of the full head of garlic removing just enough so that all the cloves are exposed. Place the garlic in the center of the foil, cut-side up. Drizzle with the olive oil. Wrap the foil around the garlic and roast for 30 to 45 minutes, until soft. Remove from the the oven and allow to cool.
  2. While the garlic is roasted, begin to prepare the soup. Pour any excess water off of the thawed tomatoes. Place the tomatoes in a large soup pot and heat to medium-high. Allow the tomatoes to cook down, crushing them with a spoon or potato masher as they cook, for about 15 minutes. Remove and discard any foam that rises to the top.
  3. Stir in the basil, red pepper, salt, and sugar. Unwrap the garlic and squeeze all of the roasted cloves into a dish. Be sure to separate out any skin and leave only the soft flesh. Add the garlic to the soup. Remove from the heat.
  4. Use an immersion blender to blend the soup and puree the tomatoes. You can also transfer it in batches to a blender to do this. Once everything is smooth simmer the soup over medium heat for 5 more minutes and let the soup thicken.
  5. Finally stir in the black beans and heat through. Serve sprinkled with grated Parmesan cheese, if desired.
Fake Food Free https://www.fakefoodfree.com/


Roasted Garlic, Tomato and Black Bean Soup Recipe | Fake Food Free

Thanks for reading! All images and content are the property of Fake Food Free unless otherwise stated. Please do not republish full recipes or images without written permission. What is okay? Feel free to Pin images, share links to my posts or share the photo in a round up post with the title of this recipe and a link back to the post. Confused about copyright and food blogs? Here is some helpful information on Recipe Attribution. If you want to use a photo or full recipe, just ask. I’m sure we can work something out.

Homemade Garden Chili Slow Cooker Recipe

September 19, 2012


Chili is one of those foods that I get burned out on by December, but every time the next September rolls around, I’m ready for it all over again. My cravings for it this year started this past week, and they are just about spot on, considering we are moving towards the end of the month.

As you can probably tell from my posts, it has been a great garden year. We are still bringing in more tomatoes than I know what to do with, and I have plenty of frozen veggies from harvests earlier in the summer. With the weather turning cooler here, chili seemed like the ideal way to use them up.
My goal was to use a lot of fresh tomatoes, so this recipe does take some prep work. For me, this is just the kind of thing I enjoy doing on a quiet Sunday. Once it’s all in the slow cooker, it’s low maintenance from there on out. 
Feel free to substitute different kinds of vegetables. I’ve been shredding and freezing zucchini all summer, and we also had some sweet corn tucked away in the freezer. Both ended up being a great addition to this chili.

Homemade Garden Chili Slow Cooker Recipe

6 – 8 lbs of tomatoes (you’ll need about 6 cups of sauce)
5 cloves garlic
1 small onion, chopped
2 cups black beans, soaked overnight
2 cups shredded zucchini, thawed if frozen
1 cup sweet corn, thawed if frozen
1 cup water
2 tbsp chili powder
1 tsp chipotle chili powder
1 tsp cumin
2 tsp salt
½ tsp ground black pepper
2 scotch bonnet peppers (or your favorite hot pepper)
Preheat the oven to 400 degrees F. Cut de-stem and core tomatoes if necessary, and cut in half. (I used a mix of San Marzano, Beefsteak and heirlooms.) Arrange cut side down on a baking sheet with the garlic and drizzle with a little olive oil. In batches, roast for 20 minutes. Set aside to cool.
Add the onion and black beans to your slow cooker. Remove the skins from the tomatoes and place the pulp and the garlic cloves in a blender. Blend in batches until a smooth sauce results. Pour the sauce into the slow cooker. Set to high.
Add the zucchini and corn. Add the water. Stir in the chili powders, cumin, salt and black pepper.  Take the scotch bonnet peppers and de-stem them. Cut a small slit in the side of each. Place the whole pepper in the soup. Put on the lid and cook on high for about 4 1/2 hours, or until the beans are tender.
Before serving, remove the two peppers and discard. Serve with your favorite toppings. Makes about 6 servings.

Roasted Eggplant and Black Lentil Soup Recipe

September 16, 2012

This eggplant and black lentil soup recipe is one I came up with after a Kentucky Food Bloggers event at Whole Foods. I’ve used black lentils a lot more since then, but this recipe still remains a favorite for cool summer days and for transitioning into autumn. It’s thickened with eggplant puree and flavored with tahini and garam masala. 

Roasted Eggplant and Black Lentil Soup Recipe | Fake Food Free
 
It’s hard to believe that it has been almost a year since our Kentucky Food Blogger group got together. We attempted all spring and summer, but busy schedules wouldn’t allow us to find a date that would work for more than a couple people.
 
That changed this past Friday night with the help of Whole Foods Market in Lexington. We were invited out to attend a special edition of their Flights After 5 event. Flights After 5 is a Friday night get-together where 5 beer tastings are matched with 5 appetizers at stations throughout the store. Last Friday Kentucky beers were featured including two of my favorite breweries West Sixth and Lore Brewing.


Several area bloggers joined the staff at Whole Foods as they told us a bit about the work that they do, and about the mission of the store. I will admit that I’m not a 100% Whole Foods shopper, but I do appreciate the products I buy there – grains from the bulk bins, my puffed kamut, and Ataulfo mangos, when they are in season.
 
I really like that on their website you can find Unacceptable Ingredients for Food and their Meat Animal Welfare Standards. That makes shopping easy. Through my work in agriculture, I’ve come across many local meat producers and fruit and vegetable farmers who supply Whole Foods. The combination of local support and global projects makes me a fan. We also learned that they price match with surrounding competitors, which explains why I’ve always felt that many things at Whole Foods aren’t any more expensive than they are at other area supermarkets.
 
Along with a little education, good beer and snacks, and great company, we received every food bloggers favorite thing – a goodie bag! They kept our cooking in mind and filled it with several ingredients, perfect for putting together a few new recipes. I was happy to see black lentils in my bag. I’ve used their brand before, and I was excited to create something new with them.
 
 
Baba ganoush was one of the appetizer offerings that night so I had eggplant on my mind. Lucky me, we just happen to still have eggplant from the garden.
 
I had no idea what direction I would go with the soup, but the more I tasted it, the more I felt it needed some Indian influences, which ended up making it a lot like daal. (And I’m definitely not complaining.) Tahini and garam masala came to the rescue, and I added some crushed red pepper for heat. It turned out to be a great way to celebrate the start of comfort soup season!
 
Roasted Eggplant and Black Lentil Soup Recipe | Fake Food Free


Roasted Eggplant and Black Lentil Soup Recipe  
Makes: 4 to 6 servings
Write a review
Print
Ingredients
  1. 6 small eggplants (you need about 1 cup roasted pulp)
  2. 1 1/2 tablespoons extra virgin olive oil
  3. 1 small onion, chopped
  4. 2 cloves garlic, minced
  5. 4-6 cups vegetable stock
  6. 2 tablespoons tahini
  7. 1 cup black lentils
  8. 1 teaspoon salt
  9. 1 teaspoon garam masala powder
  10. ¼ teaspoon ground black pepper
  11. ¼ teaspoon crushed red pepper
Instructions
  1. Preheat the oven to 400 degrees F.
  2. If your eggplant is round, de-stem and cut each in half. Longer Japanese style can be roasted whole. Lightly coat the eggplants with 1/2 tablespoons of the olive oil and spread in an even layer, cut side down, on a baking sheet. Bake for 20 minutes, or until pulp is very soft. Remove from the oven and allow to cool.
  3. In a soup pot, heat the 1 tablespoon of olive oil over medium-high and add the onion and garlic. Cook over medium to medium-high until the onions begin to soften, about 3 minutes. Add 4 cups of the stock. (Reserve the remaining 2 cups to add later, if you want a thinner soup.) Simmer for about 3 minutes.
  4. Scoop out the cooled eggplant pulp and transfer it to the soup pot. Use an immersion blender to blend the eggplant, onions and garlic with the stock until smooth.
  5. Add the tahini, and bring the soup to a low boil. Stir in the lentils. Reduce heat and simmer for 20 minutes or until the lentils are tender. Add the salt, garam masala, black pepper and crushed red pepper. Add more or less of each to taste. Simmer for another minute or two and serve.
Fake Food Free https://www.fakefoodfree.com/


—————————————————————————-

Voting for the Country Living Blue Ribbon Blogger Awards ends September 17, 2012! Fake Food Free is a finalist! If you enjoy my blog, I’d truly appreciate your vote for Reader’s Choice. You can vote here, no sign in or registration required.

Disclosure:  Some products in this recipe were given to me free of charge from Whole Foods Market. I was not required to post about them and received no compensation for doing so. Thoughts here are my own. 


Thanks for reading! All images and content are the property of Fake Food Free unless otherwise stated. Please do not republish full recipes and images without written permission. What is okay? Feel free to Pin images, share links to my posts or share the photo in a round up post with the title of this recipe and a link back to the post. Confused about copyright and food blogs? Here is some helpful information on Recipe Attribution. If you want to use a photo or full recipe, just ask. I’m sure we can work something out.  

Beer Cheese Tomato Soup Recipe

August 2, 2012
Beer Cheese Tomato Soup Recipe | Fake Food Free
When it comes to soup, tomato is my favorite. Before your mind jumps to visions of cans and concentrates, allow me to explain. Homemade tomato soup with fresh spices, splashes of balsamic vinegar and wines, and olive oil is what I’m talking about. I love it straight with basil, but sometimes I like to get fancy.
 
Enter beer cheese.
 
Okay, so maybe it’s not fancy, but it is a Kentucky staple. There is even a festival at which I had the opportunity to judge the competition last year. If you are unfamiliar, there are as many recipes as people who love it. But to simplify, it is cheddar and beer turned cheese spread. I’ve grown to love it, and I can no longer imagine a tailgate at a football game or at the horse track without it.
 
So when I was thinking about tomato soup for this round of the Tomato Love Recipe Exchange, I first considered beer. Then I considered cheddar. Then, well, why not?
Beer Cheese Tomato Soup Recipe | Fake Food Free
This recipe experiment is a winner. The mild tang of beer and the sharpness of cheddar pop with the sweet tomatoes. I may no longer be able to have tomato soup without beer cheese!
 
Beer Cheese Tomato Soup Recipe
Makes: 4-6 servings
Write a review
Print
Basic Beer Cheese
  1. 4 oz. block of sharp cheddar cheese, shredded
  2. 2 tablespoons chopped onion
  3. 1 clove garlic, peeled
  4. 1 tablespoon hot sauce (I used sriracha)
  5. 1 teaspoon Worcestershire sauce
  6. ¼ cup beer (any variety, I like to use lagers)
Tomato Soup
  1. 1 tablespoon olive oil
  2. ¼ cup chopped onion
  3. 3 cloves garlic, peeled and minced
  4. 4 lbs. tomatoes, cored and chopped
  5. 2 tablespoons dried basil
  6. 1 teaspoon sugar
  7. 1 teaspoon salt
  8. ¼ teaspoon crushed red pepper
  9. ¼ teaspoon ground black pepper
Instructions
  1. To make the beer cheese, to a small food processor add the cheddar cheese, 2 tablespoons of onion, 1 clove garlic, hot sauce and Worcestershire sauce. Pulse for 10 to 15 second intervals until the ingredients are blended. Pour in the beer and continue to pulse until it reaches a spreadable consistency. Set aside.
  2. To make the soup, in a 4 to 5-quart soup pot, heat the olive oil over medium-high. Add the 1/4 cup of onion and 3 garlic cloves. Cook for 2-3 minutes, until the onions soften. Add the tomatoes. Reduce heat and simmer, stirring often, for about 15 minutes.
  3. Once the tomatoes begin to break down, remove the pot from the heat. Use an immersion blender (or transfer in batches to a blender) to puree until smooth.
  4. Stir in the basil, sugar, salt, red pepper and black pepper. Return to the heat and simmer 2-3 minutes. Stir in the beer cheese. Serve warm.
Fake Food Free https://www.fakefoodfree.com/


Beer Cheese Tomato Soup Recipe | Fake Food Free
 
Thanks for reading! All images and content are the property of Fake Food Free unless otherwise stated. Please do not republish full recipes and images without written permission. What is okay? Feel free to Pin images, share links to my posts or share the photo in a round up post with the title of this recipe and a link back to the post. Confused about copyright and food blogs? Here is some helpful information on Recipe Attribution. If you want to use a photo or full recipe, just ask. I’m sure we can work something out.   
 

Smoky Ham Salad with Olives

April 15, 2012


Smoky Ham Salad with Olives | Fake Food Free
 
 
I think I need to plan a picnic. I can’t stop thinking about picnic foods.
 
This is surprising because I’m not much of a picnic person. All that mayo sitting out for hours in 80 degree weather is enough to turn a person off. But for some reason I’m ready to set my food safety phobias aside for the sake of nice weather and a meal outside.
 
One food from my picnic memory book is ham salad. We always had it growing up, and I really liked the way my mom would make it. She ground up the ham so it was more of a spread than other versions I’ve seen. 
 
Despite being a fan, I have never made ham salad myself. But with some ham leftover from Easter I thought it was a good time to try and put my stamp on it. 
 
I decided to use what I now call my classic combo for former mayo-only based salads – plain Greek yogurt, a little mayo and spicy brown or Dijon mustard. I’ve had success with coleslaw, potato salad and chicken salad, and I actually like it a lot more than the all mayo versions. 
 
I’d suggest using full fat Greek yogurt. I hear over and over again that people don’t like Greek yogurt, and for the life of me I haven’t been able to figure out why. Then I bought some fat free Greek yogurt by one of the popular brands. (The ones famous for their flavored, diet yogurt who decided to do Greek because it’s cool.)
 
I now know why people say they don’t like Greek yogurt. I’m not exaggerating when I say it was one of the worst things I have tasted. I threw it out.
 
So try a full fat version (Greek Gods and Fage are my favorites). I promise it will change your life, at least as far as yogurt is concerned. And because it is yogurt the way it was meant to be, you’ll need much less of it to fill you up, and for flavor and fat in your recipes. 
 
Smoky Ham Salad with Olives | Fake Food Free
 
 
Back to the ham salad. I keep a small amount of mayo in the recipe because it cuts the sour flavor of the yogurt just enough so that it’s not overpowering. I also added some olives, and finished it off with just a bit of smoked hot paprika.
 
Crackers or a crusty baguette make the best form of transport. And be careful, it might put you in the mood for a picnic. That’s fine by me. I could use the company!
 
Smoky Ham Salad with Olives | Fake Food Free


Smoky Ham Salad with Olives

Makes: About 3 cups

Ingredients 

2 ½ cups cooked ham, finely chopped
1 large rib celery, chopped
¼ cup green olives, diced
½ tbsp grated onion
¼ cup plain Greek yogurt
1 tbsp mayonnaise
1 tsp spicy brown mustard
¼ tsp black pepper
¼ tsp smoked hot paprika
 
Prep
 
In a bowl, combine the ham, celery, olives and onion. Set aside.
 
In a separate bowl stir together the yogurt, mayo, brown mustard, pepper and paprika. Pour the yogurt mixture over the ham. Stir to mix all ingredients. Refrigerate at least 30 minutes before serving. 
 
hamsalad3
 
Thanks for reading! All images and content are the property of Fake Food Free unless otherwise stated. Please do not republish full recipes or images without written permission. What is okay? Feel free to Pin images, share links to my posts or share the photo in a round up post with the title of this recipe and a link back to the post. Confused about copyright and food blogs? Here is some helpful information on Recipe Attribution. If you want to use a photo or full recipe, just ask. I’m sure we can work something out.

Hummus Sandwiches with Carrot and Cilantro

March 28, 2012
 

Hummus Sandwiches with Carrot and Cilantro Recipe | Fake Food Free

Blog posts aren’t always planned. They have been the opposite of planned more times than I can count. I may spend time plotting and planning a recipe only to end up with something that never sees the food blogging light of day.

Other times I have no intention of putting a meal on the blog only to finish and think – that’s kind of pretty, and darn tasty. In these cases you can find me sprinting through the living room with a plate in hand to the room where I take my photos. I usually mumble something to my husband like – it will be ready in just a minute – as he waits patiently for dinner.

This sandwich is a perfect example of that. It’s a super simple dinner that you can turn to on a busy night. 

You can use any type of hummus you like. I added a link in the recipe for my almond butter hummus as one idea. The veggies are open for experimentation as well. I love this combo, but you might find a few more in your fridge that would dress it up nicely. Feel free to go crazy with the veggies. I have no doubt that it will only make it better. 

Vegetarian sandwich recipe loaded with hummus and fresh vegetables. | Fake Food Free


Hummus Sandwich with Carrot and Cilantro

Makes:  2 servings

Ingredients
2 pieces baguette (about 4 inches each)
1 large carrot, peeled and shredded
2 green onions, whites and greens sliced
3 white button mushrooms, diced
Small handful of fresh cilantro
Hot sauce (optional)
 
Prep
Slice open each piece of baguette, careful not to cut all the way through. You’ll be stuffing in a lot of ingredients so it’s better to leave one side intact.
 
Spread the bottom piece of each with half of the hummus and sprinkle with shredded carrot. Divide the onions, mushrooms and cilantro, and add to each sandwich. Drizzle with hot sauce, if desired. That’s it. They’re ready to eat. 
 

Easy vegetarian sandwich recipe with hummus, fresh vegetables and cilantro. | Fake Food Free 


Thanks for reading! All images and content are the property of Fake Food Free unless otherwise stated. Please do not republish full recipes and images without written permission. What is okay? Feel free to Pin images, share links to my posts or share the photo in a round up post with the title of this recipe and a link back to the post. Confused about copyright and food blogs? Here is some helpful information on Recipe Attribution. If you want to use a photo or full recipe, just ask. I’m sure we can work something out.

Want to create beautiful food and product photos that you can't wait to share?!
Discover your style, control the light, and shoot using the tool you know how to use (yes, your phone included). Learn about free resources, Live Q&As with Lori, and online courses you can take from anywhere in the world!
We respect your privacy. Unsubscribe at any time.