Browsing Category

Gluten Free

Yellow Squash Dumplings with Spiced Tomato Sauce from Vegetarian for a New Generation

April 28, 2014
Yellow Squash Dumplings with Spiced Tomato Sauce from Vegetarian for a New Generation | Fake Food Free

Growing up with a big garden I probably liked vegetables more than most kids, but I can still remember my brother and I taking our peas like pills. Pop them in your mouth, hold your breath, take a big gulp of iced tea and swallow. It put them safely in your stomach without having to taste them. I’m sure there where dinners where broccoli and green beans had a similar fate.

When I think back, I can’t quite remember when I started to truly enjoy vegetables, but I’d be willing to bet it was well into adulthood. I’m not sure if it was the taste or an increased knowledge of the health benefit that helped me turn a corner, but getting my recommended servings of vegetables is easy-breezy these days.

Now that doesn’t mean I don’t turn my nose up at bland broccoli, or eat all my vegetables first to get it over with from time to time. Everyone has their days. But I really do look forward to kale, tomatoes, arugula, zucchini and just about every other veggie out there.

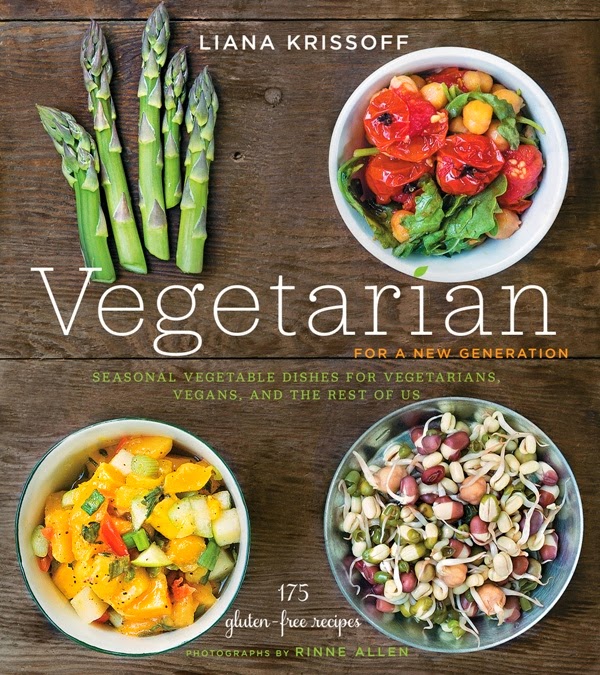
The only thing I welcome as much as a new season of fresh vegetables is a book that gives me new ideas for how to prepare them. So I’m practically giddy over Liana Krissoff’s new cookbook, Vegetarian for a New Generation.

If you’ve been reading this blog for a while, you know that I have her other two cookbooks, Canning for a New Generation and Whole Grains for a New Generation. Both are excellent. I use them all the time to get new ideas for canning and ways to use grains. Liana was kind enough to answer some interview questions for me when Whole Grains came out. She truly inspires me with her creative ideas and delicious recipes.

Vegetarian for a New Generation carries on the tradition of those other two books with 175 recipes that will have you repeatedly saying – That’s such a great idea! The gorgeous food photos will have you day dreaming about how good it must taste.

The recipes in the book are also gluten-free. I don’t eat 100 percent gluten-free, but what makes this great for me is that the focus is on vegetables, not a lot of heavy fillers like breads and grains. The recipes are light and refreshing while being comforting at the same time. Not an easy task with vegetables, but well accomplished in this book.

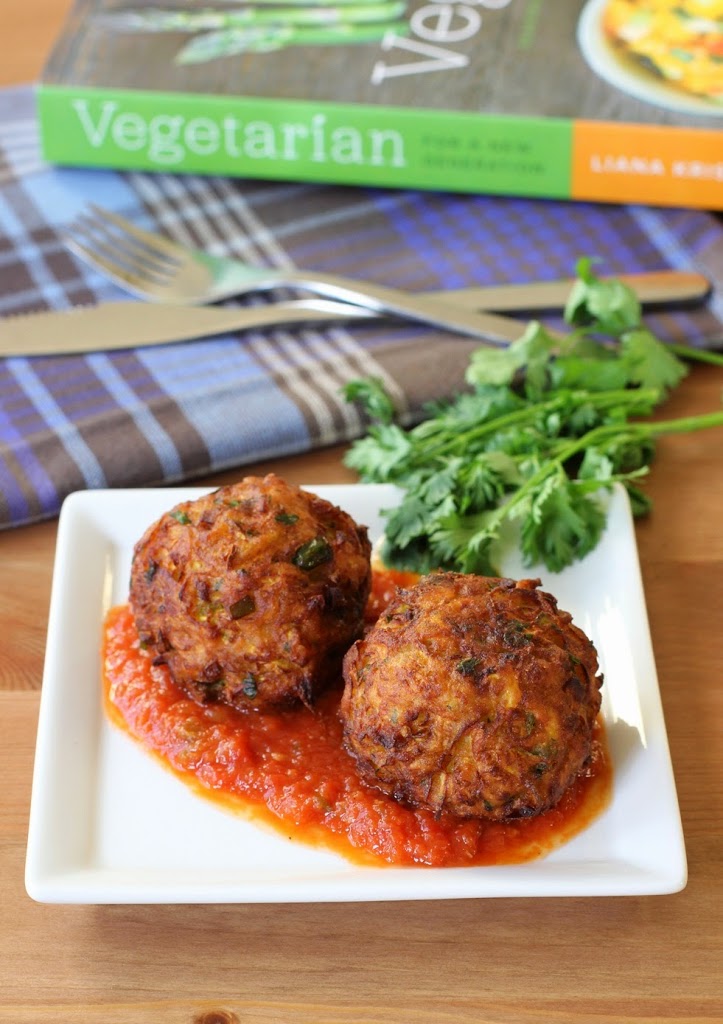
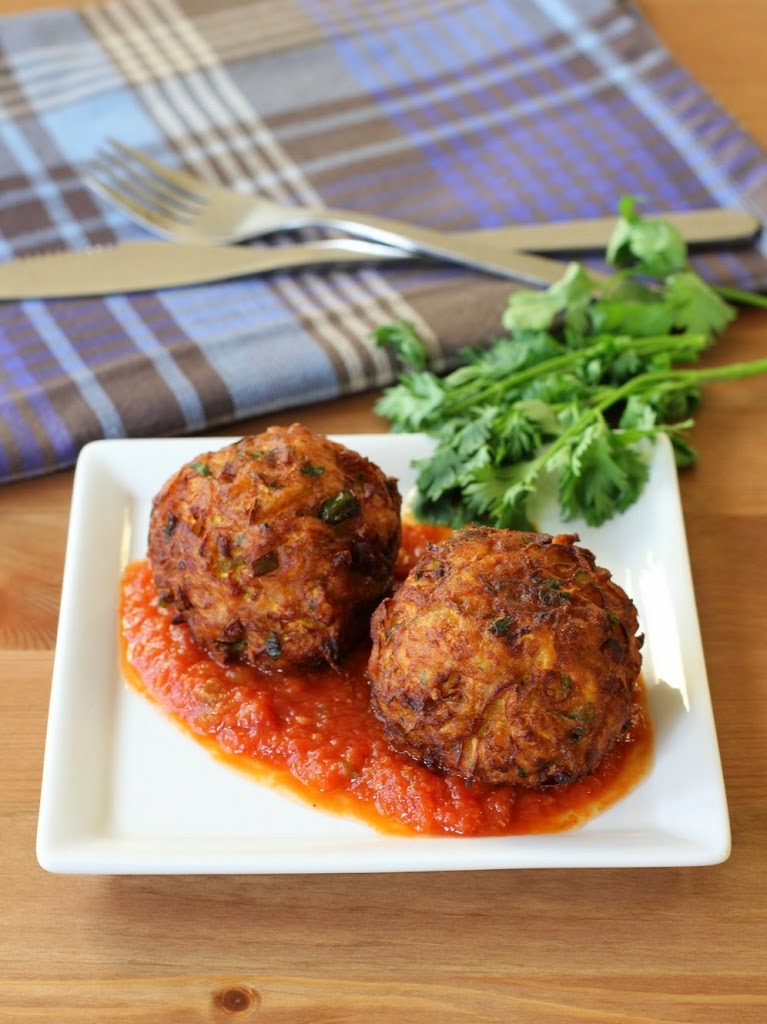
The recipe I had to try was the Yellow Squash Dumplings with Spiced Tomato Sauce. It caught my attention because the herbs and spices used were very different from what I would use with yellow squash. It also used garbanzo bean flour to thicken the batter, something I’ve been been experimenting a lot with lately. I didn’t doubt that it would be delicious and I wasn’t disappointed. The hint of cilantro in the dumplings went so well with the clove and cardamom in the tomato sauce.

Yellow Squash Dumplings with Spiced Tomato Sauce from Vegetarian for a New Generation | Fake Food Free

It was flavors I would never combine on my own which speaks to the value of this book. It will help you step out of your vegetarian cooking comfort zone. It’s almost like tasting vegetables for the first time and learning that you really like them. No swallowing them like pills required.

Yellow Squash Dumplings with Spiced Tomato Sauce

©2014 Liana Krissoff. Reprinted with permission from Abrams Books.

Serves 2 to 4
Vegan

From the book:  
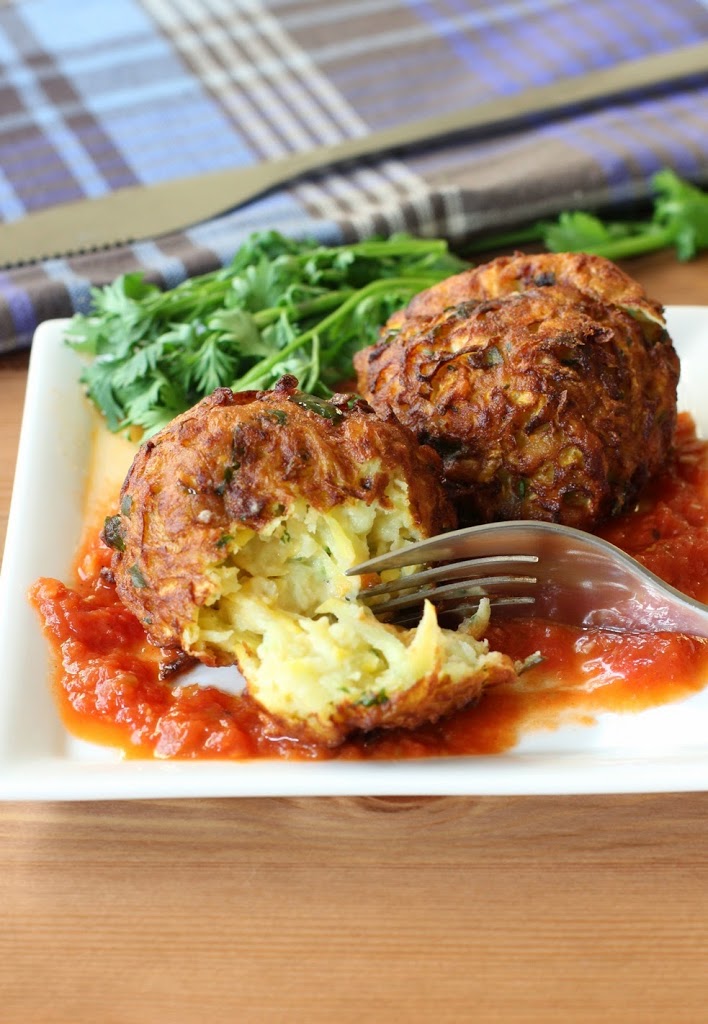
These tender, lightly spiced walnut-size balls are like a cross between pakora (batter-fried vegetable fritters) and vadai (soft grain- or legume-based dumplings). They’re fried and deeply browned, but not crisp-crunchy. The spicing here is fairly mild, and you should feel free to add more chile, some garam masala (page 247), or any other spices you wish. Even if you’re wary of frying (as I am—I really dislike cleaning up after a messy frying experience), you should try these: They don’t spatter or absorb much oil at all, and the croquettes don’t even have to be served right after frying, as they’re served with a sauce and aren’t meant to be especially crisp or crunchy anyway.

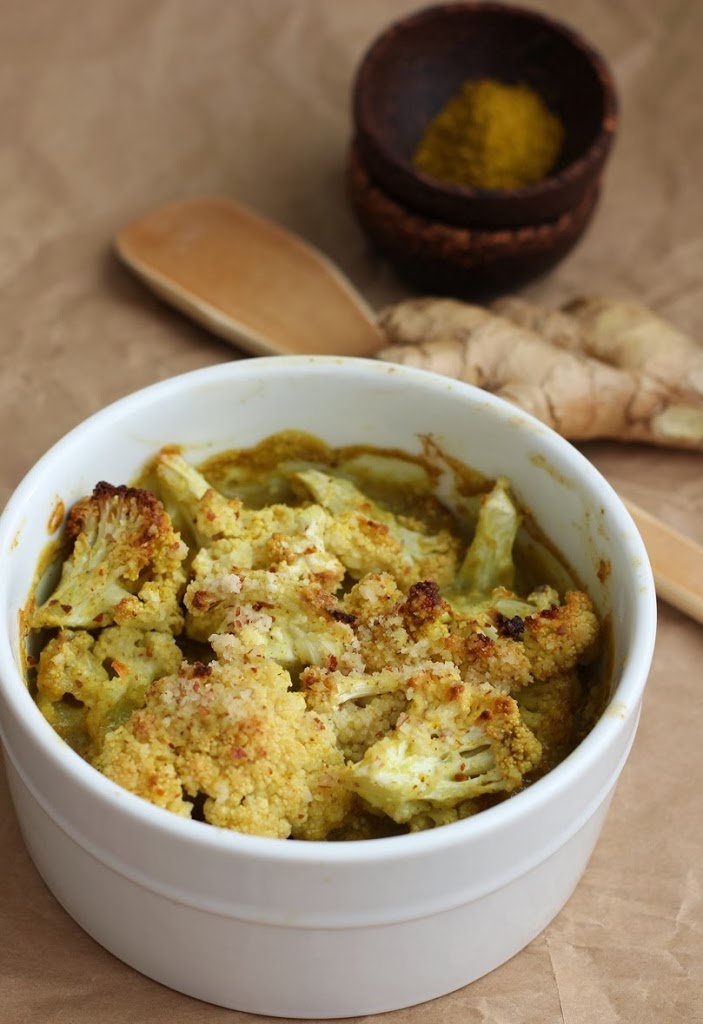
I’d suggest doubling the recipe and freezing the extra fried balls and sauce separately—they reheat nicely for a quick meal. The warmed-up sauce can be used in nearly infinite ways: Simmer some chunks of potato and cauliflower in it until tender, then add a few croquettes to warm through and serve over Spiced Brown Rice (page 219).

For the Tomato Sauce

2 tablespoons vegetable oil
1 to 2 fresh hot green or red chiles, seeded and chopped
2 cloves garlic, chopped
3/4-inch (12-mm) piece fresh ginger, peeled and chopped
1/2 teaspoon freshly ground cardamom
1/4 teaspoon ground cloves
2 bay leaves
1 (28-ounce/790-g) can whole peeled tomatoes with their juices
Salt
Pinch of sugar

For the Squash Dumplings

1 pound (455 g) yellow squash (about 3)
1/2 to 1 cup (60 to 120 g) chickpea flour (besan), or more if needed
1 fresh hot green or red chile, seeded and minced
1 tablespoon chopped fresh cilantro
1/2 teaspoon grated fresh ginger
Salt
Pinch of freshly grated nutmeg
Vegetable oil, for deep-frying

Make the Tomato Sauce
In a medium saucepan, heat the oil over medium-high heat until it shimmers. Add the chiles, garlic, and ginger and cook, stirring, until softened but not browned, about 2 minutes. Add the cardamom, cloves, and bay leaves and stir for 10 seconds, then pour in the tomatoes and their juices. Add a generous pinch of salt and the sugar. Bring to a boil, then lower the heat and simmer, stirring to break up the tomatoes a bit, until the flavors are developed and the liquid is reduced a bit, about 20 minutes.

Remove and discard the bay leaves. Puree the sauce using an immersion blender. Taste and add more salt, if needed. Cover to keep warm and set aside. (The sauce can be made, cooled, and stored in an airtight container in the refrigerator for several days. It also freezes very well.)

Make the Squash Dumplings
Coarsely grate the squash into a large bowl. If the squash is quite damp, squeeze handfuls of the shreds over the sink to extract as much liquid as possible. Sift 1/2 cup (60 g) of the chickpea flour through a sieve into the squash. Add the chile, cilantro, ginger, 1/2 teaspoon salt, and nutmeg and stir very well. If it’s too soft or wet to shape into a very loose, soft ball, add more chickpea flour, a little at a time, until it comes together.

In a large, heavy saucepan, heat 2 inches (5 cm) of oil until it registers about 375°F (190°C) on a candy thermometer. Line a plate with paper towels.

Using your hands, shape some of the squash mixture into a walnut-size ball—it will be soft and will just barely hold its shape, but don’t worry, as it’ll firm up in the oil. Set it in a slotted spoon and quickly lower it into the oil; repeat to make 2 or 3 more balls. Don’t overcrowd the oil. Fry, turning occasionally, until deeply browned and cooked through, about 6 minutes. If the balls start to brown too quickly, lower the heat. Remove to the paper towels to drain. Repeat until you have used all of the squash mixture.

Reheat the sauce, if necessary. Serve the dumplings hot or warm, or even at room temperature, with the sauce ladled over or under them.

Variation
Instead of the spiced tomato sauce, serve the croquettes with a simple raita: Rinse off the grater and run a large seeded cucumber (peeled or not) through it. Squeeze out all the excess moisture and put it in a medium bowl. Finely grate 1 clove garlic into the cucumber, add salt, pepper, and chopped fresh cilantro to taste, and stir in about 1 cup (240 ml) plain Greek yogurt.

Yellow Squash Dumplings with Spiced Tomato Sauce from Vegetarian for a New Generation | Fake Food Free

Disclosure: This book was sent to me for review purposes. I was not required to write about it and received no compensation for doing so. Recipe was reprinted with permission from the publisher.

Poached Egg on Spicy Lentils Recipe from The Healthy Slow Cooker

April 22, 2014
Poached Egg on Spicy Lentils Recipe from The Healthy Slow Cooker | Fake Food Free

I don’t use many small kitchen appliances that do the same type of work as my stove and oven. I’ve never been a huge fan of toaster ovens taking up my valuable counter space, and while I wouldn’t want to be without my microwave, it’s used for quick reheating, not so much for cooking.

But things change when we start talking about the slow cooker. Yes, I can cook beans, soups and stews on the stovetop, but I’d rather not be in the kitchen for hours. I’m amazed at how much I still use it, even now that I’m back working at home again (with extra time to cook dinner that was once spent commuting).

I have to admit that about the only thing that comes out of it these days are beans. Delicious beans, but even I can get tired of them every now and then.

A few weeks ago I received The Healthy Slow Cooker, Second Edition by Judith Finlayson. It was perfect timing because I was so ready to get out of my slow cooked bean rut.

This book is a revised version of one published in 2006. The front cover states that the book has “135 Gluten-Free Recipes for Health and Wellness,” so I had plenty to explore from cover to cover.

A highlight for me is that many of the recipes in this book can cook for 5 to 6 hours on low. This is something I look for in slow cooker recipes because if it cooks in an hour or two the idea of slow cooking while you are away for the day kind of goes out the window. That being said, the recipe instructions include a low and high setting. So if you will be around and want to speed things up, you can decrease the cooking time by setting it to high and the recipe tells you how.

Poached Egg on Spicy Lentils Recipe from The Healthy Slow Cooker | Fake Food Free

The recipes are also light on the pre and post cooking. To me, there is no reason to use a slow cooker if you are going to spend an hour cooking the food before you…cook the food. The recipe I chose to make is a good example of this.

I didn’t stray too far from beans, but these Poached Eggs on Spicy Lentils were a huge hit around here. The recipe says that it is a great cold weather dish, but I could eat this any time of year.

The lentils are full of flavor and you can make them as mild or spicy as you wish. With the coconut milk, they cooked into a rich and creamy stew that was perfect with an egg on top. The recipe requires about 5 minutes of stove cooking time before adding everything to the cooker. About 30 minutes before you are ready to serve, you stir in coconut milk and make the poached eggs to go on top. It was super simple.

The book contains everything from breakfast and appetizers to sauces, dinners and desserts. Only 134 recipes left to make and with things like Maple Sweetened Congee and Sweet Potato Coconut Curry with Shrimp on the list, I might just do it.

Poached Egg on Spicy Lentils Recipe from The Healthy Slow Cooker | Fake Food Free

Poached Eggs on Spicy Lentils

Courtesy of The Healthy Slow Cooker, Second Edition by Judith Finlayson © 2014 www.robertrose.ca Reprinted with publisher permission.

This delicious combination is a great cold-weather dish. Add the chiles if you prefer a little spice and accompany with warm gluten-free Indian bread, such as Yogurt Flatbread, and hot white rice. The Egg and Lentil Curry (see Variation in the book) is a great dish for a buffet table or as part of an Indian-themed meal.

Medium (approx. 4 quart) slow cooker

1 tbsp    olive oil    15 mL
2    onions, finely chopped    2
1 tbsp    minced garlic    15 mL
1 tbsp    minced ginger root      15 mL
1 tsp    ground coriander    5 mL
1 tsp    ground cumin    5 mL
1 tsp    cracked black peppercorns    5 mL
1 cup    red lentils, rinsed    250 mL
1    can (28 oz/796 mL) no-salt-added tomatoes with juice, coarsely chopped
2 cups    vegetable stock    500 mL
1 cup    coconut milk    250 mL
Salt
1    long green chile pepper or 2 Thai bird’s-eye chiles, finely chopped, optional
6    eggs    6
1⁄4 cup    finely chopped parsley leaves    60 mL

1. In a large skillet, heat oil over medium heat. Add onions and cook, stirring, until softened, about 3 minutes. Add garlic, ginger, coriander, cumin and peppercorns and cook, stirring, for 1 minute. Add lentils, tomatoes with juice and vegetable stock and bring to a boil. Transfer to slow cooker stoneware.

2. Cover and cook on Low for 6 hours or on High for 4 hours, until lentils are tender and mixture is bubbly. Stir in coconut milk, salt, to taste, and chile pepper, if using. Cover and cook for 20 to 30 minutes until heated through.

3. When ready to serve, ladle into soup bowls and top each serving with a poached egg (see Tip). Garnish with parsley.

Tip
To poach eggs: In a deep skillet, bring about 2 inches (5 cm) lightly salted water to a boil over medium heat. Reduce heat to low. Break eggs into a measuring cup and, holding the cup close to the surface of the water, slip the eggs into the pan. Cook until whites are set and centers are still soft, 3 to 4 minutes. Remove with a slotted spoon.

Makes 6 servings
Can Be Halved

Disclosure: This book was sent to me for review purposes. I was not required to post about it and received no compensation for doing so.

White Fish with Tomatoes and Olives Recipe

April 3, 2014

Earlier this year I mentioned that we set a goal of eating more fish. I’m happy to say we’ve kept up with it. Salmon, tilapia, sole, Pacific cod and several types of seafood have been the focus of our dinners a few nights a week.

The best part of this venture has been discovering new types of fish. I’m constantly coming across new options to research. The most recent is swai. It’s imported, but Monterey Bay Aquarium Seafood Watch considers it a Good Alternative.

This week, I was craving something with a rich tomato sauce so I decided that would be my first experiment with the swai. It turned out to be the ideal match for this firm white fish!

I’ve seen recipes that call for slipping the raw fish into the sauce to cook, but I felt better about baking the fish and adding it just before serving. Thoroughly cooking the fish helped it hold up better in the sauce.

I was surprised to find swai compared to catfish in my research. I guess the texture is similar, but the flavor isn’t nearly as fishy as what I remember when eating catfish. (My grandpa was the family catfish fisherman and I grew up attending plenty of Catholic Friday fish frys, so I’ve had my fair share of it over the years.) 

The simple tomato and olive sauce is versatile. If swai isn’t your thing, this would be equally good with a cod or even tilapia. Although, the tilapia would likely be more delicate. If you want to forgo the fish altogether, chicken cutlets or portobello mushrooms would be a delicious substitute as well.


White Fish with Tomatoes and Olives

Serves: 4

4 white fish filets
1 tbsp + 2 tsp olive oil
¼ cup diced onion
2 cloves garlic, minced
28 oz. crushed or diced tomatoes (I use Trader Joe’s unsalted, crushed)
½ cup sliced green olives
½ tsp dried basil
¼ tsp dried oregano
¼ tsp smoked sweet paprika
¼ tsp crushed red pepper (optional)
¼ to ½ tsp fine ground sea salt

Preheat the oven to 400 degrees F. Coat the fish filets with the 2 teaspoons of olive oil and place in a single layer on a baking sheet. Bake for 10 to 12 minutes, until the fish is barely cooked through and just begins to flake.

In a large skillet*, heat the olive oil over medium high. Add the onion and garlic, cook for about 3 minutes, until the onions begin to soften.

Add the tomatoes, reduce the heat to medium. Stir in the olives, basil, oregano, paprika and red pepper. Let simmer for about 5 minutes, until warmed through. Taste, and then add in the desired amount of salt. (The olives will make it slightly salty so this is based on personal preference. I use about ¼ teaspoon.)

Place the baked  fish filets in the tomato sauce and reduce the heat to low. Let cook for about 5 more minutes until the fish is reheated. Serve each filet with ¼ of the tomato sauce.

*Young cast iron can sometimes create an unappealing flavor when it comes into contact with acidic tomato sauce. The older and more seasoned your pans are, the better they hold up to things like tomatoes. I use my cast iron for tomato sauces, but choose a non-cast iron skillet if yours are not seasoned well. 

Chickpea and Spinach Stuffed Portobello Mushrooms Recipe

April 1, 2014

Every time I make a stuffed mushroom recipe, I have to research the correct spelling – portobello or portabella.

Have you ever Googled this topic? It’s more debated than most health information.

Some say one or the other is translated from Italian. Others say it was a name made up by the U.S. mushroom industry and has no roots in any specific culture. Still others say that our made-up word in the U.S. has replaced what used to be the correct name in other countries. And with all that, there is still no clear answer. Does anyone really know at this point?

The best advice I’ve seen is that it’s up to author and both are correct. This leaves me uneasy, though. When it comes to food names, I really like to be correct, especially if the name has some historic or language-specific meaning.

One thing I have learned is that I may have been meshing the two and creating my own word in the past. I could have sworn that portobella was an option.

Ooops.

For this recipe, I think I’m going to go with portobello. An “o” because, oh my goodness, these portobello mushroom caps I picked up at Trader Joe’s were huge! I’ve never seen such monstrous caps.

They tasted delicious, stuffed with chickpeas, sautéed spinach and shallots with a hint of coriander. They also happen to be vegetarian, vegan and grain-free, if you are in the market for foods that fit those categories. The ratio of mushroom to filling was just a little heavier on the mushroom side. So if you set out to make these hearty portobellos (great, now I’m questioning myself on the correct plural of the word), opt for some small to medium sized mushroom caps.And if you have a reference on the portabella vs. portobello debate, do tell.


Chickpea and Spinach Stuffed Portobello Mushrooms

Makes 2 servings

1 tbsp + 2 tsp olive oil (or your favorite cooking oil)
2 medium portobello mushroom caps
2 cloves garlic, minced
1 small shallot, finely chopped
2 cups loosely packed spinach leaves, chopped
1 ½ cups cooked chickpeas (rinsed and drained if using canned)
1 tbsp almond meal
1 tbsp low sodium vegetable stock
¼ tsp ground coriander
1/8 to ¼ tsp fine ground sea salt
Pinch of ground black pepper

Preheat the oven to 425 degrees F. Wipe the mushrooms with a clean, damp cloth and gently scrape out the gills. Use the 2 teaspoons of olive oil to lightly coat each cap and grease the bottom of a baking dish or sheet pan. Place the mushrooms gill-side up in the pan.

In a small skillet, heat the 1 tablespoon of olive oil over medium-high. Add the shallots and garlic. Cook about 1 minute, until the oil begins to bubble, and then reduce the heat to medium to prevent burning. Cook for about 3 more minutes, until softened.

Stir in the spinach and cook for about 1 more minute, just until the spinach wilts. Remove from the heat. Transfer the vegetables to a large bowl.
Add the chickpeas to the bowl and use a potato masher to combine all ingredients, gently mashing the beans while you work. You will want the beans to be slightly chunky once the ingredients are mixed.

Stir in the almond meal and stock. Add the coriander and the salt according to taste. Start with 1/8 teaspoon and add more if you’d like. Stir in the pinch of black pepper.Divide the chickpea mash in two and divide it between the two mushroom caps. Pack it firmly and mound it slightly to fill the mushroom.Bake for 20 minutes, or until the mushroom is tender and the filling is slightly browned.


Thanks for reading! All images and content are the property of Fake Food Free unless otherwise stated. Please do not republish recipes and images without written permission. Feel free to Pin images and share links to my posts, but please do not copy and paste recipes or photos and share them on other sites. Confused about copyright and food blogs? Here is some helpful information on Recipe Attribution.

Purple Brussels Sprouts Salad with Pecans and Orange Garlic Dressing Recipe

March 25, 2014

Purple vegetables.

Need I say more?

I have no idea why I’m so drawn to purple produce, but the responses to the photos that I share on Instagram tell me I’m not alone.

And it’s not just any purple veggie, either. It’s the new stuff. The poor eggplant and cabbage that I’ve always known to be purple get trampled on my way to see a head of purple cauliflower or these…

Purple Brussels sprouts!

I found them while I was browsing Whole Foods a few days ago. I had no idea they existed, but you better believe I bought some!

When it comes to flavor and texture, I’d say they are exactly the same as their green sisters, which I still love. But these purple bundles can really dress up a salad. Especially when everyone around me seems to need a serious dose of spring.

I used mostly purple sprouts with a few green to add more color. If you can only find green, don’t worry. It will taste the same. If the opportunity arises do pick up some of the purple variety, though. And if you know of more purple veggies that might be new to me, do share. I have this overwhelming desire to try them ALL.

Purple Brussels Sprouts Salad with Pecans and Orange Garlic Dressing

Makes: 4 servings

1 lb. Brussels sprouts, stemmed and thinly sliced
3 green onions, sliced
Juice of two navel oranges
1 clove garlic, grated
2 tbsp olive oil
1 tsp orange zest
¼ to ½ tsp sea salt (to taste)
Pinch of black pepper
1/3 cup pecan halves, roughly chopped

Place the Brussels sprouts and onions in a large bowl.

In a small bowl, whisk together the orange juice, garlic, olive oil, orange zest, salt and black pepper.

Pour the dressing over the vegetables and stir to coat evenly. Stir in the pecans.

I prefer it served right away at room temperature. It will stay fresh a day or two in the fridge.

Thanks for reading! All images and content are the property of Fake Food Free unless otherwise stated. Please do not republish recipes and images without written permission. Feel free to Pin images and share links to my posts, but please do not copy and paste recipes or photos and share them on other sites. Confused about copyright and food blogs? Here is some helpful information on Recipe Attribution.

Baked Coconut Curry Cauliflower Recipe

January 22, 2014

I’ve been trying to come up with some side dishes that aren’t grain-based. Don’t get me wrong, I love grains. But when I’m not training for specific events, I find I have to keep an eye on overloading my plate with carbohydrates. I’m usually good with some sautéed kale or spinach, but I have reached my limit on leafy greens at the moment.

Since I am awful at getting stuck in vegetable ruts, variety has been the focus when I’m at the farmers markets. Last week I stumbled on a table that was filled with beautiful white bundles of cauliflower so I couldn’t resist stocking up. Cauliflower is another vegetable that I tend to overdo it on, but I had a short break recently so it was time to work it back into the rotation.

Instead of roasting it with some curry powder like I often do, this time I decided to dress it up a little bit. I used light coconut milk because I thought the regular coconut milk I use would be too thick. Adding the almond meal gave the curry sauce just the right consistency. It came out rich and creamy with a wonderful curry flavor that was slightly sweetened with coconut.

Baked Coconut Curry Cauliflower

Makes: 4 servings

1 medium head of cauliflower, broken into florets
1 (14 oz.) can light coconut milk
¼ cup + 2 tbsp almond meal
1 tbsp curry powder
1 tsp grated fresh ginger
½ tsp salt

Preheat the oven to 425 degrees F.

Place the cauliflower in a large bowl. Pour in the coconut milk, ¼ cup of almond meal, curry powder, ginger and salt. Stir until everything is combined and the cauliflower is coated.

Spray or grease an 8 x 8 inch baking dish, or three 2-cup ramekins. Transfer the cauliflower to the baking dish and pour any remaining liquid over the top. Sprinkle the top with the 2 tablespoons of almond meal.

Bake for 30 minutes, until the tops are browned and the cauliflower is tender. Serve warm.

Thanks for reading! All images and content are the property of Fake Food Free unless otherwise stated. Please do not republish recipes and images without written permission. Feel free to Pin images and share links to my posts, but please do not copy and paste recipes or photos and share them on other sites. Confused about copyright and food blogs? Here is some helpful information on Recipe Attribution.

Want to create beautiful food and product photos that you can't wait to share?!
Discover your style, control the light, and shoot using the tool you know how to use (yes, your phone included). Learn about free resources, Live Q&As with Lori, and online courses you can take from anywhere in the world!
We respect your privacy. Unsubscribe at any time.