Browsing Category

Culture and Food History

Borekitas: Hazan Family Favorites

May 21, 2012

When I received my copy of the Hazan Family Favoritescookbook I will admit I had to do some research. There is no doubt that this speaks to my lack of knowledge of Italian cuisine.  It made me think about how it is possible to feel affection for a cuisine without really knowing it at all.


There is no question that I love homemade pasta and marinara sauces, or that I believe they are 100% worth the time and effort it takes to make them. I enjoy bean soups and simple meat cutlets, and the other elegant offerings that come from an Italian kitchen.

What I think I have often overlooked is the simplicity. 

In case you have some more to learn about Italian cooking like I did, the book was written by Guiliano Hazan. He is the son of Marcella Hazan whose cookbooks are credited with introducing the United States to traditions and techniques of Italian cooking. 

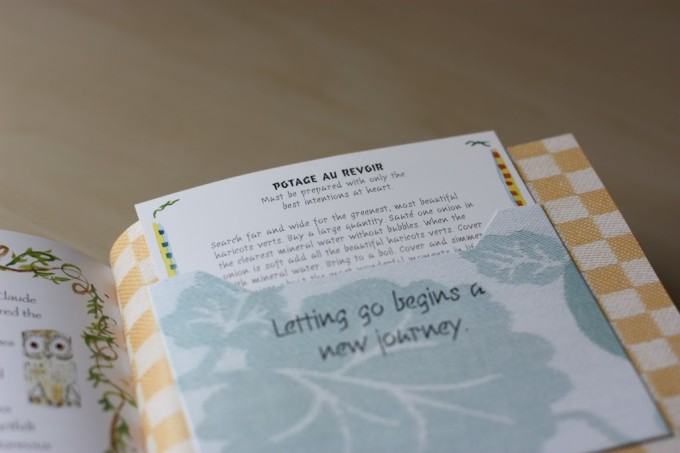
The book is a collection of recipes rescued from a fifty-six year-old notebook. As you flip through it and see the pictures you can feel the history and importance of its pages.

What you also see when you read the recipes is simplicity. Most of the recipes use only a handful of fresh ingredients to create a stunning end product. It’s impressive, educating, hunger-inducing, and it makes you think – okay, I’m ready to begin mastering the art of Italian cooking. 

Or if you are like me, it may also make you think – okay, let’s book the trip to Italy!


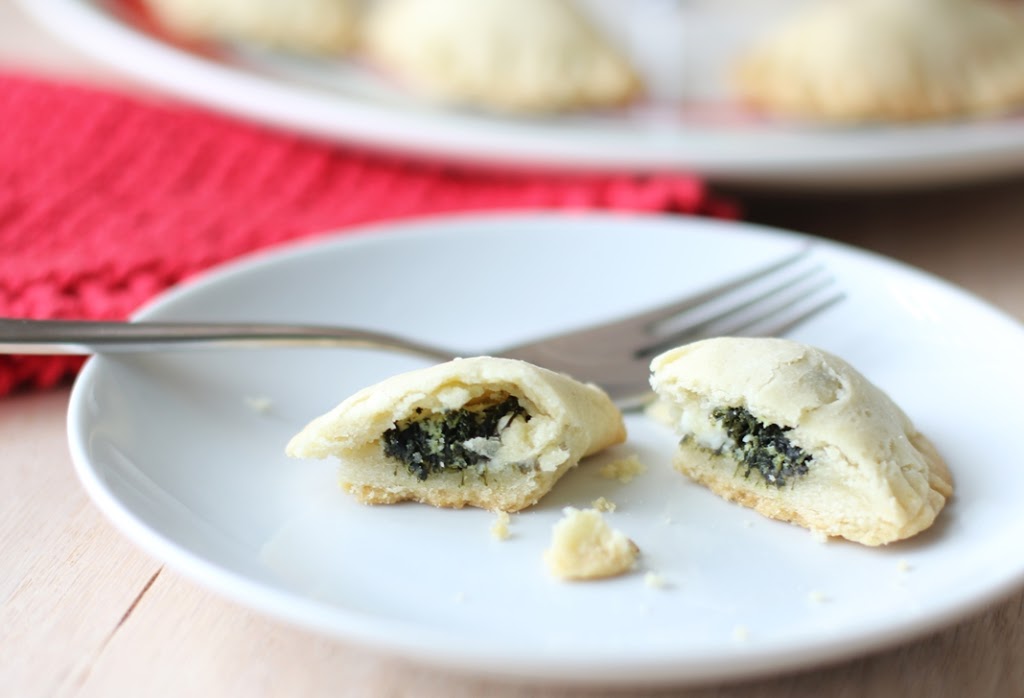
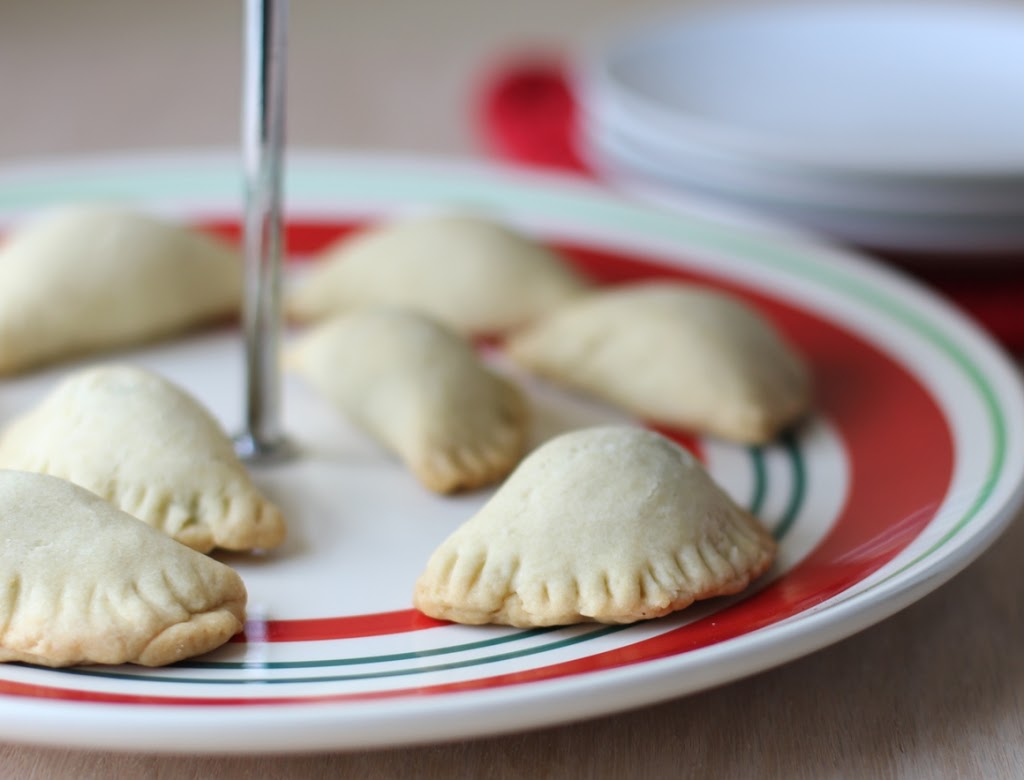
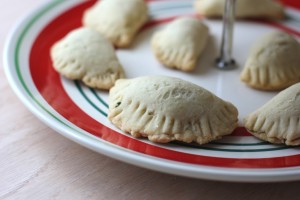
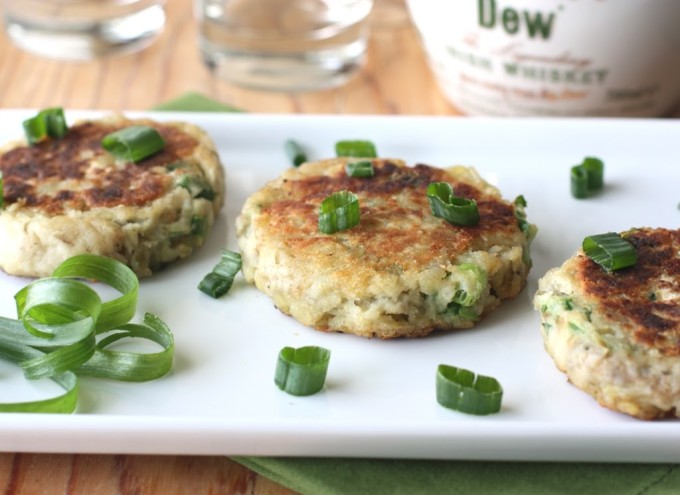
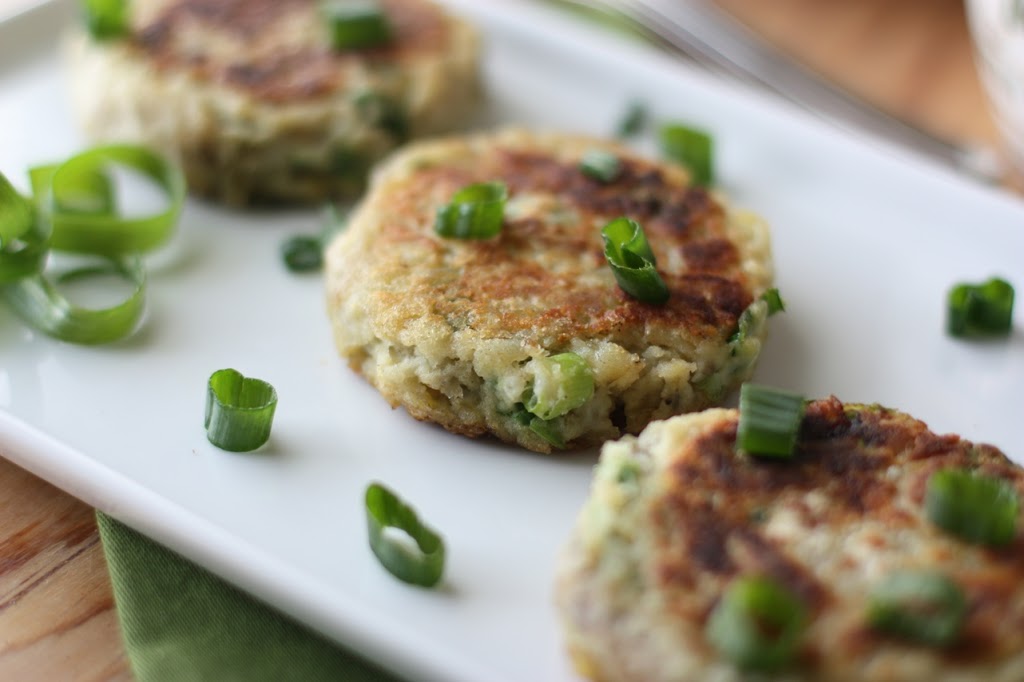
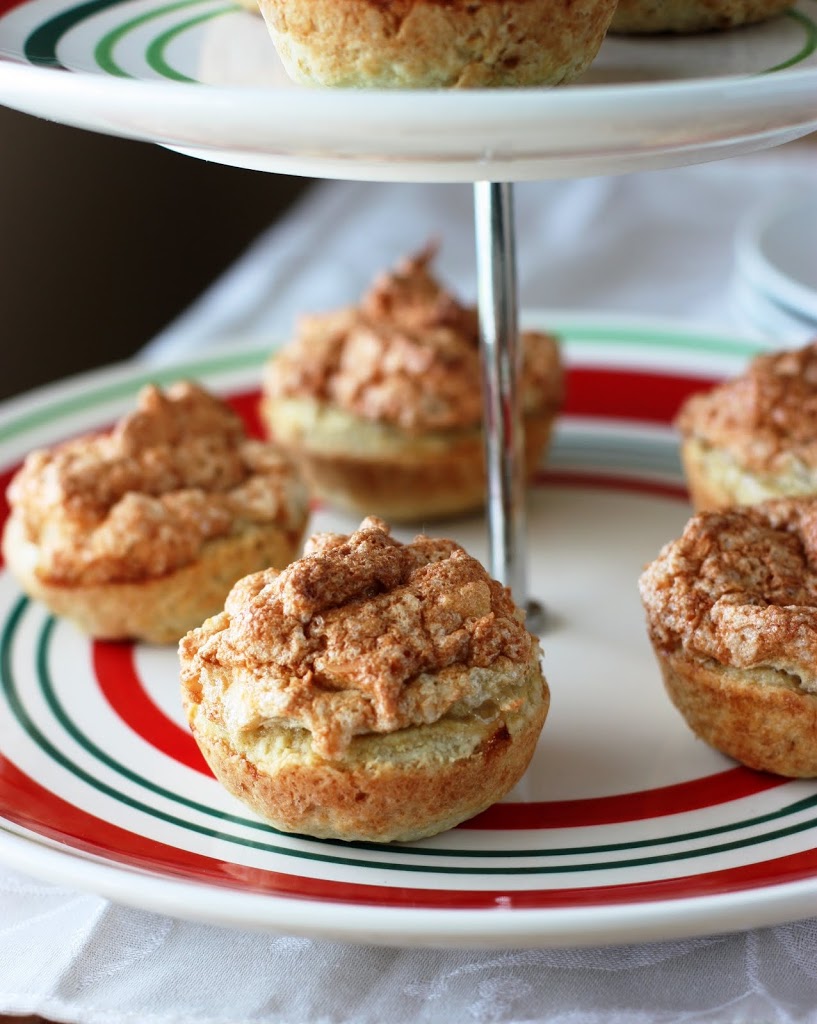
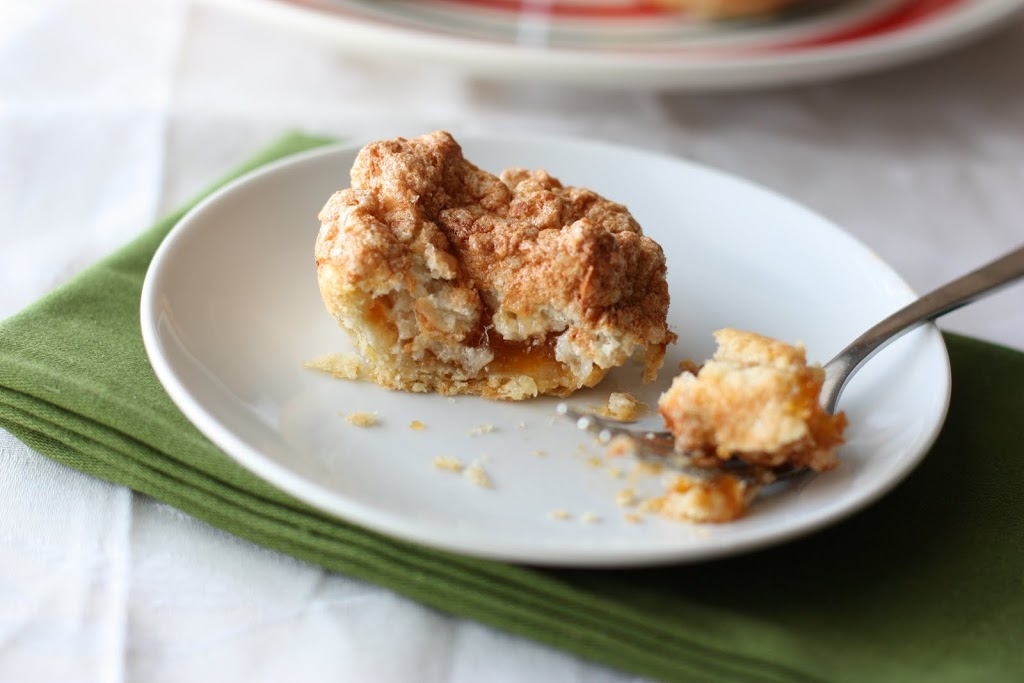
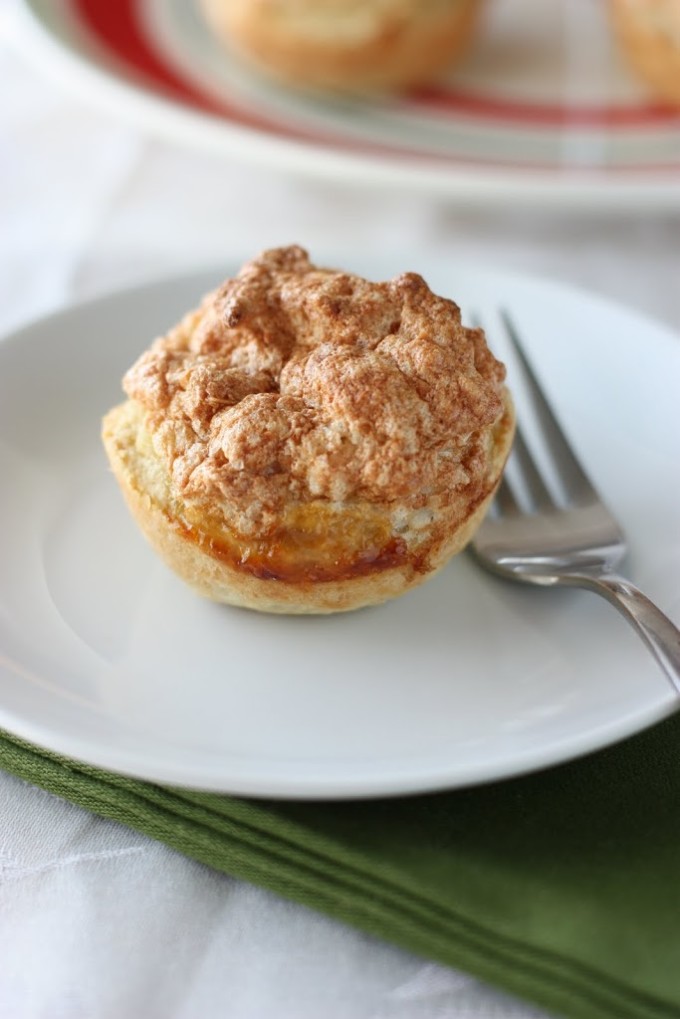
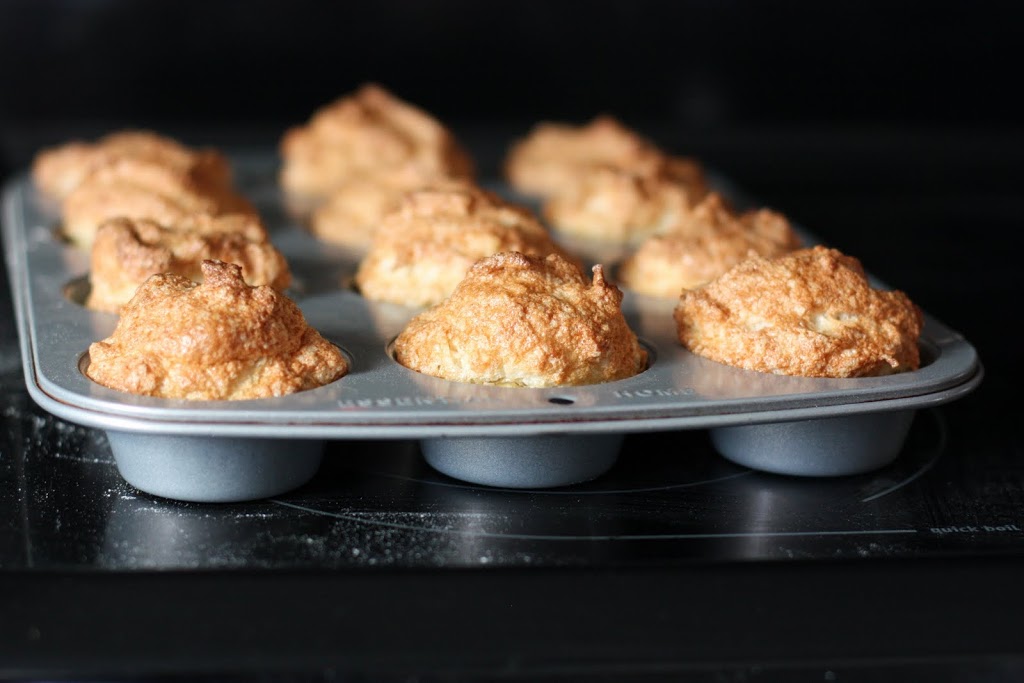
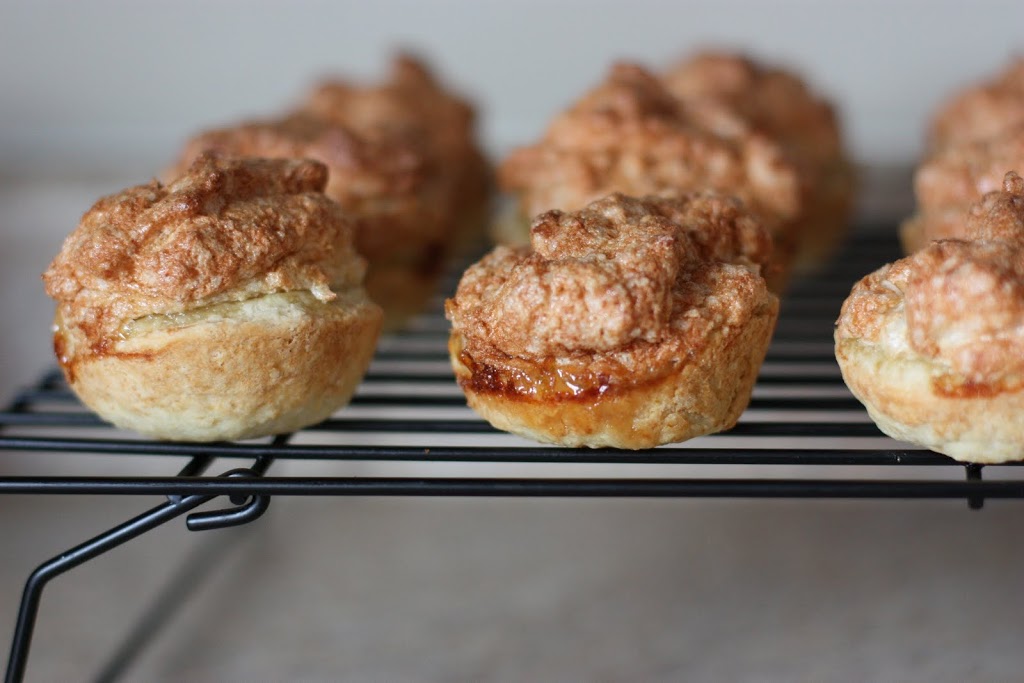
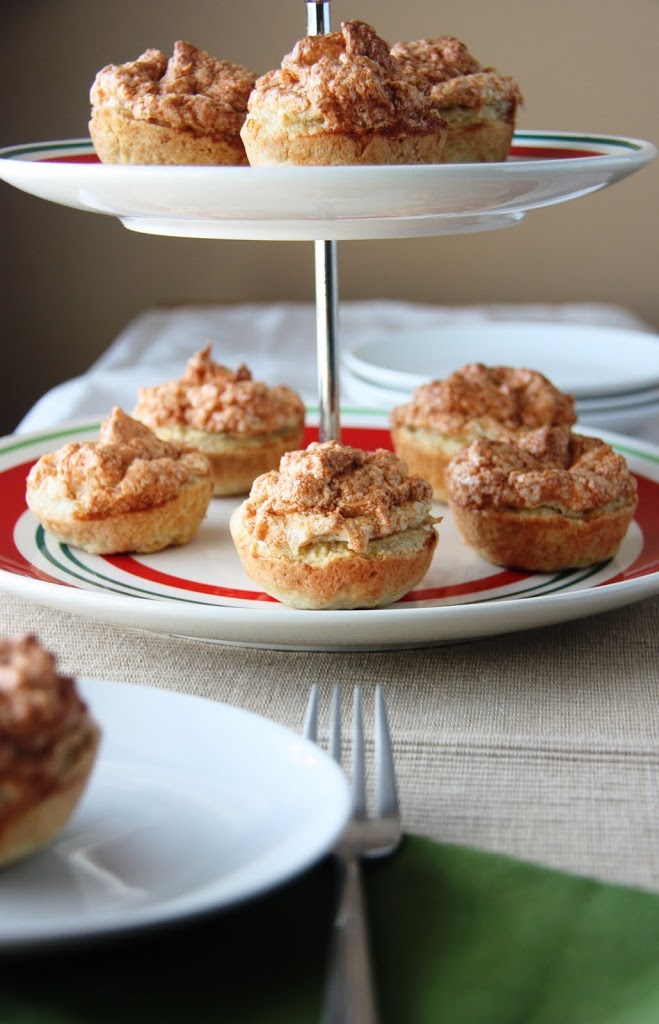
Amid the Fettuccine with Orange, Fried Parmesan Cheese-Battered Lamb Chops, and the Peach-and-Strawberry Semifreddo, the Borekitas caught my attention. What’s not to love about spinach, feta and ricotta stuffed into a bite-size pastry? Absolutely nothing. These are delicious. 
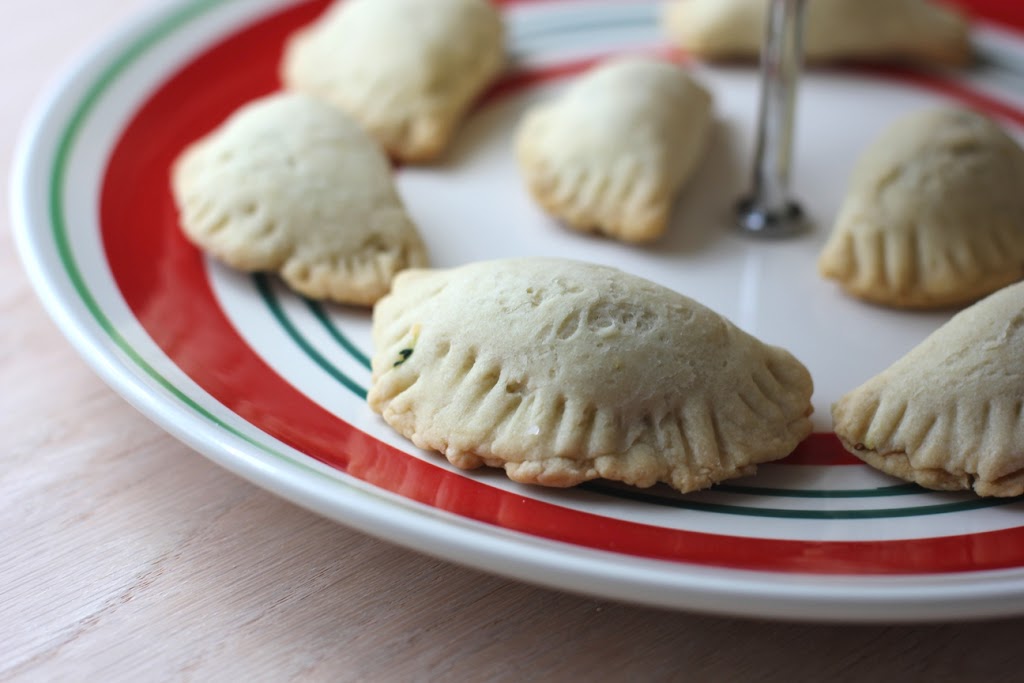

Borekitas
From Hazan Family Recipes, reprinted with permission from Abram Books 
 
Time from start to finish: 1 hour and 15 minutes
Makes about 20 borekitas 

From the cookbook:
My parents and I went to my grandparents’ almost every Friday for Shabbat dinner. I can still
taste and smell the wonderful little pies my Nonna Giulia made, which she called borekitas.
She made them either with a dough shell or a phyllo shell. The fillings were spinach or cheese.
In attempting to replicate them, I used Claudia Roden’s The Book of Jewish Food as a guide.
Both the cheese and spinach fillings below are just like what I remember, and the dough shell,
my favorite of the two, is just as good as the one Nonna Giulia used to make.


FOR the dough
4 tablespoons butter
1 1/2 cups all-purpose flour
1/4 cup vegetable oil
1/4 teaspoon salt

FOR the spinach filling (I made the spinach)
1/2 teaspoon salt
8 ounces fresh spinach, washed
1 ounce feta cheese
2 tablespoons whole-milk ricotta cheese


Cut the butter into small pieces and allow to come to room temperature.

Put all the ingredients in a food processor with 1/4 cup water and run it until a smooth, homogeneous dough forms. If it crumbles when pinched, mix in a little more water, 1 tablespoon at a time, until the dough is soft and smooth when pinched.

Wrap the dough in plastic and let it rest for about 20 minutes before using.

Spinach filling
In a pot large enough to cook the spinach, put about 2 inches of water, and place over high heat. When the water is boiling, add the salt and spinach. Cook until tender, 2 to 3 minutes, then drain.

Once the spinach is cool enough to handle, squeeze the excess water out and coarsely
chop. Place the spinach in a bowl. Crumble the feta and add it along with the ricotta. Mix thoroughly.


Assembling the borekitas
Preheat the oven to 350°F on the bake setting.

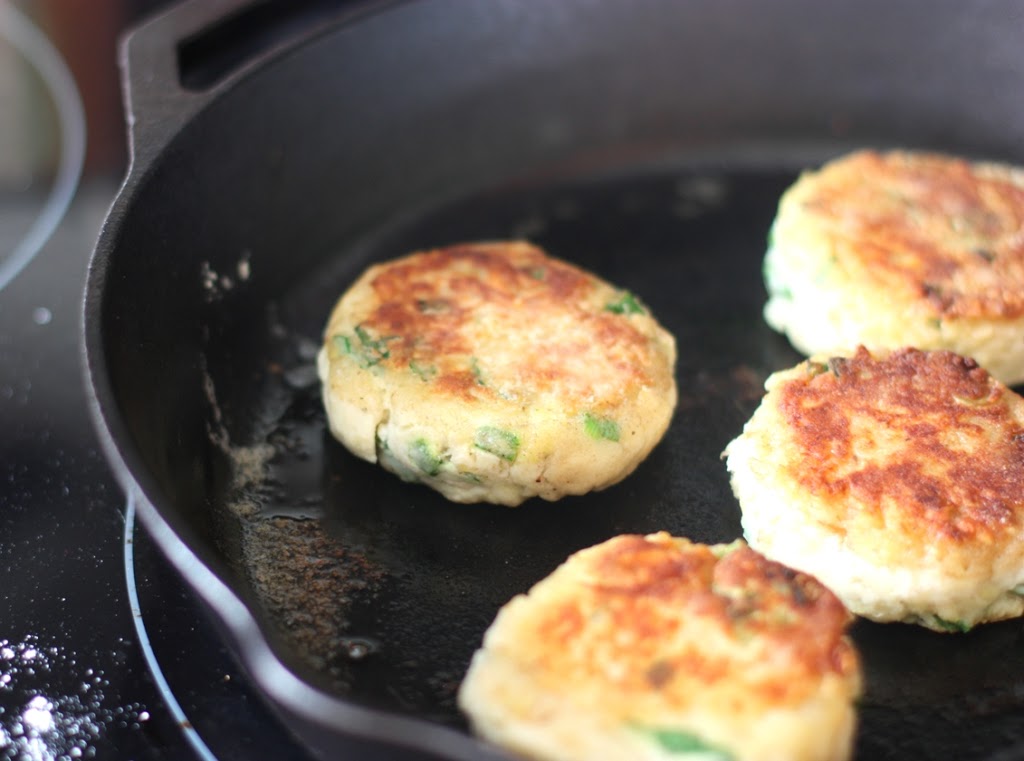
Take about a walnut-size ball of dough, place it on a counter, and press it with your fingers into a disk 2 inches in diameter. Put about 1 tablespoon of either cheese or spinach filling on the disk. Fold the disk over the filling to form a half-moon shape, making sure to pinch the open sides together to seal them, and place on a baking sheet, either oiled or lined with a nonstick baking mat.

When all the borekitas are assembled, bake until golden brown, about 20 minutes. Serve warm.


Disclosure: A copy of this cookbook was sent to me for review purposes. I was not required to post about it and received no compensation for doing so. 

Irish Boxty

March 17, 2012

Despite multiple trips to Ireland, I have failed miserably at taking an important culinary opportunity. I’ve read about it, and put it on the agenda, but pudding, scones, and chips always get in the way of Irish Boxty.

Irish Boxty | Fake Food Free | An easy dish to make for St. Patrick's Day!

This week, as I thought about what Irish food to make in celebration of March 17, I found a beautiful Instagram photo by Edible Ireland. Just like that, my plan was made.
 
Boxty is a potato pancake. I know that sounds simple enough, but with the right ingredients it is so flavorful and comforting that you may never turn back to baked potatoes or fries. I hate that I missed the opportunity to try authentic boxty in the past. It prevents me from being sure if I have really nailed a recipe, but that doesn’t stop me from giving it a try anyway.
 
Irish Boxty | Fake Food Free | An easy dish to make for St. Patrick's Day!
 
 We had potato cakes made from leftover mashed potatoes growing up, but now I know – boxty is different. The shredded raw potato mixed with the mashed potatoes gives it texture, and after pan frying there is a crispy, golden edge that is rich with butter flavor. Our version was meat-less, but I have no doubt bacon would make these even better.
 
Irish Boxty | Fake Food Free | An easy dish to make for St. Patrick's Day!

I decided not to adapt the recipe at all other than leaving out the bacon, so you can head over to Edible Ireland for the Boxty with Bacon and Scallions recipe. While you are there, take a look around. It is one my favorite new-to-me blogs in 2012.

Happy St. Patrick’s Day!
 

Pin It

Thanks for reading! All images and content are the property of Fake Food Free unless otherwise stated. Please do not republish full recipes or images without written permission. What is okay? Feel free to Pin images, share links to my posts or share the photo in a round up post with the title of this recipe and a link back to the post. Confused about copyright and food blogs? Here is some helpful information on Recipe Attribution. If you want to use a photo or full recipe, just ask. I’m sure we can work something out.

Eggnog Latte Cupcakes

December 8, 2011
 My favorite holiday coffee drink becomes a dessert in this recipe for eggnog latte cupcakes!
 Eggnog Latte Cupcakes | Fake Food Free 
 

What’s the first food or drink you think of when you hear the word culture?

For me, it’s coffee.

Coffee brings about memories of travel and some of my favorite places in this world. And it’s not just the coffee itself that I enjoy; it’s the culture that surrounds it. I love to smell it brewing in the morning, and sharing a cup over conversation with my husband or friends. I find it fascinating to watch it grow in the fields, and I feel fortunate to support those who grow it as they share a piece of their world with me in each cup. 

So a few weeks ago when I was asked if I would like to review a very special coffee, I was given a great opportunity to offer my support. 

Equal Exchange buys products directly from small-scale farmer cooperatives for Fair Trade prices. Then they pass these amazing things on to us in the form of chocolate, cocoa, tea and coffee. The Congo Coffee Project was created by Equal Exchange in partnership with Panzi Hospital in the Democratic Republic of Congo. 

The Congo Coffee is a blend of African coffee beans that was described to me as smooth and balanced. I have to agree. I took it to work with me this morning and enjoyed every sip. This is a coffee that is worth an online order. 

This is coming from someone who still recruits friends and colleagues to bring me coffee from Brazil, and who stocks up on 100% Blue Mountain coffee any time my feet touch ground in Jamaica.  Yes, I love quality coffee. 

And now is a great time to place that order as Equal Exchange will donate $2.00 per bag sold through their retail web store to the Panzi Foundation. The Panzi Hospital offers treatment, counseling and aftercare programs for over 2,000 survivors of sexual violence each year. 

So, go. Buy the coffee-lover in your life a bag for the holidays. 

When I agreed to review the coffee, I knew that I couldn’t show you a simple cup of coffee and be done with it. Although, a simple cup alone is worth a photo and sip. No, I needed to figure out a way to get it into some of my baking. 

My favorite holiday coffee drink turned cupcake? That will work.

 Eggnog Latte Cupcakes | Fake Food Free

 
These Eggnog Latte Cupcakes start with a rich chocolate, coffee-flavored cake that uses virgin coconut oil, mascavo (muscovado) sugar and white whole wheat flour. Feel free to substitute butter, brown sugar and your favorite flour, if you desire. 

Although, I will say that these are made only slightly sweet on purpose. The eggnog frosting on top is the real deal and full of sugar. I wanted a less sweet cake to balance out the frosting so my final produce wouldn’t make your teeth hurt. The minimally refined sugar and strong brewed coffee did the trick.

Eggnog Latte Cupcakes
Makes: 8 cupcakes
 
Ingredients
 
Cupcakes 
3 ½ tbsp virgin coconut oil, soft, at room-temp
½ cup mascavo or muscovado sugar
2 large eggs 
3 tbsp Congo Project Coffee, brewed strong and cooled 
¼ cup cocoa powder 
½ tsp baking soda 
½ cup white whole wheat flour 
1/8 tsp nutmeg 
½ cup plain Greek yogurt
Eggnog Frosting 
½ stick (1/4 cup) unsalted butter, softened
2 ½ cups confectioners sugar 
7 tbsp eggnog 
1 tbsp coffee, ground extra fine
Prep
Preheat your oven to 350 degrees F. Line a muffin tin with 8 cupcake liners. 

In a bowl of a mixer fitted with the paddle attachment, combine the coconut oil and sugar. Mix for about 2 minutes, until almost smooth. Beat in the eggs, one at a time. Add the coffee. 

In a separate bowl, stir together the cocoa powder, baking soda, flour and nutmeg. Gradually add the dry ingredients to the batter. Mix just until combined. Fold in the yogurt. 

Divide the batter evenly among the 8 cups in the tin. Bake for 18 minutes or until a toothpick inserted in the center comes out clean. Remove from the oven and cool completely. 

For the frosting, combine the butter and confectioner’s sugar in a mixing bowl and mix on medium and then medium-high until well combined. Slowly add the eggnog, 1 tablespoon at a time. Frost your cupcakes once cool and sprinkle each with a dusting of finely ground coffee. 

Eggnog Latte Cupcakes | Fake Food Free 

 
Eggnog Latte Cupcakes | Fake Food Free

Disclosure:  This coffee was sent to me free of charge. I was not required to use it in some pretty rockin’ cupcakes or write about it, and I received no compensation for doing so. 

Native American Cooking Hidatsa Stuffed Sugar Pumpkin

September 18, 2011
Hidatsa Stuffed Sugar Pumpkin Recipe | Fake Food Free

Other than a fondness for fry bread, I must admit that I know little to nothing about Native American cuisine or cooking styles.

However, autumn is the time of year when what little I do know about this cuisine does come to mind. In autumn we tend to think of those orange and brown tones to our foods and earthy flavors much of which encompasses the heart of Native American cooking.
A few days ago I was notified of the anniversary release of two cookbooks, one of which was Spirit of the Harvest: North American Indian Cooking by Beverly Cox and Martin JacobsThe book, a James Beard and IACP award winner, is overflowing with authentic Native American recipes from tribes throughout North America including the Cherokee, Navajo and Sioux.

Once I began reading, I knew my knowledge of this cuisine was about to change.

My favorite part of the book, aside from the wonderful recipes, is page 10. This page opens up into a map of the US. On this map are icons which represent foods traditionally used in different areas such as blue corn, buffalo, hazelnuts, deer, persimmons and sweet potatoes. While now it may be more evident in types of barbeque, the diversity of foods prepared across the US was as apparent then as it is today.

Similarly the recipes are separated into different regions and tribes throughout the book. Some of the recipes you’ll find include Iroquois Leaf Bread, Hopi Venison Stew, Honey-Ginger Baked Beets and Papago Cactus Salad.

Hidatsa Stuffed Sugar Pumpkin | Fall Recipes

 I wanted to go with something unique that I’d never tried before which, to be honest, wasn’t difficult. Almost every recipe in the book was new to me.

I settled on the impressive, yet surprisingly simple, Hidatsa Stuffed Sugar Pumpkin from the Great Plains region. Aside from scraping out a bit of pumpkin, nothing about this recipe is difficult, nor are the ingredients hard to come by. Yet, it is delicious and upon seeing it, no one will doubt your skills in the kitchen again.

The sage, the pumpkin, the hearty meat – all of it is perfect for autumn. Considering the presentation, I wouldn’t hesitate to also set it on the holiday table.

Hidatsa Stuffed Sugar Pumpkin | Pumpkin Recipe


Hidatsa Stuffed Sugar Pumpkin
Reprinted with permission from Abrams Books

1, 4 to 5 pound sugar pumpkin
2 tsp salt
½ tsp dry mustard
1 to 2 tbsp vegetable oil or rendered fat
1 pound ground venison, buffalo or beef
1 medium onion or 4 green onions, chopped
1 cup wild rice, cooked
3 eggs, beaten
1 tsp crushed dried sage
¼ tsp pepper

Preheat oven to 350 degrees F. Cut the top from pumpkin and remove seeds and strings. Prick cavity with a fork and rub with 1 teaspoon of salt and the mustard.
Heat oil in a large skillet. Add meat and onion and sauté over medium-high heat until browned. Off the heat, and stir in wild rice, eggs, remaining salt, sage, and pepper. Stuff pumpkin with this mixture.

 Hallowed Pumpkin for Hidatsa Stuffed Sugar Pumpkin Recipe

Place ½ inch of water in the bottom of a shallow baking pan. Put the pumpkin in the pan and bake for 1 ½ hour, or until tender. Add more water to the pan as necessary to avoid sticking. Cut pumpkin into wedges, giving each person both pumpkin and stuffing. (Or you can scoop out the stuffing with a bit of pumpkin which is what I did.) Serves 6.


As I mentioned, there were two books re-released so I don’t want to pass on sharing the second with you. That’s because it happens to be the ideal gift book for any creative food lover. The Secrets of Pistoulet by Jana Kolpen tells the story of a French farmhouse and was first published in 1996. When I started flipping through it, I thought – this would make the cutest gift. Then I read a bit more about it, The recipes are designed as little pull-out cards and written in paragraph form with very flexible directions. There’s Potage of Vision, Potage of Heart and Potage of Strength. It’s like a recipe book and an inspirational note all in one.


The Secrets of Pistoulet by Jana Kolpen  

The Secrets of Pistoulet by Jana Kolpen
Disclosure: A review copy of these cookbooks was sent to me free of charge. I was under no obligation to blog about them and received no compensation for doing so.

South African Hertzoggies

August 30, 2011

When I think about all the countries in this world, I realize that I have made foods from very few. Take South African cuisine, for example. I’ve seen it in blog posts, there is even a restaurant in town, but it is one food that I have yet to explore.

Lucky for me, we have a friend here who is from South Africa. She hooked me up with a cookbook so I could explore a few options. It’s taken me months to get down to business and get baking, but I think you may find these worth the wait.
   South African Hertzoggies | Fake Food Free | A pastry with apricot filling and a coconut topping.
 
 
Hertzoggies are a pastry also sometimes referred to as coconut tarts. Despite their association with coconut, I have to say what gets my attention, after now having taken several bites, is the apricot filling.

South African Hertzoggies | Fake Food Free | A pastry with apricot filling and a coconut topping.

These cute pastries are surprisingly easy to make. I adapted the recipe to include mascavo and Demerara sugars. I also had only unbleached, all-purpose flour on hand and used that instead of the recommended cake flour. Not wanting so much sugar and coconut in the meringue I reduced that a bit too.

The filling is super simple, just an apricot jam. According to the original recipe I adapted, the key to a good Hertzoggie is in the jam. Young apricot jam is ideal because it provides a bit of tartness. I wasn’t able to be picky with my jam, though. I went for my favorite variety (when it’s not homemade), Smucker’s Simply Fruit. I like it because there  is no added sugar or artificial sweeteners.
My Hertzoggies browned up a bit more than photos I’ve seen, but I expect that is because of the sugars I used.  I also struggle a bit with meringues. Nonetheless, these little treats are delicious. Not only in their original form, but the whole idea has me visualizing the potential for other flavors!
South African Hertzoggies | Fake Food Free | A pastry with apricot filling and a coconut topping.


South African Hertzoggies
Modified from Hertzoggies, Cook with 7 de Laan

Makes: 16 to 18

Ingredients

Dough
2 cups unbleached, all-purpose flour
2 tsp baking powder
Pinch of salt
½ cup butter
5 tsp mascavo sugar
3 egg yolks
1-2 tbsp milk

Filling and Topping

½ cup apricot jam
3 egg whites
¾  cup Demerara sugar
½ cup unsweetened, shredded coconut
Prep
Preheat oven to 350 degrees F and grease a muffin tin.
Sift the flour, baking powder and salt together. Cut in the cold butter. Blend with a pastry blender until the butter is in pea-size pieces. Stir in the sugar and then the egg yolks. Add the milk a little at a time until the dough comes together and is firm, but not dry.
On a floured surface roll out the dough to about a ¼ inch thickness. Using a 7 cm cookie or biscuit cutter, cut out the individual pie crusts. Gently press them into the muffin tins.
South African Hertzoggies | Fake Food Free | A pastry with apricot filling and a coconut topping.
Spoon a heaping teaspoon of jam into each of the crusts. Beat the egg whites until stiff. Gently fold in the Demerara and coconut. Using a heaping tablespoon, top each crust with the egg whites to cover the jam.
South African Hertzoggies | Fake Food Free | A pastry with apricot filling and a coconut topping.
Bake for 20-25 min or until the Hertzoggies are nicely browned and the egg whites are firm. Remove from the oven. Using a knife, gently lift the small pies out of the muffin tin and set on a wire rack to cool. Makes 16-18.
South African Hertzoggies | Fake Food Free | A pastry with apricot filling and a coconut topping.
 
 
Pin It

Gifts for the Food Lover 10: Teavana Chai and German Rock Sugar

December 1, 2010

I’ve been seeing a lot of gift lists on my favorite food blogs lately and I love reading through them. There are so many things I’ve never come across before and I end up with all kinds of new ideas.

Since I’ve come across lots of great things this year myself, I thought I’d put together my own list. So from now through Christmas I’ll be interspersing a few posts to highlight some of my favorite food-related items including books.

The first is something my husband and I found during a recent trip to Florida for a family wedding. We were killing time in the Florida Mall in Orlando while waiting to pick up family from the airport. As we walked by Teavana the white tea they were sampling caught our eye.

We tried it and were intrigued by the flavor. It was mildly fruity, slightly sweet with the warm spices of chai. We found out later that it was a mix of the Samurai Chai Mate and the White Ayurvedic Chai.

We rarely try something like this and simply have to buy some, but this was an exception. I think we surprised ourselves that we liked it since we are usually fans of Chinese green and black teas with no additional flavors or spices. This tea was just too unique to pass up. Not only in flavor, but also in the look. It was full of pieces of coconut and whole spices.

After settling on the tea, I started talking with the sales clerk about the sugar they used to sweeten the tea. She said that they used a very small amount of German Rock Sugar to release some of the aromatic flavors in the tea.

Of course with my interest in different types of sugars, I had to ask more about German Rock Sugar. This was the first I had ever heard of it. The sales clerk said that it was an unrefined sugar that just barely sweetened the tea. She was right about its sweetness. It has a wonderful flavor, which is why we bought some to compliment our newly purchased tea.

Since then I’ve been trying to seek out an exact definition and source of German Rock Sugar. A simple Google search repeatedly leads you back to the Teavana site. After digging a little deeper I did find a bit about its origin – East Frisia in the far Northwest Corner of Germany.

germanFoods.org states:

The traditional preparation of East Frisian tea is a well-defined ritual: First a piece of rock candy sugar called Kluntjes is placed in…cups… The freshly brewed hot tea is then poured on top of the sugar… The rock sugar will melt slowly which allows multiple cups to be sweetened with the same piece.

Learning the term Kluntjes led me to search for that specifically, which taught me that Kluntje – Kandis translates to rock candy (or something similar) in English. Another site I found did say that it was unprocessed and unrefined and I haven’t found any information on the actual process. A look at the Kölner website tells me that the type we bought from Teavana most closely resembles Kölner Krusten Kandis.

So I may not have learned all I wanted to about German Rock Sugar, but I definitely know a bit more than I did. And, of course, I’ve discovered a new type of sugar to experiment with!

If you have some tea lovers on your list, this blend would make a great gift. You can throw in some of the sugar with a history lesson to make the gift even more interesting and sweet.

Remembering Morretes and Barreado

September 20, 2010

I realize that I won’t be able to keep using the phrase, “when we were in Brazil,” forever. As days and years pass, those experiences will become less current and less relevant in my life. That saddens me a bit.
I feel I still have so much left to share of my time there. As the one year anniversary of our departure approaches next month, I’m reminded of a few things I still have yet to post about.

Not long before we moved back to the States we took one final trip to Curitiba with the intentions of heading out to Ilha do Mel again. After making the two hour drive to the coast and sitting in the car at the boat dock for about 30 minutes as it poured rain, we made the decision that while we wanted to see the island again, it wasn’t worth trekking through rain with no gear for the day.

Disappointed, we began the somber drive back to the city. As we continued we began to talk about Morretes, a place many had told us about, but that we hadn’t yet made it to. It is a historic town, nestled between the mountains on the way from Curitiba to the coast.

Many people take the scenic train from Curitiba, a bit of a local tourist excursion. After a quick Google search and a phone call we exited off the highway and began the process of reviving this mini-vacation which we thought was a complete loss only a few minutes before.

Morretes is a tourist-filled little town that is designed for such a population. However, it is not the type of tourist destination you are likely thinking of. It is popular among Brazilians from the surrounding areas, not international visitors. So while the historic display boards in the center of town do contain an English translation, we didn’t hear a word of it during our visit. We loved it.

This small city was incredibly intriguing even during a rainy, dreary day. It holds a significant amount of history for the country in relation to the days of gold discovery and its export back to Europe. However, if you ask someone why they visited Morretes you will likely get the answer “Barreado.”

Yes, they travel there for the food. My kind of people!

Barreado (ba-he-a-doo) is a traditional food from that state of Paraná, and now, Morretes is one of the only places you can find it. It’s surprising that it hasn’t spread to other areas because it was overwhelmingly popular. It was obvious everyone was there to eat it, and every single restaurant in town served it.

We ended up at Olimpo which looked to be new in town, maybe not as historic as the others, but it had a great balcony. Honestly you can’t miss it, or the other places which serve the dish. This town is completely centered on this specific food.

The meal began with an assortment of bolos – basically fried balls, most with fish or vegetable. Then there was a salad bar filled with lentil, wheat berry and mushroom salads along with fruits and vegetables. And if you were so inclined, you could have a shot from the massive jar of cachaça which was filled with marinating fruit. This was common in many of the restaurants we visited during our time in southern Brazil, but not in a jar with this much fruit!

Barreado is a meat stew made with beef, bay leaf, cilantro and other herbs. It is sealed in a clay pot to cook for 12 to 18 hours. Once at your table you eat it with mandioca (cassava, yucca) flour, rice and fried bananas.

Now this picture, I have to admit with embarrassment, is not the appropriate way to eat barreado.

You see, the waitress brought our food and asked us if we were familiar with the dish. We said no and apparently she must have slipped another question in there that we didn’t hear because she took our no to mean we didn’t want an explanation.

Only after we were halfway finished did we see a demonstration at another table. You are supposed to mix the meat with lots (and I mean lots) of mandioca flour. Stir it up and mash the meat, add broth, stir it more and then eat it with rice.

It literally looked like a meat paste when the waiter was done and I have to admit, not appetizing at all. Therefore, we kept eating it our way even after the demonstration.

I was completely surprised how much I enjoyed this dish. Usually when it comes to beef stew it all tastes the same, but the flavor of barreado really stood out from anything I’ve had before. There was an intense, rich and smoky flavor, not to mention the slow roasting made it incredibly tender with no visible fat in sight.

Along with a meal of barreado, ginger was a highlighted ingredient in the area. The small feira taking place during our visit was offering candies made of ginger and the ice cream shop we passed had a ginger flavor as well. I really wanted to try it so I was happy to learn our dessert would be bananas with ginger ice cream.

It was unique and delicious – spicy with fresh ginger and went so well with the bananas and cinnamon.

Looking back at meals like this makes me wonder how I ever complained about the food available to me in Brazil. I’m always reminded of how much I owe to the whole expat experience and the country. It taught me that my perceptions of must-have ingredients are simply that – perceptions, not at all necessities.

Considering the laborious preparation technique and equipment needed to make barreado, I doubt it is something I will ever be able to recreate. That definitely makes for one unique foodie experience that I’ll never forget.


A little more about barreado.

United Cakes of America – Cookbook Review and Cupcakes!

August 10, 2010

Sometimes practice makes perfect and other times practice makes presentable. The latter is how I feel about my cake baking and decorating skills.

If I haven’t mentioned it before, my mom has had a cake business for most of my life. So I was surrounded by beautifully decorated, great tasting birthday and wedding cakes for as long as I can remember.

Somehow the skill didn’t rub off on me. I’m not sure if it is lack of patience or creativity, but my cakes never turn out the way I want them to. However, it doesn’t keep me from trying, nor does it keep me from loving cakes and cake recipes.

I was excited to receive a copy of United Cakes of America by Warren Brown to review. I really enjoyed his show and story on the Food Network and the theme of this cookbook couldn’t be a better fit for me. It highlights the traditional cake, dessert or pastry from each state around the U.S. There are also a few extra recipes thrown in that utilize specific ingredients from select areas.
United Cakes of America: Recipes Celebrating Every State

It is full of recipes, some of which you may know such as Boston Cream Pie and Carrot Cake from Kansas, and some which may be new such as Chocolate Sauerkraut Cake from Michigan and the Tomato Soup Cake from New Jersey. Personally, I can’t wait to try the Kentucky Jam Cake and the Avocado Cupcakes which feature a California ingredient.

I read a less than stellar review a couple months ago which I can’t locate at the moment, so I wasn’t quite sure what to expect. The major complaint of this post was the freedom the author took with selecting recipes and putting on his own twists.

I really had no problem with Key Lime Pie, Whoopie Pies and Pumpkin Pancakes being in a cake cookbook. I say the more recipes the better. Overall, I’m glad to have this book in my collection. I think I will be referring to every time I need to make a special dessert or get creative with a birthday cake.

A few things I enjoy about this book:

  • The author highlights muscovado sugar and raw sugar for baking in the introductory chapters, two of my favorite baking ingredients.
  • The variety of recipes means I’ll be using it for a lot more than just cakes.
  • I found the steps for each recipe straightforward and easy to follow.
  • I really like all the tips throughout the book, from frosting tips with photos to variations for buttercream.
  • The little history lessons spread throughout the text are especially interesting if you are into culinary history as I am. 

Things I’m not so crazy about:

  •  With the recipe I made below, I had some major differences in yield. The recipe states that I should have gotten 24 cupcakes, but I got 12 and they barely rose to the top of the cup. I did have to leave out one ingredient, but it doesn’t seem like that would equal 12 cupcakes!
  • The recipe text has a bit of creativity. Each ingredient listed is shaded with a different color, incorporating a red, white and blue theme. I found this a bit difficult to read when I was glancing across the counter top at the book.  

The recipe I got to try was the Connecticut Nutmeg Spice Cupcakes with Old-Fashioned Milk Buttercream. The one ingredient I had to leave out was the potato starch. The author says that it lightens the texture of cake and adds a slight flavor, but I was unable to find it at supermarkets here. I didn’t look everywhere, but I did check two with no luck.

The cake itself has a wonderful flavor. The nutmeg and rum (I used a spiced rum) blended so well together. I’ll likely make it again, maybe around the holidays.

As for the frosting, I was so excited to try a new variety. This one whipped up light and frothy and has a thin consistency. It actually reminds me of the fillings my mom used to make when recreating Hostess cakes. It doesn’t store very well, but if you are looking for a light buttercream, this may be a good choice. Next time I will likely use it for a filling rather than a frosting.

My next challenge will be substituting my favorite minimally refined sugars and whole grain flours to see how it turns out!

Connecticut Nutmeg Spice Cupcakes

Reprinted with permission
Yield: One 9-inch layer cake or 24 cupcakes (I got 12)

Dry Ingredients:

8 ounces (1 cup) superfine granulated sugar
5 ounces (1 cup) all-purpose flour
1 tablespoon potato starch
1/8 teaspoon kosher salt
½ teaspoon nutmeg, freshly grated
Pinch of allspice
Pinch of salt
1/8 teaspoon baking soda

Wet Ingredients:

3 ounces (6 tablespoons) butter, melted
¼ cup half-and-half
1 tablespoon rum
½ teaspoon vanilla extract
2 whole eggs
1 egg yolk

Preheat the oven to 325 degrees F and place the rack in the middle position. Lightly coat a cupcake tray with nonstick oil-and-starch spray and line 10 of the cups with paper liners.

Measure and combine all the dry ingredients in a deep bowl. Whisk lightly for about 15 seconds to blend.

Combine all the wet ingredients in a container with a tight-fitting lid and shake well for 15 seconds.

Lightly whisk the wet ingredients into the dry ingredients. This should take about 15 seconds.

Scoop or pour 2 ounces of the batter into the paper-lined cups. (Using a food scooper or ladle works best.)

Bake for 20 to 25 minutes, or until the tops of the cupcakes are golden brown and a wooden skewer inserted in the center of one comes out clean or with just a few crumbs.

Cool the cupcakes for 5 minutes before removing them from the tray. When they are room temperature, frost or decorate with Old-Fashioned Milk Buttercream.

Old-Fashioned Milk Buttercream

 Reprinted with permission

Yield: Enough for one 9-inch layer cake or 24-cupcakes

1 cup milk
2 ounces (1/4 cup) all-purpose flour
8 ounces (2 sticks) unsalted butter
8 ounces (1 cup) superfine granulated sugar
Pinch of salt
2 teaspoons vanilla extract

Quickly whisk together 4 tablespoons of the milk with the flour. This slurry will be somewhat thick, so whisk thoroughly to make it smooth. Press out any lumps with a flexible spatula, if necessary.

Whisk in the rest of the milk and transfer the mixture to a 2-quart heavy-bottom saucepan. Bring to a simmer for about 30 seconds over medium heat, whisking the whole time.

Remove the pan from the stove and place plastic wrap directly against the milk’s surface. (This is the best method to prevent a skin from forming.) Cool to room temperature.

Combine the butter, sugar, salt and vanilla in the bowl of a standing mixer fitted with the paddle attachment and mix at medium to high speed for 5 minutes.

Pour the cooled milk-and-flour mixture into the bowl and beat for another 5 minutes, or longer, as needed to achieve a spreadable consistency.

Update on the yield:  I checked out the recipe again and it looks like the yield mistake was in the press release. The press release says the recipe makes 24 cupcakes which is the recipe I followed and reprinted. However, when checking out the recipe in the book, it says it yields 10 cupcakes. That is much closer to what I got.
Disclaimer: This cookbook was sent to me free of charge. I was under no obligation to review it and received no compensation for doing so.

Chiang Mai Thai Cookery School

April 21, 2010

As I sorted through pictures for this post, I was reminded just how much I miss the outdoor markets of other countries. While I enjoy the markets of large cities in the US with their gourmet cheeses and mixed greens displayed beautifully in a decorative crate, and the markets of small cities offering local honeys and eggs gathered that very morning, I still have not found a site here that excites me the way the markets of Brazil and Thailand do.
There is something about that rustic feel, the atmosphere that most foreigners would consider dirty with flip-flopped feet slapping through puddles as fish are cleaned, noodles are bagged, heart of palm is carved and coconut is shredded. There is nothing like finding yourself surrounded by fruits and vegetables that you’ve never seen before. You know they have to be good for you, but you haven’t the slightest idea how to eat them or how to cook them. It is my very favorite learning opportunity.
My experience with the market in Chiang Mai, Thailand all began when we were trying to decide what to do for my birthday which just happened to fall in the middle of our month long trip around Southeast Asia last October. Once I learned a little more about the cooking classes in the area, the decision was easy. We signed up for a class at the Chiang Mai Thai Cookery School. Not just any class; it was Course 3, one that began the morning with a trip to the local market.
We were picked up from our hotel and taken to the school office where they then drove us to the market. I knew it was going to the perfect day for me as soon as we pulled up. I mean, there was a pug sitting at the market for goodness sake! Our first pug sighting of the trip!

Our guide took us to a table in the middle of the market where she began to explain the ingredients we would be using that day. It was a short session overflowing with discovery. For example, until that point we hadn’t been able to identify the flavor and smell of the Kaffir lime. Within minutes I was holding one in my hand, as well as some Thai bird, or birdseye, chiles responsible for all that heat in the curry. In addition, there was pre-made packs of lemongrass and kaffir lime leaves, and palm sugar.


After the explanation, we were invited to look around the market and we took off right away. It was a small market, but the variety of foods, especially those foods that I was witnessing for the first time, was incredible. There was Thai eggplant, noodles, tofu and baskets overflowing with rice. We got a nice shot of a local chef buying some ingredients for the day. I was tempted to hop on the back of the moped he was driving and find out where his restaurant was located!


As if the morning wasn’t exciting and informational enough, we left the market to begin our efforts to become experts at cooking the foods of Thailand. We were greeted with a beautiful open air kitchen and given our own cooking station. Considering how leisurely it felt when we arrived, we weren’t at all prepared for how quickly the day would progress.


This is how it went. We were led into the class room where we watched a demo of how the dish was made. We were then instructed to go back to our cooking stations where our ingredients were set out for us. There was a little chopping involved, but not much. We quickly cooked the dish. And I mean quickly – turned up the heat, threw in the oil and ingredients, cooked it up and plated it. Then the group headed over to the dining room where we ate our dishes which were usually served with rice. We didn’t eat every course as soon as we cooked it. For a few of them, we prepared two and ate both courses together.


There was a very international crowd taking the class. There were people from France, England and Australia along with a few other places that I can’t remember now. There was a major discussion about how much garlic was going into each dish. Apparently this was overwhelming for some, which led to some giggles around the room each time the guide added garlic during the demonstrations.
Another fun part of cooking Thai food was guessing how many bird chiles to use. We asked one of our guides how many chiles he would use in a single serving dish and he said six. There were some pretty loud gasps of horror across the room, but we were up for it. We added this amount to our Papaya Salad, Som Tam. It was definitely spicy, but nothing like another papaya salad we had later in our trip. That experience is a post in and of itself.
We made a total of six dishes throughout the day. All the foods below were made by me or my husband and I’ve added a little description about each. Overall, it was an incredible experience; not only to see all the foods, but to cook with them too gave me a much better understand of Thai cuisine. The simplicity of the cooking methods makes one feel guilty for every saying you don’t have time to cook, and fresh produce has never tasted better than when prepared in a Thai dish.
Chicken in Coconut Milk Soup, Tom Kha Gai, is a combination of lemongrass, kaffir lime leaves, chiles mushrooms, coconut water and milk. This dish ties the papaya salad for my favorite.


Red Curry with Fish, Gaeng Phed Plaa, was a traditional Thai curry with Thai eggplant and bamboo shoots. We didn’t get to make the curry paste ourselves, but it was explained to us. I prefer my curry with chicken, but this was a nice change.


One of the best things about Thai cuisine is all the produce that is used. Fruits and vegetables are everywhere, in almost every dish. So of course, we made a veggie dish, Fried Mixed Mushrooms with Baby Corn, Phad Hed Ruam Khao Pod Orn. The vegetables were great, but I wasn’t a huge fan of the sauce which combined fish, soy and oyster sauces. I’d much rather have curry.


Fried Big Noodles with Thick Sauce and Pork, Raad Nah Muu, was full of mushrooms, cauliflower and carrots. This was good, but those large, paper-thin rice noodles are interesting to cook with.


My favorite Thai dish, next to Mango Sticky Rice, is Papaya Salad, Som Tam. It combines grated green papaya with garlic, birdseye chiles, long beans, tomatoes, dried shrimp, lime, palm sugar and peanuts. It’s made with a mortar and pestle and all the delicious ingredients are slightly mashed together. Best. Salad. Ever. Although, I can live without the dried shrimp, a bit salty for me.


We made a Steamed Banana Cake, Khanom Kluay, in a banana leaf for dessert. What a delicious combo made with simple ingredients. It contains only bananas, rice and tapioca flours, sugar, coconut and coconut milk. Notice the “L” in my flag for the cake. We had to mark our cake because they were all cooked together in one steamer.


Needless to say we left the class stuffed, but as I sit here writing this I would give anything for one more bite of any of those dishes, especially the papaya salad! Now the challenge is to figure out how to get all these ingredients in Kentucky, or at least something that tastes similar.

Pretzels: A Word About Easter History

March 30, 2010

When I think about the things I associate with Easter, pretzels is typically not one of them. Hot-cross buns, chocolate, eggs, bunnies, and on a religious note, sacrifice, the cross and new life. No, pretzels really don’t make the list. Well, that was before I read about their history a couple years ago.
My interest in pretzels began when we traveled to Austria and Germany a few years ago. At that point I discovered one of my top five meals of all time – German sausage, kraut, mustard, a pretzel and beer.
It has to be from the source though, so traveling is required. A simple meal, yes, and likely very unexciting for many, but it tops my list. In many cases, I could just go for the pretzel, mustard, and beer, and believe me; in Germany they are large enough to be made a meal!
This is what sparked my interest in pretzels and I soon learned that their history is strongly associated with Easter. Well, actually, they are associated with Lent. As the story goes, pretzels originated in Southern France or Northern Italy when a monk was making unleavened bread for Lent. At this time it was common for arms to be folded across the chest when praying with each hand on the opposite shoulder. Does that vision look familiar?
Such is the traditional shape of the pretzel. Supposedly this monk used the pretzel as a reward for children or other monks (each account is a bit different) who recited their prayers. Therefore the pretzels were first named “pretiola” which is Latin for “little reward.”
Another name associated with the pretzel is “bracellae” which is Latin for “little arms.” As pretzels made their way to Austria and Germany they became known as a “bretzel” or “pretzel.” Historically, aside from the association with Lent, pretzels symbolize good luck, long life and prosperity.
I’ve wanted to make pretzels for a while now, especially since I read about the history, and I decided that this Easter is the year for it. Traditionally, due to the strict Lenten fasting rules of the Catholic Church, breads made during this time were composed of only water, flour and salt.
Most pretzels today use more ingredients. For example, the one I set out to make is a recipe for Homemade Soft Pretzels by Alton Brown. As is typical of my baking, I made a few changes.
I used mascavo sugar in place of the white sugar and white whole wheat flour in place of all-purpose flour. I also didn’t have kosher or pretzel salt so I just used my finely ground sea salt, but used half of what the recipe calls for in kosher salt.
I was so happy that these whole grain pretzels turned out beautifully. They raised well, browned up nicely and remained soft and tender on the inside.
Whole Wheat Soft Pretzels
Adapted from Homemade Soft Pretzels by Alton Brown

1 ½ cups warm water
1 tbsp of mascavo/muscavado sugar
1 tsp sea salt
1 pk active dry yeast (I used rapid rise)
4 cups white whole wheat flour
4 tbsp unsalted butter, melted
10 cups water
2/3 cup baking soda
1 egg yolk, beaten
1 tbsp water
Olive oil
Salt or other seasoning
Combine the sugar, salt and water in the bowl of a mixer and sprinkle the yeast on top. Let it sit for 5 minutes, it will begin to foam. Add the flour and butter and use the dough hook to mix the dough on slow. Gradually increase the speed to medium and let mix until the dough forms and pulls away from the sides of the bowl. This only took about 2 to 3 minutes for me.
Remove the dough and knead into a ball. Place the ball in a clean bowl and coat with olive oil. Cover and set aside in a warm place to let rise for about 55 minutes.
Preheat the oven to 425 degrees F. Bring the water and baking soda to a boil in a large soup pot. Separate the dough into 8 equal pieces and roll out each piece to about 24 inches long. Shape into a U, cross in the middle, and press the two ends into the opposite sides of the bottom of the U. In other words, make a pretzel shape however you see fit. Mix the egg yolk with the water in a small bowl and set aside.
Drop the pretzels in the boiling water one at a time for about 30 seconds. Remove after they float to the top. Place on a cookie sheet (four pretzels per sheet) covered with greased parchment paper or with a silicone mat. Brush the pretzels with the egg yolk mixture and sprinkle with salt or other seasoning. Bake for about 12 minutes or until golden brown. Cool and enjoy.

Eating these lovely treats is a far cry from a sacrifice, which is what I usually associate with the Lenten season. So that is why I think I’ll stick with the name “pretiola.” I will gladly take these as a little reward any time of year.

In fact, I like that name so much I decided to spell it out for you. So this pretzel experiment is being submitted to the Eating Your Words Challenge hosted by Tangled Noodle and Savor the Thyme.

Resources for more info about pretzel history:
Catholic Education Resource Center: Lenten Pretzels
CatholicCulture.org: Pretzels for God
The History of the Pretzel

Snyder’s of Hanover: History of Pretzels

Want to create beautiful food and product photos that you can't wait to share?!
Discover your style, control the light, and shoot using the tool you know how to use (yes, your phone included). Learn about free resources, Live Q&As with Lori, and online courses you can take from anywhere in the world!
We respect your privacy. Unsubscribe at any time.