Browsing Category

Book and Product Reviews

Cocoa-Coffee Brownies: A Feast for the Eyes

January 20, 2011

The more I travel the more I grow to appreciate history. With that comes an interest in architecture. Now, I would never claim to know a thing about topic (that would be my brother’s specialty), but I know awe inspiring when I see it.

So what does architecture have to do with food?

Well, quite a lot, if my most recent cookbook review has anything to say about it.

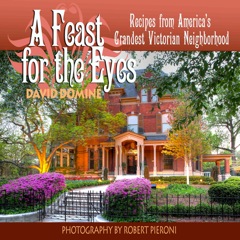
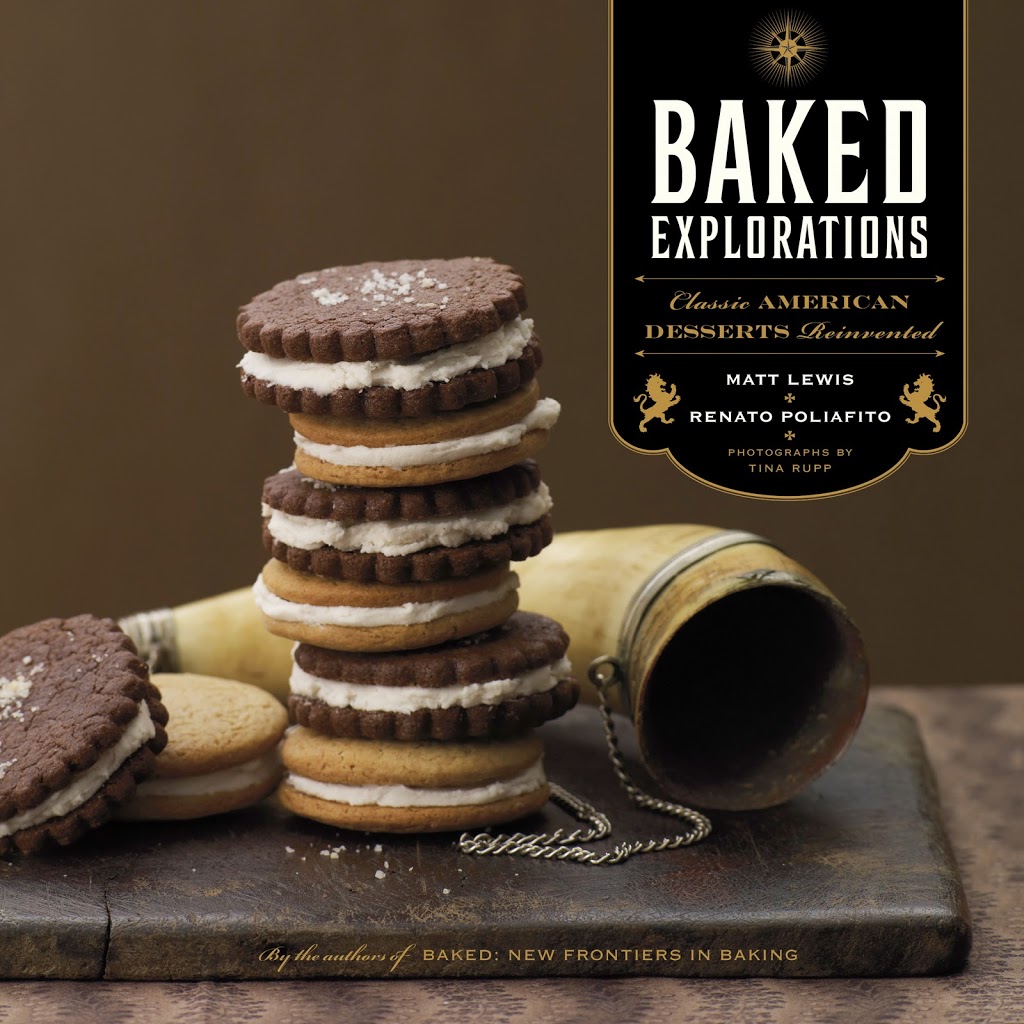
A Feast for the Eyes: Recipes from America’s Grandest Victorian Neighborhood by David Dominé is a cookbook covering topics that may first appear to be unrelated – food and architecture. It’s not until you explore the pages that you realize just how much these two things share in common.

The book is about Old Louisville. I immediately found myself relating to the introduction because it speaks of the historic areas of Louisville that often go unexplored. I have to admit that I did not realize just how beautiful and interesting Old Louisville was, or that it even existed, until a good friend moved into a historic home there several years ago.

The cookbook provides a unique look at historic architecture in an area where southern hospitality overflowed with Kentucky Derby parties and art shows. Of course, everyone knows where there is a good party, good food, and good food, a good recipe.

Each page of the book boasts beautiful photography by Robert Pieroni capturing the interiors and exteriors of gorgeous, Victorian homes. With the photographs are vivid descriptions of the home and residents. Tucked closely by is a delicious, original recipe from Gary’s Spicy Corn Chowder and Ron’s Kentucky Spoon Bread to Overnight Yeast Waffles with Carmel Maple Syrup and Bourbon Mint Punch.

What this cookbook offers that others do not is a look at Kentucky’s history through food and stunning physical structure.

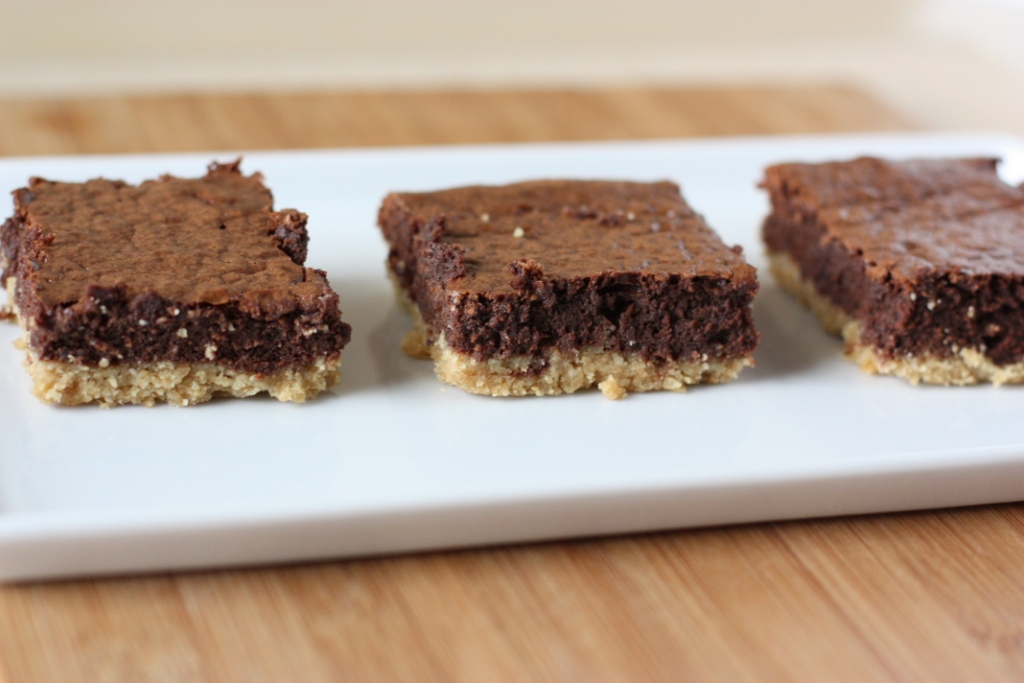
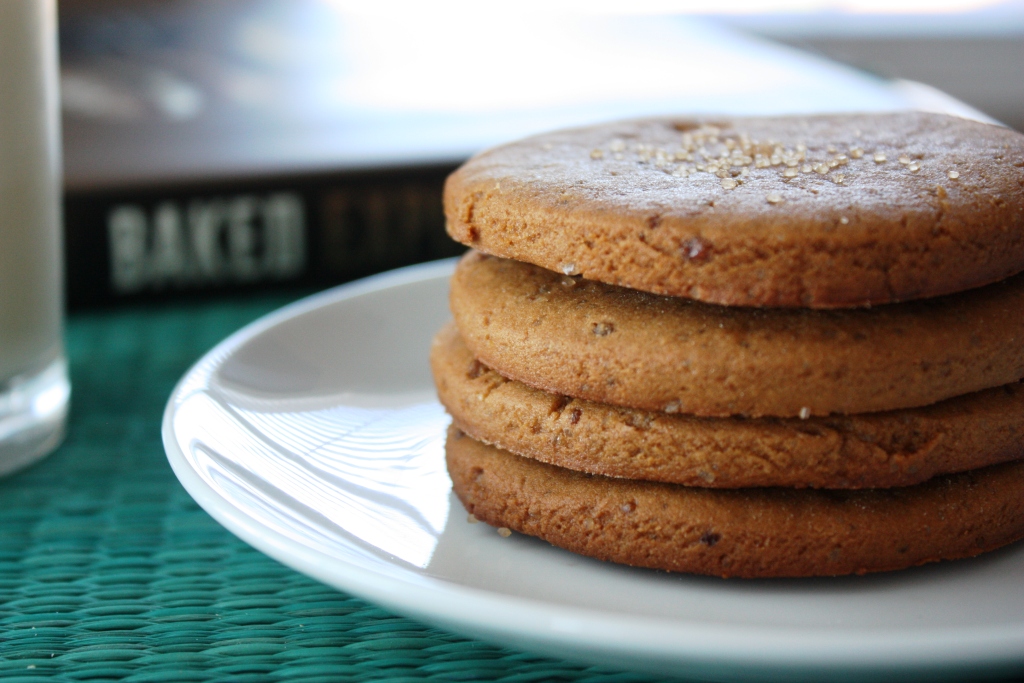
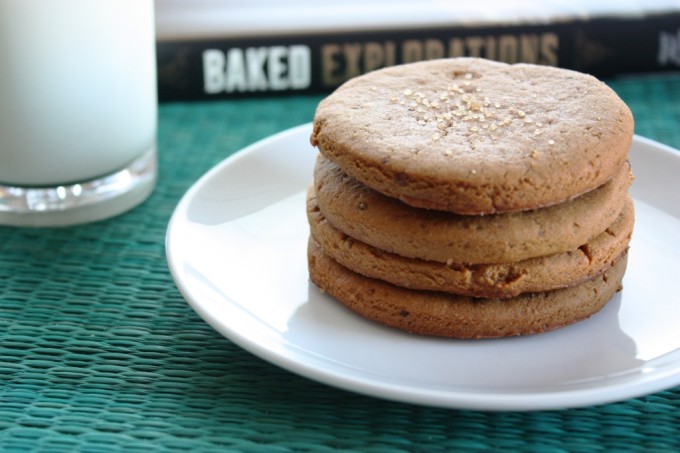
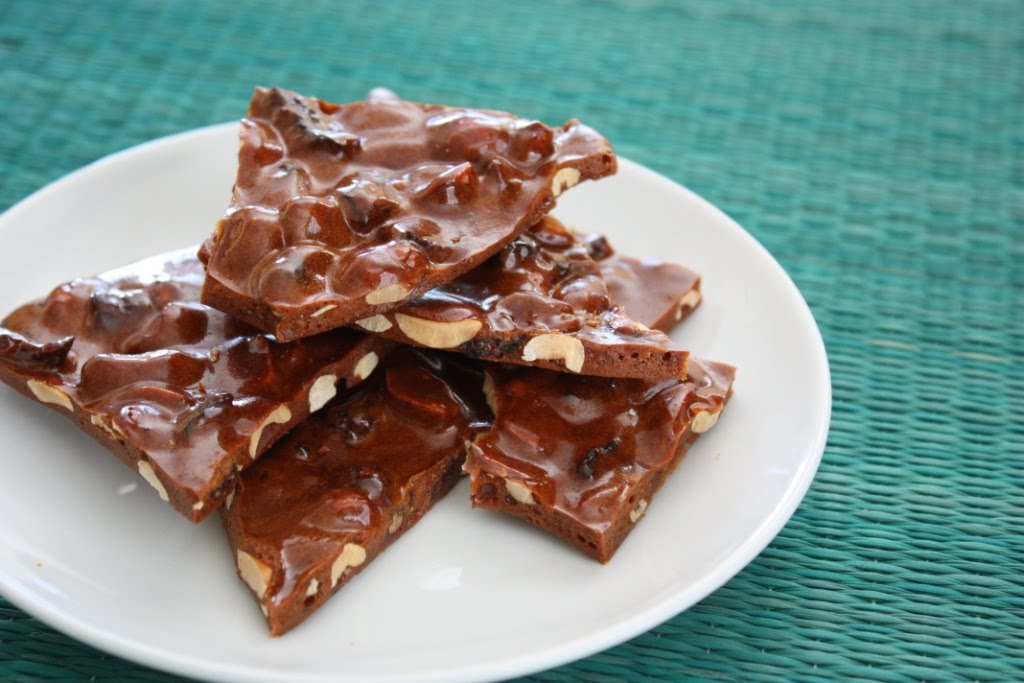
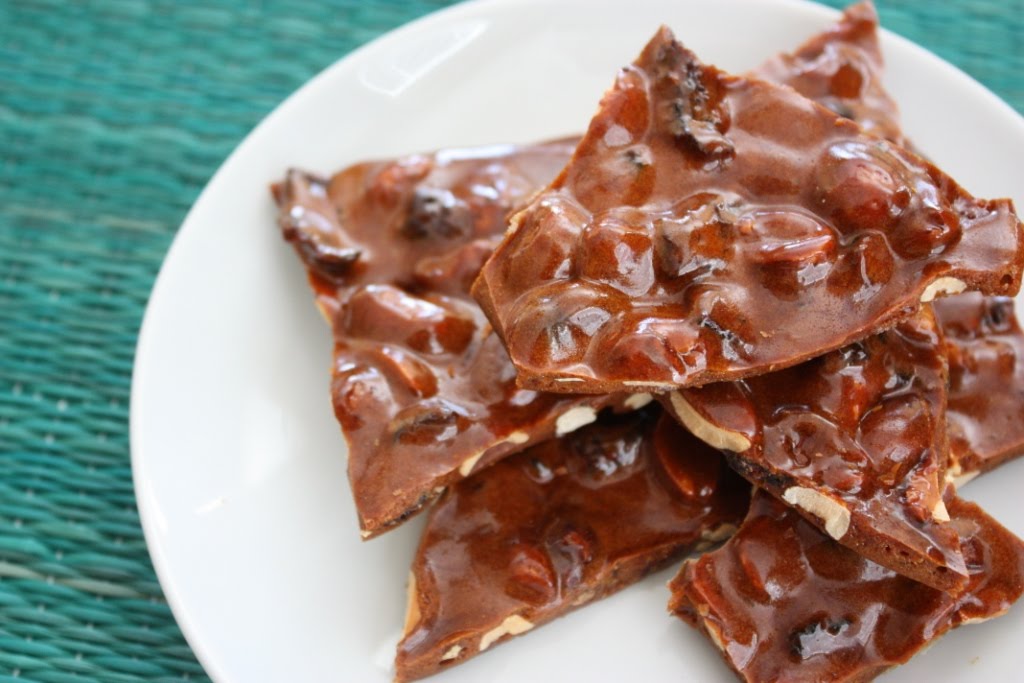
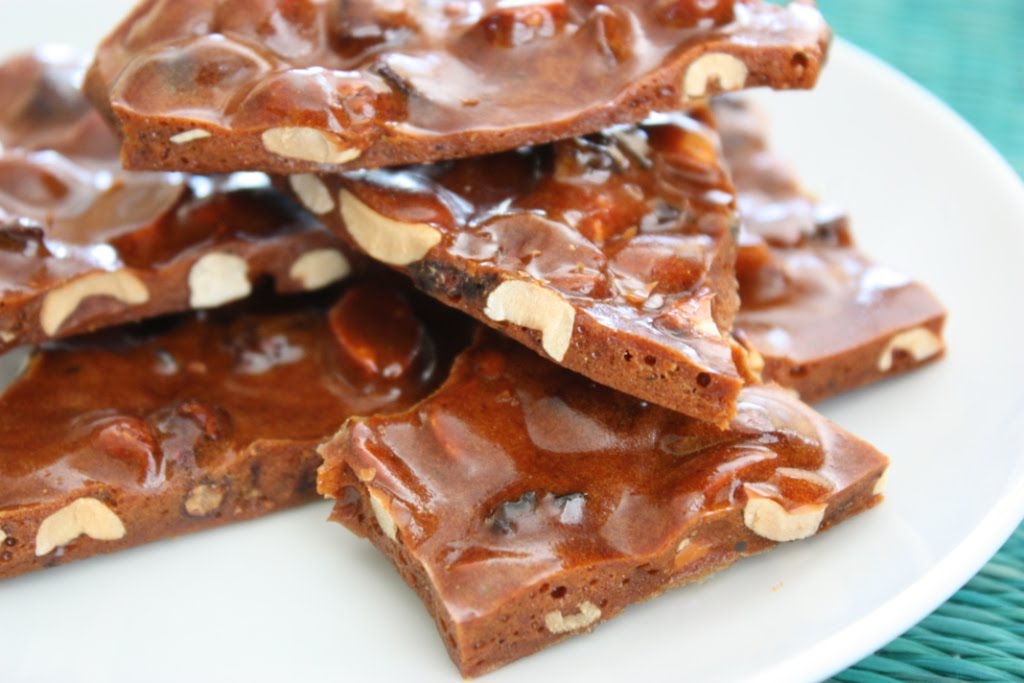
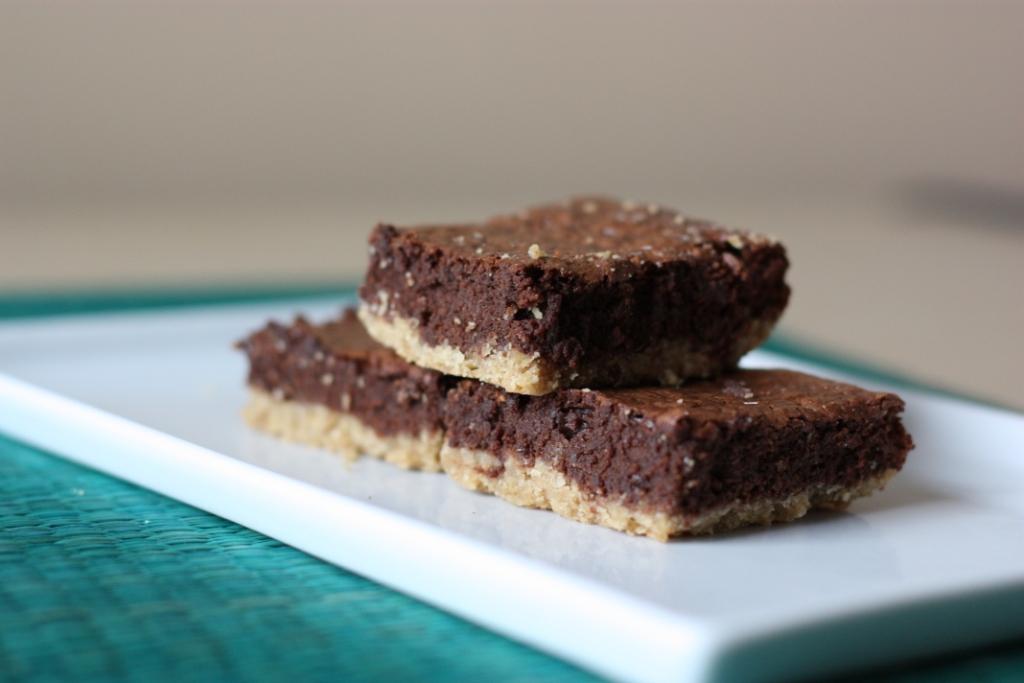
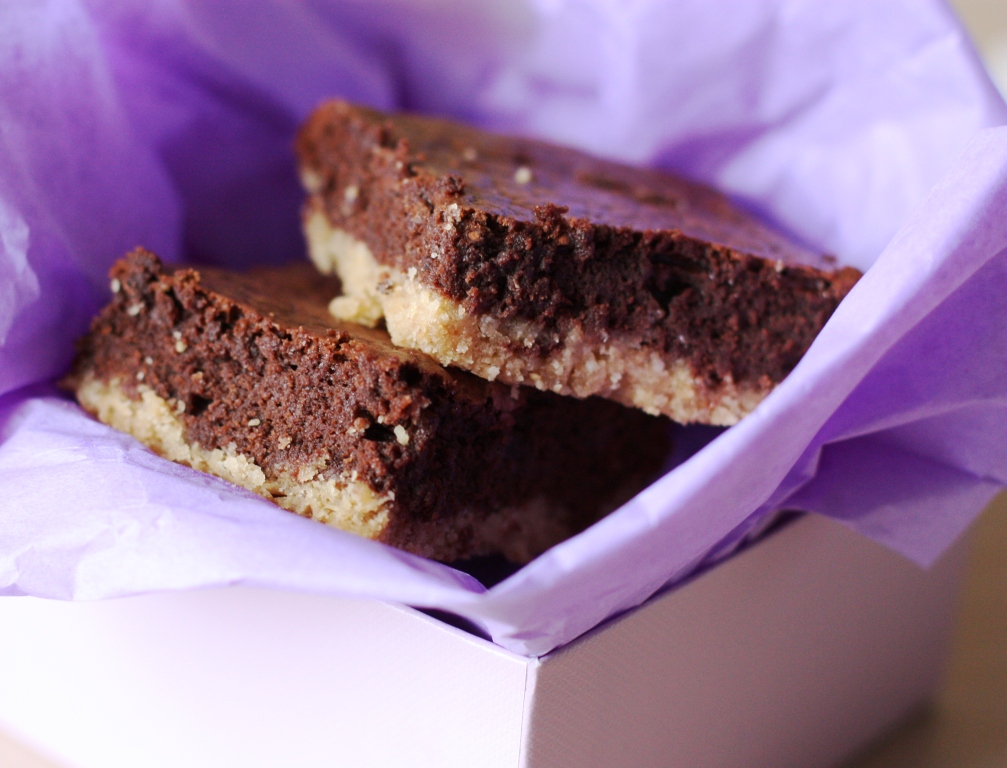
You probably aren’t surprised that I was drawn to a dessert within the cookbook. Not just any dessert, but a brownie that includes ground black pepper and an oat bran crust! A recipe contributed by John Martin. I substituted my usual white whole wheat flour and Demerara sugar and they turned out beautifully.

This is one fantastic brownie. I’d be willing to bet you haven’t had anything quite like it. Appropriately, it is as unique as the Old Louisville featured in the cookbook.

John’s Cocoa-Coffee Brownies

From A Feast for the Eyes: Recipes from America’s Grandest Victorian Neighborhood by David Dominé
Reprinted with permission from McClanahan Publishing House, Inc.

½ cup cold butter
¼ cup oat bran
¾ cup unbleached AP flour
¼ cup sugar
½ cup unsweetened cocoa
¼ cup AP flour
¼ tsp cinnamon
1/8 tsp ground black pepper
½ tsp baking powder
14 oz sweetened condensed milk
1 egg, slightly beaten
2 tbsp Kahlua
1 tsp vanilla extract
1 cup chopped pecans

In a large bowl, cut the butter into the oat bran, unbleached flour and sugar and press the mixture into a greased-and-floured 13 x 9 – inch pan. Bake at 350 degrees for 10 minutes.

In the same bowl, sift together the cocoa, flour, cinnamon, pepper and baking powder. Add the condensed milk, egg, Kahlua, vanilla extract and pecans, stirring to combine.

Spread mixture over the cookie crust and bake until the filling sets, approximately 20 minutes. Cool on a rack and cut into squares.

Disclaimer: A review copy of this book was sent to me free of charge. I was under no obligation to blog about it and received no compensation for doing so.

Baking Bread and Handmade Pottery

January 3, 2011
Baking Bread and Handmade Pottery | Fake Food Free | This recipe uses handmade pottery baker bowls for baking bread. It's the perfect amount for two to three people.

I’ve mentioned before that I lack skills for baking bread. I can come up with creative ideas and I can knead and shape dough like nobody’s business, but when it comes to pulling a light, fluffy, crusty loaf out of the oven I fail just about every time.

However, something is telling me that my luck may improve this year.

Way back in August, I went to the Woodland Art Festival. A fantastic event, by the way, if you happen to be in the area when it is hosted. There were booths full of handmade pottery and I’m quickly learning that this may be my new thing. I find pottery so interesting – both how it is made and the gorgeous end products.

Baking Bread and Handmade Pottery | Fake Food Free

About halfway through my browsing I found these bread baking bowls from Neal Pottery out of Lebanon, OH. I simply could not pass them up so I bought one for myself and one for my mom which we just gave to her for Christmas.

Baking Bread and Handmade Pottery | Fake Food Free

There are two reasons that this piece of functional art is so outstanding. It is super easy to use when making bread and it makes a small amount. Just about right for 2 to 3 people.

Mine has been sitting in the cabinet all autumn, but my mom was on the ball as soon as she received hers. She also happens to be an expert baker, if I haven’t mentioned it before, so it was no surprise that her loaf turned out great.

I wasn’t convinced that I would have success, but I thought it was about time I attempted. Since we had pasta for NYE, I decided to bake a loaf to serve with our olive oil and herb dipping sauce.

The baking bowl came with 8 recipes, some more complicated than others. I decided to take the recipe that was originally for Greek olive bread and omit the added ingredients. So basically, I wanted to make a loaf of unbleached white bread. I also added a little bit of sugar, because I have a hard time grasping bread recipes without sugar to feed the yeast and have little success with them.

Baking Bread and Handmade Pottery | Fake Food Free | This recipe uses handmade pottery baker bowls for baking bread. It's the perfect amount for two to three people.

The steps are so simple. Mix the bread dough, knead the dough by hand for a few minutes, place it back in an oiled mixing bowl, rise for an hour. Punch down, knead again for a few minutes, place in the oiled bread baking bowl, let rise to double.

Baking Bread and Handmade Pottery | Fake Food Free | This recipe uses handmade pottery baker bowls for baking bread. It's the perfect amount for two to three people.

Bake for 45 minutes and viola! It turned out perfectly! It was a really unexpected surprise given my history with bread.

Baking Bread and Handmade Pottery | Fake Food Free | This recipe uses handmade pottery baker bowls for baking bread. It's the perfect amount for two to three people.
 
If you need bread for two, this is a great option. You could easily substitute a small loaf pan or a casserole dish or large ramekin for the bread bowl. However, if you come across one of these bowls, it is a great buy. It bakes some great bread and looks darn cute sitting out in the kitchen.
 

Basic White Bread in a Bread Baking Bowl

Makes: 1 small loaf, about 2 to 3 servings

Ingredients

1/2 pkg dry yeast
1/2 cup lukewarm water
1 tsp mascavo sugar
1 1/2 cups unbleached white flour, plus extra for kneading
1 1/2 tsp olive oil, plus extra for the bowl
1/2 tsp salt

1 small bread baker pottery bowl, about 6.5 inches in diameter and 3.5 inches deep

Prep

In a small bowl combine the yeast, water and sugar. Let sit a 5 to 7 minutes, until it blooms.

In a medium bowl, stir together the flour, olive oil and salt. Add the liquid ingredients and mix until a dough is formed. Add a more water by the teaspoon if it is too dry to form into a ball.

Turn the dough out onto a floured surface and knead until smooth, about 2 or 3 minutes. From the dough into a ball. Coat the inside of the mixing bowl with olive oil. Place the dough back in the bowl and cover with a clean dish towel. Let rise until doubled in size, about 1 hour.

Place the dough on a floured surface, punch down and knead for about 2 to 3 more minutes. Roll into a ball. Lightly oil the pottery bowl and place the dough in the bowl. Cover with a dish towel and let rise until doubled in size again.

Place the bread and baking bowl in a cold oven, set the temperature to 350 degrees F and bake for about 45 minutes. Mine was perfect right when the timer went off.

I checked out the Neal Pottery website and they have started selling some of their products (bread baking bowls included) on their Etsy site. You can check them out there if you are interested, or check out their art show appearance listing to purchase one in person.
 
Baking Bread and Handmade Pottery | Fake Food Free | This recipe uses handmade pottery baker bowls for baking bread. It's the perfect amount for two to three people.
 
Thanks for reading! All images and content are the property of Fake Food Free unless otherwise stated. Please do not republish full recipes and images without written permission. What is okay? Feel free to Pin images, share links to my posts or share the photo in a round up post with the title of this recipe and a link back to the post. Confused about copyright and food blogs? Here is some helpful information on Recipe Attribution. If you want to use a photo or full recipe, just ask. I’m sure we can work something out.  

Last Minute Food-Inspired Gifts

December 21, 2010

Have you looked at the calendar yet? If not, maybe you should just avoid it all together. I’m so excited it is Christmas week (even more excited that I’m off work until the New Year), but I can’t believe it is already the 21st!
I had planned to do 10 leisurely posts throughout December highlighting some of my favorite things to serve as gift ideas. Well I’ve done 2 and there are 4 shopping days until Christmas. Yeah, the math doesn’t work out so well.

So let’s scratch that plan with the countdown and I’ll just give a few more of my favorites. If you are anything like me you still have shopping to do. Today I’m a baking machine, tomorrow, I’m headed out to brave the crowds and finish up the gift buying.

If you need a stocking stuffer, I love these little kitchen scrubber shaped like fruit from Loofah-Art. I picked one up for a friend and I think this watermelon is the cutest. The scrubbers are described as eco-friendly and bio-degradable. The company works to support impoverished farmers certified to grow loofah in developing cultures. I picked mine up at Harry and David’s.

I can’t get over how cute ornaments are these days. Hallmark has so many series out now and a couple are kitchen and food-inspired. I picked up this one for $10, an adorable tray of cupcakes, frosted and ready to serve.

The Spice Necklace: My Adventures in Caribbean Cooking, Eating, and Island Life
I read The Spice Necklace: My Adventures in Caribbean Cooking, Eating, and Island Life  by Ann Vanderhoof this summer for a book review I did for The Lost Girls World. This is such a great book about Ann’s adventures with her husband to sail the Caribbean islands with a mission to learn all she could about cooking the local foods. It is adventure novel, documentary and cookbook all in one! Check out my review if you’d like to learn more about it.
 
Eat CaribbeanWe returned from Jamaica last week. Considering how my interest in cookbooks has spiked over the past year, I had my eye out for a souvenir that would teach me more about Caribbean cooking. I found it in Eat Caribbean by Virginia Burke. There are recipes for traditional foods from around the Caribbean islands such as Jerked Chicken with Avocado and Papaya salad and Pepperpot Soup. It is also filled with recipes for spice mixes, rubs and dressings, not to mention gorgeous food and travel photography.
I also reviewed several cookbooks this year that top my list.
Canning for a New Generation – A must if you want to preserve foods that are a little more adventurous and creative than the traditional things grandmother used to make.
Good to the Grain – If you like to bake with whole and alternative grains, you need this book!
Good Meat – A guide for the home cook about small scale meat production and sustainable methods; how to find it and how to cook it. It’s an excellent resource.
Jonathan’s Bluegrass Table – The best of Kentucky cooking with a gourmet twist. The recipes are some of the best southern fare you will find.
Do you still have holiday shopping to finish up?

Baked Explorations: Ginger Rum Molasses Cookies

October 11, 2010

I remake these delicious Ginger Rum Molasses Cookies every year! Soft and chewy, they are by far my favorite spiced cookie. Perfect for the holiday season or any time you have a craving! 

When I received my copy of Baked Explorations by Matt Lewis and Renato Poliafito, I turned directly to the Cookies and Bars section.

  Baked Explorations: Ginger Rum Molasses Cookies | Fake Food Free


I’m not sure why because the book is filled with every other treat imaginable – pies, tarts, bundt cakes, layer cakes, cupcakes, waffles, donuts and scones. The subtitle of the book is, Classic American Desserts Reinvented, and these experienced authors and bakers have left no stone unturned.

Lewis and Poliafito are authors of another, very popular, cookbook, Baked, and own a Brooklyn-based bakery of the same name. It was love at first word as I read the introduction when Lewis explains how he no longer plans vacations like a normal person. He writes:

“In addition to choosing the mountain, the condo, and the best month to ski, I might also insist that we spend a day off-slope in search of a much-written-up, much-blogged-about creamy bourbon milkshake.”

The Cookbook, Baked Explorations | Fake Food Free

One, he mentioned food and travel. Two, he mentioned bourbon.

I’ll sum up my review of this cookbook pretty quickly – if you love to bake or want to love it, you need this cookbook. The recipes will spark some memories of old time favorites, but you might also be introduced to delicious cakes and pies you were previously unfamiliar with.

Each recipe begins with an interesting story. The instructions are straightforward and well explained. The only thing I might fault is that the ingredient list is difficult to read due to small print and italics, but it emits a bit of style that goes so well with the book that I’m willing to overlook it in my recommendation.

The Red Velvet Whoopie Pies, Salt-n-Pepper Sandwich Cookies, Carrot Coconut Scones and the Caramel Apple Cake are all on my to-bake list. For this review, however, given my current schedule I chose something a little ambitious, but no less delicious.

The name given to these cookies in the book is Joe Froggers and a wonderful little story accompanies this name. However, according to the Baked Note (little tips throughout the book) the original Joe Frogger was made with all vegetable shortening. The authors switched this to half butter, half shortening and warned that an all butter cookie just wouldn’t be a Joe Frogger.

 
Baked Explorations: Ginger Rum Molasses Cookies

So unfortunately, I guess I can’t call mine Joe Froggers because I don’t use vegetable shortening in my baking. I can, however, give it the second name given in the book – Ginger Rum Molasses Cookies.

If you are looking for your next gingerbread man, I’ve found him for you.

This cookie bakes up into a chewy, soft, spicy cookie. As you have probably already guessed, yes, it is going on the holiday baking list! I love this cookie!

I used my standard white whole wheat flour, dememara and mascavo sugar, but I am printing the original recipe here for you to do as you wish. The dough needs to be refrigerated so plan ahead when making these.

This cookbook is one for your baking bookshelf. If you can’t get it in time for your holiday baking, I’d highly suggest putting the book itself on your gift wish list!

Ginger Rum Molasses Cookies

Reprinted with permission from the publisher.

Makes: 36 to 48 cookies (depending on the size of your cookie cutter)

Ingredients

4 cups all-purpose flour
1 ½ teaspoons salt
1 ½ teaspoons ground ginger
½ teaspoon freshly grated nutmeg
½ teaspoon ground cloves
1 teaspoon baking soda
4 tablespoons (1/2 stick) unsalted butter
¼ cup vegetable shortening
¾ cup firmly packed dark brown sugar
¼ cup granulated sugar
1 ¼ cups molasses
3 tablespoons dark rum
Coarse sugar for décor

Prep

Whisk the flour, salt, ginger, nutmeg, cloves, and baking soda together. Set aside.

In the bowl of a standing mixer fitted with the paddle attachment, beat the butter and shortening together until there are no visible lumps. Add both sugars and beat just until incorporated. Scrape down the bowl, add the molasses, and beat until the mixture is uniform in color.

Prepare 1/3 cup very hot water. Add the flour mixture to the butter mixture, alternating with the hot water; in three parts, beginning and ending with the flour mixture. Scrape down the bowl, add the rum, and mix for 15 seconds. Cover the bowl and chill for at least 3 hours or overnight.

Preheat the oven to 375 degrees F. Line two baking sheets with parchment paper. Dust a work surface with a sprinkling of flour. Roll the dough into a ¼ – inch thick round. Cut out the cookies with a 2- to 3-inch round cookie cutter, and transfer them to the prepared baking sheets. Sprinkle a tiny bit of sanding sugar onto each cookie.

Bake the cookies for 8 to 12 minutes, until they are set. The author notes – 8 minutes for a chewy cookie, 12 minutes for a crispier cookie. Place the baking sheet on a wire rack to cool for 5 minutes. Use a spatula to transfer the cookies to the rack to cool completely. Store in an airtight container for up to 3 days.


Baked Explorations: Ginger Rum Molasses Cookies

Disclaimer: This book was sent to me for review purposes. I was not required to write about it nor did I receive any compensation for doing so.

Thanks for reading! All images and content are the property of Fake Food Free unless otherwise stated. Please do not republish full recipes and images without written permission. What is okay? Feel free to Pin images, share links to my posts or share the photo in a round up post with the title of this recipe and a link back to the post. Confused about copyright and food blogs? Here is some helpful information on Recipe Attribution. If you want to use a photo or full recipe, just ask. I’m sure we can work something out.

Good Meat: Cookbook Review and Pig Candy!

September 8, 2010

One word that seems to be synonymous with meat is slab. When I think of a steak, I think of a slab of meat. Similarly, when I received the cookbook – Good Meat: The Complete Guide to Sourcing and Cooking Sustainable Meat – I had the exact same thought.

This is one slab of a cookbook! A thick, hardback of 400 pages that is filled with valuable information, delicious recipes and stunning photography from cover to cover.

Anyone else excited by this book simply by reading the title? I was, and the title pretty much says it all.

Inside you will find everything you wanted to know about grass-fed beef and pastured meat and eggs – what it is, definitions of common terms used when discussing it, how to cook it, and the tools you’ll need to do so. It is described not only as a cookbook, but as a guide and that is spot on. This book is as much a necessary reference for meat in general as it is a collection of recipes.

We don’t eat an overabundance of meat, in fact, I would say our diet is at least 70% vegetarian, but we do eat meat and enjoy it. With the exception of the occasional order while traveling, when we do include meat in our meals it is from local farms utilizing sustainable practices and those which treat the animals as humanely as possible. Fortunately we have a lot of options that fit these criteria here in Kentucky.

Despite my frequency of preparing meat, I always struggle with recipe ideas. It’s just never been my strong point. Well, that could all change after browsing this book. The author, Deborah Krasner, a James Beard Award winning cookbook writer, covers beef, lamb, pork, rabbit, poultry and eggs, and even provides a recipe section for side dishes.

A taste of the recipes include:

Beef and Lamb Meat Loaf
Baked Cured Ham Steak with Honey, Onion Confit, and Bourbon
Roast Chicken with Apples Sausage, and Cider
Sicilian Rabbit Agrodolce
And yes, if you are the adventurous type, there are recipes for sweetbreads, tongue and gizzards.

What I love about this book:

  • The book opens with multiple, homemade spice rubs that are used in many of the recipes to follow.  
  • The recipes are clearly written with straight forward instructions, one recipe per page. 
  • The recipes incorporate a variety of cultural cuisines including French, Indian, North African, Chinese and Cuban. 
  • There isn’t a photo with each recipe, but the photography included is outstanding from farm scenery to completed dishes. There are also pictorial descriptions of meat cuts for each meat type.  
  • The author touches on ethical topics for those of us who care deeply about animals, but still feel that some are meant to be a source of food. One example is her short section on the topic of naming animals.

What I’m not so crazy about:

I really like to make sure I look at cookbooks with a critical eye and mention the good with the bad. I have to be honest, though; there is nothing I don’t like about this cookbook.

If I had to stretch it, maybe I would go with the fact that it is really difficult for me to see a cute calf on one page and a slab of beef on another, but that doesn’t make the photography or the book any less spectacular. The book is also very large and difficult to keep open with the recipe in view while cooking, but I find that with multiple cookbooks in my collection.

Did I mention that there are dessert recipes in this meat cookbook? I got to test out the Pig Candy recipe and I absolutely love that name. Pig Candy is a peanut brittle-type candy that has the spiciness of crushed red pepper and the saltiness of pastured bacon.

I really wanted to make this recipe with brown rice syrup because I’ve heard that it is a good substitute for corn syrup. However, I couldn’t find it at the markets I went to so I stuck with corn syrup that did not also have HFCS in it. I’m not sure how much of an improvement that is, but I used what I had to work with. In addition, I used Demerara sugar instead of white sugar.

The result? Well, I think I burnt it a bit, and the Demerara did make it much darker. I am a true amateur candy maker and I need a lot more practice so I am going to chalk it up to that. However, despite the fact that I slightly burnt it and it isn’t perfect, we still can’t keep our hands out of it around here.

This recipe is brilliant, in my opinion. Add another one to your holiday baking list!

Pig Candy
Reprinted with permission from Abram Books

Peanut brittle made with crisp pastured bacon and a little red pepper—what could be bad about that? Try this with a glass of Bourbon or cocktails, or serve it at a Super Bowl party—either way, it’s memorable.

MAKES ABOUT 1 POUND BRITTLE

2 tablespoons unsalted butter, softened, plus more for greasing the baking sheet and spatula
1 cup sugar
1⁄2 cup light corn syrup
1⁄2 teaspoon sea salt or smoked salt flakes
1⁄4 cup water
1 cup roasted unsalted peanuts
1⁄4 teaspoon crushed red pepper flakes, or more to taste
1⁄2 cup crumbled crisp-cooked pastured pork bacon (about 6 slices)
1 teaspoon baking soda

Butter a silicone baking liner or cookie sheet, as well as an offset spatula or icing knife, and set aside.

Using a 1-quart saucepan, heat the sugar, corn syrup, salt, and water over medium heat and cook until the sugar dissolves, stirring with a silicone spatula. Stir in the nuts, red pepper, and bacon pieces.

Cook the mixture until it registers 300 to 310 degrees on a candy thermometer—it will form a long thread when you pull the spatula out. Depending on the pan and the efficiency of the burner, this can take up to 20 minutes.

Remove the pan from the heat and carefully but thoroughly stir in the 2 tablespoons butter and the baking soda (take care—the mixture will foam). Immediately pour the mixture onto the prepared pan and, using the offset spatula or an icing knife, spread it into an even layer as thinly as possible. When the brittle is cool enough to handle (but still warm and pliant), use your hands (gloves can help) to stretch and pull it even thinner.

When the brittle is cool, break it into pieces and serve, or store in an airtight tin.

Disclaimer: This cookbook was sent to me free of charge. I was under no obligation to review it and received no compensation for doing so.

The Thinkfood Cookbook Is Here!

August 27, 2010

Exciting news! The hard copy of the Posit Science Thinkfood Cookbook arrived in my mailbox yesterday.

I am incredibly honored to be among the folks in this book. Some of my favorite bloggers and photographers are featured, and it really hit me as I was thumbing through and saw all the familiar faces. Such a wonderful collaboration on brain food!

I have one hardcopy of the cookbook to giveaway to one lucky reader so that you can enjoy it as well!

Just leave me a comment telling me your favorite food that is associated with boosting brain health and your favorite way to eat it. If you have a blog and recipe, leave a link, because I’d love to see it!

If you need some ideas for brain-healthy foods, here are few featured in the book:

almonds, artichokes, blueberries, butternut squash, chicken, dark chocolate, flaxseed, garlic, oats, sage, spinach, kale, tomatoes and turmeric

There are lots more, but this should give you a good start.

I’ll pick a winner at random next Wednesday, September 1, 2010. Open to everyone. I’ll ship international if you win. You just have to give me a valid address to receive it. Remember to comment answering both parts of my question to qualify!

Canning for a New Generation: A Cookbook Review

August 18, 2010
Call me easy to please, but there are few things more exciting than receiving an unexpected package in the mail. When that unexpected package turns out to be not only a cookbook, but a cookbook covering a topic and technique you are currently trying to master; well, the excitement goes beyond words.
I know you think I’m exaggerating, but I have no doubt that my neighbors heard me shout, “Awesome!” when I opened an envelope at the mailbox a couple weeks ago to discover a copy of Canning for a New Generation: Bold Fresh Flavors for the Modern Pantry by Liana Krissoff.

This summer is the first that I’ve finally been able to overcome the fear instilled in me by my food safety nutrition courses in college. I’m not kidding. The reason I have never canned is because of how strong the warnings were in those classes about botulism and all sorts of unpleasant things.

This year, however, things changed. One, we have our own garden, and two, I’ve been witnessing this canning craze going on in the food world accompanied by wonderful recipes and cookbooks.

My first sign that I’d love this particular cookbook came in the introduction as I read through helpful info that was down to earth and completely…well, me. For example, in an attempt to explain the basis for the book and how it relates to the reader, Krissoff writes:

“How an early-morning spoonful of perfect blueberry marmalade, made by a good friend you might know only via email and your perspective blogs, can help you make it through a busy day of office work.”

See? Perfect for me. Perfect for us. I’ve lost count of these types of relationships I’ve stumbled upon in the past couple years.

Before I go on and on with detailed stories about why I am a huge fan of this book (because I certainly could), let me break down the pros and cons.

Things I love about it:

  • There is a detailed, yet easy-to-read intro on the basics of canning including the purpose of different ingredients and equipment.  
  • The recipes are divided by season and fruit or vegetable.
  • There are freezing tips throughout the book for some of the same ingredients used in the canning recipes.  
  • The diversity in recipes is astounding, 200 total. There is everything from traditional U.S. jams, jellies and pickles to Indonesian and Indian vegetables and relishes.  
  • In addition to weight measurements for the ingredients in some recipes, numbers are listed too which is helpful and the ones I followed were spot on.  
  • While the author tells she uses white sugar, she does recommend a resource for using alternative sweeteners and aims to reduce the use of commercial ingredients. For example, she uses green apples for pectin in her canning. 
  • All the recipes are for water-bath method which is the only method I’m interested in at the moment. A pressure cooker is a whole other canning animal for me. 
  • After you can your fruits and veggies, there are plenty of recipes provided for using up your stock of homemade canned goods. Enchiladas Verdes and Toffee Topped Vanilla Peaches, to name a couple.

Things I’m not so crazy about: 
  • Some of the instructions are in long paragraphs so you really have to sit down and read carefully before getting started. This makes it really easy to lose your place when you are going back and forth between the recipe and your pot.
My first success using the book came with the Whole Jalapeños with Honey and Allspice which is the recipe I have to share with you. First of all, I like the fact that there is so little chopping with this recipe. The author explains that these are barely hot, but I left the ribs and seeds intact so there is no mistaking the heat in mine.

Next time I may remove those parts, but otherwise this recipe is a keeper for me. The spiced honey adds an element that is surprisingly tasty with the hot of the jalapeño. It is like sweet pickle meets chile pepper. I served them up with the Vegetable Fried Rice I made recently and they were delicious!

My next success was the Charred Tomato and Chile Salsa. At first I wasn’t sure how I would like the charred flavor of the veggies, but I opened a jar today and it is fantastic! There is a slight sweetness that hits you first and then the spicy jalapenos come in with a punch. This salsa is gift worthy for sure.

I have so much left to try in this book that I’ll be using it for seasons to come. My next project includes the Spiced Apple Butter, Hot Chile Jelly and the Minted Cranberry Relish with Walnuts!

Whole Jalapeños with Honey and Allspice
Reprinted with permission from Abrams Books

Makes about 5 pint jars

2 ½ pounds jalapeño chiles
6 cups cider vinegar (5% acidity)
2 tablespoons pure kosher salt
2 tablespoons honey
5 cloves garlic
5 small bay leaves
1 teaspoon whole allspice
½ teaspoon black peppercorns

Slit the chiles almost in half lengthwise from the bottom and set aside. (I did go ahead and remove the stems on mine and cut them fully in half.)

Prepare for water-bath canning: Wash the jars and keep them hot in the canning pot, and put the flat lids in a heatproof bowl.

In a non-reactive saucepan, combine the vinegar, 2 cups water, the salt, and honey. Bring just to a boil, stirring to dissolve the salt and honey.

Ladle the boiling water from the canning pot into the bowl with the lids. Using a jar lifter, remove the hot jars from the canning pot, carefully pouring the water from each one back into the pot, and place them upright on a folded towel. Drain the water off the jar lids.

Working quickly, pack the chiles as tightly as possible into the hot jars (flattening them first with your palm if necessary), along with the garlic, bay leaves, and spices, leaving 1 inch head space at the top. Ladle the hot vinegar mixture into the jars, leaving ½ inch headspace. Use a chopstick to remove air bubbles around the inside of each jar. Use a damp paper towel to wipe the rims of the jars, then put a flat lid and ring on each jar, adjusting the ring so that it’s just finger-tight. Return the jars to the water in the canning pot, making sure the water covers the jars by at least 1 inch. Bring to a boil, and boil for 10 minutes to process. Remove the jars to a folded towel and do not disturb for 12 hours. After 1 hour, check that the lids have sealed by pressing down on the center of each; if it can be pushed down, it hasn’t sealed, and the jar should be refrigerated immediately. Label the sealed jars and store.

Disclaimer: This cookbook was sent to me free of charge. I was under no obligation to review it and received no compensation for doing so.

Chocolate Cashew Shortbread

August 17, 2010

It’s starting.

That point in the year where I see a cookie recipe and I think – oh, now that would be nice on my holiday cookie tray. I know it seems a bit early, but it starts for me about this time every year.

I had cookies on my mind this week because I still have some of the fabulous raw cashews that Oh Nuts sent to me a few weeks ago. While I haven’t tired of eating them as a snack or in stir-fry, I’ve felt the need to get a little more creative.

As a result I turned to my favorite shortbread recipe. I doubled the batch to make a few more for freezing, added cocoa because I’ve been hungry for chocolate, and then incorporated the cashews.

What I like most about these cookies is that they turn out pretty darn cute with very little effort. Few ingredients, easy to bake, and a rich, buttery chocolate flavor with a nutty crunch. Hello, holiday baking list!

Chocolate Cashew Shortbread

1 cup unsalted butter, softened
½ demerara sugar
2 cup white whole wheat flour
2 tbsp cocoa powder
1 tsp vanilla
½ cup raw cashews, finely chopped
24 to 30 raw cashew halves (optional)

In a mixer, combine the butter and sugar. Let it mix on medium and then high for about 3 minutes. The demerara takes a while to get incorporated. Mix in the flour, cocoa powder and vanilla.

On a piece of plastic wrap, spread out the chopped cashews. Remove the cookie dough from the mixing bowl and form it into a log with your hands. The length is up to you and depends on how big you want your cookies. Mine ended up being about 18 inches long, give or take a bit.

Place the cookie dough log on the plastic wrap and gently roll in the cashews until it is fully coated in nuts. Wrap the plastic wrap around the cookie dough and refrigerate for at least 30 minutes.

Preheat the oven to 350 degrees F. Remove the cookie dough from the fridge and use a serrated knife to cut the cookies about a ½ inch in thickness. Place on an ungreased cookie sheet, or on a baking mat on a cookie sheet. Press a cashew half into the top of each cookie if using.

Bake for 12 minutes or just until cookies are firm. The edges and cashews will brown only slightly, if at all. Allow to rest for 3 or 4 minutes and carefully move to a cooling rack. Makes about 24 to 30 cookies.

Disclaimer: I’m sure you are just dying to read one, so you can check out the original when I used Oh Nuts in a recipe a few weeks ago. Oh, alright, I won’t make you surf the web. Oh Nuts were sent to me free of charge for review, no obligation, no compensation.

United Cakes of America – Cookbook Review and Cupcakes!

August 10, 2010

Sometimes practice makes perfect and other times practice makes presentable. The latter is how I feel about my cake baking and decorating skills.

If I haven’t mentioned it before, my mom has had a cake business for most of my life. So I was surrounded by beautifully decorated, great tasting birthday and wedding cakes for as long as I can remember.

Somehow the skill didn’t rub off on me. I’m not sure if it is lack of patience or creativity, but my cakes never turn out the way I want them to. However, it doesn’t keep me from trying, nor does it keep me from loving cakes and cake recipes.

I was excited to receive a copy of United Cakes of America by Warren Brown to review. I really enjoyed his show and story on the Food Network and the theme of this cookbook couldn’t be a better fit for me. It highlights the traditional cake, dessert or pastry from each state around the U.S. There are also a few extra recipes thrown in that utilize specific ingredients from select areas.
United Cakes of America: Recipes Celebrating Every State

It is full of recipes, some of which you may know such as Boston Cream Pie and Carrot Cake from Kansas, and some which may be new such as Chocolate Sauerkraut Cake from Michigan and the Tomato Soup Cake from New Jersey. Personally, I can’t wait to try the Kentucky Jam Cake and the Avocado Cupcakes which feature a California ingredient.

I read a less than stellar review a couple months ago which I can’t locate at the moment, so I wasn’t quite sure what to expect. The major complaint of this post was the freedom the author took with selecting recipes and putting on his own twists.

I really had no problem with Key Lime Pie, Whoopie Pies and Pumpkin Pancakes being in a cake cookbook. I say the more recipes the better. Overall, I’m glad to have this book in my collection. I think I will be referring to every time I need to make a special dessert or get creative with a birthday cake.

A few things I enjoy about this book:

  • The author highlights muscovado sugar and raw sugar for baking in the introductory chapters, two of my favorite baking ingredients.
  • The variety of recipes means I’ll be using it for a lot more than just cakes.
  • I found the steps for each recipe straightforward and easy to follow.
  • I really like all the tips throughout the book, from frosting tips with photos to variations for buttercream.
  • The little history lessons spread throughout the text are especially interesting if you are into culinary history as I am. 

Things I’m not so crazy about:

  •  With the recipe I made below, I had some major differences in yield. The recipe states that I should have gotten 24 cupcakes, but I got 12 and they barely rose to the top of the cup. I did have to leave out one ingredient, but it doesn’t seem like that would equal 12 cupcakes!
  • The recipe text has a bit of creativity. Each ingredient listed is shaded with a different color, incorporating a red, white and blue theme. I found this a bit difficult to read when I was glancing across the counter top at the book.  

The recipe I got to try was the Connecticut Nutmeg Spice Cupcakes with Old-Fashioned Milk Buttercream. The one ingredient I had to leave out was the potato starch. The author says that it lightens the texture of cake and adds a slight flavor, but I was unable to find it at supermarkets here. I didn’t look everywhere, but I did check two with no luck.

The cake itself has a wonderful flavor. The nutmeg and rum (I used a spiced rum) blended so well together. I’ll likely make it again, maybe around the holidays.

As for the frosting, I was so excited to try a new variety. This one whipped up light and frothy and has a thin consistency. It actually reminds me of the fillings my mom used to make when recreating Hostess cakes. It doesn’t store very well, but if you are looking for a light buttercream, this may be a good choice. Next time I will likely use it for a filling rather than a frosting.

My next challenge will be substituting my favorite minimally refined sugars and whole grain flours to see how it turns out!

Connecticut Nutmeg Spice Cupcakes

Reprinted with permission
Yield: One 9-inch layer cake or 24 cupcakes (I got 12)

Dry Ingredients:

8 ounces (1 cup) superfine granulated sugar
5 ounces (1 cup) all-purpose flour
1 tablespoon potato starch
1/8 teaspoon kosher salt
½ teaspoon nutmeg, freshly grated
Pinch of allspice
Pinch of salt
1/8 teaspoon baking soda

Wet Ingredients:

3 ounces (6 tablespoons) butter, melted
¼ cup half-and-half
1 tablespoon rum
½ teaspoon vanilla extract
2 whole eggs
1 egg yolk

Preheat the oven to 325 degrees F and place the rack in the middle position. Lightly coat a cupcake tray with nonstick oil-and-starch spray and line 10 of the cups with paper liners.

Measure and combine all the dry ingredients in a deep bowl. Whisk lightly for about 15 seconds to blend.

Combine all the wet ingredients in a container with a tight-fitting lid and shake well for 15 seconds.

Lightly whisk the wet ingredients into the dry ingredients. This should take about 15 seconds.

Scoop or pour 2 ounces of the batter into the paper-lined cups. (Using a food scooper or ladle works best.)

Bake for 20 to 25 minutes, or until the tops of the cupcakes are golden brown and a wooden skewer inserted in the center of one comes out clean or with just a few crumbs.

Cool the cupcakes for 5 minutes before removing them from the tray. When they are room temperature, frost or decorate with Old-Fashioned Milk Buttercream.

Old-Fashioned Milk Buttercream

 Reprinted with permission

Yield: Enough for one 9-inch layer cake or 24-cupcakes

1 cup milk
2 ounces (1/4 cup) all-purpose flour
8 ounces (2 sticks) unsalted butter
8 ounces (1 cup) superfine granulated sugar
Pinch of salt
2 teaspoons vanilla extract

Quickly whisk together 4 tablespoons of the milk with the flour. This slurry will be somewhat thick, so whisk thoroughly to make it smooth. Press out any lumps with a flexible spatula, if necessary.

Whisk in the rest of the milk and transfer the mixture to a 2-quart heavy-bottom saucepan. Bring to a simmer for about 30 seconds over medium heat, whisking the whole time.

Remove the pan from the stove and place plastic wrap directly against the milk’s surface. (This is the best method to prevent a skin from forming.) Cool to room temperature.

Combine the butter, sugar, salt and vanilla in the bowl of a standing mixer fitted with the paddle attachment and mix at medium to high speed for 5 minutes.

Pour the cooled milk-and-flour mixture into the bowl and beat for another 5 minutes, or longer, as needed to achieve a spreadable consistency.

Update on the yield:  I checked out the recipe again and it looks like the yield mistake was in the press release. The press release says the recipe makes 24 cupcakes which is the recipe I followed and reprinted. However, when checking out the recipe in the book, it says it yields 10 cupcakes. That is much closer to what I got.
Disclaimer: This cookbook was sent to me free of charge. I was under no obligation to review it and received no compensation for doing so.

Thinkfood Featured Recipe

August 4, 2010

Let’s all take five minutes and relax. Yes, that’s it. Sit back, close your eyes, and breathe deeply. Wonderful.

I just wanted to share this moment with you. The way I’m feeling right now.

Why? Well, because as of about 2:00 pm yesterday. I’m finished with the book!!! I have submitted the final manuscript for the Everything Guide® to Food Remedies! Yes, there will likely be revision to come, but nothing takes away from this, I’m-finally-done feeling. I’ve been walking around the house just sighing with relief.

I don’t know the publication date yet, but will share it with you when I do. I’ll also have a couple copies to give away to my readers.

With these past two weeks behind me, I feel like I’m returning to normal life as I know it. More writing, of course, but blog reading, and without a doubt, cooking and baking! I started the latter last night.

To top off this wonderful week, the featured recipe for the Thinkfood Cookbook today is by yours truly! You can check out the site for my Curried Wheat Berry & Tomato Salad.

If you aren’t familiar with the Thinkfood project, I posted about it on the blog a few months ago. It is a cookbook of recipes utilizing ingredients that boost brain health, a collaborative effort by Posit Science and 50 fabulous food bloggers that I’m honored to be a part of.

You can check out the site and sign up for a weekly recipe announcement. There will be hard copies of the book as well which you can preorder. Those should be ready soon and when they are, I’ll be giving one away here on the blog.

That’s it for now, but I’ll be back tomorrow with a report from our trip to the orchard and what became of all the peaches and blueberries we picked there!

Want to create beautiful food and product photos that you can't wait to share?!
Discover your style, control the light, and shoot using the tool you know how to use (yes, your phone included). Learn about free resources, Live Q&As with Lori, and online courses you can take from anywhere in the world!
We respect your privacy. Unsubscribe at any time.