Browsing Category

California

Savory Profiteroles with Asparagus and Goat Cheese Recipe

April 16, 2014

Back in early March we vacationed in Antigua. It was our second trip there and I highly recommend it — gorgeous island, friendly people and outstanding food and drink. I did a post on the food highlights from our last trip, but this time I brought back some ideas to recreate in my own kitchen.

We’re no strangers to digging into the local foods, but often the resorts where we stay come up with some delicious things as well. I spotted these profiteroles on the menu our first night and I was bound and determined to try them before the trip was over.

Not only did I want to try them, I knew as soon as I spotted them (and I’m pretty sure I said it out loud to my husband) – that’s what I’m making with the goat cheese!

Right before we left for the trip, I received a package overflowing with products from Redwood Hill Farm in Sebastopol, Calif. A Certified Humane goat dairy, Redwood Hill Farm is a small family farm that has been producing goat milk products since 1968.

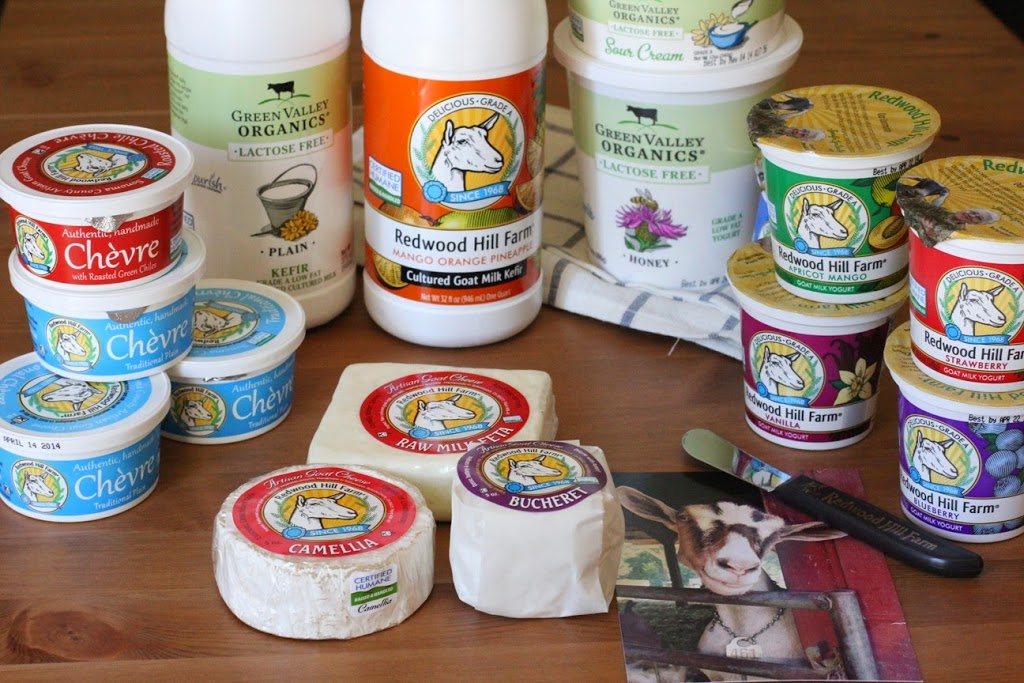
My generous package contained — Chèvre (including roasted chile chèvre!), Bucheret, Camellia (camembert), raw milk feta, goat milk yogurt in flavors like apricot mango and mango orange pineapple kefir. I also received some lactose-free products from their sister company, Green Valley Organics – yogurt, kefir and sour cream.

The kefirs have made a delicious addition to breakfast and those aged goat cheeses have been a true treat for the cheese plates my husband and I like to snack on over the weekend. But let’s talk about this chèvre.

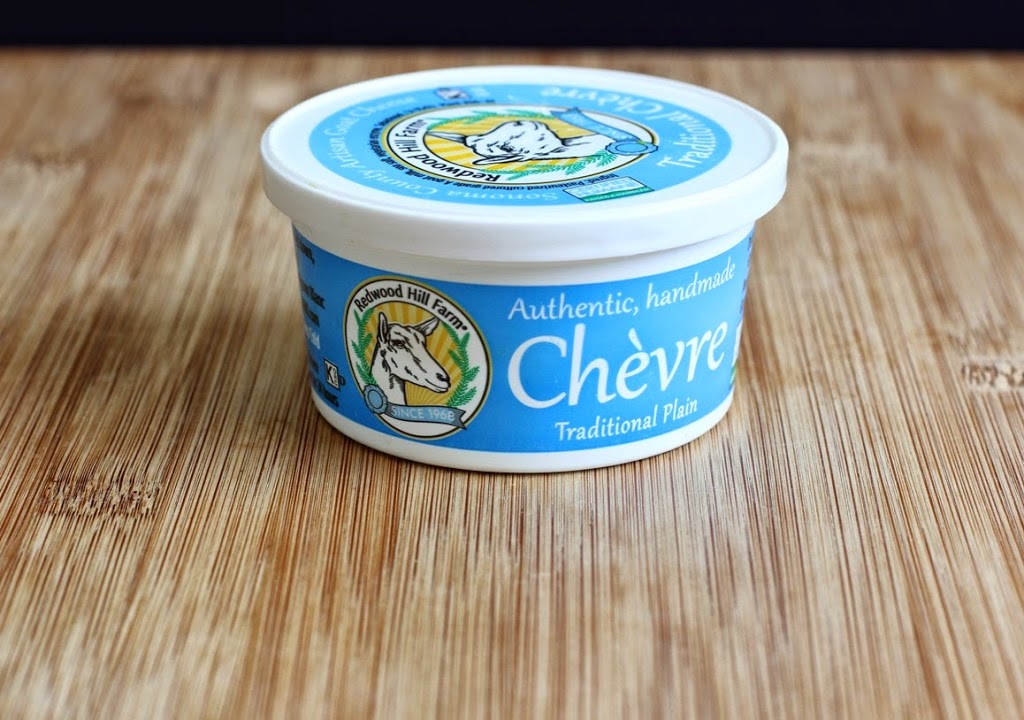
First of all, I have not seen it in re-sealable packaging like this, and I love it! Usually I’m dealing with the log wrapped in messy plastic that is a pain to store in the fridge. This makes it so much easier to keep the fridge stocked.

Unlike the other treats that have been a joy to eat and drink as they are, I wanted to make some with the chèvre. When I saw those profiteroles on our trip, I knew that was it. I had the goat cheese and we were coming into asparagus season. Perfect.

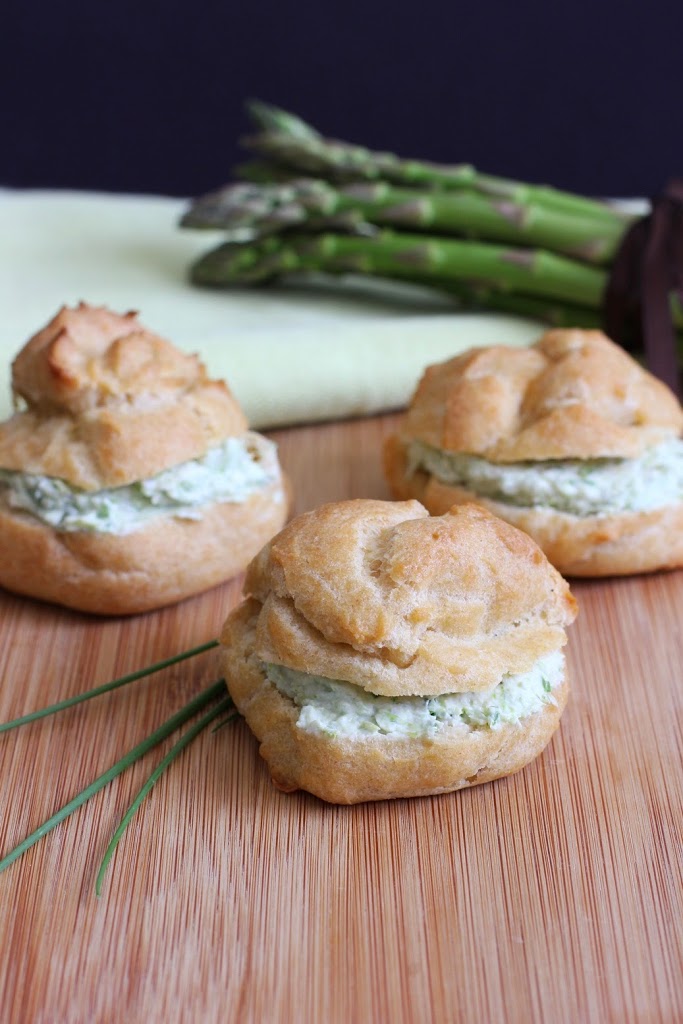
These profiteroles are the answer to the traditional finger sandwich. I would take this light, puffed pastry filled with goat cheese over a roll with ham salad any day. They are also easy to make. I know puffy baked things can be intimidating, but even with my past baking challenges, I can make profiteroles without fail. They are not at all as complicated as they seem. Promise.

Redwood Hill Farm chèvre is ideal for this recipe because it has a creamy, almost whipped texture. It blends well with the steamed asparagus. Speaking of the asparagus, be sure to steam it until it is almost mushy and then chop it before adding it to the food processor. This will ensure the asparagus purees and blends into the goat cheese so you have a smooth filling.

Savory Profiteroles with Asparagus and Goat Cheese

Makes: 12 profiteroles

Ingredients:

Profiteroles
1 cup water
½ cup unsalted butter
¼ tsp salt
1 cup white whole wheat flour
4 eggs

Filling
6 stalks asparagus, steamed and chopped
8 oz. chèvre
2 tbsp chopped fresh chives
¼ tsp salt
1/8 tsp ground black pepper

Prep:

Preheat the oven to 400 degrees F.

Add the water, butter and salt to a medium sauce pan. Bring to a boil over medium-high heat.

As soon as it comes to a rolling boil, stir in the flour and reduce the heat. Continue to stir vigorously until a smooth dough is formed. Remove from the heat.

Stir in the eggs. Stir quickly until they are completely mixed in and the mixture returns to a soft dough.

Use a tablespoon to scoop and drop the dough onto the baking sheet to make 12 large profiteroles. You can also use a pastry bag to pipe the dough onto the baking sheet.

Bake for 22 to 25 minutes, until they are puffed and golden brown. Let cool completely.

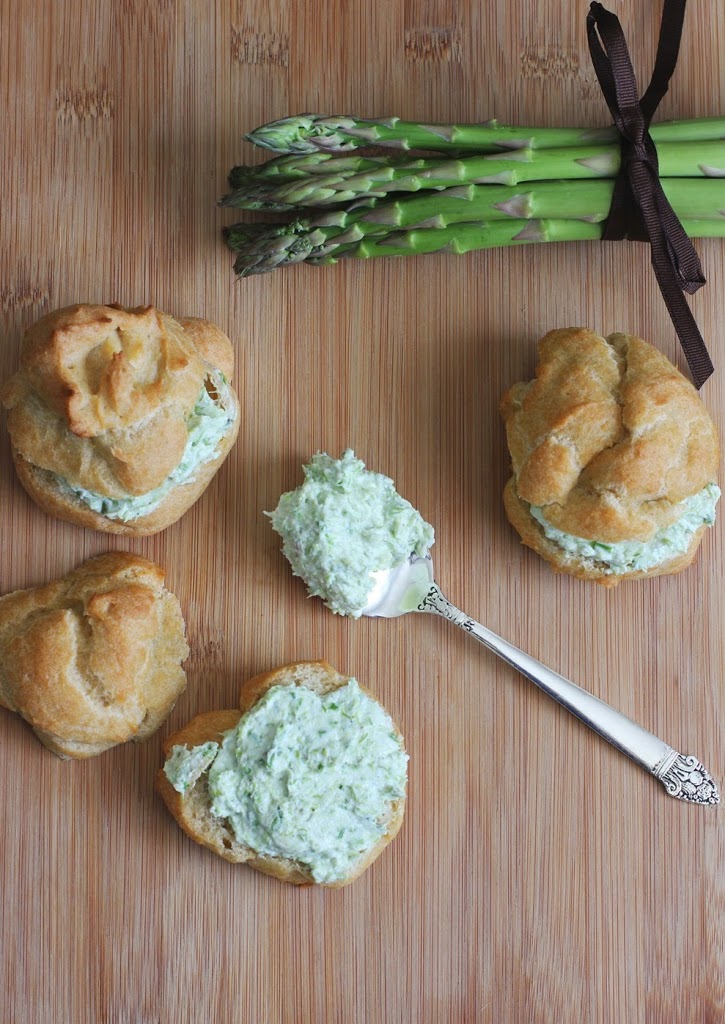
To make the filling, combine the asparagus and chèvre in a small food processor. Pulse until combined into a smooth green spread. Transfer to a bowl and stir in the chives, salt and pepper.

Use a serrated knife to cut open each profiterole like a bun. Spread an even amount of the goat cheese filling inside each profiterole and serve.

Disclosure:  The products mentioned in this post were provided by Redwood Hill Farm. I was not required to post about them and received no compensation for doing so.


Thanks for reading! All images and content are the property of Fake Food Free unless otherwise stated. Please do not republish full recipes and images without written permission. What is okay? Feel free to Pin images, share links to my posts or share the photo with the title of this recipe and a link back to the post. Confused about copyright and food blogs? Here is some helpful information on Recipe Attribution. If you want to use a photo or full recipe, just ask. I’m sure we can work something out. 

A visit to St. George Spirits in Alameda, CA

April 9, 2014
As you cautiously weave the car around the blocks of abandoned buildings you will ask the question — are we headed in the right direction? This is a sure sign that you are almost there. 
When you reach the water’s edge and the San Francisco skyline comes into view, three airplane hangars will emerge. Welcome to Booze Alley. Also affectionately known in the local media as Alcohol Alley and Distillery Row. 
The first of these hangars is Rock Wall Wine Company, the second is Faction Brewing and the third is St. George Spirits – home of Hangar 1 vodka. 
This area beckons for a visit. Not only for the high quality beverages, but for the views and the history. 
We’d checked a visit to Rock Wall and Faction Brewing off our list, so last Saturday we hopped on our bikes and headed out to tour St. George Spirits.  
Small scale alcohol production in airplane hangars is a brilliant idea. Plenty of room for processing and distribution, a wide open space to tour, and tasting rooms that have the appealing vibe of old warehouse meets modern design. 

I love it when food and drink tours load me with new information and the St. George Spirits tour did not disappoint. Put it on your list for a must-do when you visit the East Bay. These are few tips to help and some of my favorite highlights from our afternoon. 

A few tips for a visit:

  • Visitors have three options. A tasting, a basic tour with a tasting and a more in-depth tour and tasting. We chose the second option and it was perfect. More details on that below.

  • You have to purchase a tasting to try the vodka. Unlike Faction Brewing next door (excellent beer, by the way), you can’t just swing in for a shot or cocktail, although we really wish you could!

  • Book your tour online and get there 10 minutes early. There were only a couple spaces left in our tour which we booked about 30 minutes before leaving the house. We were on the printed list when we arrived, but we got there about 3 minutes before the tour started. Because of the line to get in, and people buying the tastings, we were late to join the tour.

  • Take your camera. They have some creative displays for their vodkas, the warehouse has original redwood ceilings from the 1940s and the view of the city from the area is gorgeous.

  • Visit in the fall. Our guide showed us a photo of the warehouse full of California and Colorado pears that are used to make the pear brandy. Apparently you can witness the warehouse full of fruit if you visit after they are shipped in during peak season.

  • We biked the 10 miles from our house. If you live in the city or anywhere that you can get in on the ferry to Alameda Main Street Station, bring your bike. It’s an easy 5 to 10 minute ride from the ferry terminal.

  • Plan to shop. They have a gift shop with some things that are difficult to find elsewhere. Some of the brandies were available in smaller bottles and they had a great 3-pack sampler of their gins. The bourbon was also available in the gift shop.


The tour, interesting facts and product highlights:

  • Our tour lasted about an hour and included a tasting of five St. George Spirits products that were selected for us and then we selected one other option to try. 
  •  Hangar 1 vodka is made from viognier grapes and wheat. There were four varieties available – Straight, Buddha’s Hand, Kaffir Lime and Mandarin Blossom. 
  • St. George Absinthe Verte was the first released after the ban was lifted in the U.S. in 2007. 

  •  Hangar 1 vodka is incredibly smooth. Something that is pleasantly unexpected for a vodka. They get major bonus points for the creative flavors. I mean, who else would think to infuse vodka with Kaffir Lime? While sipping it I had visions of a spicy vodka martini with Thai chilies.

  • Their gins are outstanding. As described by our guide, the Bontanivore (I love that name!) has 19 botanicals that taste like a gin and tonic before even adding tonic. 
  •  The next on my list to try is the Terroir Gin, made from California botanicals foraged on Mount Tamalpais (Mt. Tam). To date, my only experience with Mt. Tam was the most difficult trail race I’ve ever endured, which I’d rather forget. I’m hoping the gin will change my perspective.

  • The Spiced Pear Liqueur tasted exactly like someone had gathered everything from the holiday season, distilled it and poured it in my glass. Despite being made from pear brandy, it tasted as described – like apple pie.

  • Two things I didn’t get to try that I hope to in the future are the NOLA-style coffee liqueur and the single malt whiskey. 
I’ve added St. George Spirits to my arsenal of options that I present when asked — what is there to do in Alameda? One sip and you won’t dare underestimate the potential of a quiet island or abandoned warehouses again. Three cheers for repurposing old buildings, local products and some fine craft spirits!
 

Hibiscus Limón Grapefruit Margarita and Wild Ginger Mint Julep with Mixer Elixir

February 26, 2014

Welcome to the first cocktail week on Fake Food Free. This week I’m recapping some of the excellent cocktail mixers I discovered at the Fancy Food Show in San Francisco in January. This is post two of three. Check out post one for more great drink ideas!

The first place I stopped while at the food show was the new products pavilion. I love this area because it is full of passionate small companies who are excited about their products and they hope that you will be, too.  

Nicely displayed in a corner booth, Mixer Elixir was a product that immediately caught my attention. I loved the trendy jars and logo design, and I think it’s been pretty well established that I like cocktails.

These drink mixers are from the San Diego-based company Praline Patisserie, created by pastry chef, Cruz Caudillo. They use few ingredients like fresh herbs, fruits and pure cane sugar to create a syrup that can be used to flavor seltzer water, teas, and of course, cocktails.

I had two varieties to try – Hibiscus Limón and Wild Ginger. Each has cocktail suggestions on the bottle.

For the Hibiscus Limón, a margarita with orange juice was suggested. But because I can’t think of hibiscus without thinking about Jamaica, and I also associate grapefruits with Jamaica, I added my own twist with grapefruit juice. Yes, I know we’re talking tequila and not rum (which I also associate with Jamaica), but trust me, a margarita is a winner with this one. The Hibiscus Limón is rich, sweet and tangy. It would make a unique soda mixed with seltzer or club soda as well.

The Wild Ginger has a wonderful spicy flavor and bourbon was the first thing that came to my mind. So I spiced up one of my favorite drinks, the Mint Julep. I may make all my Mint Juleps like this from now on. The kick from the ginger isn’t lost in sweetness like it can often be with sodas. I might even venture to use this Elixir as a flavoring in desserts.

In addition to keeping one around for myself, Mixer Elixir is going on my gift-ideas list. I like that both non-alcoholic and cocktail options are offered on each bottle making them perfect for just about everyone.


Hibiscus Limón Grapefruit Margarita

Makes: 1 drink

3 oz. red grapefruit juice
2 oz. gold tequila
2 oz. Mixer Elixir Hibiscus Limón
.5 oz. lime juice
Ice
Salt for rim of glass (I used this grapefruit sea salt)
Lime slices for garnish

Place the grapefruit juice, tequila, Mixer Elixir and lime juice in a cocktail shaker. Add ice, cover and shake until cold.

Fill a salt-rimmed glass with ice. Strain the margarita into the glass. Garnish with a lime slice and serve.

Wild Ginger Mint Julep

Makes: 1 drink

2 oz. Kentucky bourbon
2 oz. Mixer Elixir Wild Ginger
2 sprigs fresh mint
Crushed Ice

Place the bourbon in a cocktail shaker with one sprig of the mint. Mull the mint with the bourbon to extract the oils. Add the Mixer Elixir and stir.

Pack a mint julep glass full with crushed ice. Strain the cocktail into the glass, over the ice. Garnish with the second mint sprig and serve.

Disclosure: This product was provided to me for review purposes. I was not required to write about it and received no compensation for doing so.

Whole Grain Chocolate Cookie and McConnell’s Fine Ice Cream Sandwiches

February 14, 2014
This hearty, whole grain chocolate cookie is best served with a delicious ice cream. One of my new favorites is McConnell’s Fine Ice Cream based in Santa Barbara, Calif. 
 
Whole Grain Chocolate Cookie Recipe | Fake Food Free

My first New Year’s Eve in California was spent in Santa Barbara. It was just last year and we were on the fourth day of our five day cross-country move. Knowing that we didn’t want to spend that particular night in a roadside hotel, we drove a few extra miles to the beach.

It was a short trip with two pugs along so we didn’t see much of the city, but since that little taste, I’ve wanted to return. I thought I had plenty of reasons for wanting to go back, but a few days ago I found one more.

This ice cream…

I was introduced to it through the Winter Fancy Food Show that I attended last month. You can order it online, but I fully support using it as an excuse to visit California.

Despite my endeavors to make most of the foods we eat, occasionally you come across something that you simply cannot master as well. You can’t make it any more delicious or natural. This ice cream is that for me.

McConnell’s has been making their ice cream since 1949, but I have yet to come across a company that uses such great ingredients or creates a product that tastes as good as this. I know. It’s ice cream. But the texture and flavor of McConnell’s is truly outstanding.

The ice cream is made from raw milk and cream from California grass-fed cows that is pasteurized and homogenized in-house. It’s then combined with cage-free organic eggs, some pure cane sugar and all kinds of natural, local ingredients like organic fruits and nuts.

I got four varieties to try:

Olive Oil & Salted Almonds – Mild and creamy. Vanilla lovers will enjoy its simplicity.
Milk Chocolate & Raspberry Jam – Smooth chocolate meets fresh raspberry swirl.
Eureka Lemon & Marionberries – It’s like California and the Pacific Northwest came to a party in my mouth.
Oaxacan Chocolate – A flavor so rich and complex (with hints of cinnamon) that you’ll keep taking bites just to analyze it some more.

While I was completely intrigued by the Oaxacan Chocolate, I decided that the Eureka Lemon & Marionberries was my favorite. It was tough to choice!

This ice cream needs nothing more than a spoon, but I thought I would use it in a Valentine’s Day dessert. I tested out a cookie recipe with whole grains, raw cane sugar and California butter to complement all the natural ingredients in the ice cream. The goal was a mildly flavored cookie that’s sweetness or flavor wouldn’t overpower the ice cream. These were perfect.

Whole Grain Chocolate Cookie Recipe | Fake Food Free

Whole Grain Chocolate Cookie and McConnell’s Fine Ice Cream Sandwiches

Makes: 6 ice cream sandwiches

½ cup unsalted butter, softened
¾ cup raw sugar
1 large egg
2 tbsp unsweetened cocoa powder
1 tsp cream of tartar
½ tsp baking soda
¼ tsp salt
1 ¼ cup white whole wheat flour
½ cup raw sugar for rolling the cookies
1 pint Eureka Lemon & Marionberries McConnell’s Fine Ice Cream (or your favorite flavor)

Preheat the oven to 375 F.

In a mixer fitted with the paddle attachment, beat the butter and sugar on medium speed for about 30 seconds. Scrape the sides of the bowl as needed, and increase the speed to medium-high. Beat for about 2 minutes or until well combined.

Reduce the speed to medium and mix in the egg. Mix in the cocoa powder. Scrape the sides of the bowl as needed.

Mix in the cream of tartar, baking soda and salt. Slowly add the flour, a little at a time. Mix just until all ingredients are combined.

Scoop out the dough and roll into generous golf ball size portions. Roll in the raw sugar and place on an ungreased baking sheet. Place only 6 to 9 cookies on each baking sheet. Press the cookies slightly flatten them.

Bake for 12 minutes or until the edges are lightly browned and centers of the cookies are somewhat firm. Cool for 1 minutes and transfer to a cooling rack to cool completely.

Once cooled, allow the ice cream to soften at room temperature for about 5 minutes. Place six of the cookies bottom-side up on a flat surface.

Top with a generous ¼ cup of ice cream. Place the remaining six cookies on top, bottom-side down, to create the sandwich. Gently press the cookies so that ice cream spreads to the edges. Depending on how generous you are with the ice cream. You may have some leftover. I suggest eating it.

Wrap the sandwiches in plastic wrap and refrigerate for at least 3 hours before serving.

Whole Grain Chocolate Cookie Recipe | Fake Food Free


If you are looking for more ways to use McConnell’s Ice Cream, check out Salty Sweet Life’s Pear, Gorgonzola and Thyme Galette!


Disclosure:  I received this product for review purposes. I was not required to blog about it and I received no compensation for doing so. All thoughts and content here are my own. It’s really good ice cream!

Grilled Rosemary and Garlic Salmon with Smoked Sea Salt Recipe

January 27, 2014

Salmon is one thing that I never order when we go out to eat. It’s not that I don’t like it, but that it is so simple to make at home. I can’t justify paying so much more for it when we are out. (I have similar feelings about pasta.)

I’m perfectly capable of tossing some herbs, citrus, salts or oils on a beautiful piece of salmon and putting it on the grill. Not only is it healthy, it one of the fastest meals I can throw together.

With commitments to both eating more fish and firing up the grill more often in the new year, this salmon has been making the dinner rotation quite a bit. I realize not everyone lives in the mid-60 degree temperatures of the East Bay right now, so grilling may feel out of season. You can easily broil or bake the salmon, it just won’t have the same smoky flavor so be sure to try it again when the temps warm and you pull out the grill.

Grilled Rosemary and Garlic Salmon with Smoked Sea Salt

Makes: 6, 4 oz. Servings

4 cloves garlic, minced
1 ½ tbsp olive oil + plus extra to brush on the grill
1 ½ tsp finely chopped rosemary leaves, about 2 small sprigs
½ tsp smoked sea salt (this Bourbon Smoked Sea Salt from Kentucky is my favorite)
1 ½ lb. filet of salmon, skin-on (check Seafood Watch for the best varieties)

Fire up the grill and take it high heat, about 475 to 500 degrees F.

In a small dish, stir together the garlic, olive oil, rosemary and salt. Place the salmon on a baking sheet, skin-side down, and rub the herb and oil mix over the fish.

Brush the grill with olive oil and place the salmon on the grill, skin-side down. Grill for 15 to 17 minutes, until the thickest part is cooked through and begins to flake.


Thanks for reading! All images and content are the property of Fake Food Free unless otherwise stated. Please do not republish recipes and images without written permission. Feel free to Pin images and share links to my posts, but please do not copy and paste recipes or photos and share them on other sites. Confused about copyright and food blogs? Here is some helpful information on Recipe Attribution.

8 Best Cocktails for New Year’s Eve

December 30, 2013
 
After two weeks of travel to visit New York City, explore the Christmas markets in Vienna and Krakow, and spend time with family in Indiana and Kentucky, I’m back at my computer. 
2013 has been so amazing I can hardly put it into words. I’m sure I’ll miss some things, but here are a few highlights.
Aside from how wonderful it is to now be a California resident, I also live by the water with access to fresh seafood and salty air. Something I’ve always wanted to do.
I ran my first marathon. (And I ran it across this.)
My husband and I celebrated 10 years of marriage.
I landed my first magazine column. (You can find it at Hobby Farm Home.)
I’ve finally (successfully) transitioned into a full-time freelancer. Writing about food, developing recipes and taking food photos is now my job. 
I got to gaze in awe at Lake Tahoe for my 35thbirthday. 
I was able to show my family around the Bay Area on their first visit to California.
I saw New York City at Christmas time.
I explored the Christmas markets of Vienna and Krakow.
What a year! I have no idea how 2014 is going to top it, but I’m convinced that it will.
A great year deserves a special toast. So here are 8 of my favorite cocktails to help you close out 2013 and ring in the New Year. Some are here on Fake Food Free, and others are from the work I’ve done for the blog the Daily Squeeze. 
(Just click on the drink name to get to the recipe.)
Grapefruit Moon Beer Cocktail 
The Spicy Citrus
Cherry Margarita
Red Wine and Navel Orange Sangria 
Spiced Old Fashioned 
Coconut Lime Dessert Martini
Orange Bourbon Apple Cider 
Orange Cosmo on the Rocks  

What will you be toasting to on Tuesday night? Any favorite memories from 2013?
Happy New Year!!

Ginger Molasses Cookie Bars Recipe

December 13, 2013

I can’t get enough of ginger flavored treats during the holiday season. These cookie bars are a recreation of one of my favorite cookies made with fresh ginger and molasses!

 Ginger Molasses Cookie Bars | Fake Food Free

This past summer, I discovered my favorite cookie. It’s sold at Blue Bottle Coffee in Oakland. I’ve always been a fan of gingerbread-like desserts, but this cookie takes it to a new level. It’s made with fresh ginger and ground black pepper. It’s slightly crunchy on the inside, but soft and chewy on the inside. Darn near perfect when it comes to cookies.

When I tried it, the idea of both fresh ginger and black pepper in a cookie were new to me. I’ve wanted to try making something similar ever since. I think creating the right cookie texture is going to take me much more practice than I am able to commit to this holiday season, so I went the easy route and incorporated the flavors into a bar.

It’s certainly not an exact replica, but for someone who can’t get enough gingerbread this time of year, these chewy, spicy cookie bars hit the spot.

Ginger Molasses Cookie Bars

Makes: 16 bars

Ingredients

1 cup unsalted butter, softened
1/3 cup coconut sugar
1/3 cup + 1 tbsp turbinado sugar
2 tbsp molasses
1 large egg
½ tbsp grated fresh ginger
1 cup white whole wheat flour
½ tsp baking powder
¼ tsp salt
¼ tsp ground black pepper
1/8 tsp ground cinnamon
1/8 tsp ground nutmeg
1/8 tsp ground clove

Prep

Preheat the oven to 350 degrees F. Grease an 8 x 8 inch baking pan lightly with unsalted butter.

In the bowl of a mixer fitted with the paddle attachment, add the butter, coconut sugar and 1/3 cup of the turbinado sugar. Cream together on medium to medium-high speed, about 2 minutes. Add the molasses and mix for about 30 more seconds, scraping the sides of the bowl as needed.

Add the egg and mix 30 more seconds. Mix in the fresh ginger.

In a small bowl, stir together the flour, baking powder, salt, pepper, cinnamon, nutmeg and clove. With the mixer on low, gradually add the dry ingredients. Increase the speed to medium and mix just until all ingredients are combined.

Transfer the cookie dough to the prepared pan and spread evenly with a spatula. Sprinkle the top with the remaining 1 tablespoon of turbinado sugar.

Bake for 18 to 20 minutes, until the edges begin to brown and a toothpick inserted in the center comes out clean. Let cool completely and cut into 16 bars.

Ginger Molasses Cookie Bars | Fake Food Free


Thanks for reading! All images and content are the property of Fake Food Free unless otherwise stated. Please do not republish full recipes and images without written permission. What is okay? Feel free to Pin images, share links to my posts or share the photo in a round up post with the title of this recipe and a link back to the post. Confused about copyright and food blogs? Here is some helpful information on Recipe Attribution. If you want to use a photo or full recipe, just ask. I’m sure we can work something out.


Sourdough Stuffing with Artichokes and Sundried Tomatoes Recipe

November 5, 2013
Stuffing is my favorite dish on the holiday table! This recipe for sourdough stuffing combines local flavors with a traditional favorite.
 Sourdough Stuffing with Artichokes and Sundried Tomatoes | Fake Food Free

When I first started thinking about this year’s Thanksgiving menu (and believe me, I’ve been thinking about it a while), I was set on traditional. I didn’t cook at all last year. I was visiting my husband here in California, in the midst of our move, and we ate Thanksgiving dinner at a local restaurant.

Knowing this year would be different, I started planning early. Sweet potato casserole, my usual cranberry pecan stuffing — it had all been penciled in. But then I considered all the new ingredients I have access to. It seemed silly not to take full advantage and incorporate them into some new traditions.

So I’ve shifted gears a bit. There will still be some old favorites, like my grandmother’s pumpkin pie. But otherwise, I want avocados, artichokes, dates and figs to make an appearance. I’ve never had such access to these foods and it seems to me they should fit right in with what we are used to this time of year.

I’ve been experimenting a little so that the big day isn’t a big fail. My first challenge was the stuffing (my favorite thing on the menu, next to cranberry sauce).

It had to be sourdough. No exceptions. Then I came across some California sundried tomatoes and I thought they would be the perfect partner for the artichoke hearts I’d been considering.

Sourdough Stuffing with Artichokes and Sundried Tomatoes | Fake Food Free

The result? What a winner! The sweet sundried tomatoes and the tart artichoke hearts were meant to be with the tangy sourdough. I don’t always add an egg white to my stuffing, but this time I was glad I did. It created a soft, but solid center that was balanced by the crispy, crunchy edges on top.

I may not go back to my old favorite. Or I might have to start making two stuffings. I haven’t decided yet.

Sourdough Stuffing with Artichokes and Sundried Tomatoes

Makes: 4 servings

Ingredients

1 ½ tbsp olive oil
½ cup red onion, chopped
3 cloves garlic, minced
2 tbsp finely chopped sundried tomatoes
3 canned, unseasoned artichoke hearts, chopped (marinated would work, but it may add a different flavor)
3 ½ cups toasted sourdough bread cubes (I cut my own from a stale loaf and broiled for about 5 minutes)
1 ¼ cups vegetable stock
1/8 ground black pepper
1/8 tsp poultry seasoning
¼ – ½ tsp salt
1 egg white

Prep

Preheat the oven to 375 degrees F. Lightly grease a 1 quart casserole dish or loaf pan with your oil of choice.

Heat the olive oil in a medium skillet on medium-high heat. Add the onion and garlic. Cook, stirring occasionally, for 4 minutes, until the onion begins to soften.

Add the sundried tomatoes and artichoke hearts. Cook for 1 more minute. Turn off the heat.

Place the bread cubes in a large bowl. Add the cooked vegetables. Add the vegetable stock a little at a time as you stir the stuffing. Continue to stir until the bread cubes are well saturated.

Stir in the black pepper and poultry seasoning. Add the ¼ to ½ teaspoon of salt to taste (you may need less if your stock is salted).

Once you’ve added the right amount of salt, stir in the egg white. Continue to stir until it is incorporated into the stuffing.

Transfer the stuffing to the baking dish. Press it gently into the dish to smooth the surface.

Bake for 20 minutes, until the edges are browned and the top has a nice golden color. Serve warm.

Sourdough Stuffing with Artichokes and Sundried Tomatoes | Fake Food Free

Thanks for reading! All images and content are the property of Fake Food Free unless otherwise stated. Please do not republish full recipes and images without written permission. What is okay? Feel free to Pin images, share links to my posts or share the photo in a round up post with the title of this recipe and a link back to the post. Confused about copyright and food blogs? Here is some helpful information on Recipe Attribution. If you want to use a photo or full recipe, just ask. I’m sure we can work something out. 

Beecher’s Flagship Cheddar with Avocado, Lime, and Shell Pasta from Melt: The Art of Macaroni and Cheese

October 23, 2013
Cheddar with Avocado, Lime, and Shell Pasta Recipe from Melt: The Art of Macaroni and Cheese on Fake Food Free


I’ve only had the book for a week, but every person I’ve told about it or shown it to has had the same response. It’s something like, “Oh, wow,” accompanied by a deep, long sigh. You know, the kind of sigh that is reserved for thoughts of, and longing for, comfort food.

The book is Melt: The Art of Macaroni and Cheese by Stephanie Stiavetti & Garrett McCord, and it deserves every comfort food sigh and oh-wow that it prompts.


I mean, it’s mac and cheese. It’s the heart of the definition of comfort food. Even though most of us grew up with the fake stuff in a box or that made with cheese food, we still have a place in our hearts for the real deal.

If you don’t know what the real deal is, let me explain. 

The real deal is a perfect combination of creamy and pleasantly gooey cheese with well-cooked pasta. It can be straight from the stovetop or out of the oven. Take your pick. It also goes beyond cow’s milk cheddar and Monterey jack to include blue cheese, goat and sheep’s milk cheeses.

The real deal is summed up and well defined by Melt.

Stephanie and Garrett have managed to recreate macaroni and cheese while maintaining its roots and deep traditions. I fell for it within the first few pages as they explain how so many amazing cheeses are reserved for the cheese plate or the wooden serving block, positioned next to a few grapes or figs and a glass or two of good wine. One of their goals with this book is to introduce ways to use these amazing cheeses in your cooking.

I found that goal to be a huge relief. I love cheese. I’ve taken cheese making courses and written an article on making it at home, but I still find cheese overwhelming. This is especially true considering all the cheeses I now have access to here in California, many of which are recommended in this book.

I found myself thinking – you mean it’s okay if I actually cook with these cheeses instead of reserving them for a platter of fruit and crackers?

Yes. It is. And this book will show you some the best recipes and methods for doing just that.

Melt is full of cheese education. But don’t be discouraged if you haven’t heard of the cheeses mentioned in the recipes. Each has a helpful list of alternative cheeses you can use. There are also wine and additional food pairings to help you enjoy your new cheese find even more.

Before you begin to think that this book is only pasta coated in delicious cheese and baked into a comfort-food casserole, let me share the titles of some recipes with you. There are plenty of flavorful twists on casseroles and stovetop versions, but there are also refreshing pasta salads such as Drunken Goat with Edamame, Fennel, and Rotini and side dishes like Point Reyes Original Blue with Pecans, Figs, and Shell Pasta (which will make it on our Thanksgiving table this year). There is even a dessert section with recipes like Fromage Blanc, Chevre, Peach, and Ghost Pepper Cannelloni.

Despite all those wonderful options, the Beecher’s Flagship Cheddar with Avocado, Lime, and Shell Pasta caught my attention for two reasons. First, I just got back from Seattle where I walked by the Beecher’s Handmade Cheese Shop. I reluctantly passed up their mac and cheese because I was on the mission for another food find. (Yes, I regret that decision.) Second, because I am crazy about avocados and I was completely intrigued with the idea of mixing them into a bowl of macaroni and cheese.


Recipe for Mac and Cheese with Cheddar, Avocado and Lime! | Fake Food Free


One taste of this dish and I was ready to grab my fork and eat it straight from the pan. It’s creamy, tangy, sweet and salty all at the same time with the prominent qualities of traditional, southern-style macaroni and cheese.

Make it. Then consider it a good indicator of what is to come when you get yourself a copy of the book. You may not have realized you needed a cookbook devoted to macaroni and cheese, but trust me, you do.


From the book:
If you ever have the opportunity to wander through the Pike Place Market, the heart of the food scene in Seattle, you’ll likely come across the Beecher’s Handmade Cheese shop. Inside, you can sample their wares and watch the cheesemaking process unfold before your eyes. The proprietors serve what they call the World’s Best mac and cheese; with its jaunty kick of spice and smooth sauce, it’s definitely a contender for the title.

We love to use Beecher’s Flagship—a fierce, creamy paragon of Cheddar if ever there was one—in this avocado macaroni and cheese. The svelte texture of avocado melds so well with this sharp, tangy Cheddar. Smooth and buttery with a slight citrus tang, this jade-colored mac is a casual way to enjoy mac and cheese.

Beecher’s Flagship Cheddar with Avocado, Lime, and Shell Pasta

©2013 Stephanie Stiavetti and Garrett McCord. Reprinted with permission from Little, Brown and Company.

Serves 4 to 6

1 jalapeño pepper
Zest of 1 lime
Juice of 1 lime
2 green onions, green parts only, chopped
2 cloves garlic, chopped
3 ripe avocados, pits and skin removed, divided
10 ounces conchiglie or other medium shell pasta
1½ cups milk
2 tablespoons butter
3 tablespoons flour
1 teaspoon sea salt
½ teaspoon freshly ground black pepper
10 ounces Beecher’s Flagship
Cheddar, shredded
¼ cup chopped cilantro
Lime wedges for garnish

1. Remove the stem from the jalapeño and cut the jalapeño half. Remove the ribs and seeds—or keep them, depending on how much heat you like. Toss the jalapeño into the bowl of a food processor with the lime zest and lime juice. Add green onions, garlic, and flesh of 2 of the avocados. Blitz together into a very smooth paste.

2. Cook the pasta in a large pot of salted boiling water until al dente. Drain through a colander and set aside.

3. To prepare the mornay sauce, heat the milk in a small saucepan over medium heat. As soon as the milk starts to steam and tiny bubbles form around the edges of the pan, turn off the heat. Place the butter in a medium saucepan and melt over medium flame. Add the flour and stir with a flat-edge wooden paddle just until the roux begins to take on a light brown color, scraping the bottom to prevent burning, about 3 minutes. Slowly add the milk and stir constantly until the sauce thickens enough to evenly coat the back of a spoon—a finger drawn along the back of the spoon should leave a clear swath. Remove from heat and stir in salt and pepper. Add cheese to sauce, stirring until completely melted. Add the avocado-onion paste and whisk together until uniform and creamy. The key word here, if you haven’t guessed, is smooth. Season with more salt and pepper to taste.

4. Add the pasta and cilantro to the sauce and stir together. Dice the last avocado and toss together with the mac and cheese. Serve immediately with a splash of lime juice.

Alternative cheeses: Jasper Hill Cabot Clothbound Cheddar, Fiscalini Bandage Wrapped, Cheddar, Shelburne Reserve

Wine pairings: Pinot Grigio, Verdelho, Godello

Additional pairings for the cheese, outside of this recipe:
corn, cooked black beans, persimmons, most chili peppers, winter squashes such pumpkin or butternut


Disclosure: This book was sent to me for review purposes. I was not required to write about it and received no compensation for doing so. Thoughts are my own and this is a really great book.

Places Worth Preserving – The Pumpkin Farm

October 7, 2013
 
          Pumpkin Patch | Fake Food Free
 

I can see them before I pull up to the entrance of the farm. They are specs of bright orange sunshine amid a sea of dry, brown brush. The excitement builds as I get closer and begin to make out the endless shapes and sizes. Some perfectly symmetrical, others with an odd bump here or a groove there that only adds to their character.

Picking a pumpkin is unlike any other garden harvest. It takes a good eye and a good bit of strength to find (and haul) the right one. First, I judge by size. I have to get this thing back to the front register to check out, so as tempting as those extra-large beauties may be, I have to leave those in the field for someone a bit stronger.

Next, they must be analyzed from every angle ensuring there is at least one good side to show off to the neighborhood. It may take a while to find one, but there is nothing I enjoy shopping for more than the perfect pumpkin.

Pumpkin Recipes | Fake Food Free

While I have memories of pumpkin hunting from my childhood, the appreciation of the local pumpkin patch is something I associate much more with as an adult. Fall is my favorite season, and there is nothing better than seeing the first signs in the form of a bright pumpkin.

When I was invited to participate in a special project with Frei Brothers Reserve to celebrate a place that I feel is worth preserving, the opportunity hooked me in right away. It was a tough decision. There are so many. But what is the one place that stands out most for me?

The local pumpkin farm.

Pumpkin Recipes | Fake Food Free
 

It’s not a place that is reserved for a lucky few that live in a specific region. It’s not tucked in the wooded hills of the East or along the rugged coastline of the Northwest. From Kentucky to California, and just about every state beyond and in between, when October arrives you can hear the laughter, smell the spiced cider and see the orange specs among the dry brush. It’s pumpkin season, and for me, this feeling and this special place is worth preserving.

As part of my participation in the Frei Brothers Reserve project, I was asked to create a meal around my place to preserve. So I roasted my first winter squash of the season, blended up the beautiful, sweet orange puree and prepared three courses in celebration of pumpkin with the help of Frei Brothers Reserve Chardonnay.

Autumn Salad with Pumpkin-Orange Dressing | Fake Food Free

 Autumn Salad with Pumpkin-Orange Dressing

Serves: 4

6 cups mixed greens
4 ounces blue cheese, crumbled
1/3 cup walnut halves
¼ cup dried cranberries
3 tbsp extra virgin olive oil
2 tbsp fresh orange juice
1 tbsp rice wine vinegar
1 tbsp fresh pumpkin puree
2 cloves garlic, peeled
¼ tsp salt
Pinch ground black pepper

Place the lettuce, cheese, walnuts and cranberries in a large bowl.

Combine the olive oil, orange juice, vinegar, pumpkin and garlic in a small food processor. Pulse until smooth. Stir in the salt and pepper.

Pour the dressing over salad and toss to coat.

Divide into 4 portions and serve.

Pork Scaloppini in White Wine Sauce over Handmade Pumpkin Pasta | Fake Food Free

Pork Scaloppini in White Wine Sauce over Handmade Pumpkin Pasta

Pairing tip: pair with Frei Brothers Reserve Chardonnay

Serves: 4

Pasta
2 cups unbleached all-purpose flour
2 eggs
3 ½ tbsp fresh pumpkin puree

Scaloppini
1/3 cup panko bread crumbs
1/3 cup almond meal
1 tsp sea salt
¼ tsp ground nutmeg
¼ tsp ground cayenne pepper
¼ tsp ground black pepper
1 egg
1/3 cup milk
2 tbsp olive oil
1 tbsp unsalted butter
1 pound pork scaloppini (about 8 thin slices)

¼ cup chopped onion
2 cloves garlic, minced
¾ cup Frei Brothers Reserve Chardonnay
1 tbsp unsalted butter
Salt and pepper to taste
2 tbsp chopped fresh chives

Pasta
Combine the flour, 2 eggs and 3 ½ tablespoons of pumpkin puree in a food processor. Pulse until the dough comes together.

Turn the dough out onto a floured surface, and kneaded just until the dough comes together into a smooth ball.

Let rest under a damp paper towel for 15 minutes. Follow your pasta maker instructions for rolling and cutting the pasta, or you can follow my guide for Beginner Homemade Pasta Making.

To cook the pasta, boil for 3 to 4 minutes in salted water, drain and set aside.

Pork

In a shallow dish, combine the bread crumbs, almond meal, salt, nutmeg, cayenne and black pepper. In a separate shallow dish whisk together the milk and the 1 egg.

Heat the olive oil and butter in a large cast iron skillet or a similar skillet over medium-high heat. Dip each piece of pork in the egg and milk, and then into the bread crumbs, turning to coat it evenly.

Working in batches so you don’t overcrowd the pan, add the pork to the hot skillet and cook 2 to 3 minutes on each side, until browned and cooked through.

Transfer to a paper towel to drain.

Once all the pork is cooked, add the onion and garlic to the skillet and carefully pour in the wine to deglaze the pan. Scrape the bottom of the pan well as the wine boils and reduces for about 30 seconds.

Reduce the heat to medium. Add the butter and continue to scrape the pan until the butter melts. Salt and pepper the sauce to your taste.

Add the cooked pasta to the skillet and toss to coat in the sauce.

To serve, add ¼ of the pasta to each serving plate. Top with 1 to 2 pieces of the scaloppini and garnish with ½ tablespoon of the chopped chives.

Pork Scaloppini in White Wine Sauce over Handmade Pumpkin Pasta | Fake Food Free
Homemade Pumpkin Ice Cream | Fake Food Free

Homemade Pumpkin Ice Cream

Serves: 4 to 6

2 cups 2% milk
1 cup heavy cream
¾ cup raw sugar
5 tbsp fresh pumpkin puree
2 egg yolks
1 tsp pure vanilla extract
¼ tsp ground cinnamon
Pinch of salt

Combine the milk, cream, sugar and 3 tablespoons of pumpkin puree in a heavy sauce pan. Turn the heat to medium and gently scald the milk, stirring often. The milk should begin to foam on the top, but it should not come to a full boil. Remove from the heat.

In a small bowl, whisk together the remaining pumpkin puree, egg yolks, vanilla, cinnamon and salt. Temper the mixture by slowing pouring in ½ cup of the warm milk, while whisking vigorously.

Transfer the tempered egg mixture back to the pan of warm milk by pouring slowly and whisking constantly.
Return the pan to medium-low heat. Cook stirring often for about 5 minutes, until the milk begins to foam again, but do not allow it to come to a boil.

Pour the mixture through a fine mesh strainer into a heat and freezer safe bowl (such as Pyrex). Place the bowl over a larger bowl filled with ice and stir the mixture until cool.

Refrigerate until cold, at least 1 hour. (I sometimes put it in the freezer to speed up the process.)

Freeze in a counter-top ice cream maker per the manufacturer’s instructions.

Homemade Pumpkin Ice Cream | Fake Food Free
Pumpkin Recipes | Fake Food Free

What is your Place Worth Preserving? Frei Brothers Reserve is currently hosting a photo competition on Facebook for Places Worth Preserving in association with National Geographic Traveler. Every month between now and November, they are giving away prizes for photo entries including a grand prize trip to visit their winery at Frei Ranch in Sonoma County plus a stay in Yosemite National Park.

You can also check out a round-up of all the delicious Places Worth Preserving and wine inspired recipes at Kitchen PLAY.

Discloser: I was invited to participate in the Frei Brothers Reserve Places Worth Preserving project by Kitchen PLAY. This is a sponsored post. I received monetary compensation for this post and a bottle of wine to pair with my meal.

Want to create beautiful food and product photos that you can't wait to share?!
Discover your style, control the light, and shoot using the tool you know how to use (yes, your phone included). Learn about free resources, Live Q&As with Lori, and online courses you can take from anywhere in the world!
We respect your privacy. Unsubscribe at any time.